You know you are knee deep in the DIY life when you look at a wooden bracelet…and you don’t see a wooden bracelet. You see a planter. Then and only then have you made the crossover into DIY addict. DIY crazed. DIY tomfoolery. I guess it might also have something to do with the fact that I never wear bracelets. They just get in the way. They hit the keyboard all day when I clearly have important emails to send (…to my mom) and important news articles to scroll (…at Yahoo.com…yes, that is where I get my “news”…don’t judge). I like my carpel tunnel to be unadulterated. Sans wrist accouterment.
Here’s the other thing – when you come across an Etsy shop like Rock N Wood Supply, you really have no other choice than to order some funky bracelets and see what DIY road they take you down. Today we’re traveling down the DIY succulent planter road…but who knows…next week we may take these wooden bracelets and turn ’em into necklaces with huge clock pendants. If Flava Flav was a crafter, he would surely be all about some DIY clock pendants.
Okay. Less Flava Flav. More bracelet planters. Let’s go.
What you need:
- a wooden bracelet. A thick one like THIS works great.
- Polymer Clay and a rolling pin
- Hot glue gun
- succulent plant
- Paint Pens
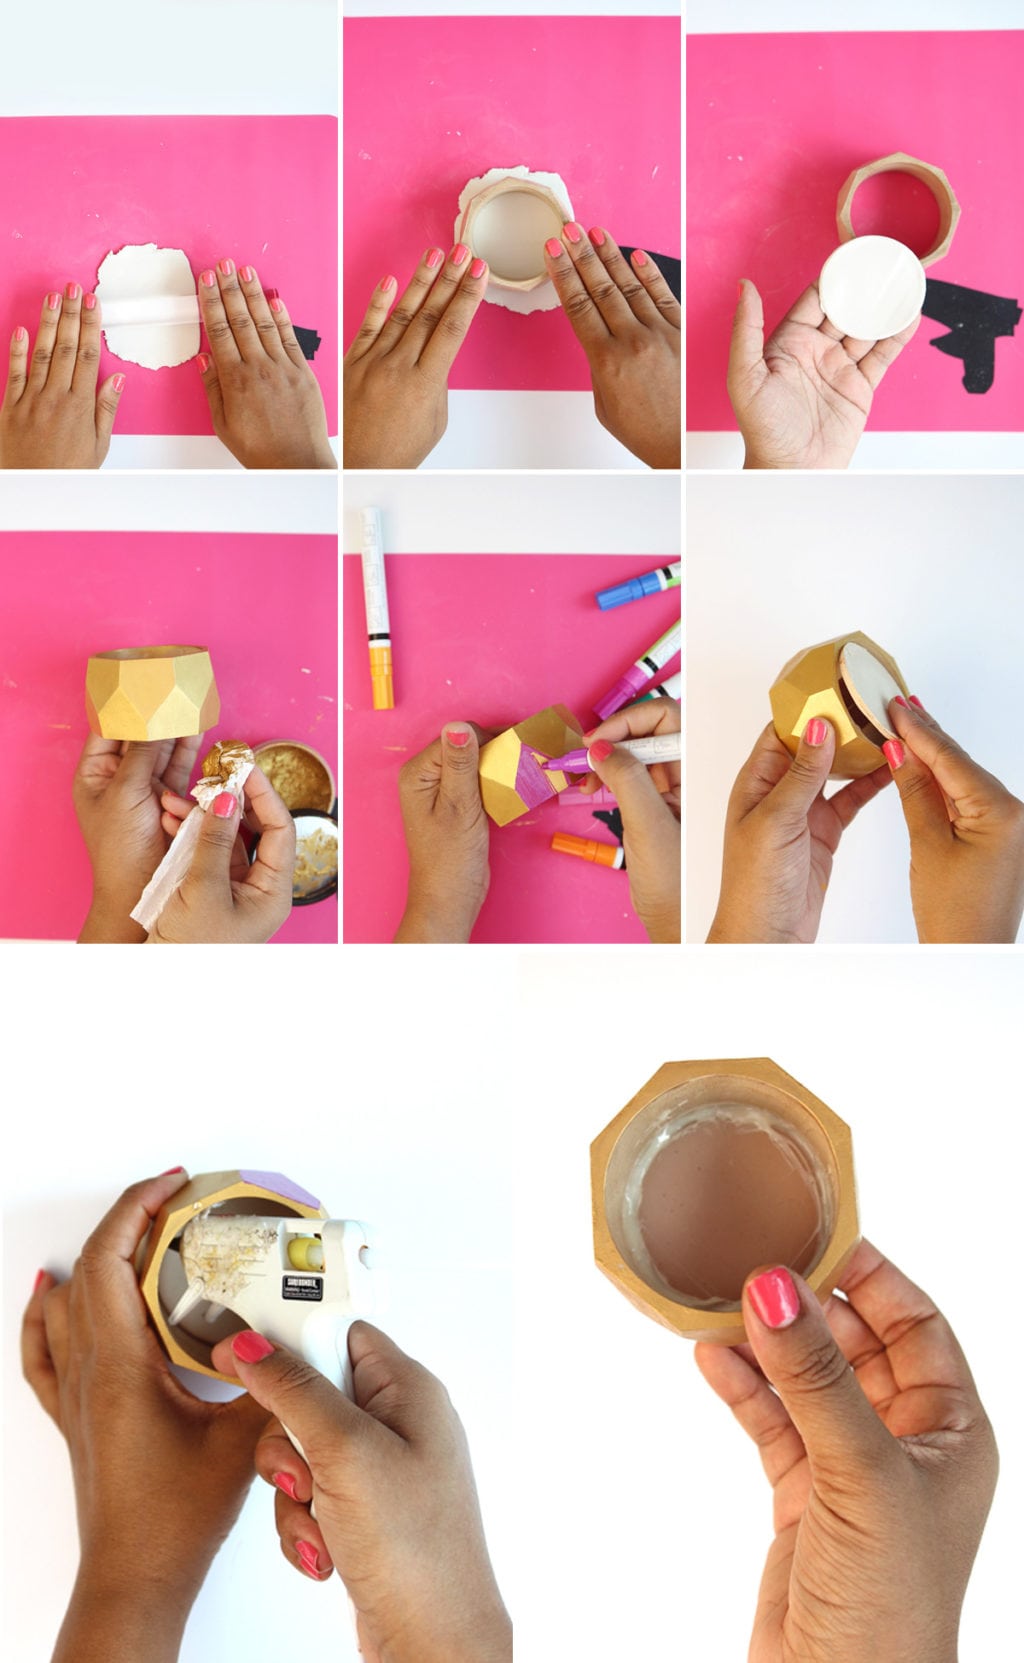
- Roll out a piece of polymer clay to about 1/4″ thickness
- Press your bracelet into the clay as if you are using a cookie cutter
- You’ll be left with a circle that is sized to fit inside the bracelet NOTE: At the step, go ahead and use a drinking straw to poke a small hole in the center of the clay circle for drainage. Once you’ve done this, bake the clay according to package instructions.
- Rub Metallic Lustre onto the wooden bracelet (for a full tutorial on using Metallic Lustre, check out THIS post).
- Use paint pens to add color in any way you which
- Place the baked circle into the bottom of the bracelet
- Use the hot glue gun to run a bead of glue around the inside seam of the bracelet and clay circle
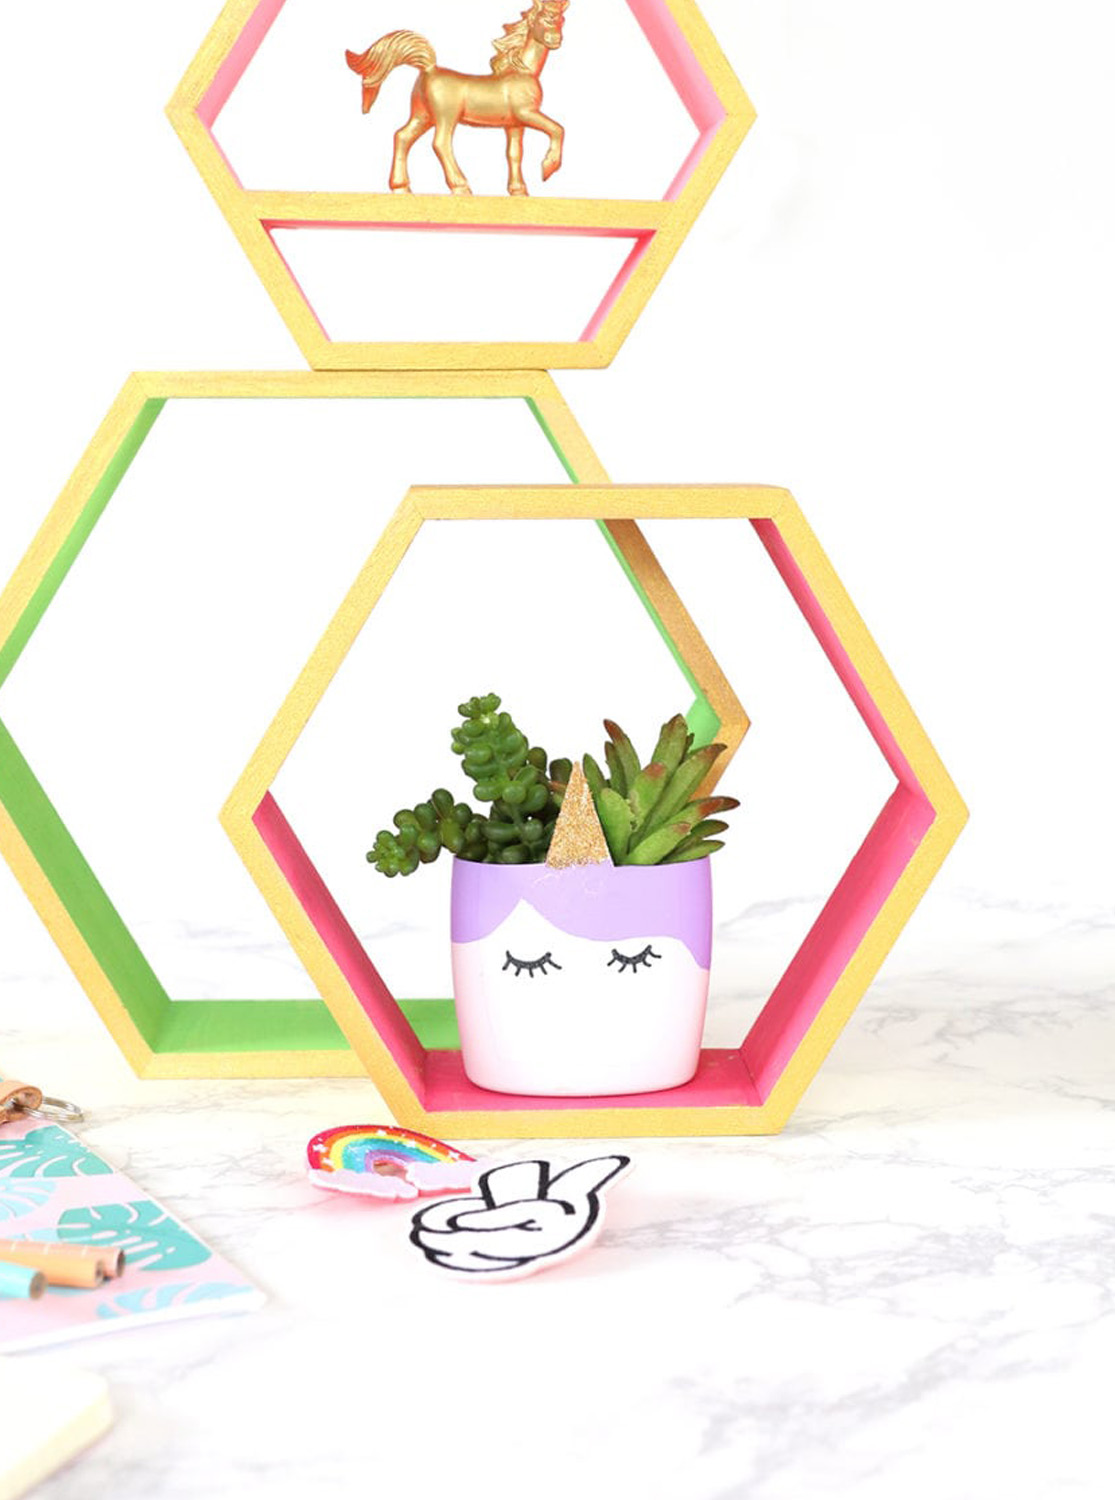
- Your finished product will look like this…
These easy to make planters were the kick off project for my series of #miamimakes workshops that I’m hosting right here in Miami. The first workshop was great! Be sure to checkout #miamimakes on instagram to see how the first workshop went! (Hint: It was awesome.
A special shout out the Zazzle, Flower Muse, Les Petits Sucres, Jugo Fresh, Mimo Market




Generic100mgEasy: Generic100mgEasy – buy generic 100mg viagra online
пинап казино – pinup 2025
buy generic 100mg viagra online [url=https://generic100mgeasy.shop/#]Viagra generic over the counter[/url] Generic100mgEasy
пинап казино – пин ап казино официальный сайт
пин ап казино зеркало – пин ап казино официальный сайт
buy Viagra online [url=http://generic100mgeasy.com/#]Generic100mgEasy[/url] Viagra online price
пин ап казино – пин ап казино официальный сайт
пин ап вход – пин ап казино официальный сайт
Generic100mgEasy [url=http://generic100mgeasy.com/#]Viagra online price[/url] buy generic 100mg viagra online
пин ап вход – пинап казино
пин ап казино зеркало – пин ап вход
buy Viagra online [url=https://generic100mgeasy.com/#]Generic100mgEasy[/url] Generic 100mg Easy
пин ап – пинап казино
Kamagra online bestellen [url=https://kamagrapotenzmittel.com/#]kamagra[/url] Kamagra Original
Beste online drogist: ApotheekMax – Betrouwbare online apotheek zonder recept
Apoteket online: apotek online recept – Apoteket online
https://kamagrapotenzmittel.com/# Kamagra Original
apotek online [url=https://apotekonlinerecept.com/#]Apoteket online[/url] apotek online recept
Online apotheek Nederland met recept: Online apotheek Nederland zonder recept – Online apotheek Nederland zonder recept
Kamagra kaufen ohne Rezept: kamagra – kamagra
Apotek hemleverans recept [url=http://apotekonlinerecept.com/#]apotek online[/url] apotek online recept
http://apotheekmax.com/# Online apotheek Nederland met recept
Kamagra Oral Jelly [url=https://kamagrapotenzmittel.com/#]kamagra[/url] Kamagra Gel
Kamagra Oral Jelly: kamagra – Kamagra Oral Jelly kaufen