The Spread the Love Campaign continues throughout this week as Clear & Simple Stamps encourages us all to share our blog crushes with the creative blogging community. For me, word of mouth has been the best way for me to find out about all the fabulous, creative bloggers out there. On Sunday, I shared on of my many blog crushes: You Are My Fave. Today, I’ve got another blog crush for you as well as another project that I’m sort of obsessed with. It is after all… a cupcake.
Now for the reveal of my blog crush…
The Fresh Exchange by Meg Gilger is a creative lifestyle blog that inspires me in so many ways. First, each of her posts is perfectly styled and I find myself studying the layouts everyday! I love her use of handwriting in the text of her photos, and that’s something I’ve been playing with thanks to her inspiration. Meg’s laid back style comes through each post whether it be fashion, travel or hosting fabulous parties like this crazy beautiful outdoor summer soiree that pretty much left me feeling extreme levels of jelly. One of my favorite elements of The Fresh Exchange is the “Just 5” feature, where Meg shares simple recipes and beautiful photography. Check out these Egg Baskets…yum.
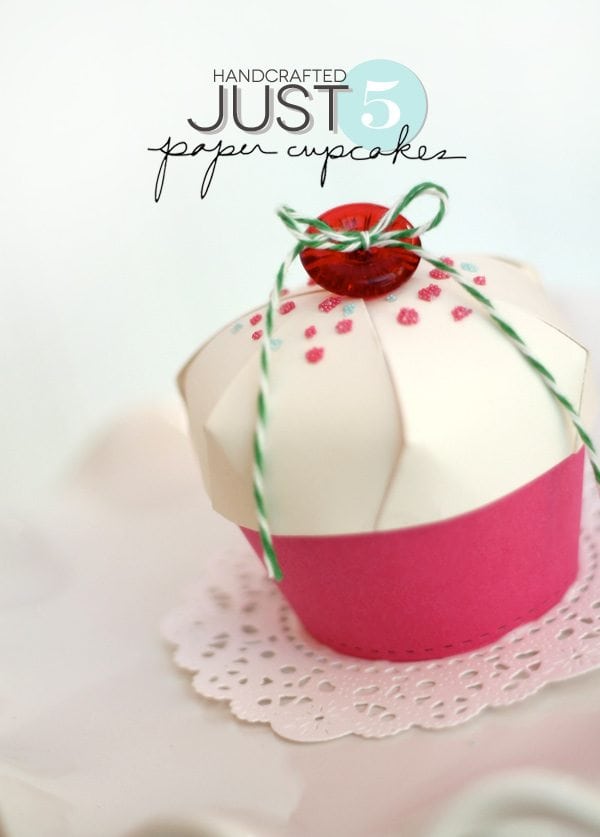
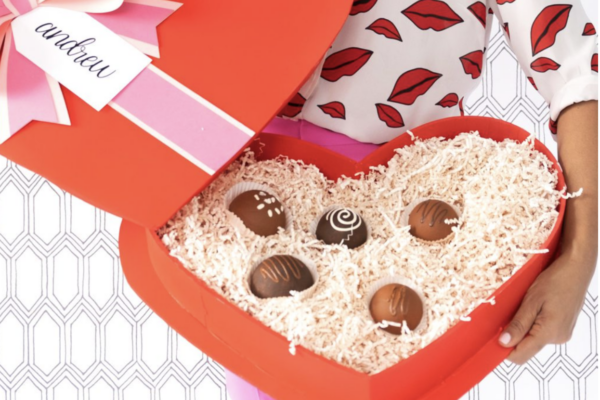
So…with her Just 5 feature in mind, I decided to do a Just 5 of my own…but with a papercrafter’s twist. Here’s what I came up with:
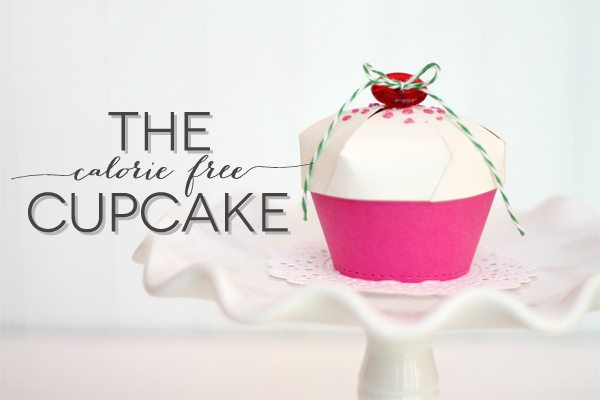
…because we all wish for a calorie free cupcake, right?
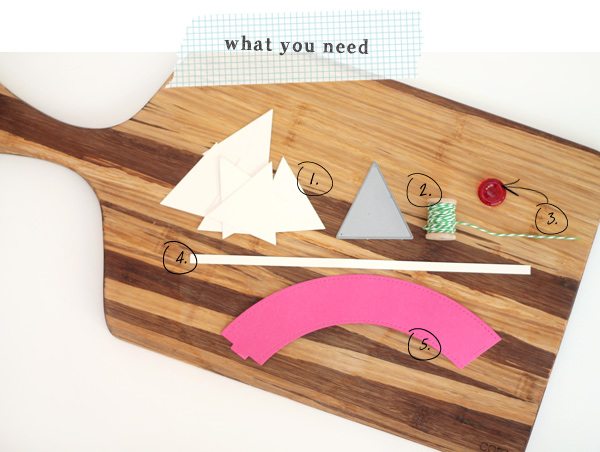
{1} Six triangles die cut from the second largest shape in the Clear & Simple Stamps Triangle Shapes Die collection
{2} Green baker’s twine
{3} A red button
{4} A 1/4″ x 10″ strip of cardstock in the same color as the triangle die cuts.
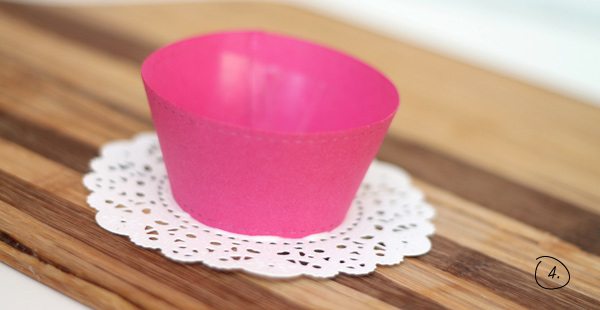
{5} One large cupcake wrapper die cut from the Clear and Simple Stamps Cupcake Wrapper Die collection.
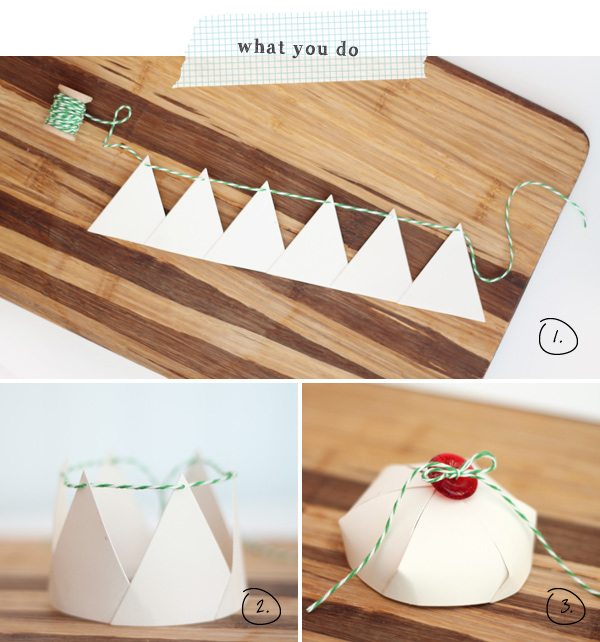
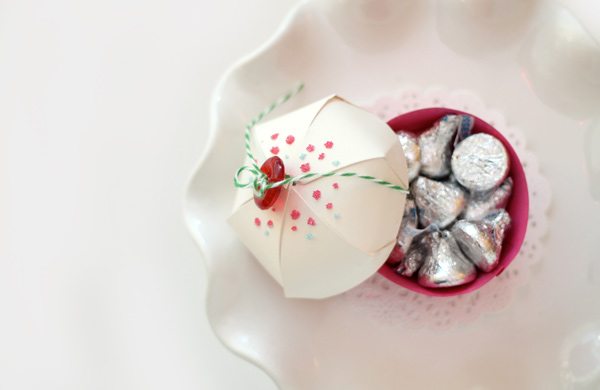
{1} Adhere triangles to the strip of cardstock so that they span the entire length of the strip. I suggest using craft glue for this to ensure best adhesion. Once adhered, thread the baker’s twine through the tip of each triangle as shown.
{2}Adhere the first and last triangles to create a “crown.”
{3} Pull the twine to the center and secure with a knot and tie button into place.
{4} So….I think this probably counts as a sixth “ingredient” but I’m gonna go ahead and use creative license and say that it’s not! To close the bottom of these little cupcake container, I suggest adhering the cupcake wrapper to something, like a doily or maybe just a piece of cardstock. The Clear & Simple Doily die would work perfectly here or better yet…the Cupcake Stands would be so adorable with this project!
*I added some microbeads to the top of my “cupcake” but this step is totally optional…not to mention, if I add microbeads to the supply list, I’m really pushing things on this “Just 5” project. Just being honest!




so cute. love these and so would my daughter. Have you done a post on the craft tools that you use? Would love to learn more about your tools 🙂
Hi Crystal! This project would be perfect for a little girl!As for posts about tools – I did do a series a while back called “Start Your Stash” where I reviewed some of my favorite tools and supplies. Are the particular tools that you are interested in learning about?
Super cute project! I’ve never made a cupcake in my entire life! lol. I have to give this a try! This might just be my very first cupcake. hehe. 🙂
This is such a sweet blog. I love how it’s all about spreading the love, even when you don’t know the person.
Eeeeek, absolute brilliance. The microebead topping is wonderful.
Fantastice versatility with the basket die too, in awe 😀
I love your calorie free cupcake – so pretty and so creative!
This is so stinkin’ cute! Love it!
Quick question for you Amber: can you share what font you’re using for the “calorie-free” text in your photo?
The fond is called Bombshell Pro, though I believe Amber has altered it slightly in some places for aesthetic purposes. The font is unfortunately not cheap and I haven’t been able to find a less expensive (i.e. free) substitute that matches closely.
I LOVE THESE CUPCAKES. I WILL BE MAKING THESE AS PARTY FAVORS FOR MY GRANDDAUGTHER BIRTHDAY PARTY. WELL I WILL TRY 🙂
Great! I love that you are going to give these a go! Happy birthday to your granddaughter!
Hi there! This is an older post, but I’m hoping you might see my question and answer (fingers crossed!).
Can you tell me approximately what size the base of the triangles are? I don’t have a die cutting machine but am thinking I can make do with scissors – and knowing that length would be very helpful!
This is lovely! I need a paper cupcake as a display of sorts and am hopeful this might work! Thank you for the tutorial!
Hi there! The length of the assembled triangles is 10″ so as long as you cut out triangles that fit onto a 10″ strip you should be in good shape. I hope that helps!
Yes! Thanks so much!
The base of this cupcake, did you make that out of card stock or did you purchase it? This could be in the directions and I just missed it but I will go back and read again just in case.
Thx!
Oops I think I see now, sorry. That piece would be # 5.
best rated canadian pharmacy
https://expresscanadapharm.shop/# Express Canada Pharm
trusted canadian pharmacy
Appreciate their commitment to maintaining global healthcare standards.
buying cytotec price
A trusted partner for patients worldwide.
Looking for expert guidance on protecting assets while qualifying for Medicaid? As experienced elder law attorneys near me, our team at Ohio Medicaid Lawyers provides specialized legal assistance with Medicaid planning, estate planning, and asset protection strategies. We help seniors understand medicaid eligibility income charts and navigate the complex 5-year lookback period. Visit our website for comprehensive information about Ohio medicaid income limits 2024 and schedule a consultation with a trusted elder care attorney who can safeguard your future.
Register now to begin your journey to find your true love! Yet now this is just the start of your journey on a Ukrainian relationship site, for where you go from here is of very important significance – studying an article doesn’t change your life immediately. You are particular. You are distinctive and deserve a fabulous love life. Clearly, you’d higher embrace Internet dating and make fantastic things occur in your love life? The quick-observe to a successful love life is to hitch a Ukrainian courting website lately, partly as a result of Internet relationship is mainstream (if not the only means to fulfill somebody you like), and partly as a result of international relationship oftentimes has to happen online first. If you are feeling like you might be ready to settle down however you don’t have time and opportunities to fulfill new people in actual life, you can use the internet that will help you achieve success. Because of this, scammers have free rein to target people who are looking for love however unknowingly put themselves at risk resulting from lack of transparency from the company relating to potential dangers related to on-line courting.
It is claimed that most individuals who read one thing like this will never apply any of the information above. The platform is updated weekly, so you can keep checking in to see if there are new ladies who have [url=https://www.flickr.com/photos/charmdatereviews/]charmdate[/url] joined. If you are about to affix a Ukrainian dating site the place you can meet the best candidate, you will profit from the knowledge in this text at the moment as a result of I will train you how one can create an efficient dating profile. And the capital city of Kiev is also not that expensive of a metropolis, Additionally it is one in every of the preferred cities in Eastern European countries to satisfy single Eastern European ladies for marriage. We offer all our members a genuine rip-off free courting expertise along with a real likelihood to meet Eastern European girls and ladies for marriage. So, how to fulfill Ukrainian ladies? Where to satisfy European Singles?
How to communicate with other members: to draw an Eastern European love, wink at women and ship likes to them, and to attract one, use a chat function and send mails. Family additionally plays an vital position in many European cultures, males usually look for someone who respects their very own household as well as their own. Whenever you bounce onto a reputable dating platform, it’s like you’ve got a backstage pass to a diverse group of Ukrainian mail order brides who’re genuinely excited to speak to a man just like you. Take that likelihood and bounce into the world of courting companies on-line! As an example, you can wear a high-quality go well with in your courting profile photo. Can overseas relationship sites get any better? Learn more about how you can take cost of your life as well as your courting life with the help of Simply Dating! I understand that you are keen to incorporate all your strengths in your profile headline so extra women will notice you on the Ukrainian dating webpage. Because of this, I encourage singles to strive online courting: Your time is unquestionably more essential than your money because… Next time a chance rocks up, I’d such as you to grab it.
I’d wish to thanks for taking the time to learn my weblog articles. Now I’d like to make use of a enterprise analogy. It’s arduous to deny the advantages of meeting Ukrainian girls on-line when you’re free to make use of it. When you first enroll, you possibly can flick thru profiles, send up to 20 “expressions of interestâ€, and examine the last 10 girls who checked out your profile free of charge. They’ve got the adaptability to maneuver with the times, and so they respect a man who can lead but in addition knows how one can be a genuine companion. By reading this blog, you’ve gotten already taken Step 1. You’ve determined that regardless of which stage you might be proper now, you can still learn and improve your love life on some level. That being stated, what will certainly change your life is the actions you’re taking and the choices you make from the second you depart this blog publish. I don’t wish to generalize or stereotype, but it’s very doubtless that your Slavic girlfriend will be capable of adapt to international conditions, like if she comes to reside with you in your home nation. I don’t need you to be one in all them.