I’m willing to bet all the loose change in my purse that 99% of you have extensive friendship bracelet experience. And just so you know, it’s fair to estimate that there is at least $14.22 of loose change in there and that’s enough money for like 2.2lbs of gummi bears from that overpriced candy shop in every mall on the planet.
Okay. Back to the friendship bracelet conversation. I’ve made about 17 grillion of them in my lifetime. I distinctly remember one summer where I was basically running my own one-woman sweatshop for friendship bracelet production. I would safety pin them to my shorts and walk around with embroidery floss dangling from me like a trail of TP on your shoe. Friendship bracelets were a big deal in the 80’s. They just were. Along with big bangs, scrunchies, layered socks and L.A. Gear sneakers. Today, I’ve outgrown friendship bracelets. And scrunchies. And layered socks. And big bangs. But if you give me some L.A. Gears, I will most definitely rock out like Zack Morris. And for those times when I’m jonesing for a friendship bracelet, I’ve got a project that jives with my current crafting sensibilities. It’s still colorful and it still uses those beloved skeins of embroidery floss.
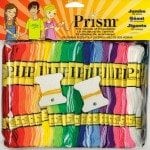
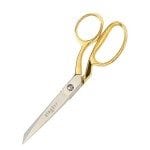
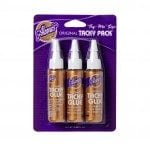
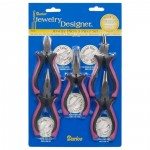
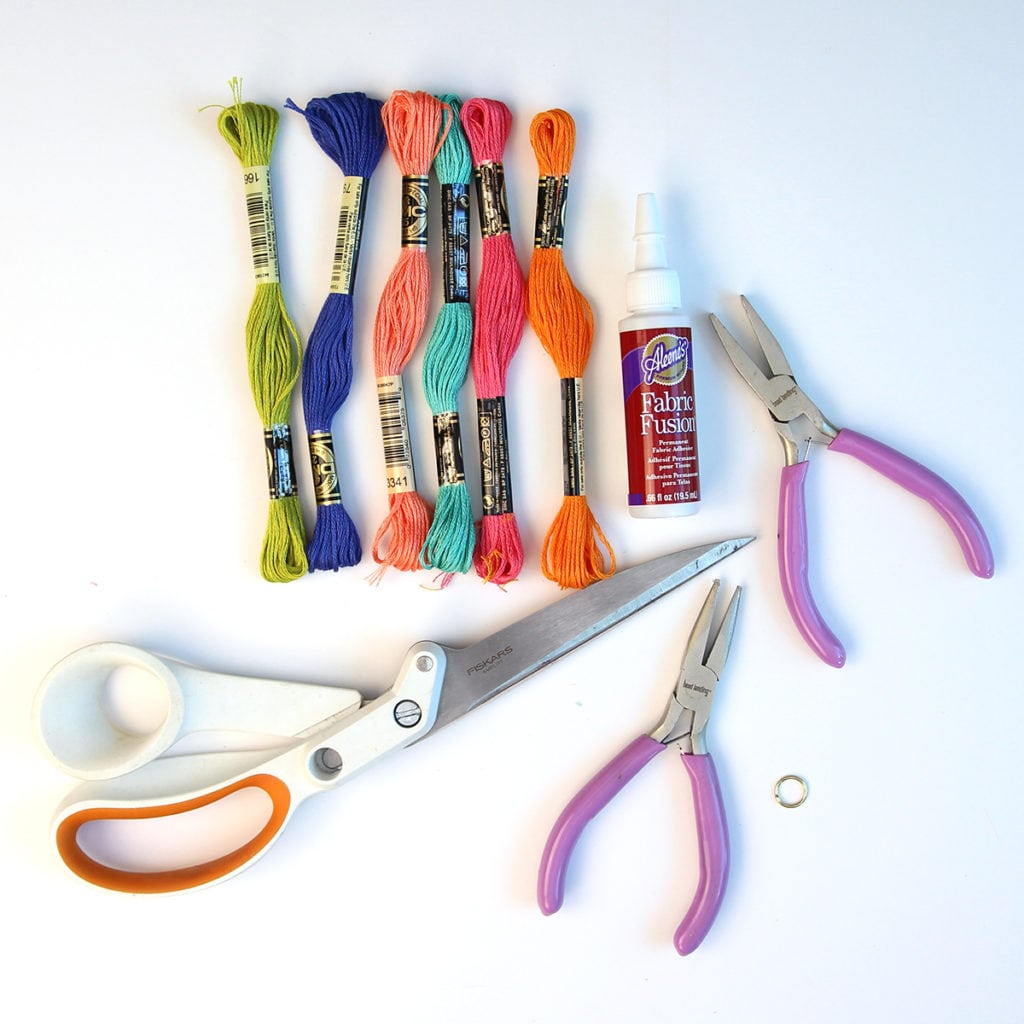 What you need:
- Six skeins of assorted embroidery floss
- Scissors
- Strong crafting glue
- 2 pairs of jewelry pliers
- 1 medium sized jump ring (located in the jewelry findings section of the craft store)
[ninja_form id=6]
 Okay – now before you start using a collection of four letter words, this project is easy. EASY. Don’t be fooled by the number of steps. I literally photographed every. single. thing for this tutorial to be sure you see exactly what’s going on. In actuality, this tassel will take about 15 minutes to assemble. Service announcement over. Let’s do this:
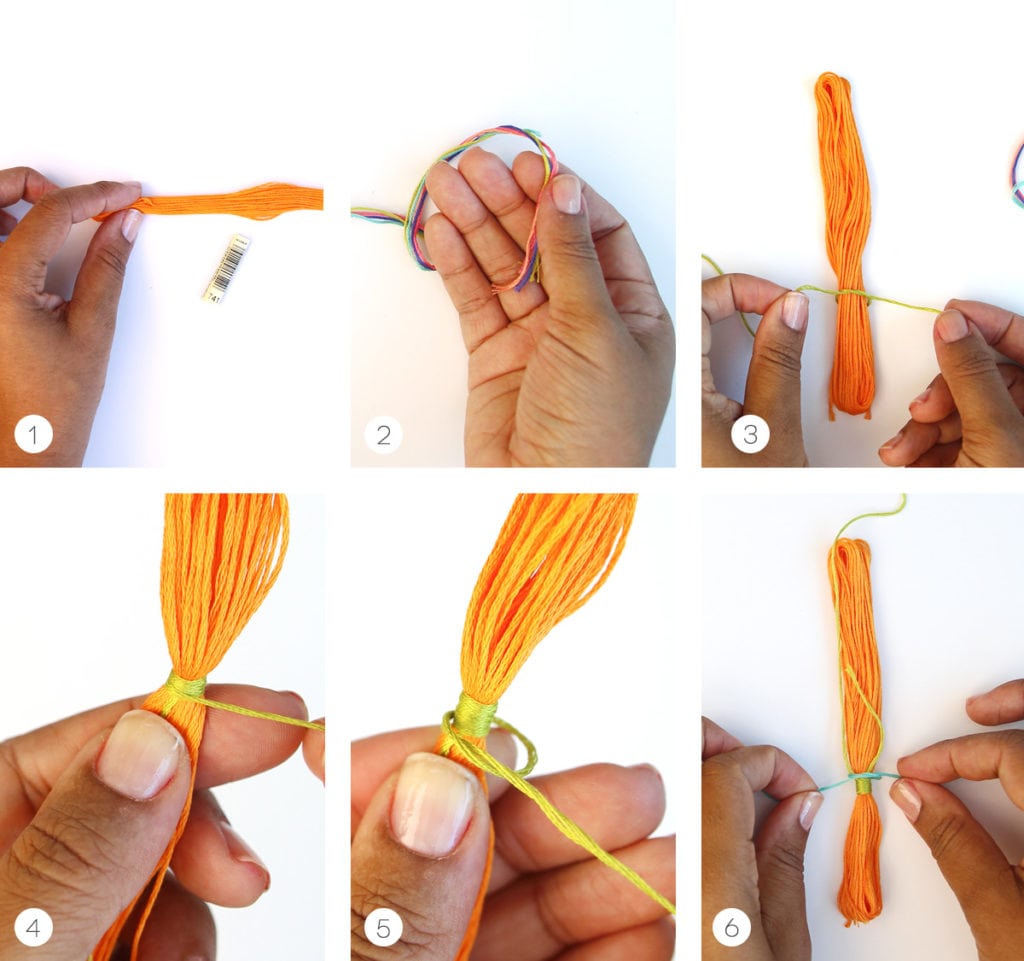
- Remove the sleeves from one of the skeins of floss
- From the remaining five skeins, cut even lengths of floss measuring approximately one yard
- Starting about one-third the way up the skein of floss tie one of the strands once around (no need to tie a knot)
- Once tied, begin looping the strand around and around the full skein
- Once you have looped the strand around a few times, tie it off as shown
- Now add the second strand color by tying it onto the skein just as you did the first color
- Continue looping the second strand around as shown
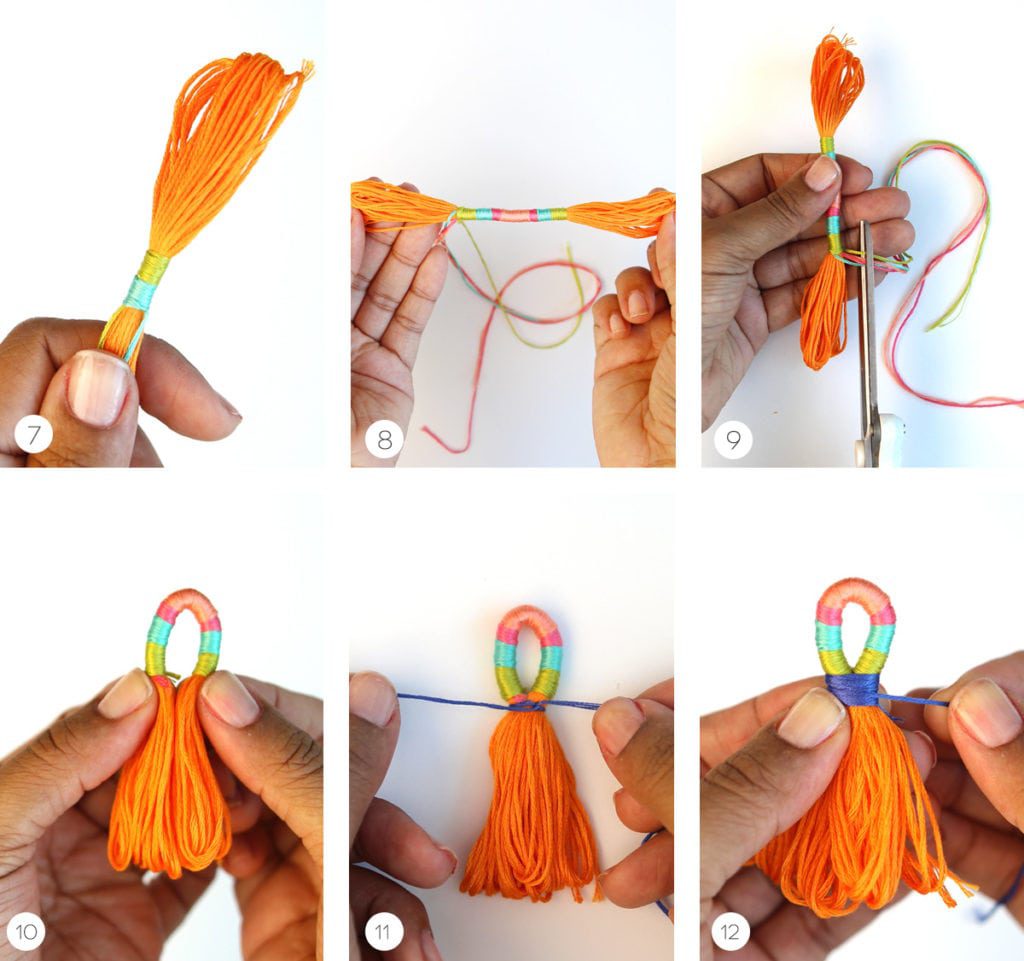
- Continue adding color strands and looping until you have looped around the middle one-third of the skein. Be sure to tie off each color strand before moving on to the next color.
- Use scissors to trim off the excess strands
- Bend the skein in half
- Tie on the last color strand as shown
- Loop the strand around as shown and tie off
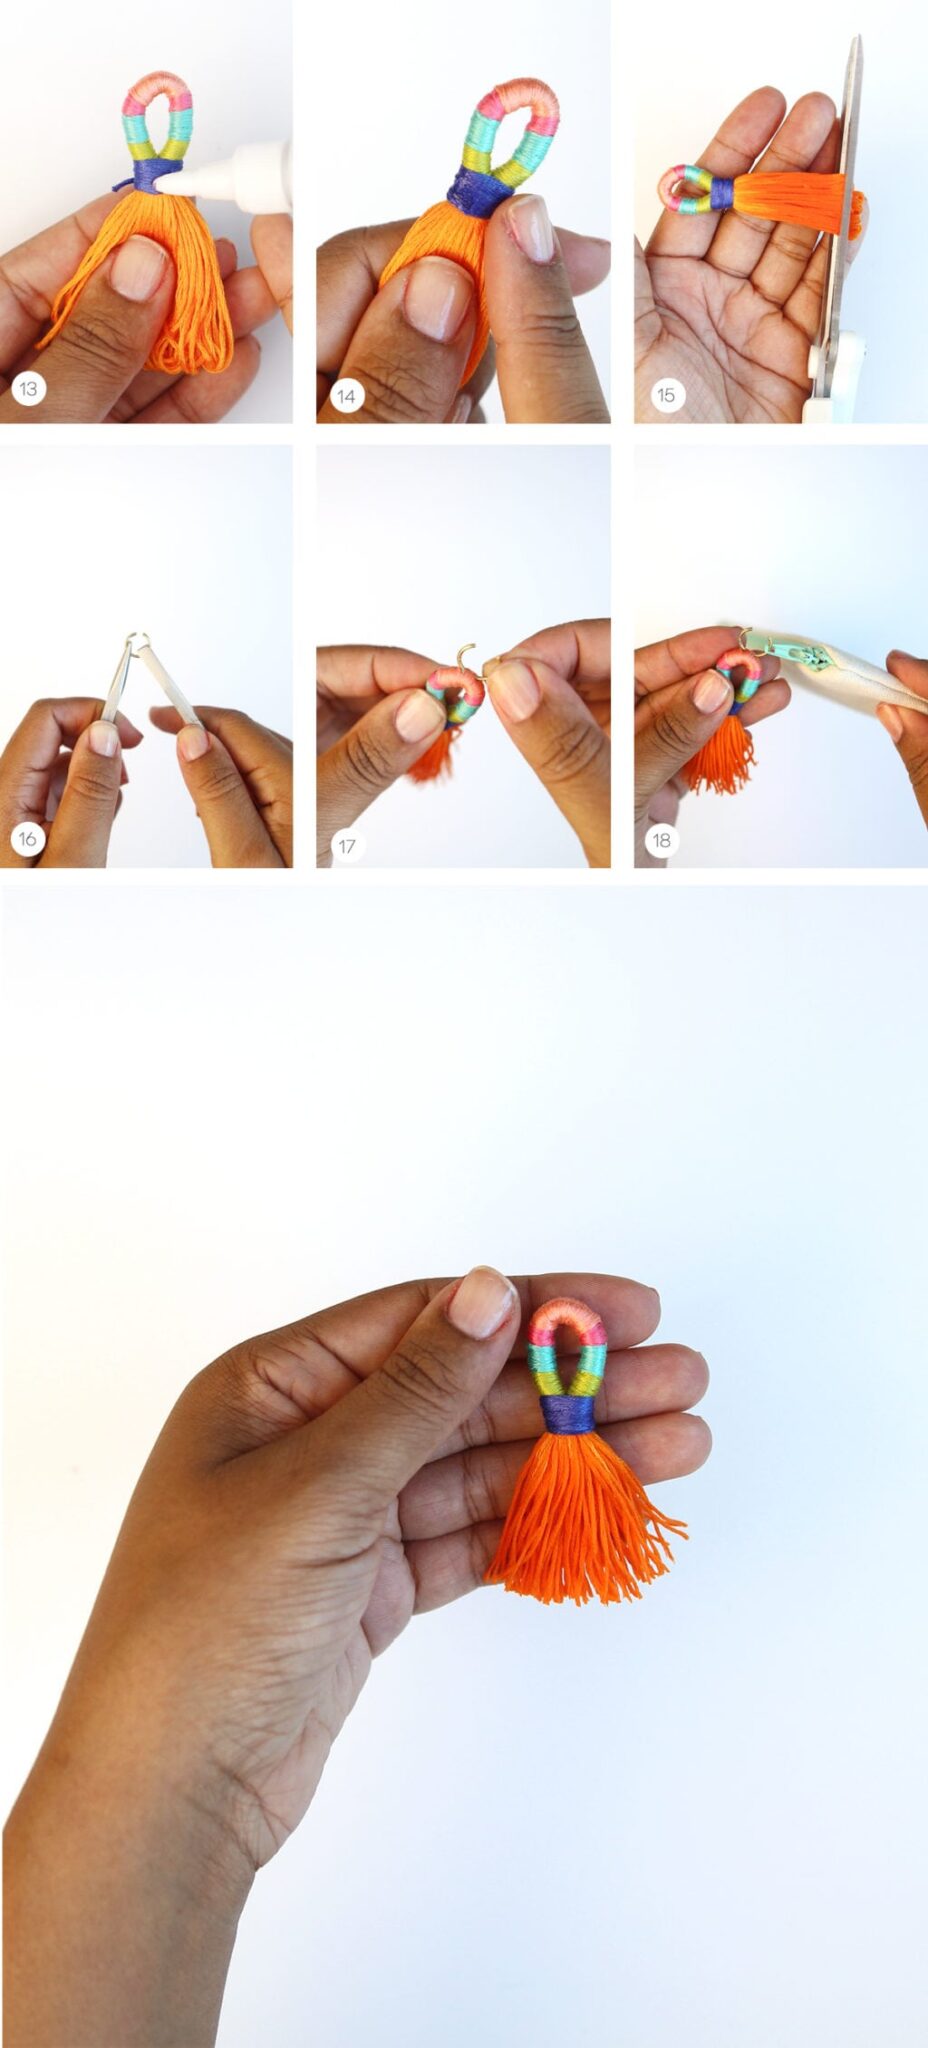
- Add a dab of craft glue
- Use finger to smooth the loose end into the craft glue. This will ensure that everything stays together and doesn’t unravel.
- Trim off the bottom of the skein. HINT: Dip the bottom portion of the tassel into water before cutting. This makes it much easier to cut a clean even line.
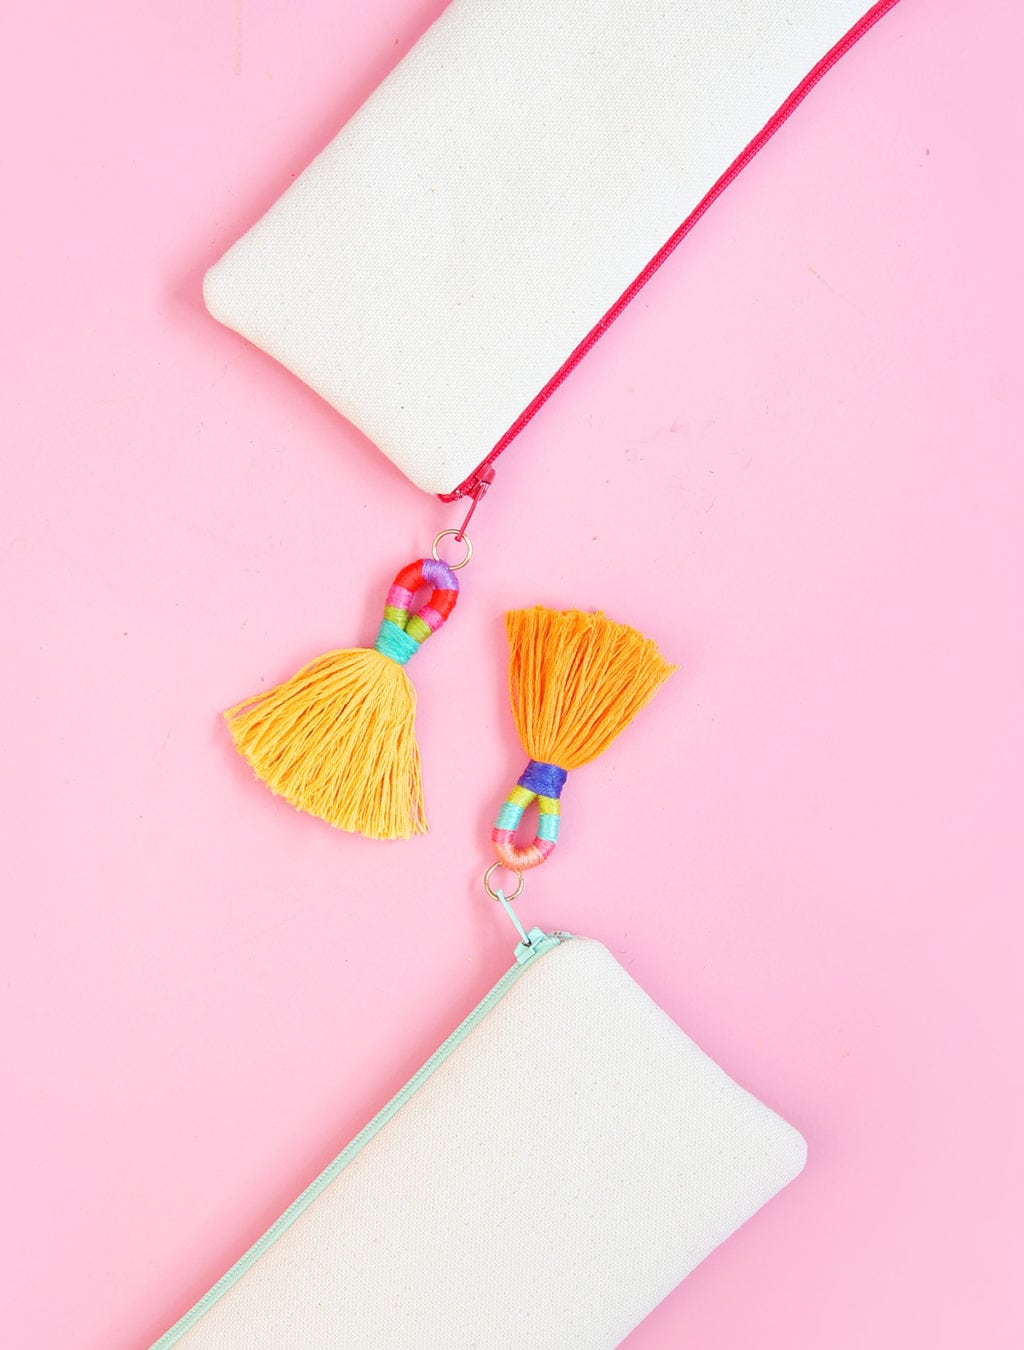
- Use pliers to open jump ring
- Thread jump ring through the top of the tassel.
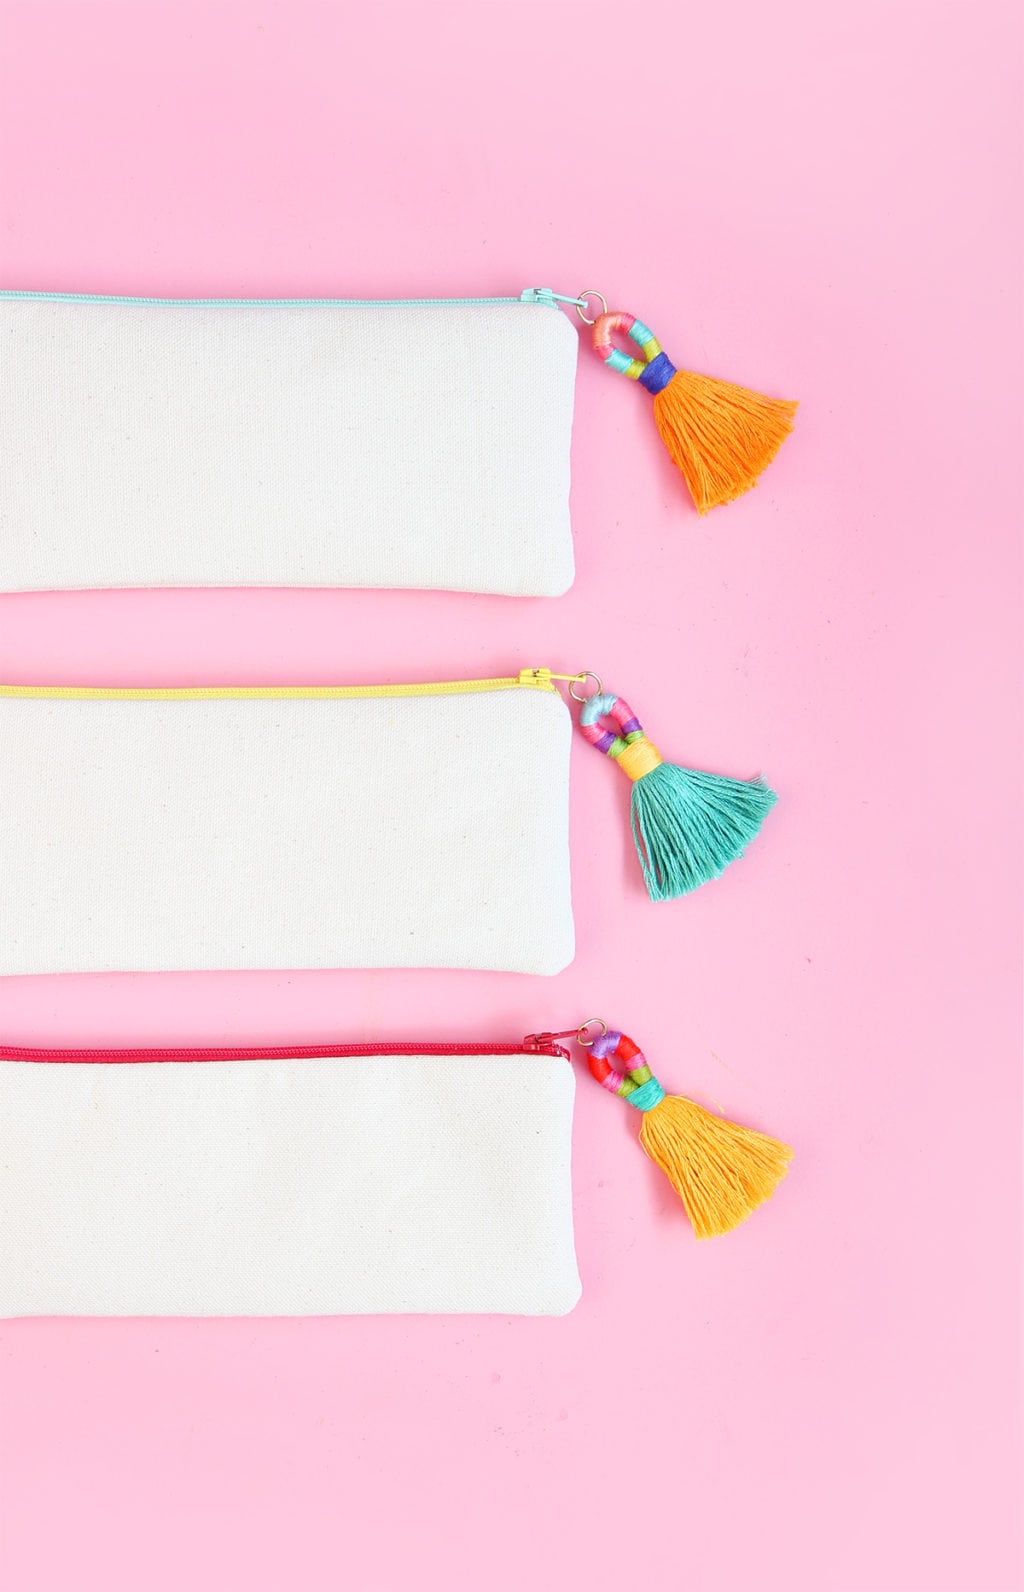
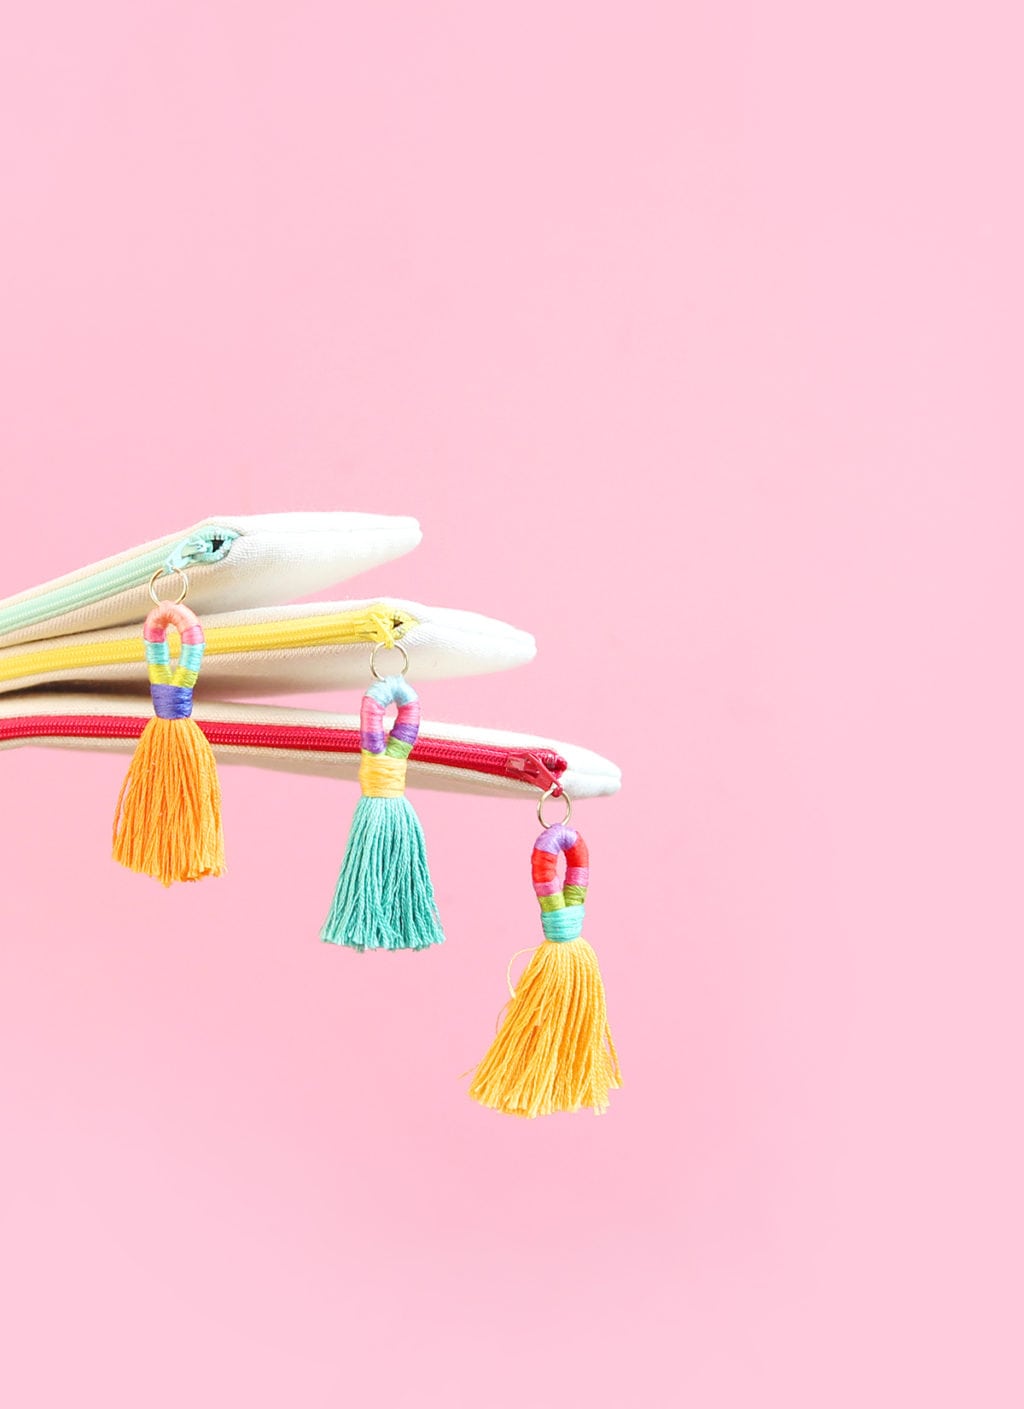
- Attach jump ring to zipper pull and close with pliers.
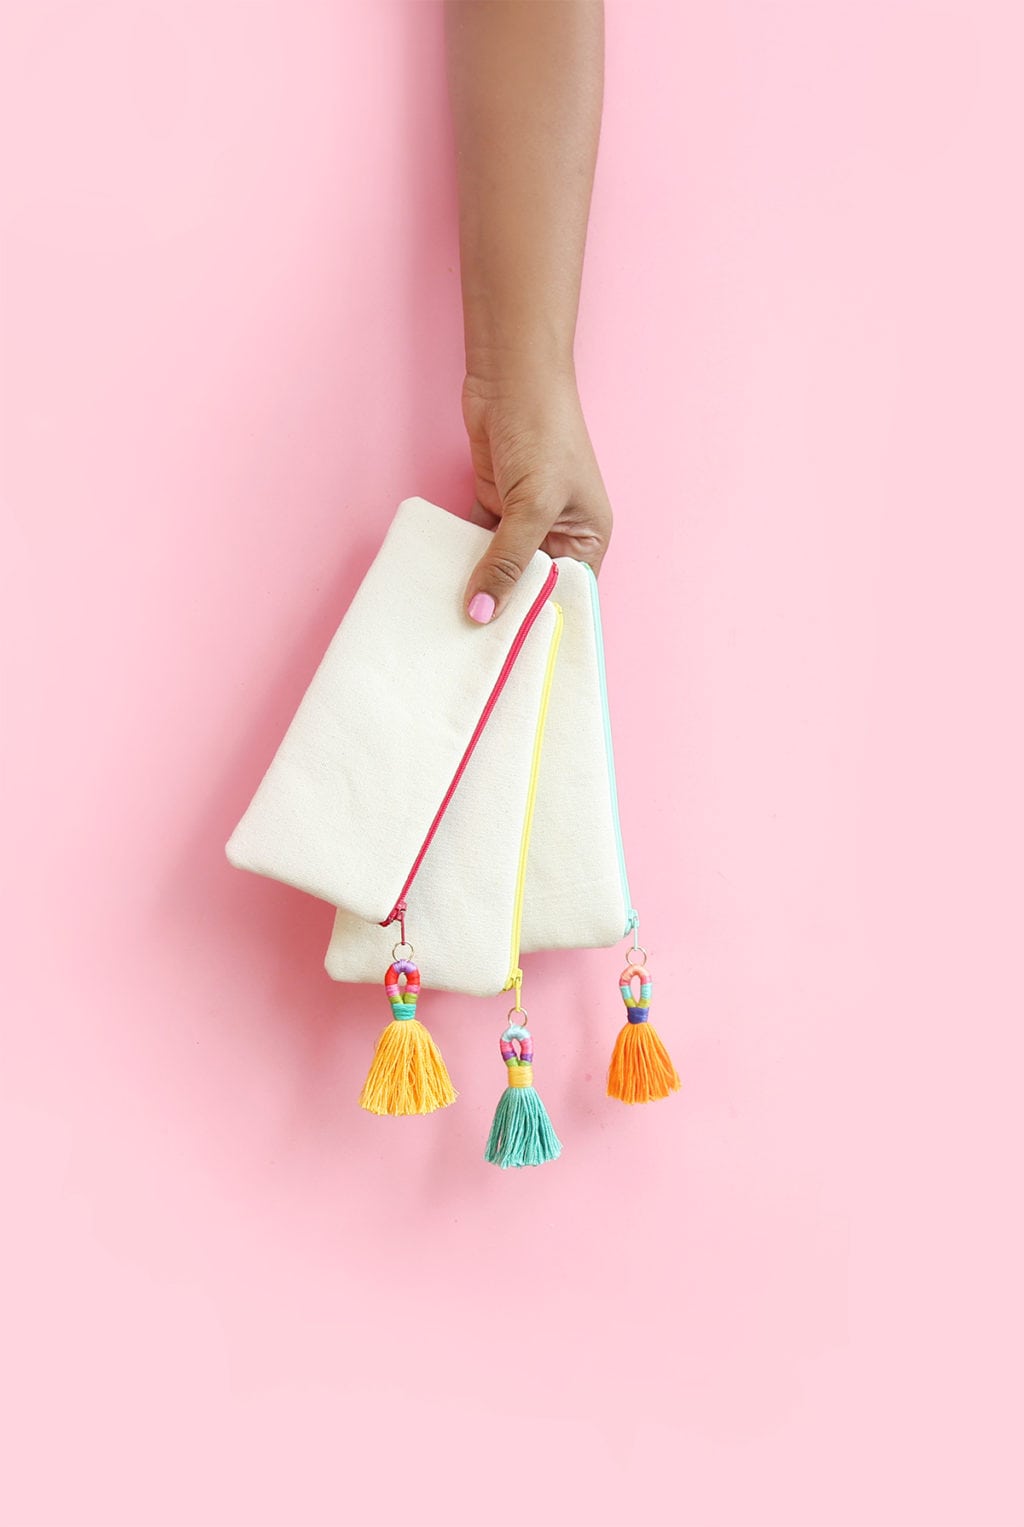
I’m calling these “hula tassels” because they sort of look like little hula dancers, right?! I love ’em and by my math, you only need about $4 in embroidery floss to make them!
 And now you must, must, must make a pit-stop at the Commonthread blog. Commonthread is the new home of DMC Thread – the makers of basically every yarn, embroidery and sewing fiber you’ve ever seen. You know that wall of rainbow embroidery floss at every craft store? Yeah – that’s DMC. I’m excited to be partnering with Commonthread to bring you a Damask Love take on their goodies. Be sure to visit their blog to see more deets on this post as well as an adorable pair ice cream sundae sneakers by my girl Kelly of Studio DIY.
Much love to Commonthread for partnering with Damask Love on this post. I received payment, product or both in exchange for this original content. All project ideas, photographs and wackadoo stories are all my very own.


adorable project. turn over the money! I’ve never heard of a friendship bracelet!
WHAT?! Well dammit Joan – I owe you $14.22. I had big plans for all those quarters and nickels!
These tassels are so darn cute. I’ll definitely be adding this to my favorite craft projects list. Thanks for sharing.
And where did you find those cute little clutches?
oh bridget – you just unleased a beast…I hope your wallet is prepared. I just started ordering all of my clutches from an Etsy shop called “Else and Rita.” You can get the low down on them in this post: https://damasklove.com/damask-lovesetsy/
The link doesn’t work for me.
THOSE are dang stinkin cute!! I can honestly say I’ve never made a friendship bracelet…..(the horror of it…I know!) I did do the big 80’s bangs, layered socks and those horrid scrunchies! Yikes!
These are SUPER cute! I’m a sucker for a good tassle. 🙂
So cute!! I think they do look like little hula dancers! You chose great colors–love them! I never made a friendship bracelet, wore double socks or had “mall bangs”, but i did sport a couple of custom scrunchies and… *gasp*… bows! Let’s go to step class now…
Such gorgeous tassels!!
These are so fun!!! And yes, I mean 3 exclamations’ worth of fun 🙂
In addition to now wanting to add one to every dang zippered thing I have, I also want to make one as a pendant for a necklace and little ones for earrings. Love the happy colors. I’m also very thankful to you for sharing something I can do with the gobs of DMC floss I HAD to buy in most every color years ago when I did cross stitching.
Your blog is so fun—I really enjoy reading it and seeing the talent you share!
These tassels are really nice Amber. I made some cosmetic bags and I will have to make some for them. Never did the friendship bracelet though. That was probably something my younger sister would know about, since she’s a 70’s baby. Thanks for the idea!
This idea is genius. I’ve seen DIY tassels before but your version tajes the cake! I will try and make some of these for my clutches 😉
xo Natasha
freeurcloset.com
Seriously brilliant! Love these so much!
Nice idea! Easy to copy. Thanks for the instruction! Regards
I am so going to make these! Too freaking cute!
Oh I love these! So, so cute. And I totally had a summer that I walked around with embroidery floss pinned to my shorts too.
These are absolutely adorable! I NEED to make some, thanks for sharing.
so cute! great project! thanks for sharing
Such awesome tassels..
Hey there! This post couldn’t be written any better! Reading through this post reminds me of my good old
room mate! He always kept chatting about this.
I will forward this write-up to him. Fairly certain he will have a
good read. Thanks for sharing!
Super cute! Love tassels!!
these are absolutely beautiful
This was the sauce with sprinkles! I made one double thick with 2 skeins of varigated, multi color floss. Turned out so RAD that I attached it to my jacket zipper pull, pulled the zip up to make a turtleneck with the tassel front and center. It made me happy all day! Thank you, now I can make more to match my friendship bracelets (I got over carrying a can of Aqua Net in my purse, but friendship bracelets…never!).
Boy howdy, these are so cute!!!! Guess I can make it through husbands football watching and make these!!!
Woot, woot!!!
I make madras pouches out of scrap fabric. You should too!!! They’re easy and screaming out for these!
Thank you for such a great tutorial – I can’t wait to make some of these.
I’m in love with these tassels! Now I’m thinking of ways I want to use them for and with other craft projects. I’ll be sending people back here for your excellent tutorial for sure.
You left out permed hair (or, better yet, as if it wasn’t enough of an entity on its own, a “perm”). I’ll admit it, I permed the s*** out of my hair, right until it singed off all of my bangs and I walked around middle school like alfalfa (there’s another reference the young generation won’t understand) for 6mos. After that catastrophe, the perm and I went our separate ways. (ps did anyone else ever perm just their bangs? )
I love this tutorial! I am so glad I found you! I too, made friendship bracelets like crazy as a kid. In fact, I found my treasure trove of embroidery floss in the basement and got started making tassels. It pays to hang onto some things for 25 years I guess. Thank you!
I made friendship pins (safety pins with tiny beads) and friendship bracelets. Thanks for calling up that fun playground memory from the early 80s! Hey, if there are any Type A Newbie Crafters reading this tutorial, I just wanted to add that you don’t use the whole yard you cut! And there’s tons left over. Buy extra of your “base” tassel color and make more. Y’all probably knew this, but I panicked at first. Thanks for the clear step-by-step photos!
Muito agradcida!
These are great! I can’t wait to make these and put them on a few of my vintage clutches. They will great!
Honey I LOVE the Tassels!!! Also did you make that pouch. It is very nice
I agree
Today, they want you to take their Target Check Card, link it to your checking account (have your check book with you when going shopping), and receive 5% off any purchase at Target that day, and into the future.
https://www.paybackdollar.com/stores/rebecca-minkoff-coupon
Today, they want you to take their Target Check Card, link it to your checking account (have your check book with you when going shopping), and receive 5% off any purchase at Target that day, and into the future! Just use it this season and the cash reward will be automatically applied to your checking account by the 15th of the next month.
https://www.paybackdollar.com/stores/soufeel-coupon
I really love it!!! I found your site today and it’s amazing!!!
Love your tassels, they are so beautiful.
I just wanted to leave a suggestion that I saw on another tassel tutorial that I think is a good idea. When she was done wrapping and tying off, she wrapped a piece of tape around the bottom and the cut through the strands and tape for a nice even finish.
I did the very same with pinning bracelets in-progress to my pants and walking around with string hanging from me!!
This method of making a tassel is GENIUS!!
These tassels are amazing and I can’t wait to make them
This method of making a tassel is GENIUS!! http://www.coupert.com
I loved how the tassels looked, so much so that I went into my floss stash and made one last night. But I was unsure about two things. From the pictures it is clear that you return to a color. After the first use, do you tie off and cut, or do you just carry the strand against the main body of the tassel and wrap around it? And how tightly do you wrap? I didn’t know whether to pull it very tight or just try to lay it on smoothly, but loose. Thanks for your help
Want to find coupons. Find best coupons on our website. Visit
promo Code