Organization is not exactly my forte. I have the capacity to organize, but on most days, I don’t have any of the motivation. Right now, there is a pile of mail jammed into the diaper bag. There are several brand new spools of bakers twine on the floor – because I’m not sure where else to put them – and let’s be honest – the floor is nothing if not a big ‘ol shelf. Am I right? Currently, Markus’ toys are neatly stashed away in our living room. Neatly stashed into a big Amazon Prime box that previously held last month’s shipment of toilet paper. I just haven’t had time to wrangle together a better toy box solution. Don’t judge. I’m just keeping it all the way real. So yeah, I’m not always the best at keeping things organized. Today though, I’m getting it together just a little bit. I built a mail organizing station inspired my the Home Depot Do-It-Herself Workshop project that I’ll be co-hosting this Thursday, June 18th at the West Palm Beach Home Depot. If you are in the area, I’d love to see you. You can register here to make sure you have a seat.
My DIY mail station is inspired by this outdoor beverage station. I added my own spin on this project making it perfect for all you crafters and paper lovers. If you want to build your own, I’ve even drafted some building plans that maps out the step-by-step process.
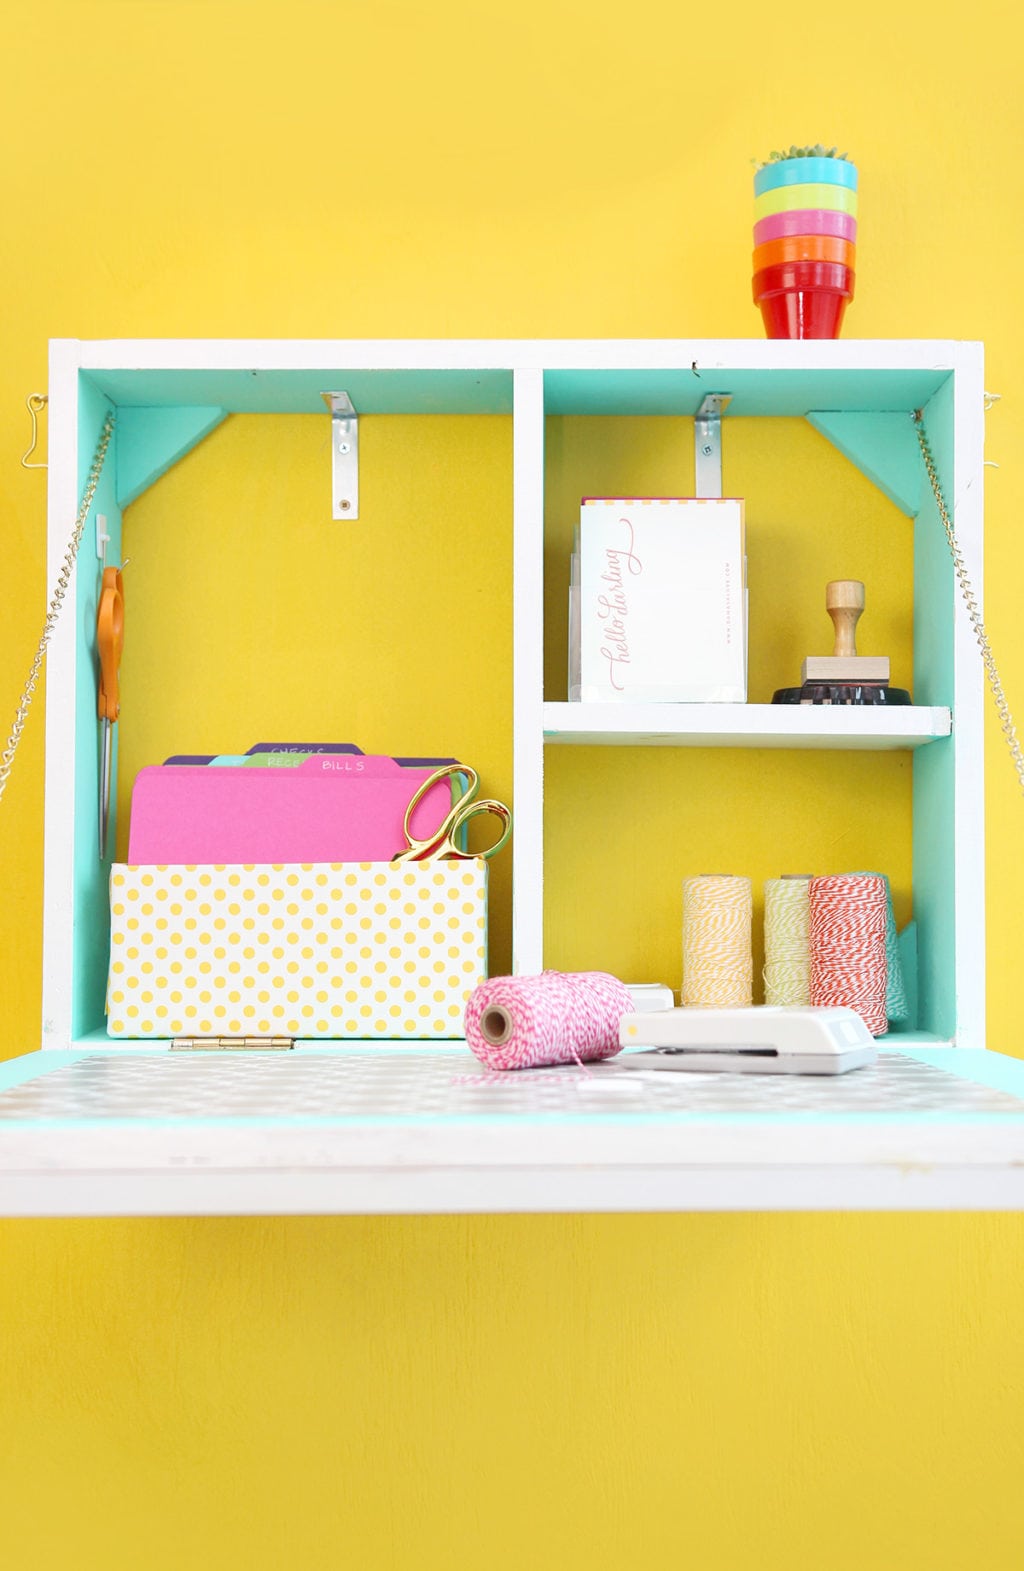
Unlike the original design, this mail station has a hefty dose of color. Yeah. Shocker, right? I painted the inside of the station with aqua paint and kept the rest clean and simple with bright white. To define a small workspace on inside of the door, I added a quatrefoil print drawer liner with self-adhesive backing.
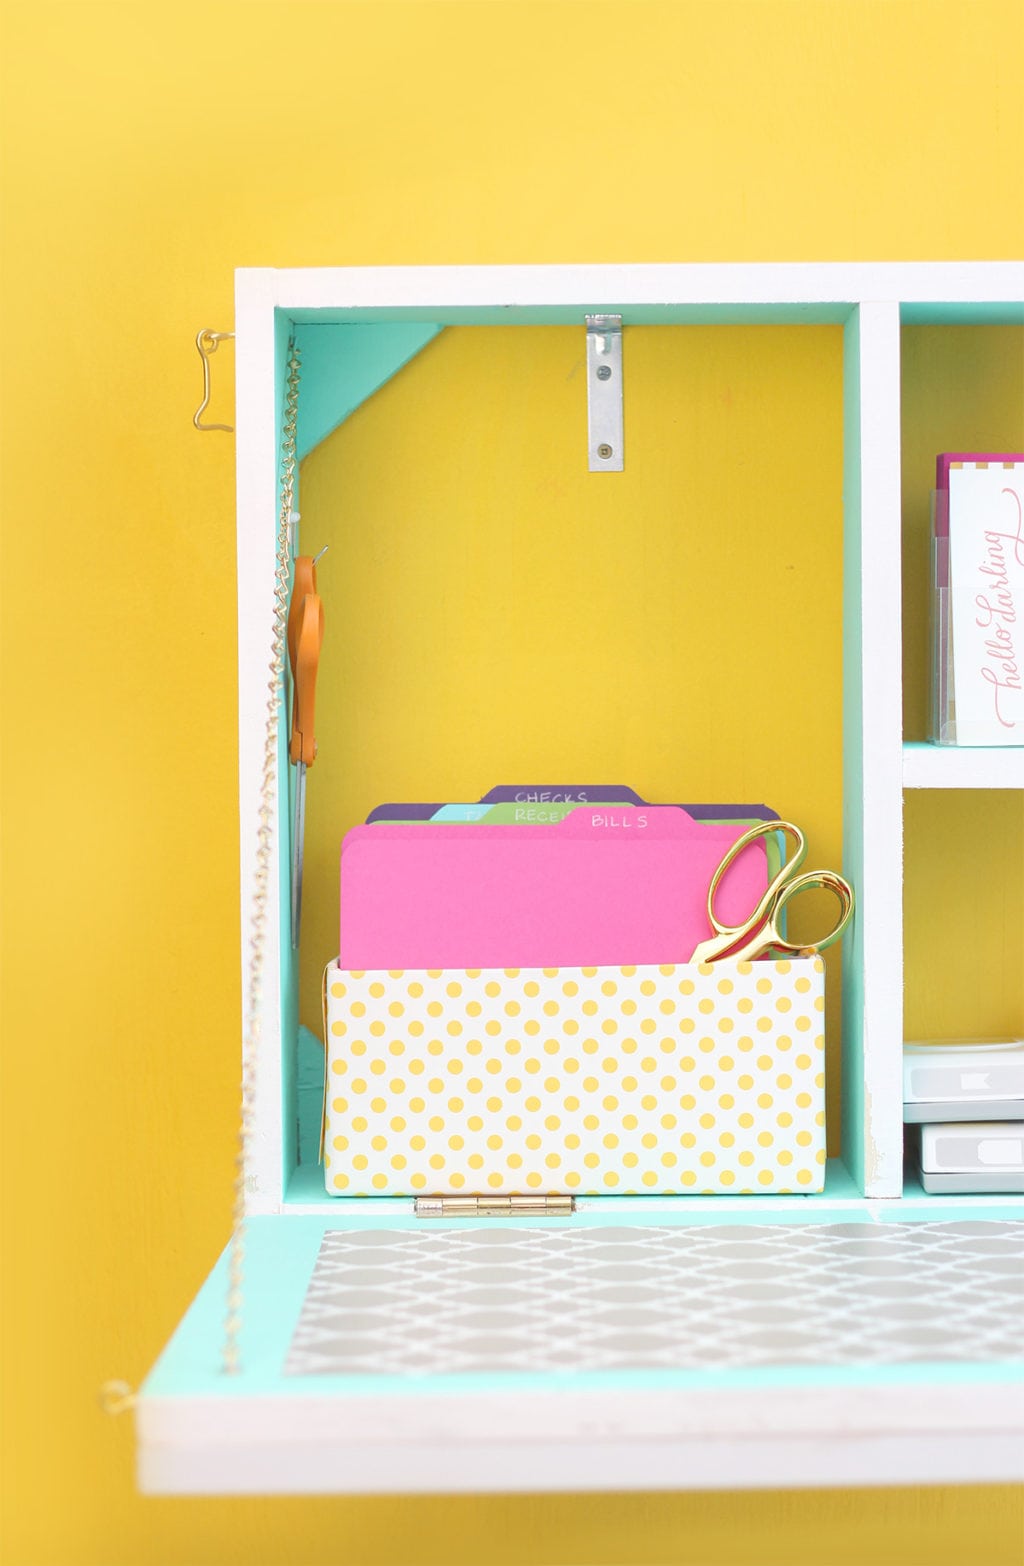
On the inside of the mail station, you’ll find some bright file folders that I created with the We R Memory Keepers Envelope Punch Board, along with a few packaging staples like stationery, basic punches, cardstock and baker’s twine. I even placed a hook for holding a pair of scissors.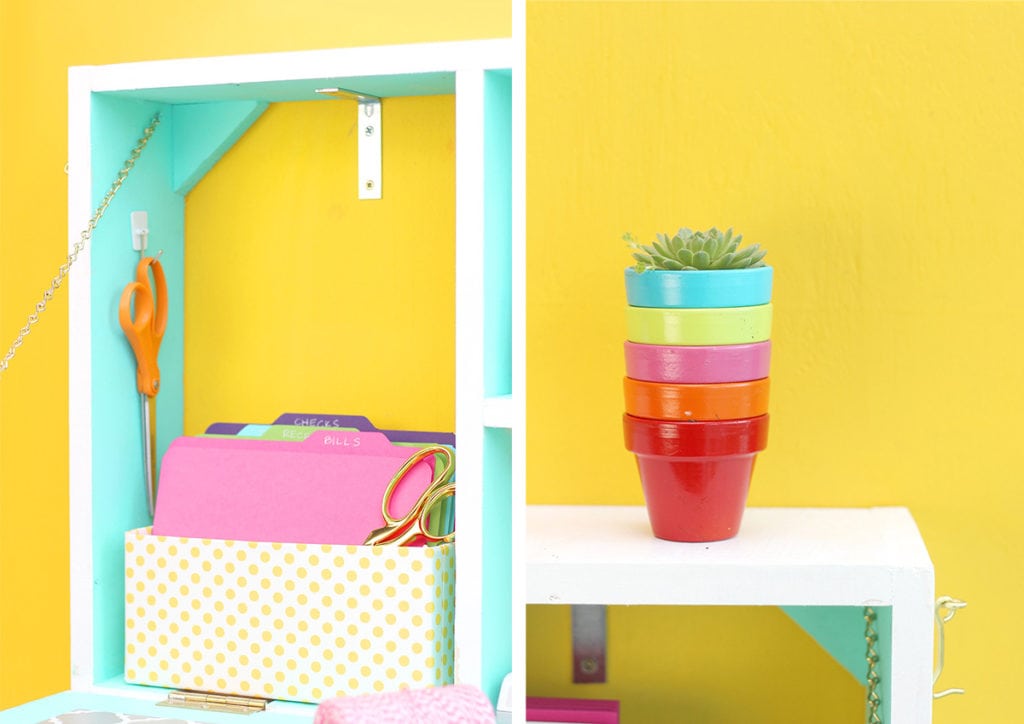
 When closed, this mail station is just as functional. I painted the front door with magnet primer and chalkboard paint to create a magnetic chalkboard. I then framed the whole thing with molding. To cut the molding, I used this Ryobi Miter Saw, which was surprisingly easy to use.
Are you inspired to get organized! If you want to see how to make this mail station, come say “hello” this Thursday, June 18th at the West Palm Beach location. Register HERE!
This post is brought to you by The Home Depot. All ideas, opinions and wackadoo stories are all my very own!









online apotheek: online apotheek – Beste online drogist
Apotheek online bestellen [url=https://apotheekmax.shop/#]Apotheek online bestellen[/url] ApotheekMax
http://apotekonlinerecept.com/# apotek online recept
https://kamagrapotenzmittel.com/# Kamagra Oral Jelly
Hi there, I found your web site via Google while searching for a related topic, your website came up, it looks good. I have bookmarked it in my google bookmarks.
One other issue is that if you are in a problem where you do not have a co-signer then you may really want to try to make use of all of your financial aid options. You could find many awards and other scholarships that will give you money to help with school expenses. Thanks alot : ) for the post.
One thing I’d prefer to say is before getting more computer system memory, look at the machine into which it could be installed. In the event the machine will be running Windows XP, for instance, a memory ceiling is 3.25GB. Setting up more than this would basically constitute a new waste. Make sure that one’s motherboard can handle the actual upgrade quantity, as well. Great blog post.
I?m impressed, I must say. Really rarely do I encounter a blog that?s both educative and entertaining, and let me inform you, you’ve got hit the nail on the head. Your concept is outstanding; the problem is something that not sufficient persons are talking intelligently about. I’m very completely happy that I stumbled across this in my seek for something referring to this.
Do you mind if I quote a few of your posts as long as I provide credit and sources back to your blog? My blog site is in the very same area of interest as yours and my visitors would truly benefit from a lot of the information you present here. Please let me know if this alright with you. Thanks a lot!
I can’t express how much I admire the effort the author has put into producing this outstanding piece of content. The clarity of the writing, the depth of analysis, and the wealth of information provided are simply remarkable. Her zeal for the subject is obvious, and it has undoubtedly resonated with me. Thank you, author, for providing your knowledge and enriching our lives with this extraordinary article!
There are some attention-grabbing points in time in this article however I don?t know if I see all of them center to heart. There is some validity but I’ll take maintain opinion till I look into it further. Good article , thanks and we would like more! Added to FeedBurner as well
hey there and thank you for your info ? I have certainly picked up anything new from right here. I did however expertise several technical issues using this site, as I experienced to reload the site many times previous to I could get it to load properly. I had been wondering if your hosting is OK? Not that I am complaining, but slow loading instances times will often affect your placement in google and can damage your quality score if ads and marketing with Adwords. Well I?m adding this RSS to my e-mail and could look out for much more of your respective exciting content. Make sure you update this again soon..
Great ? I should certainly pronounce, impressed with your site. I had no trouble navigating through all the tabs as well as related info ended up being truly simple to do to access. I recently found what I hoped for before you know it at all. Quite unusual. Is likely to appreciate it for those who add forums or something, website theme . a tones way for your customer to communicate. Excellent task..
Thanks for these tips. One thing I should also believe is the fact that credit cards offering a 0 rate of interest often entice consumers with zero interest, instant endorsement and easy over-the-internet balance transfers, but beware of the number one factor that can void your 0 easy neighborhood annual percentage rate and also throw you out into the poor house quickly.
Thanks for your article. I also think that laptop computers are becoming more and more popular right now, and now will often be the only sort of computer utilised in a household. It is because at the same time that they’re becoming more and more reasonably priced, their computing power is growing to the point where they are as robust as personal computers out of just a few years ago.
Have you ever considered creating an e-book or guest authoring on other sites? I have a blog based on the same ideas you discuss and would love to have you share some stories/information. I know my subscribers would enjoy your work. If you’re even remotely interested, feel free to send me an email.
Hello! Do you know if they make any plugins to protect against hackers? I’m kinda paranoid about losing everything I’ve worked hard on. Any suggestions?
In these days of austerity in addition to relative anxiousness about running into debt, most people balk contrary to the idea of making use of a credit card to make acquisition of merchandise or maybe pay for a holiday, preferring, instead to rely on a tried in addition to trusted procedure for making payment – cash. However, if you possess the cash available to make the purchase completely, then, paradoxically, this is the best time to be able to use the credit card for several reasons.
Thank you a bunch for sharing this with all folks you really understand what you’re talking about! Bookmarked. Please also consult with my website =). We will have a link change arrangement between us!
Today, I went to the beach with my kids. I found a sea shell and gave it to my 4 year old daughter and said “You can hear the ocean if you put this to your ear.” She put the shell to her ear and screamed. There was a hermit crab inside and it pinched her ear. She never wants to go back! LoL I know this is completely off topic but I had to tell someone!
Hello this is somewhat of off topic but I was wondering if blogs use WYSIWYG editors or if you have to manually code with HTML. I’m starting a blog soon but have no coding know-how so I wanted to get advice from someone with experience. Any help would be greatly appreciated!
hey there and thank you to your info ? I?ve certainly picked up anything new from proper here. I did however expertise several technical issues the use of this site, as I skilled to reload the site a lot of occasions previous to I could get it to load correctly. I were wondering in case your hosting is OK? Now not that I’m complaining, but slow loading cases times will very frequently affect your placement in google and can damage your high-quality ranking if ads and ***********|advertising|advertising|advertising and *********** with Adwords. Anyway I am adding this RSS to my e-mail and can look out for a lot more of your respective fascinating content. Make sure you replace this once more very soon..
I have noticed that car insurance companies know the cars which are at risk of accidents as well as other risks. Additionally , they know what style of cars are prone to higher risk and the higher risk they’ve already the higher the actual premium amount. Understanding the uncomplicated basics of car insurance will allow you to choose the right kind of insurance policy that should take care of your family needs in case you happen to be involved in any accident. Thank you for sharing the ideas on your own blog.
One other issue is when you are in a scenario where you don’t have a cosigner then you may actually want to try to exhaust all of your financing options. You will find many grants or loans and other scholarships and grants that will ensure that you get finances to support with education expenses. Many thanks for the post.
Magnificent site. Lots of helpful information here. I?m sending it to several pals ans additionally sharing in delicious. And obviously, thanks for your effort!
Appreciate you for sharing most of these wonderful discussions. In addition, the best travel plus medical insurance plan can often eradicate those issues that come with journeying abroad. Any medical crisis can soon become extremely expensive and that’s certain to quickly slam a financial impediment on the family’s finances. Having in place the best travel insurance offer prior to setting off is worth the time and effort. Thanks
fantastic post, very informative. I wonder why the other specialists of this sector don’t notice this. You should continue your writing. I am confident, you’ve a huge readers’ base already!
Thanks for the unique tips provided on this blog site. I have seen that many insurance carriers offer prospects generous reductions if they prefer to insure more and more cars with them. A significant volume of households have several autos these days, in particular those with more mature teenage kids still located at home, plus the savings in policies can soon mount up. So it is good to look for a good deal.
I have learned quite a few important things through your post. I would also like to say that there is a situation in which you will obtain a loan and never need a cosigner such as a Federal government Student Support Loan. But when you are getting financing through a standard financial institution then you need to be willing to have a cosigner ready to make it easier for you. The lenders can base any decision on a few factors but the greatest will be your credit rating. There are some lenders that will likewise look at your work history and choose based on this but in many instances it will be based on on your report.
Howdy! Do you know if they make any plugins to protect against hackers? I’m kinda paranoid about losing everything I’ve worked hard on. Any recommendations?
Thank you for the good writeup. It in fact was a amusement account it. Look advanced to far added agreeable from you! By the way, how could we communicate?
As I website possessor I believe the content material here is rattling wonderful , appreciate it for your hard work. You should keep it up forever! Best of luck.
I’ve noticed that credit score improvement activity has to be conducted with techniques. If not, you will probably find yourself damaging your positioning. In order to reach your goals in fixing your credit rating you have to be careful that from this moment in time you pay all your monthly fees promptly prior to their slated date. It is really significant because by never accomplishing so, all other actions that you will choose to use to improve your credit position will not be useful. Thanks for sharing your suggestions.
Yet another issue is that video games usually are serious as the name indicated with the principal focus on knowing things rather than fun. Although, there is an entertainment feature to keep your young ones engaged, each game is usually designed to focus on a specific expertise or programs, such as numbers or scientific research. Thanks for your write-up.
Hiya, I am really glad I’ve found this information. Nowadays bloggers publish just about gossips and web and this is really frustrating. A good blog with interesting content, that is what I need. Thanks for keeping this web-site, I’ll be visiting it. Do you do newsletters? Can’t find it.
Today, taking into consideration the fast life-style that everyone is having, credit cards have a big demand throughout the economy. Persons from every area are using credit card and people who are not using the credit cards have made arrangements to apply for just one. Thanks for spreading your ideas about credit cards.
I have seen that fees for online degree authorities tend to be a fantastic value. Like a full Bachelors Degree in Communication from The University of Phoenix Online consists of 60 credits with $515/credit or $30,900. Also American Intercontinental University Online gives a Bachelors of Business Administration with a complete program requirement of 180 units and a price of $30,560. Online studying has made taking your diploma much simpler because you could earn your current degree from the comfort of your home and when you finish from office. Thanks for all your other tips I have learned from your website.
I don?t even know how I ended up here, but I thought this post was great. I don’t know who you are but definitely you’re going to a famous blogger if you are not already 😉 Cheers!