For the last five months, Cricut has hosted the Design Space Challenge. Tons of bloggers created projects with their Cricut Explore and submitted them for voting. After five rounds of competition and hundreds of entries, we are down to five bloggers vying for a $10,0o0 cash prize. That’s some serious shekels, friends. I made it into this final round of competition with my Print Then Cut Cookie Exchange Party…then came the fun part. Exactly two weeks after having a baby, I received an email from Cricut stating that I’d made it into the final round of the Design Space Star competition. I remember it very well. I was sitting on the couch with the baby. My mom was sitting next to me. I read the email and immediately had a huge smile on my face. I looked at my mom and said “I’m in a contest to win $10,000!” My next thought…”How the hell am I gonna do this…all with a baby who’s developed quite the breastmilk habit?!” There was a lot of excitement, worry, fear and confusion at that moment.
I am nothing if not persistent, people. So I got to work. I could make this happen…and I did. Here’s a rundown of our assignment:
- Use the Cricut Explore to transform a space in your home
- The transformation should be “dramatic”
- You have a budget of $1,000 plus access to whatever Cricut supplies you need
- Use the Cricut Explore in unique & different ways
- Create an accompanying video that showcases your space in whatever way you wish
- Feed your baby every 2-3 hours and keep him happy (…well, so that wasn’t in the actual rules, but ya know…it sort of went without saying)
![]()
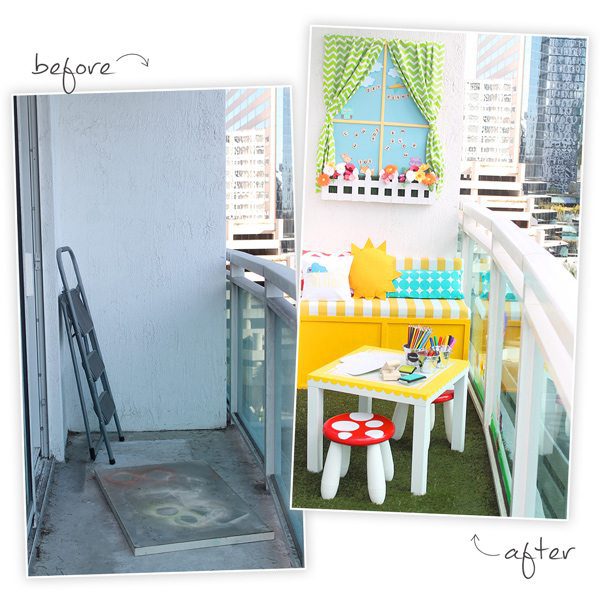
I went back and forth about what space I would revamp. First, I thought I’d give our master bedroom a makeover but I quickly gave that one the kibosh when I realized that I’d have to sew a new duvet…which is a skill that this girl does not have. Then I considered the master bathroom…I’m sure you’ll thank me for not going that route. Then I started thinking “outside” the box…quite literally. The balcony outside of Markus’ room was in major need of attention. It was gross. Here’ the proof: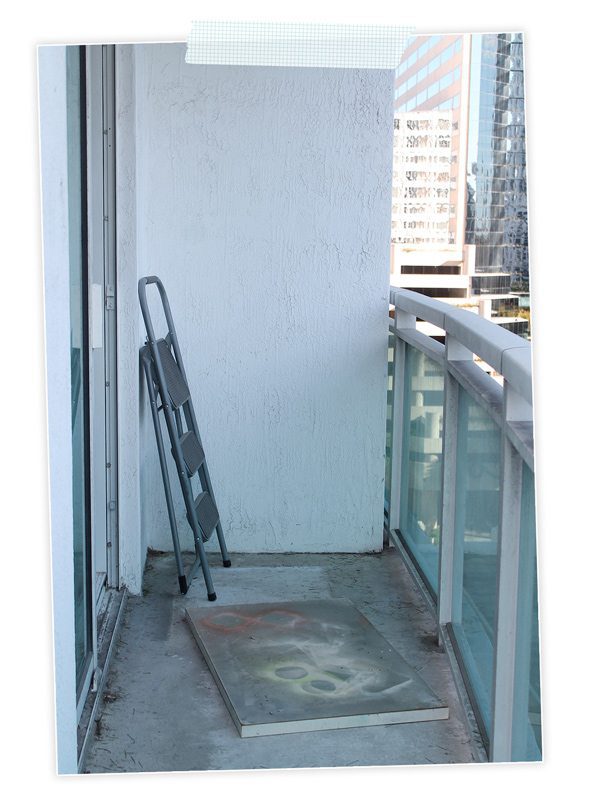 It was empty, dirty and home to a few random items including an old table top that I used for spray painting small objects. The good news: it was a blank slate. The bad news: it was a blank slate. I could transform this in anyway I wanted, but I had to start from scratch. There was nothing to salvage – nothing to repurpose.
Here’s a rundown of my mission:
- Take the balcony from “Crackhouse in the Sky” to “Playhouse in the Sky”
- Use the Cricut Explore in as many ways as I can, with a variety of materials
- Create a colorful, child-friendly play space with interactive play elements and home decor items
- Create doable DIY’s that could be accomplished on my newly busy schedule.
- Feed the baby every 2-3 hours and keep him happy
With lots of support from my mom and husband, I made it happen.
![]()
First up – a little moving picture action filmed, produced, edited and directed by your’s truly. Watch out Tarantino – I’m coming for you … and I’m pretty sure you have absolutely nothing to worry about.
[ylwm_vimeo height=”400″ width=”600″ ]117609366[/ylwm_vimeo]
Now, let’s take a closer look at each element of this “Playroom in the Sky”
 Miami winters are beautiful and offer the perfect excuse for outdoor projects like this. The cool temperature means that you can spend hours outside without sweating your eyeballs out. This outdoor playroom is paradise for any kiddo and is a great way to celebrate a comfortable winter and welcome spring. As always, I kept the colors bold and bright and filled this space with tons of projects that will keep any child occupied for hours.
![]()
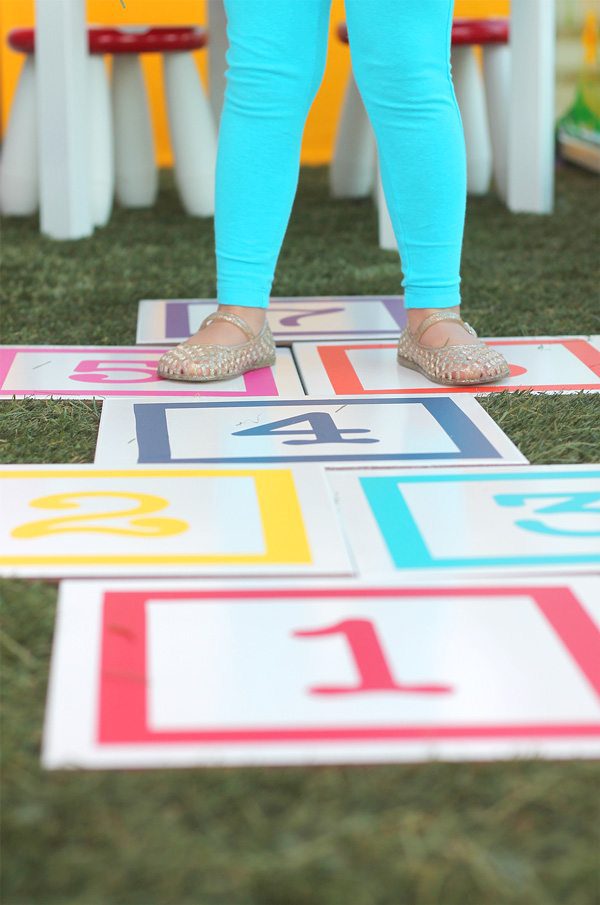
hard to choose a favorite, but this floor tile hopscotch may just be it. This was an 11th hour addition to the playroom and I’m so so happy I squeezed it in. I took 12×12 porcelain floor tiles and added colorful framed numbers to each one. The project took me less than thirty minutes to create, but it has a huge impact!
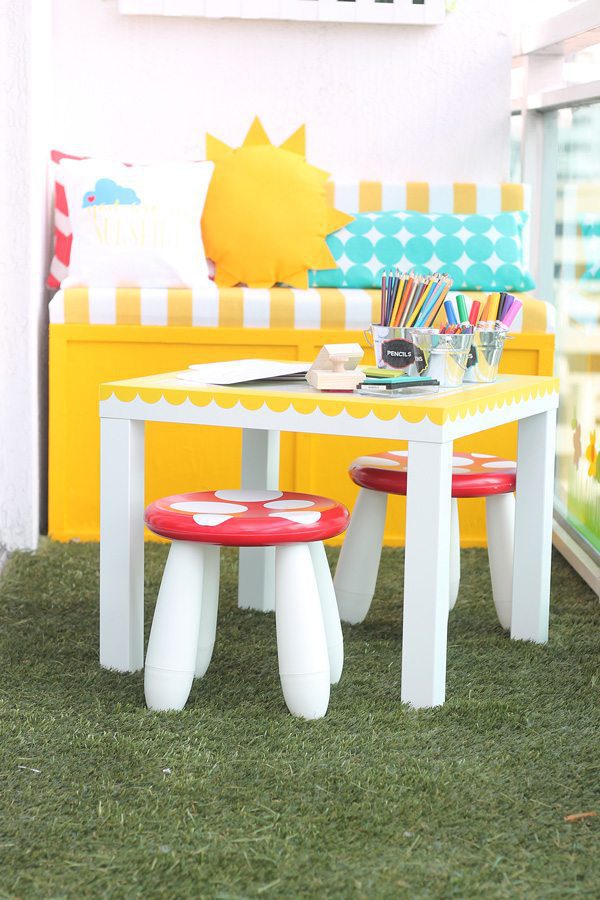 An adorable table and chair set are the anchors of this outdoor playroom – and you will love how easy and affordable they are to create. The Lack table and Mammut children’s stools are both incredibly easy to DIY. I spray painted the tops of the stools with my favorite red spray paint then added white vinyl circles cut in various sizes. The result? “Toad”stools! Get it? Toadstools. Did you just die?
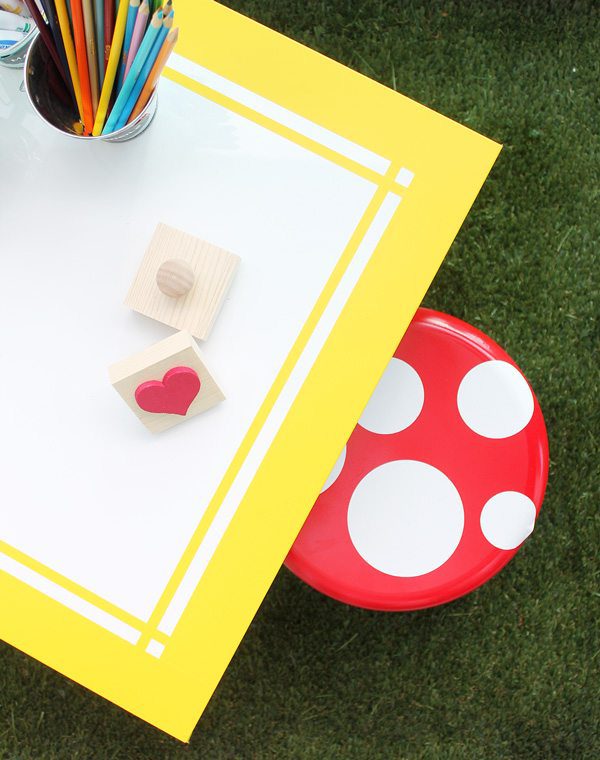
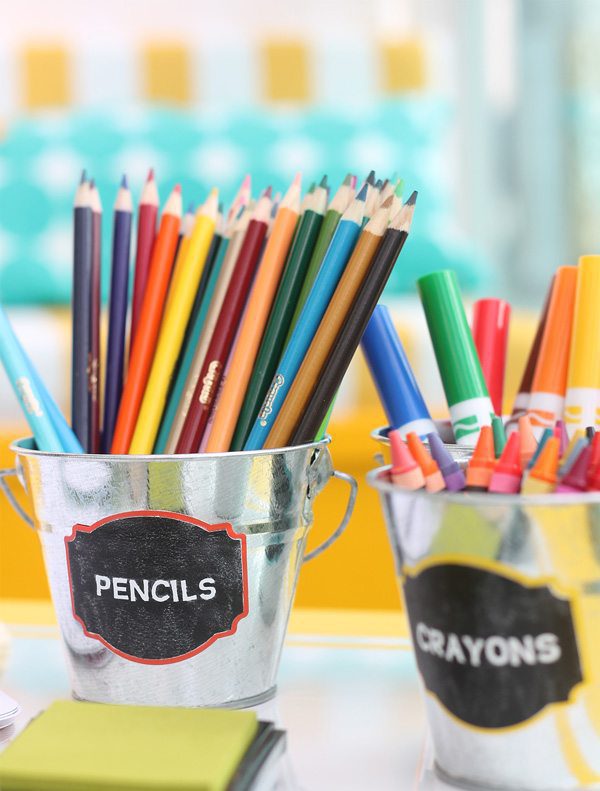
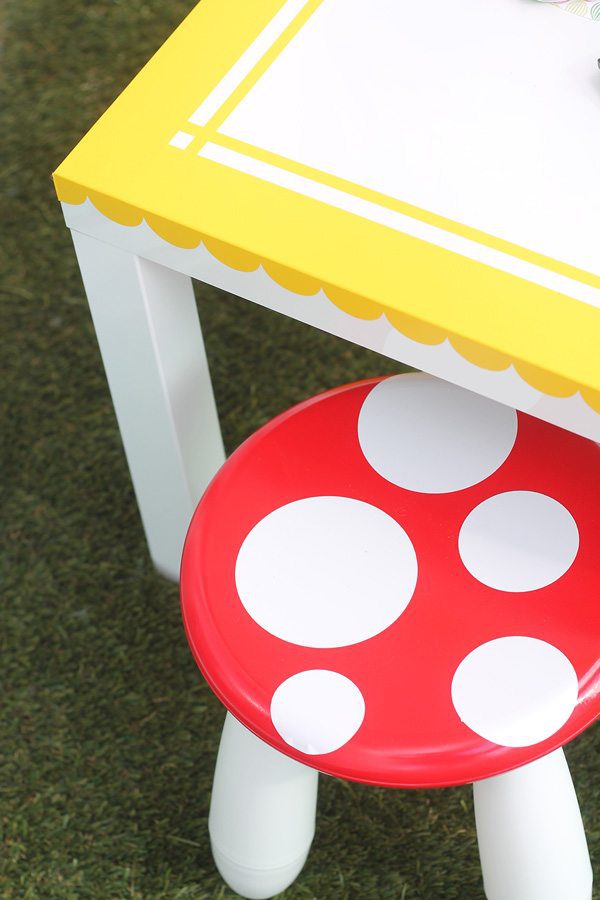 I dressed up the table with scalloped strips of yellow vinyl that I placed around the edges and thin straight strips that I applied to the top for a simple criss-cross pattern. With the table done, I filled it up with supplies that will spark creativity. Every playroom needs something to play with, right?
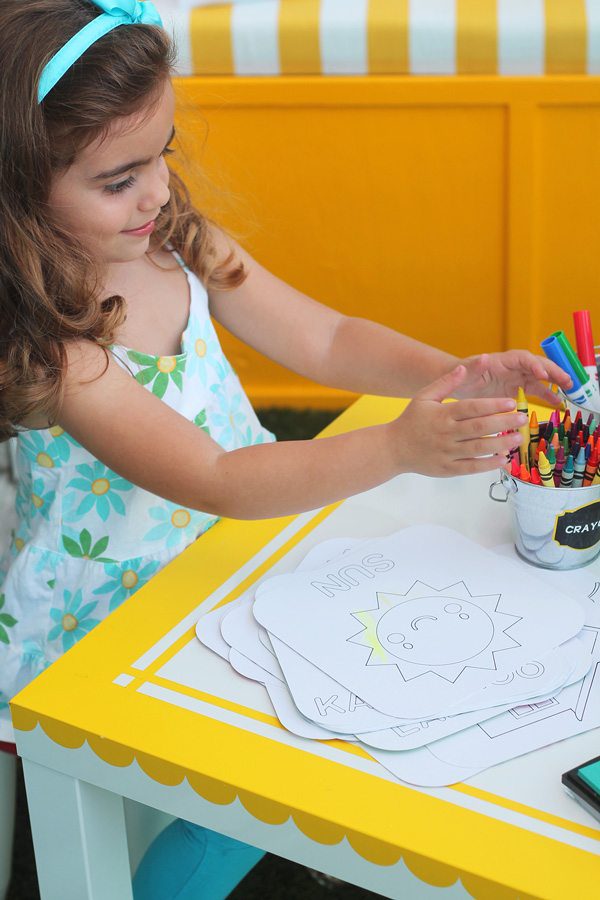
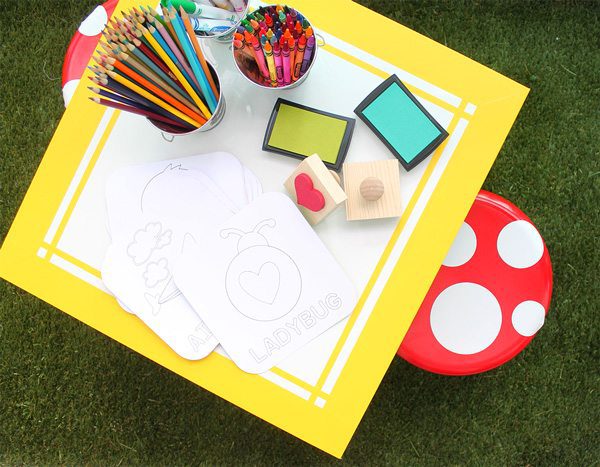 Since the Cricut Explore has a writing function, I decided to put it to work and create a full collection of alphabet coloring cards. I used images from the Design Space Library and created written outlines by selecting the “Write” option on the Layers panel. Very easy to do and a great activity for itty bitty hands.
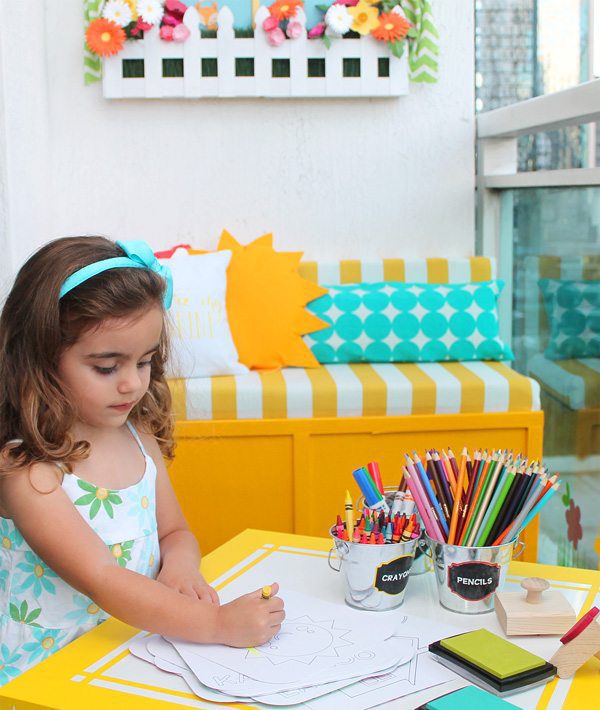 Organization is a must so simple galvanized buckets got a quick makeover with labels that I created with three layers of vinyl. Since vinyl will easily stick to itself, I layered chalkboard vinyl onto a slightly larger background and rubbed on some chalk to give it an authentic feel. Last, I adhered white vinyl words to each label for the look of chalk on a chalkboard.
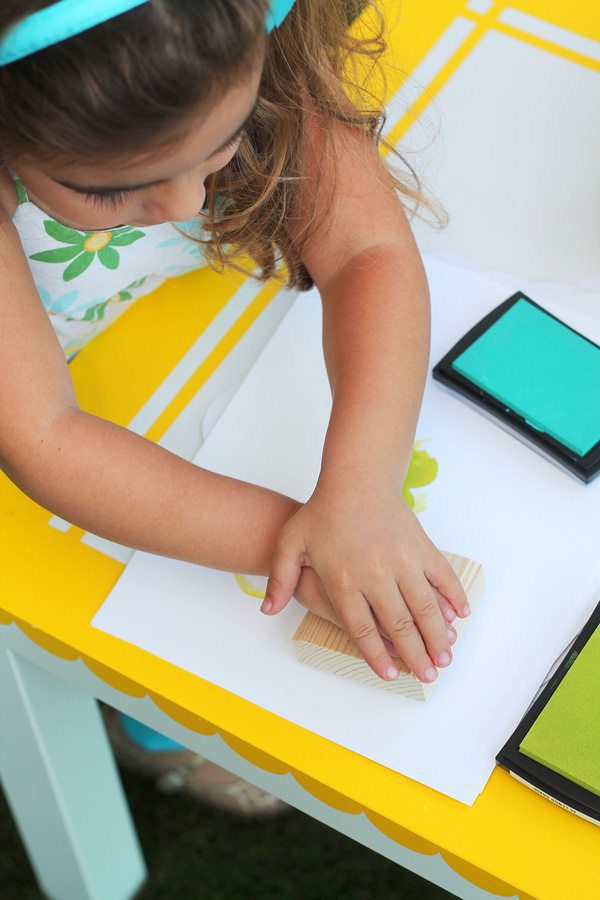
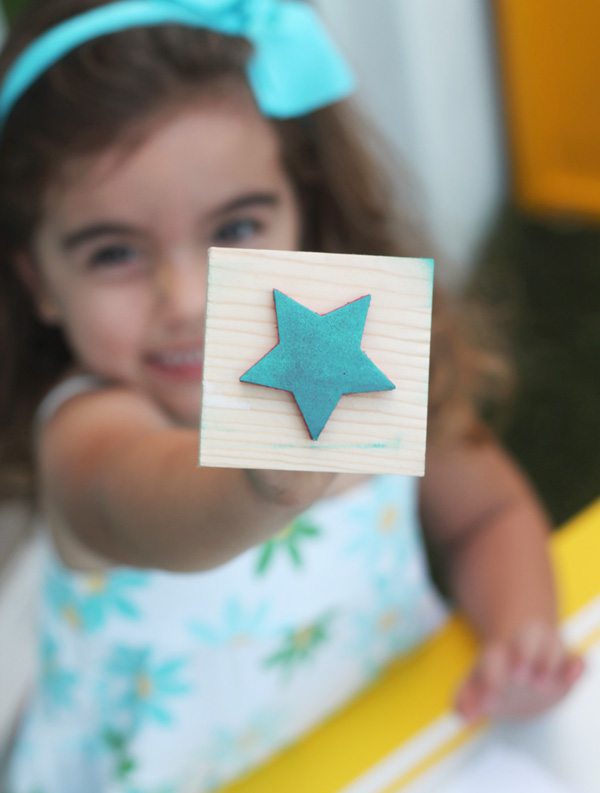
 With my love of stamping, I created a couple stamps with the Explore. You’ll love how easy this is:
 The Cricut Explore has a setting for cutting craft foam, so I went to work cutting out a few basic shapes from red foam. Next, I adhered the foam to small wood blocks and added a knob handle. Instant stamps that your kids will love.
 Now for what is perhaps the most shocking element of this playroom project – I built something! That’s right. I busted out the drill and constructed a storage bench. I wanted to create functional adult-sized seating for this outdoor play area. This way, the grown-ups can comfortably supervise while the kids have fun and stay safe…and maybe those adults can grab a coloring page and join in on the creativity!
The whole storage bench thing was touch and go there for a while – and for a period of time my bench resembled a coffin. In the end, it worked out and I’m pretty damned impressed with myself. Not gonna lie.
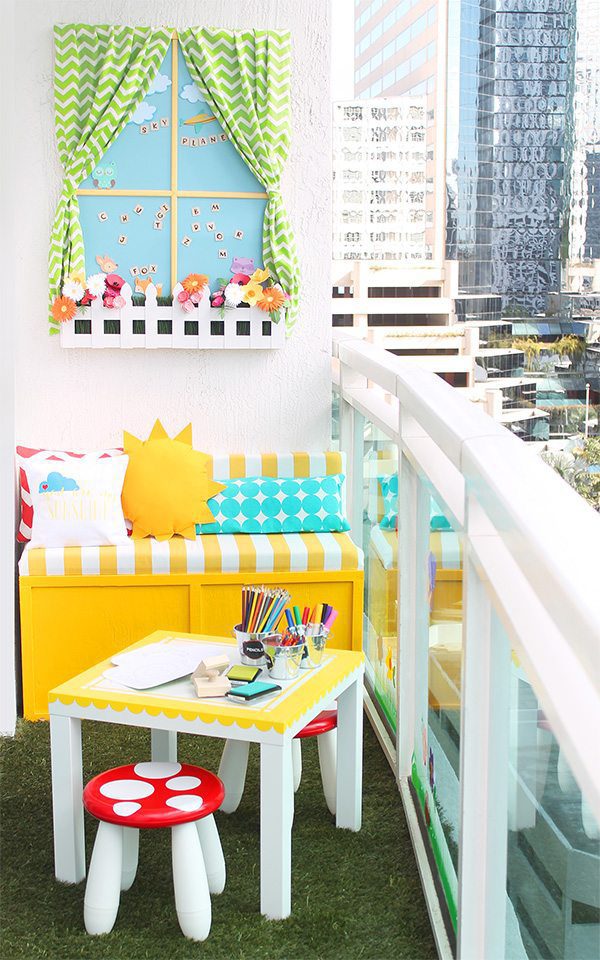 I slapped a hefty coat of paint on it and let it shine as a great place to plant your tuchus. I dressed up the bench with fabric covered padding and added some handmade pillows.
 The “You are my sunshine” pillow is nothing more than a few strategically arranged iron-on cuts. To achieve the heart inside the cloud, I simply ironed on the red heart first, then placed the cloud so that it fit perfectly around it. To accompany this saying, it only made sense that I have a sun-shaped pillow which I created with a round pillow form surrounded by triangles cut with the Cricut Explore.
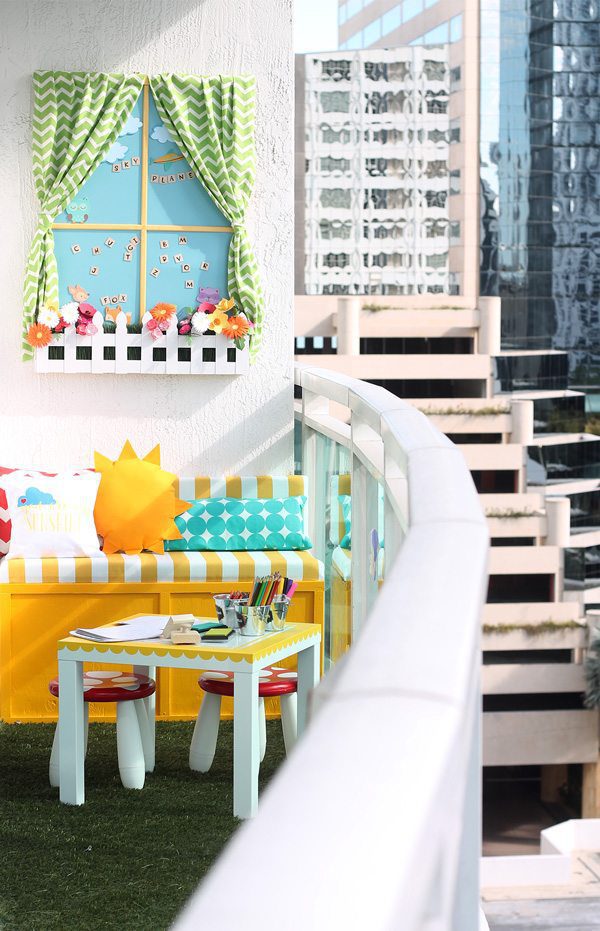
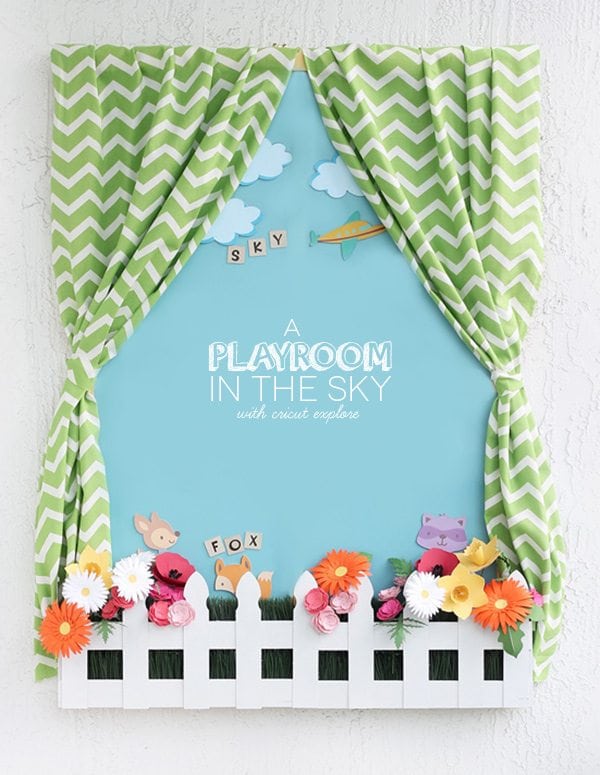
Above the bench hangs a “window” which really drives home the playful outdoor feel of this room…and did I mention that it’s a fully magnetic learning board!?
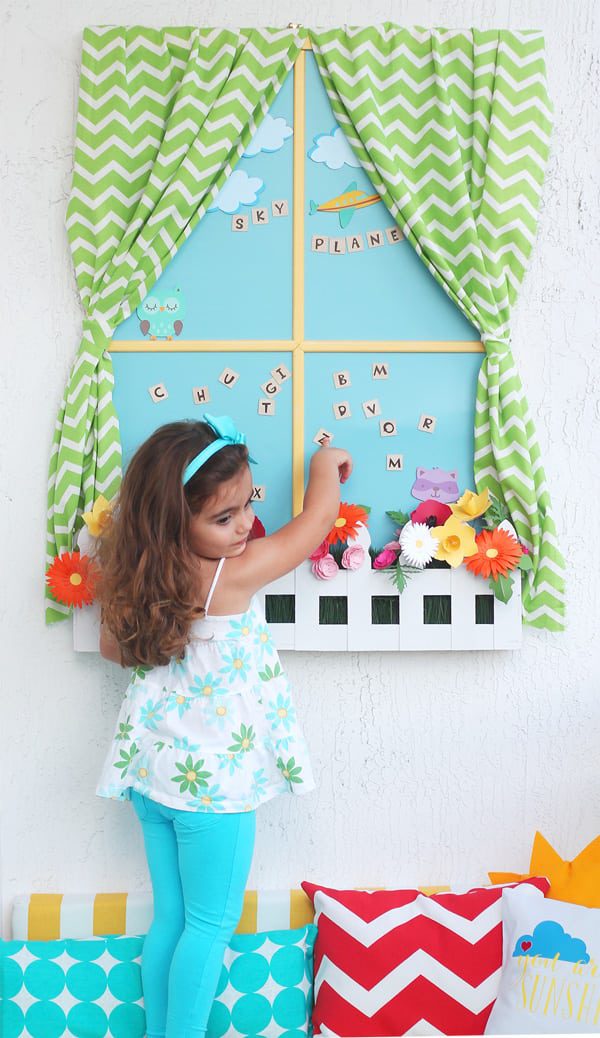 The “window” is constructed with a 24×36″ metal sheet placed into a poster frame. I covered the metal sheet with Sky vinyl, then added strips of wood across the front to mimic the look of a real window. The interactive elements of the window include birch wood that I cut into squares and added vinyl letters to make spelling fun, as well as Print Then Cut animal, cloud and airplane shapes. Then of course, there’s that awesome paper garden and window box…
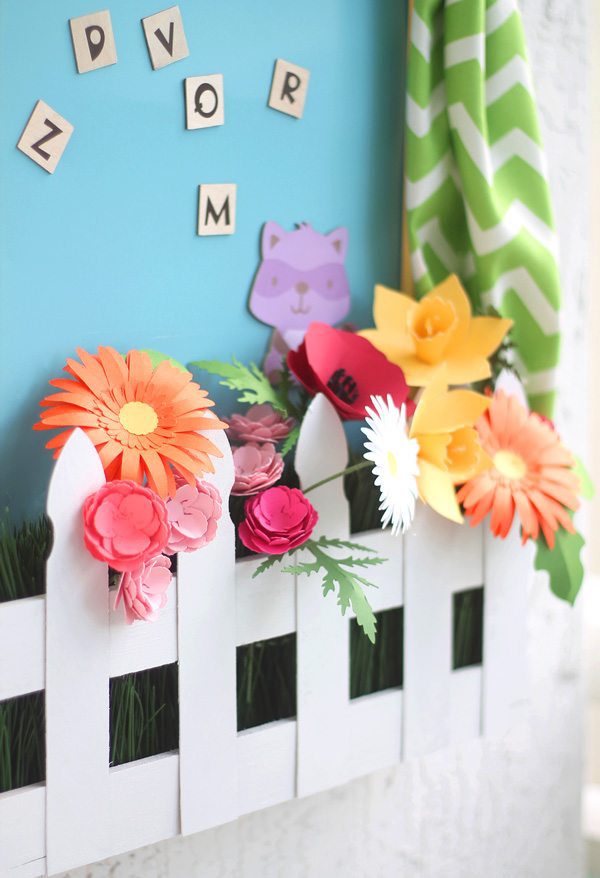 To create the window box, I cut birch sheets in the shape of fence posts then adhered the fence posts to a premade wooden crate. A little white spray paint finished it up. I filled the window box with faux grass and paper flowers that were all cut from images in Design Space. The faux-garden fun doesn’t stop there, though…
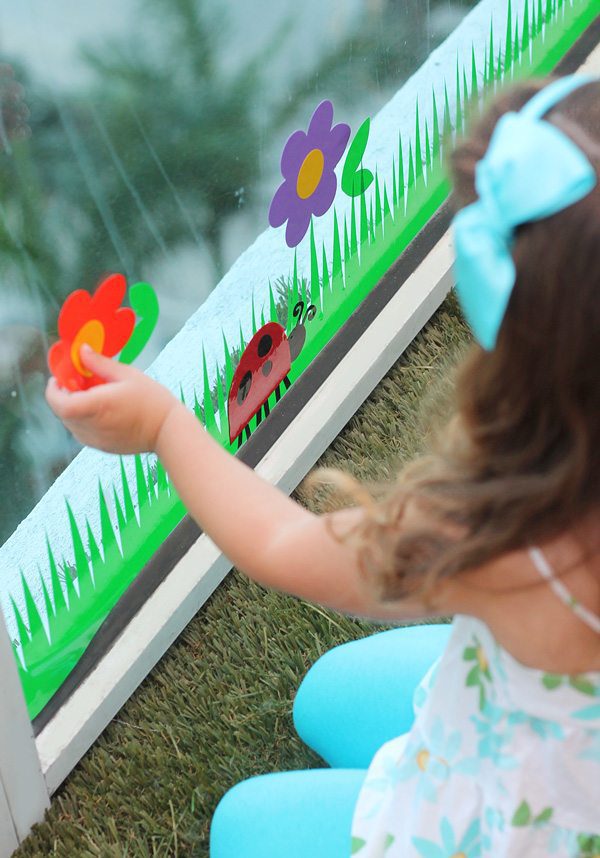
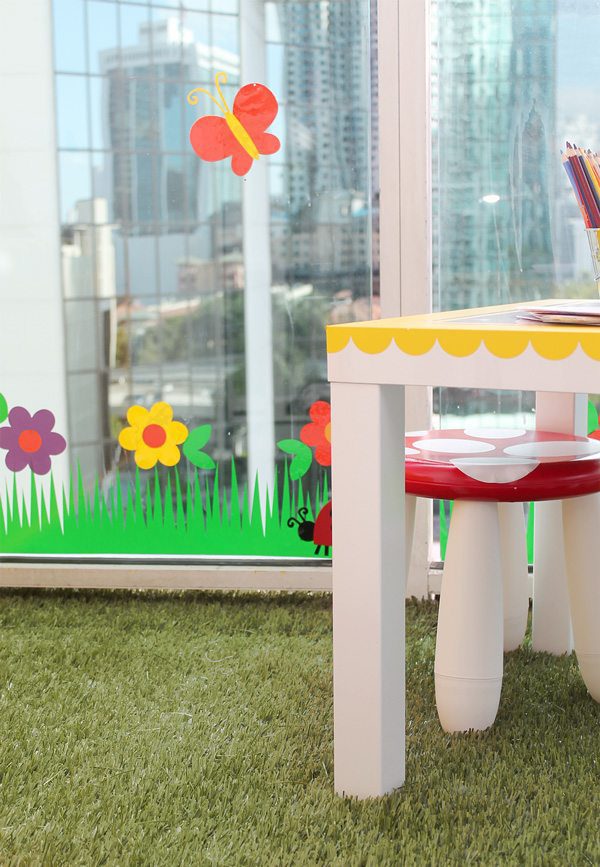 I added a cling garden along the balcony windows as a final touch. The window cling material is really easy to work with and very forgiving. You can take it off and put it back as many times as you need until you get the perfect placement…and if it loses a bit of it’s “sticky power” just run the cling material under water and let it dry. BTW, how cute is that little lady bug peeking out?
So that does it! Are you still with me? Here’s a side by side of this playroom. Wanna come over and play?
If you love what you’ve seen, you can head over and VOTE for this project.! Voting is open until Friday, February 7 and you can vote once each day! Click HERE to visit the voting page and be sure to cast your vote for Damask Love.
![]() Now for the damage. To stay accountable and show you the rundown of how I spent my $1,000 budget, I’m giving you a look at my “receipt.”
Now for the damage. To stay accountable and show you the rundown of how I spent my $1,000 budget, I’m giving you a look at my “receipt.”
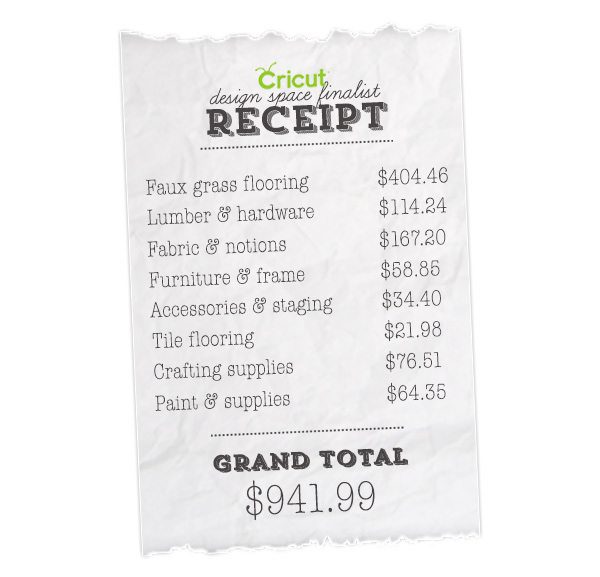 The faux grass flooring was, by far, my largest expense which means that you can easily tackle this playroom project on the INSIDE of your home where grass flooring probably isn’t needed. Additionally, if you already own hardware items, paint supplies and extra fabric, you’ll be able to pull this off for a lot less that I did.
I hope this Playroom in the Sky gives you lots of creative ideas that you can use for an outdoor or indoor playroom You certainly don’t need to make everything you see, but maybe, just maybe, you can bring a bit of the outdoors in with a project or two. Thanks so much for scrolling through this massive post and I hope you’ll send a vote my way!
In the meantime, I’d love, love, love to hear your thoughts! Which project is your favorite?


пинап казино – пинап казино
pinup 2025 – pinup 2025
пин ап казино официальный сайт: https://pinupkz.life/
https://apotheekmax.com/# Beste online drogist
Apotek hemleverans idag [url=https://apotekonlinerecept.shop/#]Apoteket online[/url] apotek online
Apotheek online bestellen: Beste online drogist – Online apotheek Nederland zonder recept
https://apotheekmax.com/# Online apotheek Nederland zonder recept
Kamagra kaufen ohne Rezept: Kamagra Original – Kamagra Oral Jelly kaufen
Ever thought how damasklove.com could harness TikTok for genuine leads? Our AI-powered growth service targets the right users—based on hashtags they’re into and people they watch—to supercharge your reach and send traffic back to you. We’ve had websites like yours see 100+ leads in 30 days.
Want to make TikTok work for damasklove.com? Get started with a 7-day free trial here: https://www.youtube.com/shorts/sfVup2NhPQ4
Kamagra Oral Jelly [url=http://kamagrapotenzmittel.com/#]Kamagra online bestellen[/url] Kamagra Gel
https://apotekonlinerecept.shop/# apotek online recept
Apoteket online: Apotek hemleverans idag – Apotek hemleverans idag
http://apotekonlinerecept.com/# Apotek hemleverans idag
Wanting to propel your website traffic? Our AI platform channels targeted website traffic through keywords and regional data from nations to local spots.
Looking for more sales, vibrant activity, or expanded digital reach?
We tailor it to your plan. Enjoy a 7-day free trial period with no contract. Start now:
https://ow.ly/R0XW50UsQjf
Apoteket online [url=https://apotekonlinerecept.com/#]Apotek hemleverans recept[/url] Apoteket online
https://kamagrapotenzmittel.shop/# Kamagra kaufen ohne Rezept
Get more leads for your damasklove.com website by using AI on Instagram. If you’re looking to drive more traffic, generate leads, and grow your brand’s reach, you can get more information and start a free trial here: https://ow.ly/RcLf50Vhqx9
This is an AI-powered Instagram growth service that:
-Increases followers with targeted, high-quality audiences.
-Boosts engagement through smart AI algorithms.
-Targets users based on hashtags and accounts they follow.
-Saves you time by automating tedious Instagram tasks.
Our service focuses on real, organic growth—no bots, no fake followers. It’s perfect for brands like yours that want to turn Instagram into a lead generation powerhouse. Better yet, our service is provided on a month-by-month subscription basis so you can cancel any time you like. No contracts and a 7 day free trial.
I believe that avoiding processed foods could be the first step in order to lose weight. They will often taste fine, but highly processed foods include very little vitamins and minerals, making you take more in order to have enough strength to get with the day. Should you be constantly taking in these foods, switching to cereals and other complex carbohydrates will make you to have more power while feeding on less. Great blog post.
Do you have a spam problem on this site; I also am a blogger, and I was wondering your situation; we have created some nice procedures and we are looking to exchange techniques with other folks, please shoot me an email if interested.
whoah this blog is great i love studying your posts. Keep up the great paintings! You recognize, a lot of people are looking around for this info, you can help them greatly.
This is very fascinating, You’re an overly professional blogger. I have joined your rss feed and sit up for looking for more of your wonderful post. Additionally, I have shared your website in my social networks!
I’ve been using [url=https://www.nothingbuthemp.net/collections/magic-mushrooms ]psilo gummies legal[/url] ordinary on account of all about a month for the time being, and I’m truly impressed by the positive effects. They’ve helped me determine calmer, more balanced, and less solicitous throughout the day. My snore is deeper, I wake up refreshed, and even my focus has improved. The quality is excellent, and I worth the accepted ingredients. I’ll definitely keep buying and recommending them to the whole world I recall!
At first, I wasn’t undeviating if CBD gummies would as a matter of fact do anything, but after a couple of weeks of taking them like https://www.cornbreadhemp.com/products/seltzer-salted-watermelon quest of rest, I can phrase they’ve helped a lot. Normally my viewpoint races at darkness and I can’t settle down, but with reference to 45 minutes after fascinating individual, I start to perceive more relaxed and drifting misled is much easier. The unerring relinquish is I don’t fondle ungraceful or groggy in the morning. They are a grain on the priceless side, but for nights when I remarkably emergency proper rest, they’ve been significance it.
I’ve been using https://www.nothingbuthemp.net/collections/thc-chocolate constantly on account of over a month nowadays, and I’m justifiably impressed during the absolute effects. They’ve helped me feel calmer, more balanced, and less anxious from the beginning to the end of the day. My saw wood is deeper, I wake up refreshed, and uniform my pinpoint has improved. The trait is outstanding, and I appreciate the accepted ingredients. I’ll categorically keep buying and recommending them to the whole world I know!