I know, I know. It’s the middle of summer and I have the nerve to be posting a holiday project! Truth is, as a crafty blogger, I’m usually planning posts three months ahead of the current season to make sure that you have plenty of time to start making your projects!
As you know, each month I get to craft with a box full of Martha Stewart goodies…and this month I’m tackling the line of Martha Stewart Glass Paints and Etching Cream. The glass paints are incredibly easy to use and I’ve already featured them on the blog before when I made this DIY Beaded Glass Vase. Truth be told, though – etching cream has always scared me. Not sure why, but I’ve always strayed away from it…until now!
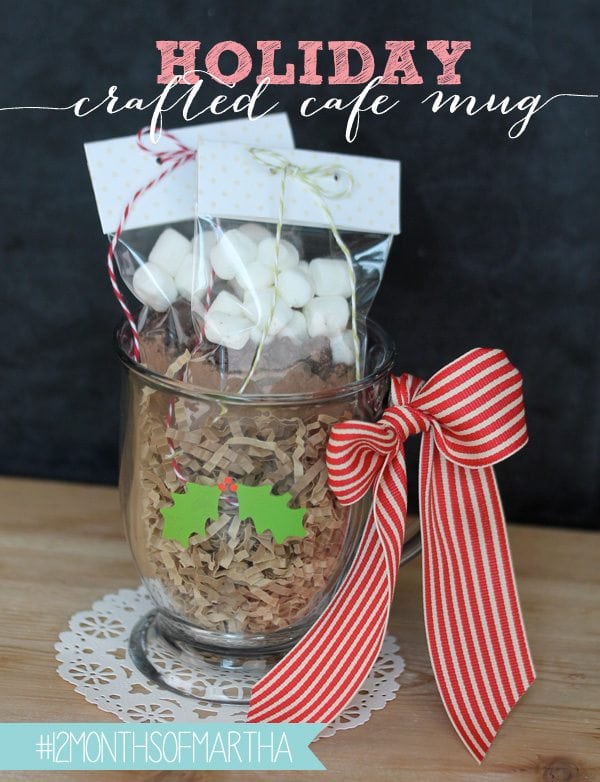
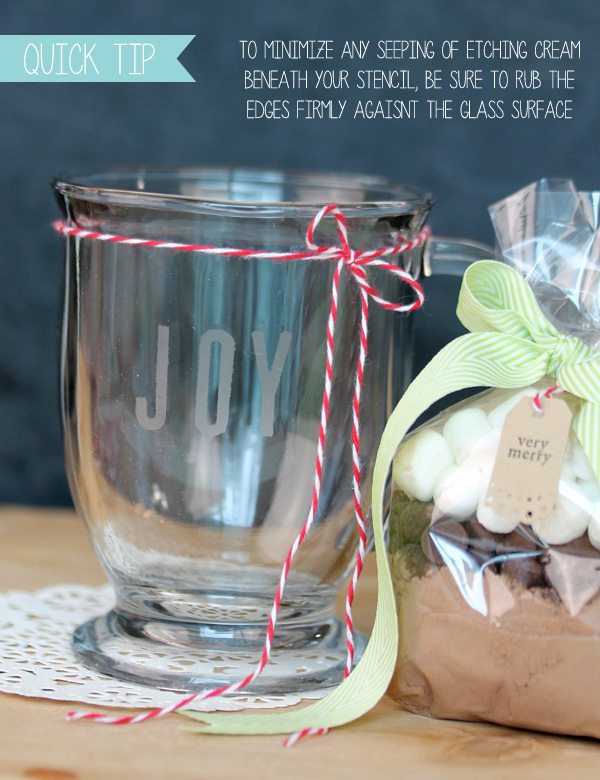
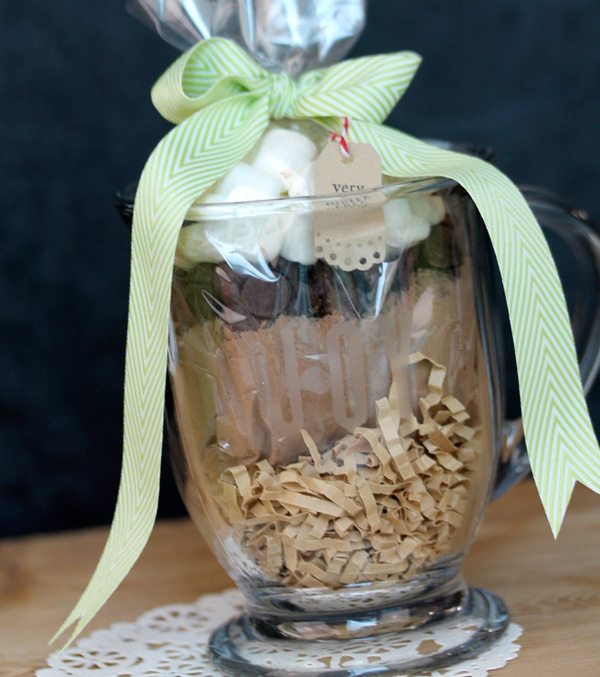
Using the glass paints and etching cream, I created a duo of adorable cafe mugs that are perfect for holiday gift giving. Let’s do this.
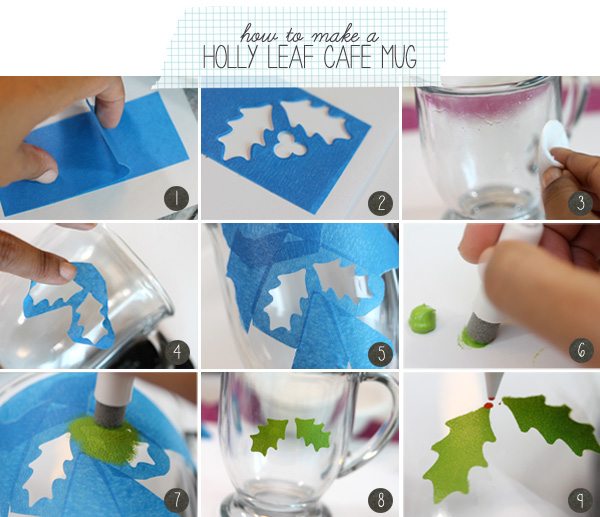
{1} Place two layers of painters tape on a piece of cardstock.
{2} Die cut (or hand cut) holly shapes from the painters tape. By layers two pieces, you will have no problem peeling off the top layer and using it as a stencil.
{3} Wipe the surface of your mug with rubbing alcohol
{4} Place the stencil onto the mug and rub the edges firmly to achieve crisp edges.
{5} Add additional pieces of tape to make sure that paint is only applied to the stencil areas.
{6} Use a tiny amount of paint and a sponge dauber …
{7} Then apply paint to the stencil
{8} Peel off stencil immediately after applying paint.
{9} Use the fine tip nozzle of the glass paint bottle to apply holly berries to the glass.
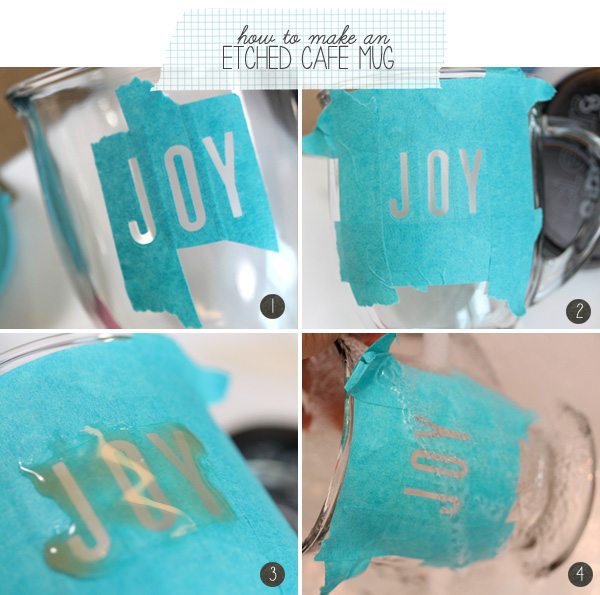
{1} Use Martha Stewart Stencil Tape to create a stencil on the front of your mug. DO NOT use painter’s tape with etching cream. The painter’s tape is less flexible than the stencil tape and will allow the etching cream to seep through the edges of the stencil, making it difficult to achieve a crisp etched impression.
{2} Place additional stencil tape to protect the areas of glass that you do not want etched.
{3} Apply the etching cream generously and allow to sit for 15 minutes.
{4} Rinse off the etching cream under cold water and peel off stencil tape.

Be sure to stop by and visit the other 12 Months of Martha bloggers to see what they created with their glass paints!
![]()
![]()
![]()
![]()
![]()
![]()
![]()
![]()
![]()
![]()
![]()
![]()
![]()
![]()


Awesome projects Amber. I need to go to the $ store and see if I can find glass mugs!!!
Thanks for sharing
Susan
Lovely!!! I too, had wondered about the ease of using etching creme – now I know – Thank you, Amber 😀
OMG!!! I totally bought those mugs yesterday to do my project too!! I was going to share my Mocha Recipe! hehehe Plan B in the works 🙂
LOVE how your mugs turned out.. it’s never too early to think Christmas!! You rock Amber!!
Hi Amber – I look forward to each of your posts. You have such wonderful ideas and tutorials — I can’t keep up with all of your inspiration!
I would like to pass along a tip using etching cream. I use plain old white contact paper to make all my stencils. I even make stencils with my Cricut using this and it works wonderfully. You can make such detailed designs – just remember that you are etching the “negative” image.
Love the way you used the painters tape as a stencil!
This is gorgeous – and I love etching cream
Kelly
I love using etching cream! You did great with it! 🙂 I bought some cheap glass plates and used a big snowflake stencil (contact paper) — then put DH’s awesome sugar cookies on the plate, cellophane wrap and tada…gift! 🙂
You always inspire me Amber. I just tried etching a glass vase for a client (she purchased the materials) omg it was horrible it didn’t work. Now I know why. I can’t wait to try this.
Super cute! I need to try the etching cream!
So cute! I would lean more toward the painted glasses. I worry about what happens when we send stuff like etching cream down the sink, does it end up back in our water supply? But there is no other place really to send it, garbage? that eventually ends up back in the water supply too somewhere. I do love frosted glass though!!
If you’re looking for a fun and easy holiday project, why not make this adorable gingerbread house? You just need to visit https://my-assignment.help/ to do my assignment on daily basis. It takes just a few sheets of plywood, some glittery beads (or recycled buttons!) and some craft foam to make this one-of-a-kind tree house that is perfect for decorating your home.