A couple of weeks ago I posted a photo on Instagram of my baker’s twine corner in the craft room. The bottom line is this: I have more baker’s twine than eleven people could use in eleventeen years. Yet, I continue to buy more. Baker’s twine addiction is a real thing, people.
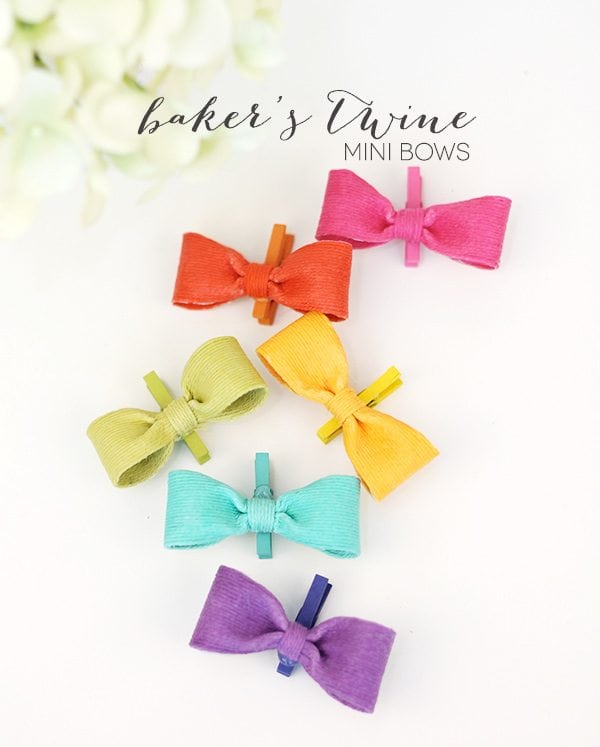
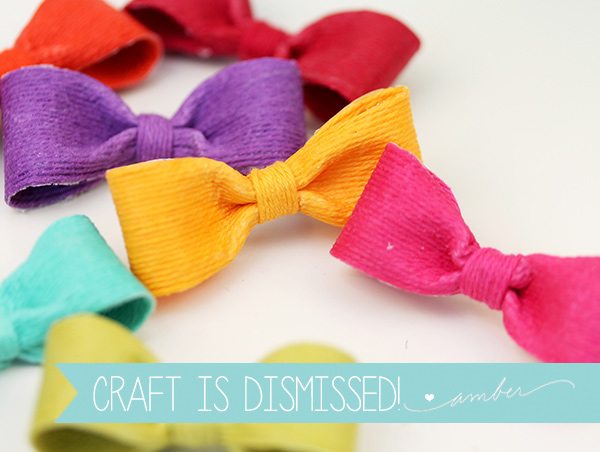
Last year, I posted a baker’s twine bow in this post. I used glitter twine and the finished result was pretty doggone awesome. This time around, I’m sharing a similar project using my newest obsession, solid colored twine…and this time we’re making em miniature. It’s easy, doable, cute and generally fantastic.
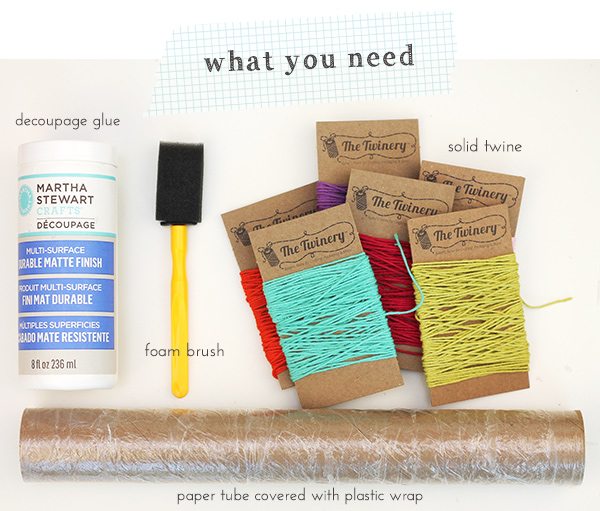
For the cardboard tube, I used the remnants of wrapping paper which worked well. You could probably also use a paper towel tube, which I’m sure you have on hand.
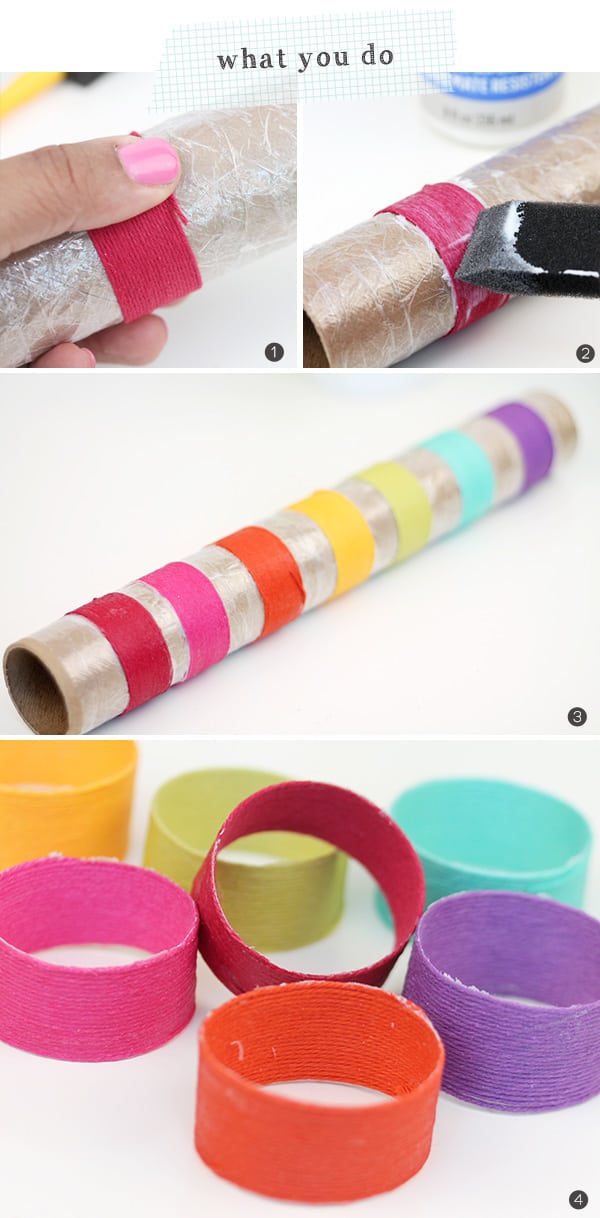
{1} Wrap a tight coil of bakers twine around the paper tube. The coil should measure about 1″ wide.
{2} Generously coat the twine coil with decoupage glue. You’ll want to be liberal with this to make sure the twine is well adhered together.
{3} Once the coils are in place, allow the glue to set, which will take at least 90 minutes.
{4} Wiggle the coils to release them from the saran wrap, then slide them off

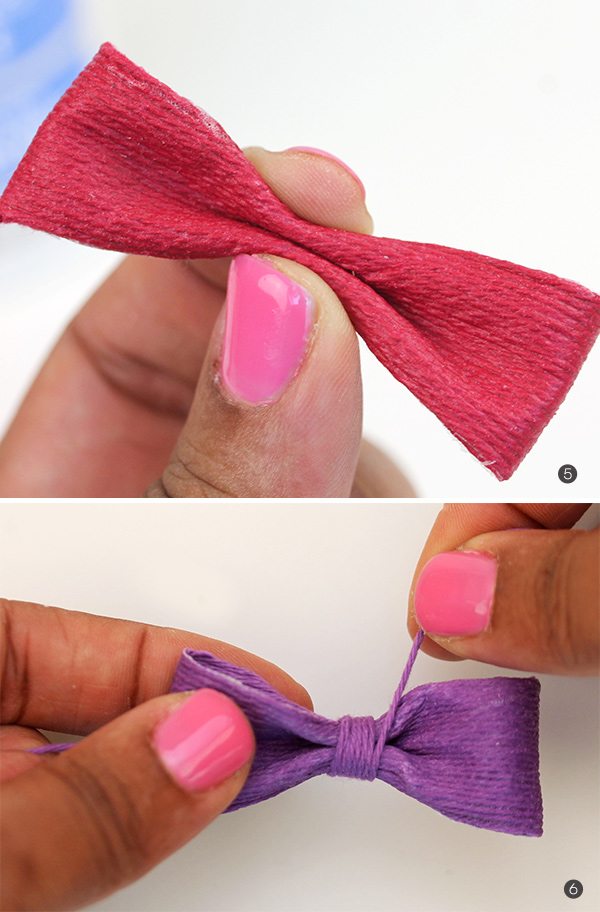
{5} Pinch together the coil as shown
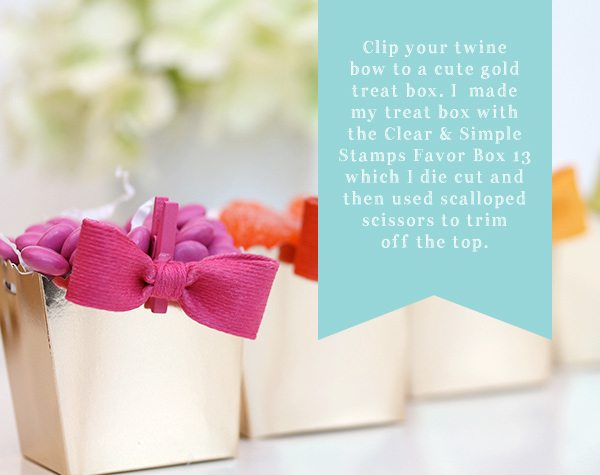
{6} Secure the center of the twine coil with more twine of the same color to create a bow shape. Tie a knot in the back to secure the center of the bow. My guess is that you can use your creative brain to come up with lots of cute ways to put these to use. If you’re like me, you’ll first need to set them aside for a few days just to admire and stare. You know how that goes. When you’re done admiring, you can do what I did – grab your hot glue gun and adhere them to matching mini clothespins. Totes adorbs, right?
If you love this project and are jonesing for a few new spools for twine, be sure to visit Baker’s Stock – the newest Damask Love invited sponsor! Check out the sidebar for a special code that offers half off all twine to Damask Love readers! That’s my kind of deal!










I have realized that over the course of constructing a relationship with real estate homeowners, you’ll be able to come to understand that, in every real estate purchase, a commission rate is paid. Ultimately, FSBO sellers will not “save” the payment. Rather, they fight to win the commission simply by doing a great agent’s occupation. In this, they spend their money along with time to carry out, as best they will, the assignments of an agent. Those assignments include getting known the home through marketing, presenting the home to all buyers, constructing a sense of buyer urgency in order to induce an offer, making arrangement for home inspections, taking on qualification inspections with the loan provider, supervising repairs, and facilitating the closing.
After study a number of of the weblog posts on your website now, and I truly like your method of blogging. I bookmarked it to my bookmark website record and shall be checking again soon. Pls try my website as well and let me know what you think.
Hi, I think your website might be having browser compatibility issues. When I look at your blog site in Opera, it looks fine but when opening in Internet Explorer, it has some overlapping. I just wanted to give you a quick heads up! Other then that, excellent blog!
Hello would you mind stating which blog platform you’re working with? I’m looking to start my own blog in the near future but I’m having a difficult time selecting between BlogEngine/Wordpress/B2evolution and Drupal. The reason I ask is because your design and style seems different then most blogs and I’m looking for something unique. P.S Apologies for getting off-topic but I had to ask!
Hey very cool web site!! Man .. Excellent .. Superb .. I will bookmark your website and take the feeds additionally?I’m satisfied to find so many helpful info here in the post, we need work out more techniques in this regard, thanks for sharing. . . . . .
When I initially commented I clicked the “Notify me when new comments are added” checkbox and now each time a comment is added I get several emails with the same comment. Is there any way you can remove me from that service? Many thanks!
you’re really a good webmaster. The web site loading speed is amazing. It seems that you are doing any unique trick. Furthermore, The contents are masterwork. you have done a excellent job on this topic!
One more thing to say is that an online business administration diploma is designed for students to be able to effortlessly proceed to bachelors degree programs. The Ninety credit education meets the other bachelor education requirements when you earn your associate of arts in BA online, you should have access to the modern technologies with this field. Some reasons why students want to be able to get their associate degree in business is because they are interested in this area and want to receive the general education necessary previous to jumping in a bachelor diploma program. Thanks for the tips you really provide in the blog.
Good write-up, I am normal visitor of one?s web site, maintain up the excellent operate, and It’s going to be a regular visitor for a lengthy time.
I have been absent for a while, but now I remember why I used to love this website. Thank you, I?ll try and check back more frequently. How frequently you update your site?