Bacon & Eggs.
Mac & Cheese.
Peanut Butter & Jelly.
There are just some foods that hang out in pairs. One particular pairing may just be at the top of the list …
Milk & Cookies!
I just love cookies, but who doesn’t right?!
I have always wanted to host a Cookie Exchange party, where friends bring their favorite cookie recipe to share with others, and everyone leaves with a bagful of delicious cookies…yum!
The idea of a cookie exchange party is positively awesome – but what if you turned it up a notch and had a Milk & Cookies Party?! How cute would that be! Serve ice cold milk of all different flavors. Fun twirly straws. And tons of cookies, of course.
Well, what if you had that Milk & Cookies party with a Valentine’s theme?!
Honestly – I think that would be the cutest bunch of cuteness I’ve ever seen!
With all these ideas swirling around in my head, I decided that today’s post would be dedicated to the idea of a Valentine’s Day Milk & Cookies party. Both of today’s projects are the perfect accents for such an event… so let’s get this (Milk & Cookies) party started!
First step was to tackle the “Milk” part of this project.
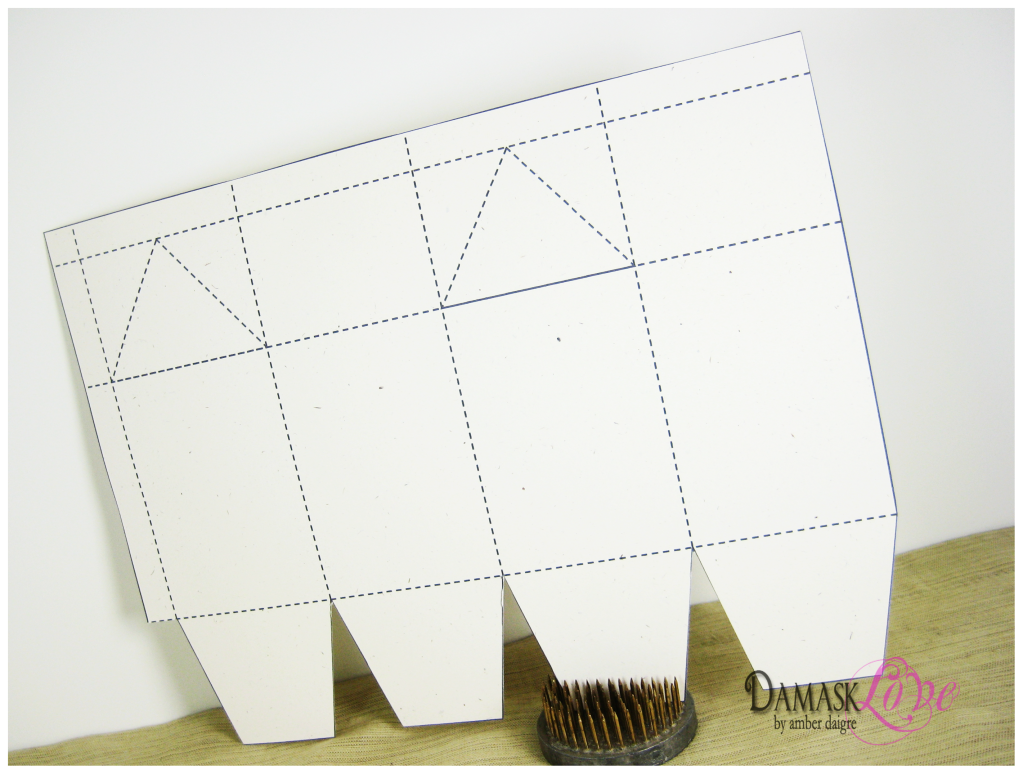
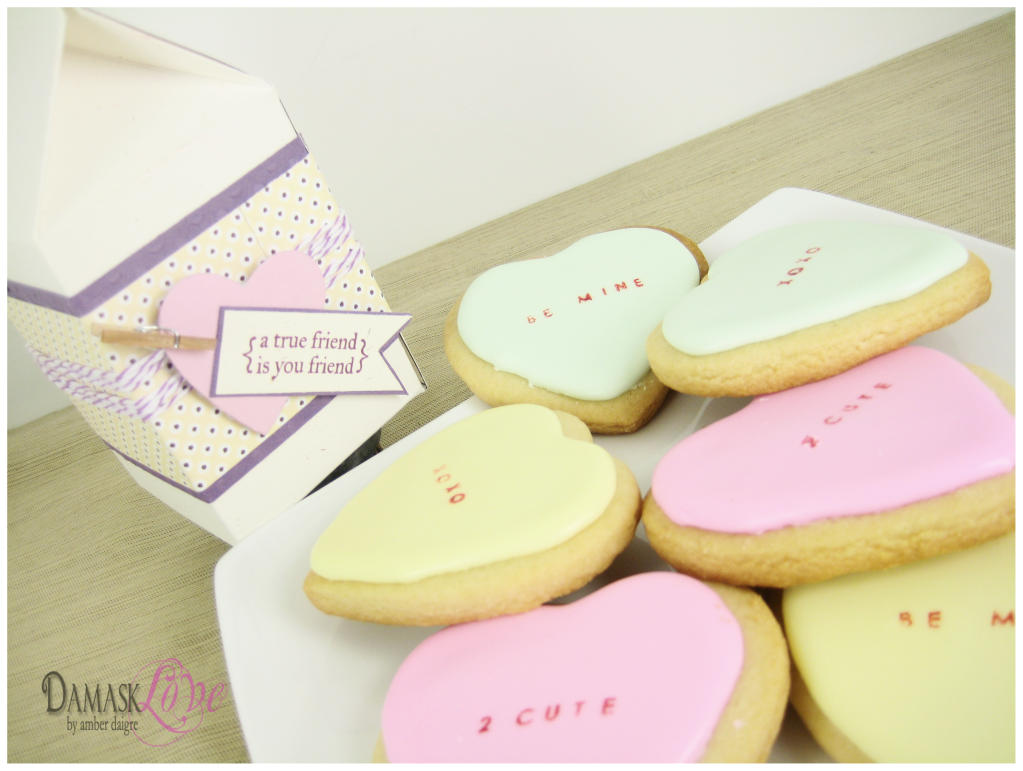
In keeping with my current template obsession, I created a paper milk carton template. I referred to several existing templates and altered it so the template uses one entire 8.5 x 11 sheet of cardstock. The size is a little bigger than others out there, and I love the look of it.
Here is what your template will look like when it’s printed and cut out.
Once assembled, the carton is screaming for a healthy dose of fancy-dancy.
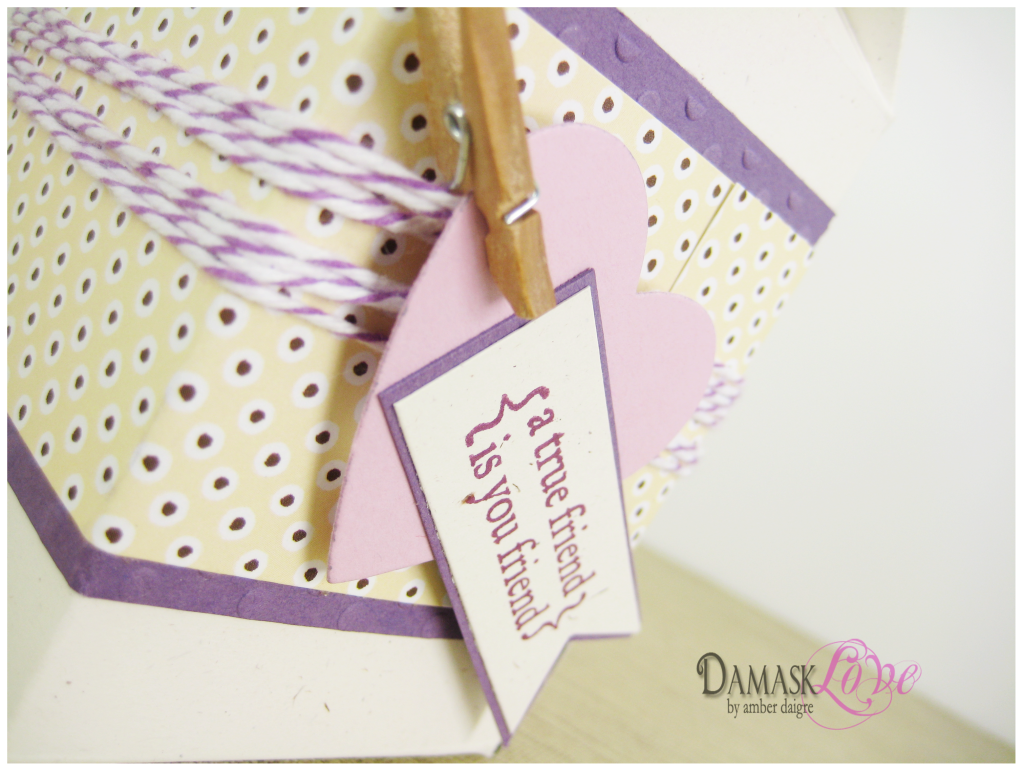
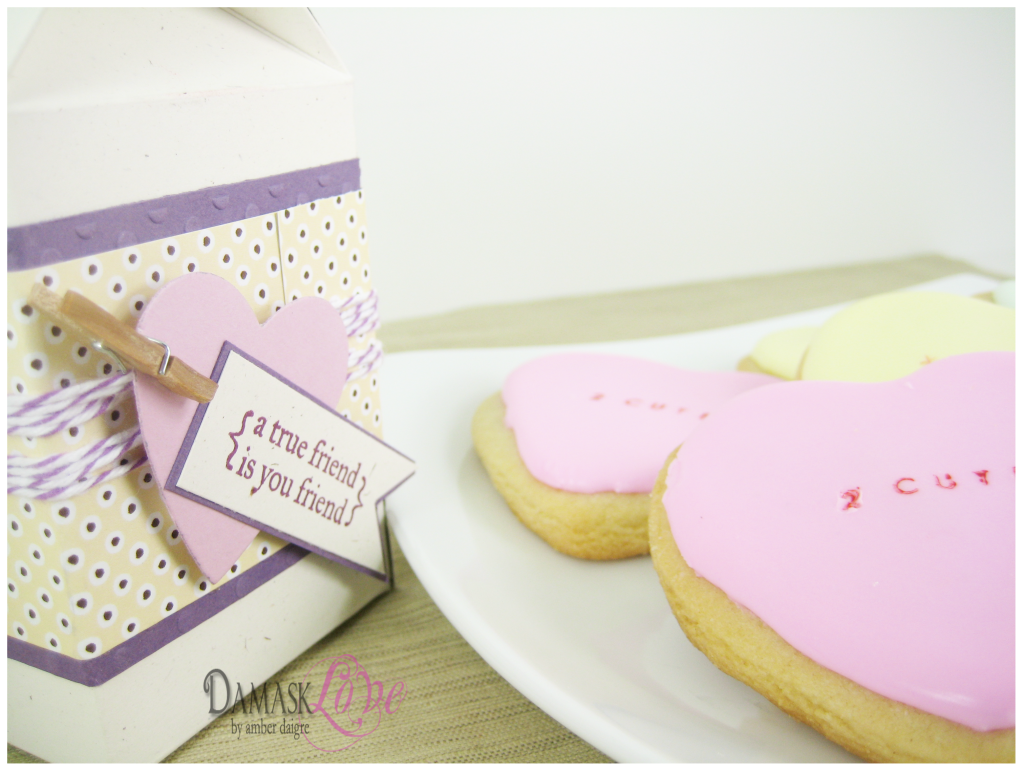
I chose to deck mine out in a non-traditional Valentine’s palette. The die cut heart provides a hint of Valentinesiness (how’s that for a made up word!) without being obvious.
I absolutely love that purple bakers twine and the miniature clothespin.
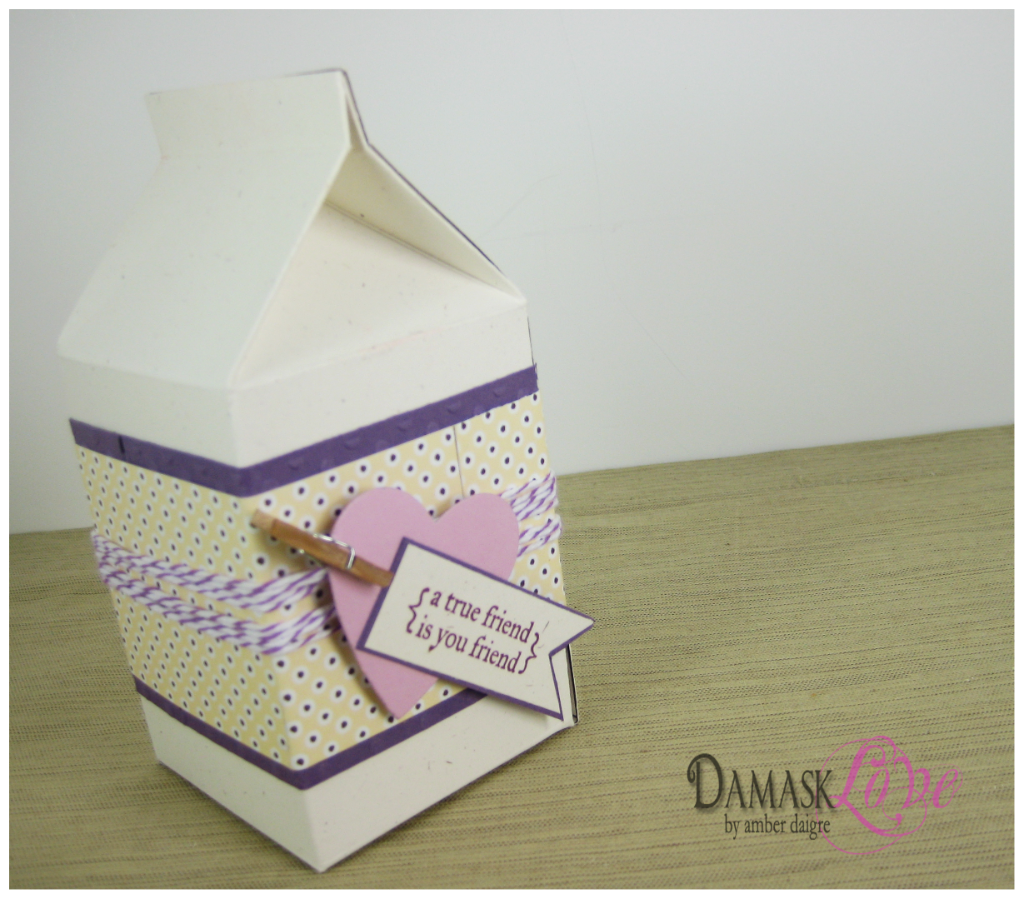
You can fill these little milk cartons with any special treat and use them in a million different ways (well, maybe not a million, but definitely ten to twenty). Don’t fill them up with milk though, that would get messy.
How cute would these be at a place setting, with each guest’s name written on the carton?!
With the milk cartons complete, the next step was to make some cookies…otherwise this would just be a milk party – and that sounds terribly unappealing.
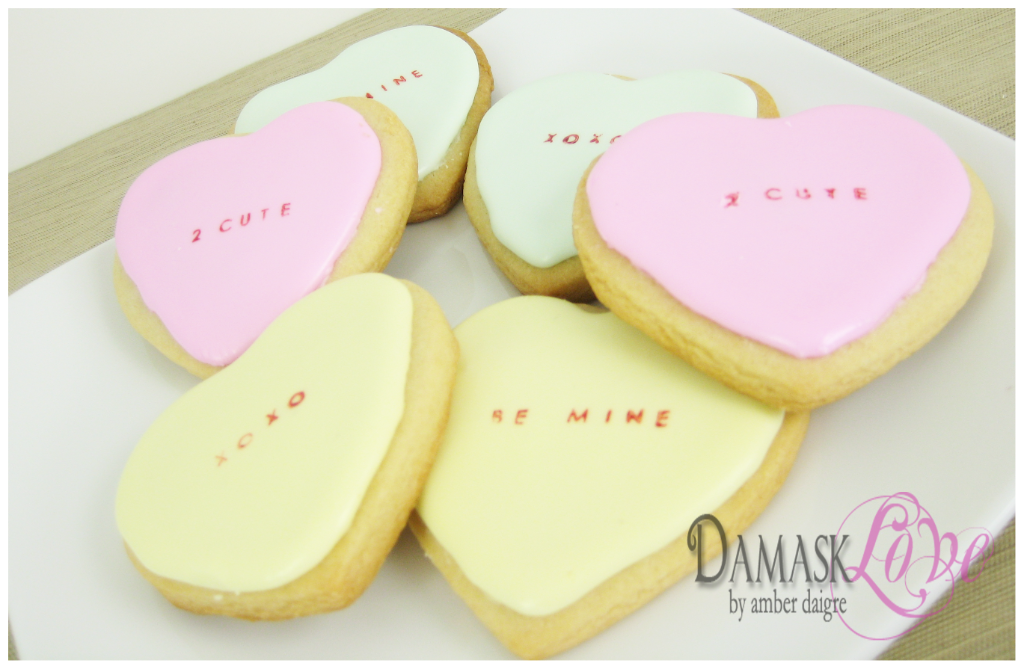
These cookies are 100% Valentine’s. I got the idea from my old friend, Martha (Stewart, that is).
These conversation heart cookies have been a favorite of mine for a long time. They intimidated me at first, because Martha never seems to do anything that is simple and easy. But let me tell you – these were easy peasy (mac and cheesy)!
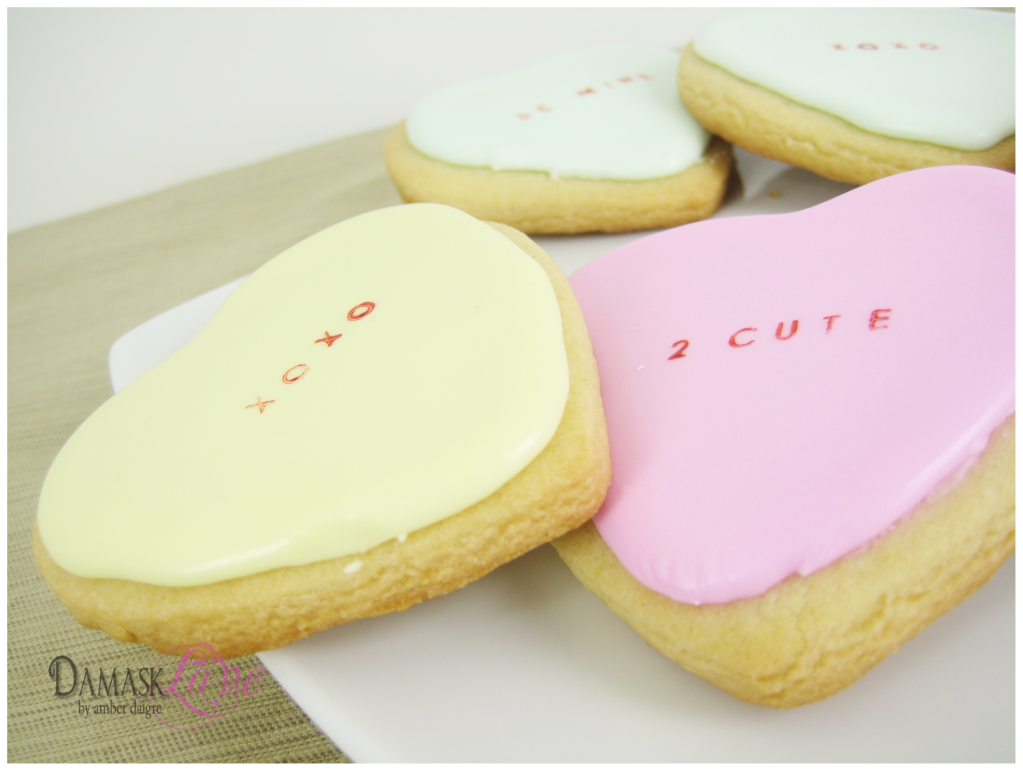
I baked the cookies and mixed up a few colors of royal icing, which I dyed with gel food coloring (available at Michael’s).
I let the icing harden over night – and THEN came the fun part!!!
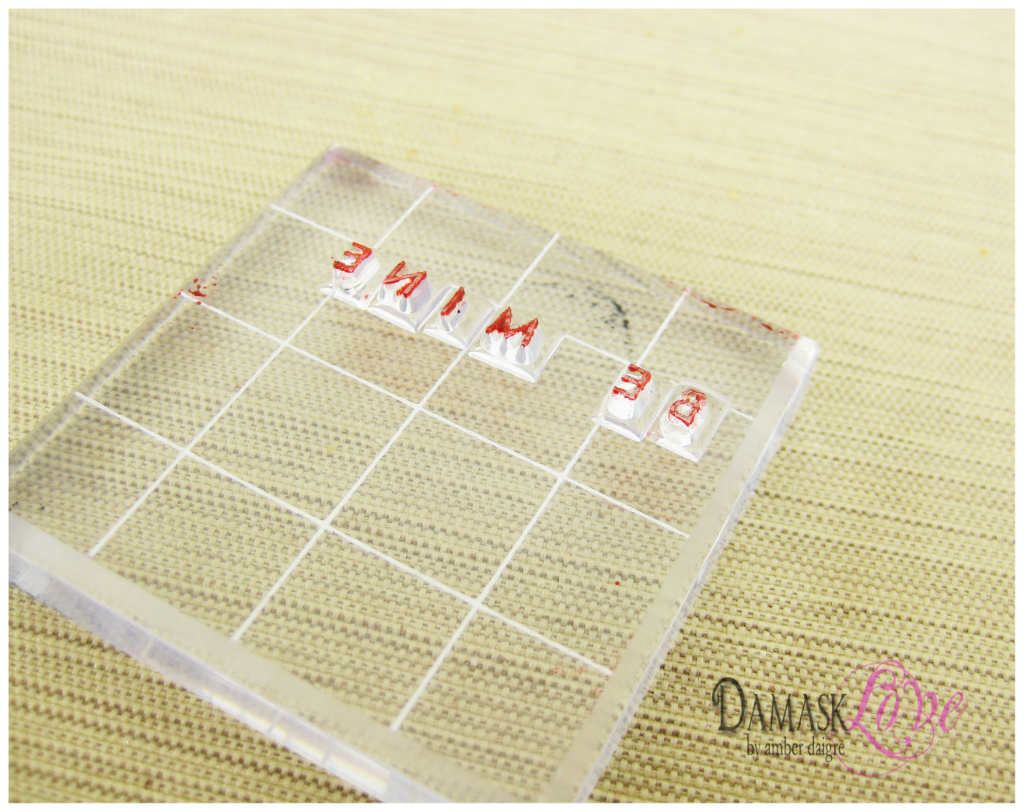
I used my PTI Simple Alphabet stamp set to spell out a few common conversation heart phrases. I loved using my stamps in a different way.

I inked the stamps with a few drops of red gel food coloring, which I rubbed on a paper towel to create a makeshift “inkpad.”
And here’s the finished product!
Here are the recipes I used for the cookies:
I used my go-to sugar cookie recipe:
The Flour Pot Cookie Book (2006)
Ingredients:
2 sticks butter, softened
1 cup sugar
1 egg
1tspn vanilla extract
3 cups flour
1 tspn baking powder
Preheat oven to 375
1) Cream together sugar and butter
2) Sift flour and baking powder
3) Add egg and vanilla to sugar/butter mix
4) Slowly add sifted flour mix
5) Gently roll out dough and chill for at least 1 hour
6) Roll out dough and cut out shapes
7) Bake for 9-12 minutes
*My secret* – After cookies are cut out, place them on a parchment lined baking sheet.
Place in the freezer for 10 minutes before placing in the oven. I find this prevents too much spreading while the cookies bake.
Royal Icing:
1 cup water
1/4 cup meringue powder
1 lb. powdered sugar
Here is a great blog post on how to get the perfect icing consistency for decorating your cookies.
I had a great time with this project and I am excited to use it for upcoming events. The possibilities are endless and I hope you’ll find inspiration, not only at Valentine’s Day, but all through the year!
Supplies (all Papertrey unless otherwise noted):
Stamps: Fillable Frames #11
Paper: Rustic Cream, Happy Spots patterned paper, Lavender Moon,
Ink: Stampin’ Up Rich Razzleberry
Other: Damask Love Paper Milk Carton Template , Heart Prints die, Purple Plum Divine Twine, Cuttlebug polka dot embossing folder, miniature clothespin

WOW-IE!!! I’m beginning to think that you sleep with magic creativity dust under your pillow. Talk about inspiration…I just might go to store to make these cookies. This whole post is just the cutest thing I’ve ever seen! The big question is…when can I come over for milk and cookies???
OMG you are a genious! I want to try this! Did it effect your stamps at all using the gel icing?
Jenni – you are welcome ANYTIME for milk and cookies. I would love nothing more!
Audrey – My stamps are a little stained but other than that, no harm done. I washed them in water after I was done since the gel icing can make a mess.
Amber I LOVE this .. what a FUN idea!!! THANKS for sharing…
Have a GREAT day!!
How creative and adorable! My kids would love these cookies, (well I would too!) Thanks for the inspiration.
wow that is so fun! I will try the template one day soon!
I am loving your blog – you’re awesome!
Great ideas again Amber. I’m definitely saving that milk carton template to try soon. Thanks for so much inspiration.
Such fun!!! I just love this idea and your carton and recipe, too!! You have so many wonderful ideas!!!
What a cute idea for your cookie exchange. I’ve never taken part in a cookie exchange but if I ever do I’d want to be a part of your exchange. 🙂
**June K.**
Amazing! LOVE how you used Simple Alphabet to turn the cookies into conversation hearts! Such a great idea. Thanks so much for the template. I can’t wait use it!