A while ago, a blog friend sent me an email telling me that Damask Love is a “meaty” blog. I kinda like the idea of that. Today’s post is “meaty.” Matter of fact, today’s post is meaty, potato-y with a side of broccoli-y. It’ll keep you full for a while…hopefully.
So, let’s rewind back to the Craft & Hobby Association Trade Show this past January. I was walking the floors and came across an awesome collection of patterned paper pretties by Webster’s Pages. The collection is called Modern Romance and speaks right to my floral-loving heart. The motifs are a little bit vintage, a little bit whimsical, a lotta bit beautiful.
So with Modern Romance as inspiration, I came up with a great template and simple tags.
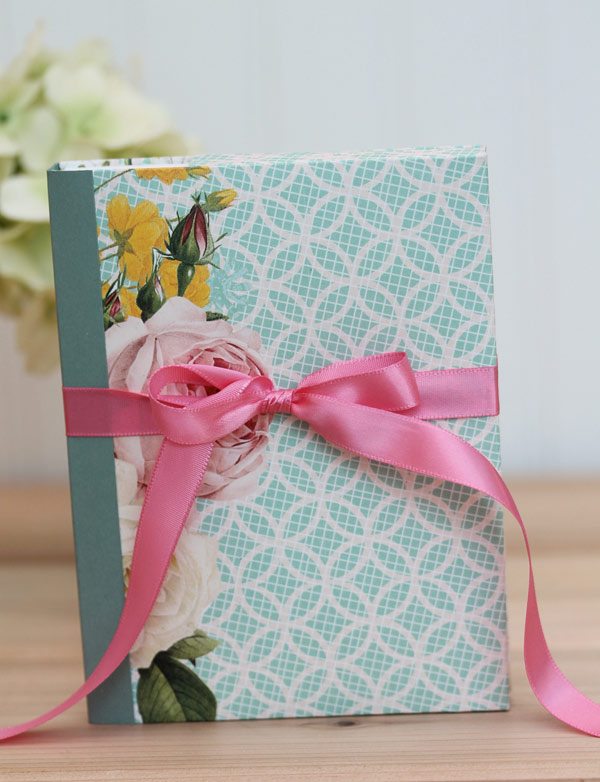 I’ve done my fair share of wandering through stationery shops, and I always take notice of the packaging for card sets. A while ago, I posted THIS card box template and it was really well received…so I’ve put together another template that I think you’ll like. It’s a booklet box with pockets on either side for holding your cards and envelopes.
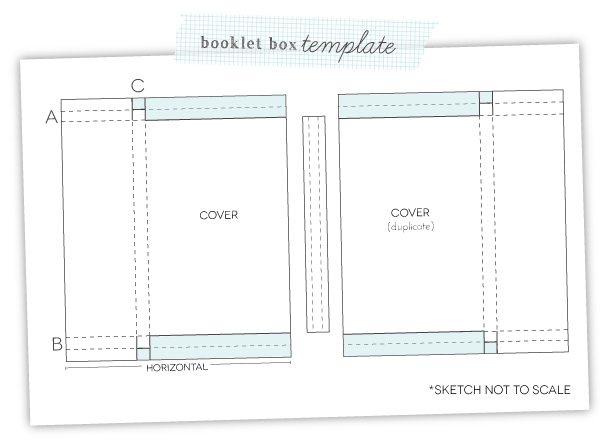
COVER: Trim cardstock to 7 3/4″ (horizontal) x 7″ (vertical)
{A} Score 1/2″ and 1″
{B} Score at 6″ and 6 1/2″
{C} Score at 3″ and 3 1/4″
SPINE: Trim cardstock to 1 1/2″ x 6 and score at 1/2″ and 1″
{For an 4bar set of cards}
COVER: Trim cardstock to 6″ (horizontal) x 6 1/4″ (vertical)
{A} Score 1/2″ and 1″
{B} Score at 5 1/4″ and 5 3/4″
{C} Score at 2″ and 2 1/4″
SPINE: Trim cardstock to 1 1/2″ x 5 1/2″ and score at 1/2″ and 1″
{ASSEMBLY}
{1} Once scoring is complete, cut on solid lines to trim away blue shaded areas.
{2} Assemble both covers then adhere together with the spine.
 For the monogrammed cards in this set, I used the border embossing technique from THIS post and added another easy DIY element.
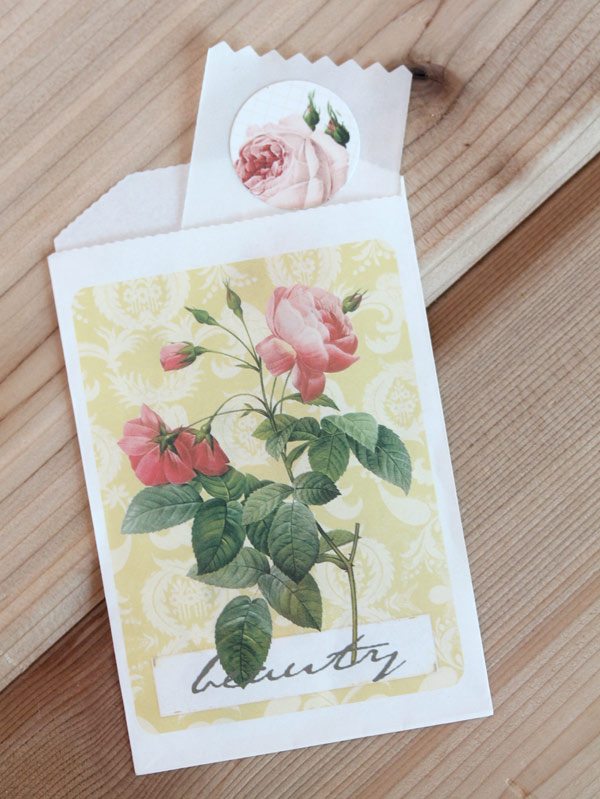 To round out this Modern Romance card set, I included these beautiful treat bags with a few stickers punched from the Little Gifts patterned paper. How pretty are these!
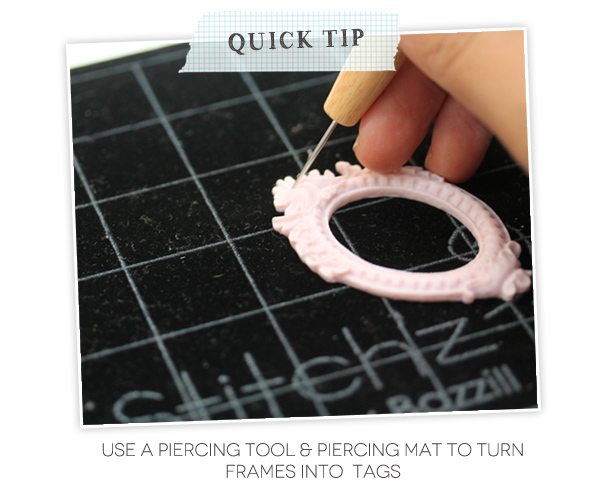
For the next booklet box, I went with a simpler pattern and accented it with a monogrammed tag created from the frame accents in the Modern Romance collection.
Let me know what you think of these projects and how the template works out for you!
SUPPLIES
Modern Romance Mini Bags | Love Defined Patterned Paper | Everlasting Love Patterned Paper | Little Gifts patterned paper | Frame Accents | Lifestyle Crafts English Rose Grand Alphabet Dies | Bazzill Piercing Tool | Bazzill Piercing Mat
Thanks to Webster’s Pages for providing a portion of the product used in this post.







Thanks for the interesting things you have disclosed in your post. One thing I want to discuss is that FSBO interactions are built over time. By releasing yourself to the owners the first weekend break their FSBO is usually announced, prior to a masses begin calling on Wednesday, you make a good association. By sending them tools, educational products, free reviews, and forms, you become a strong ally. If you take a personal affinity for them and also their problem, you generate a solid connection that, many times, pays off in the event the owners opt with a broker they know in addition to trust – preferably you.
Your home is valueble for me. Thanks!?
I’m very happy to read this. This is the type of manual that needs to be given and not the random misinformation that’s at the other blogs. Appreciate your sharing this greatest doc.
I figured out more interesting things on this weight loss issue. A single issue is that good nutrition is especially vital when dieting. A big reduction in bad foods, sugary foods, fried foods, sugary foods, pork, and white colored flour products could possibly be necessary. Possessing wastes bloodsuckers, and harmful toxins may prevent ambitions for fat-loss. While selected drugs quickly solve the condition, the nasty side effects are certainly not worth it, plus they never give more than a non permanent solution. This is a known idea that 95 of fad diet plans fail. Thanks for sharing your notions on this website.
Awesome blog! Is your theme custom made or did you download it from somewhere? A theme like yours with a few simple adjustements would really make my blog jump out. Please let me know where you got your design. Cheers
Thank you for another informative web site. Where else could I get that kind of info written in such an ideal way? I’ve a project that I am just now working on, and I’ve been on the look out for such info.
I?d should check with you here. Which is not something I normally do! I get pleasure from studying a submit that will make folks think. Additionally, thanks for permitting me to comment!
Somebody necessarily assist to make critically articles I might state. This is the first time I frequented your website page and up to now? I surprised with the research you made to create this particular post incredible. Magnificent activity!
One thing I would like to say is that before getting more personal computer memory, take a look at the machine in to which it is installed. In case the machine is actually running Windows XP, for instance, the particular memory ceiling is 3.25GB. The installation of a lot more than this would easily constitute a waste. Be sure that one’s mother board can handle this upgrade volume, as well. Interesting blog post.
Howdy are using WordPress for your site platform? I’m new to the blog world but I’m trying to get started and set up my own. Do you require any coding expertise to make your own blog? Any help would be greatly appreciated!
It is in reality a nice and useful piece of information. I am satisfied that you simply shared this useful information with us. Please stay us informed like this. Thank you for sharing.
whoah this blog is excellent i love studying your articles. Keep up the good paintings! You realize, a lot of individuals are searching round for this information, you could help them greatly.
Thanks for your information on this blog. One particular thing I would wish to say is that often purchasing electronic devices items from the Internet is certainly not new. The fact is, in the past several years alone, the market for online electronic devices has grown considerably. Today, you could find practically almost any electronic device and product on the Internet, which include cameras along with camcorders to computer pieces and gambling consoles.
Thanks a bunch for sharing this with all people you actually understand what you’re talking approximately! Bookmarked. Please also discuss with my web site =). We can have a link change agreement among us!
It’s a pity you don’t have a donate button! I’d without a doubt donate to this excellent blog! I suppose for now i’ll settle for bookmarking and adding your RSS feed to my Google account. I look forward to brand new updates and will share this website with my Facebook group. Talk soon!
I have really noticed that credit improvement activity should be conducted with techniques. If not, chances are you’ll find yourself endangering your position. In order to realize your aspirations in fixing your credit ranking you have to confirm that from this moment you pay your monthly dues promptly prior to their appointed date. It is really significant on the grounds that by definitely not accomplishing that, all other activities that you will choose to adopt to improve your credit rating will not be powerful. Thanks for discussing your strategies.
I like the valuable info you provide for your articles. I will bookmark your blog and test once more here regularly. I’m reasonably certain I will learn lots of new stuff right right here! Good luck for the next!
This actually answered my downside, thanks!
I know of the fact that now, more and more people are being attracted to cameras and the discipline of digital photography. However, to be a photographer, you will need to first invest so much time deciding the exact model of camera to buy and moving store to store just so you could buy the least expensive camera of the trademark you have decided to settle on. But it does not end now there. You also have to take into consideration whether you can purchase a digital video camera extended warranty. Thx for the good tips I gathered from your website.
I have realized that over the course of making a relationship with real estate proprietors, you’ll be able to come to understand that, in each and every real estate contract, a payment is paid. Eventually, FSBO sellers don’t “save” the commission. Rather, they try to earn the commission through doing a great agent’s occupation. In completing this task, they commit their money plus time to carry out, as best they might, the assignments of an realtor. Those assignments include revealing the home by way of marketing, introducing the home to willing buyers, making a sense of buyer desperation in order to trigger an offer, making arrangement for home inspections, managing qualification check ups with the mortgage lender, supervising repairs, and aiding the closing.
I do not even understand how I ended up right here, however I assumed this submit was once great. I don’t recognize who you are but certainly you are going to a famous blogger should you are not already 😉 Cheers!
I loved as much as you will receive carried out right here. The sketch is tasteful, your authored subject matter stylish. nonetheless, you command get bought an edginess over that you wish be delivering the following. unwell unquestionably come further formerly again since exactly the same nearly very often inside case you shield this increase.
Thank you for the good writeup. It in fact was once a enjoyment account it. Look advanced to more added agreeable from you! By the way, how can we keep in touch?
Thanks for the concepts you reveal through this web site. In addition, many young women which become pregnant do not even try and get health insurance coverage because they are concerned they would not qualify. Although a lot of states at this moment require that insurers offer coverage in spite of the pre-existing conditions. Costs on these guaranteed options are usually bigger, but when taking into consideration the high cost of health care bills it may be some sort of a safer approach to take to protect the financial potential.
Hello my friend! I wish to say that this post is amazing, nice written and include approximately all vital infos. I would like to see more posts like this.
Hi! I know this is kinda off topic nevertheless I’d figured I’d ask. Would you be interested in trading links or maybe guest authoring a blog article or vice-versa? My blog goes over a lot of the same subjects as yours and I feel we could greatly benefit from each other. If you happen to be interested feel free to shoot me an email. I look forward to hearing from you! Wonderful blog by the way!
Thanks for the helpful posting. It is also my opinion that mesothelioma cancer has an extremely long latency period, which means that symptoms of the disease would possibly not emerge until finally 30 to 50 years after the preliminary exposure to asbestos fiber. Pleural mesothelioma, and that is the most common type and has effects on the area about the lungs, will cause shortness of breath, upper body pains, and also a persistent cough, which may bring about coughing up our blood.
What an eye-opening and well-researched article! The author’s meticulousness and capability to present complex ideas in a comprehensible manner is truly commendable. I’m thoroughly captivated by the scope of knowledge showcased in this piece. Thank you, author, for sharing your expertise with us. This article has been a real game-changer!
Thanks for the suggestions you have discussed here. Another thing I would like to talk about is that laptop or computer memory demands generally go up along with other breakthroughs in the technology. For instance, if new generations of cpus are made in the market, there is usually a similar increase in the dimensions calls for of all computer memory in addition to hard drive room. This is because software program operated by these processors will inevitably boost in power to make new technological know-how.
Thanks for your publication on this weblog. From my own personal experience, there are occassions when softening right up a photograph may provide the wedding photographer with a bit of an artistic flare. Oftentimes however, that soft cloud isn’t just what you had as the primary goal and can often times spoil an otherwise good photo, especially if you intend on enlarging them.
Thanks for the publish. My spouse and i have generally seen that a majority of people are wanting to lose weight because they wish to look slim and attractive. However, they do not often realize that there are more benefits for losing weight additionally. Doctors declare that overweight people are afflicted by a variety of health conditions that can be instantly attributed to their excess weight. Fortunately that people that are overweight and also suffering from numerous diseases can reduce the severity of their particular illnesses by simply losing weight. You possibly can see a constant but notable improvement with health as soon as even a moderate amount of weight reduction is obtained.
That is really fascinating, You are a very professional blogger. I’ve joined your rss feed and look forward to searching for extra of your excellent post. Additionally, I’ve shared your website in my social networks!
Hey very cool website!! Man .. Beautiful .. Amazing .. I will bookmark your website and take the feeds also?I am happy to find a lot of useful information here in the post, we need work out more strategies in this regard, thanks for sharing. . . . . .
I know this if off topic but I’m looking into starting my own weblog and was curious what all is required to get setup? I’m assuming having a blog like yours would cost a pretty penny? I’m not very internet smart so I’m not 100 positive. Any tips or advice would be greatly appreciated. Appreciate it
Thank you for another informative blog. Where else could I get that type of information written in such a perfect way? I’ve a project that I’m just now working on, and I’ve been on the look out for such information.