
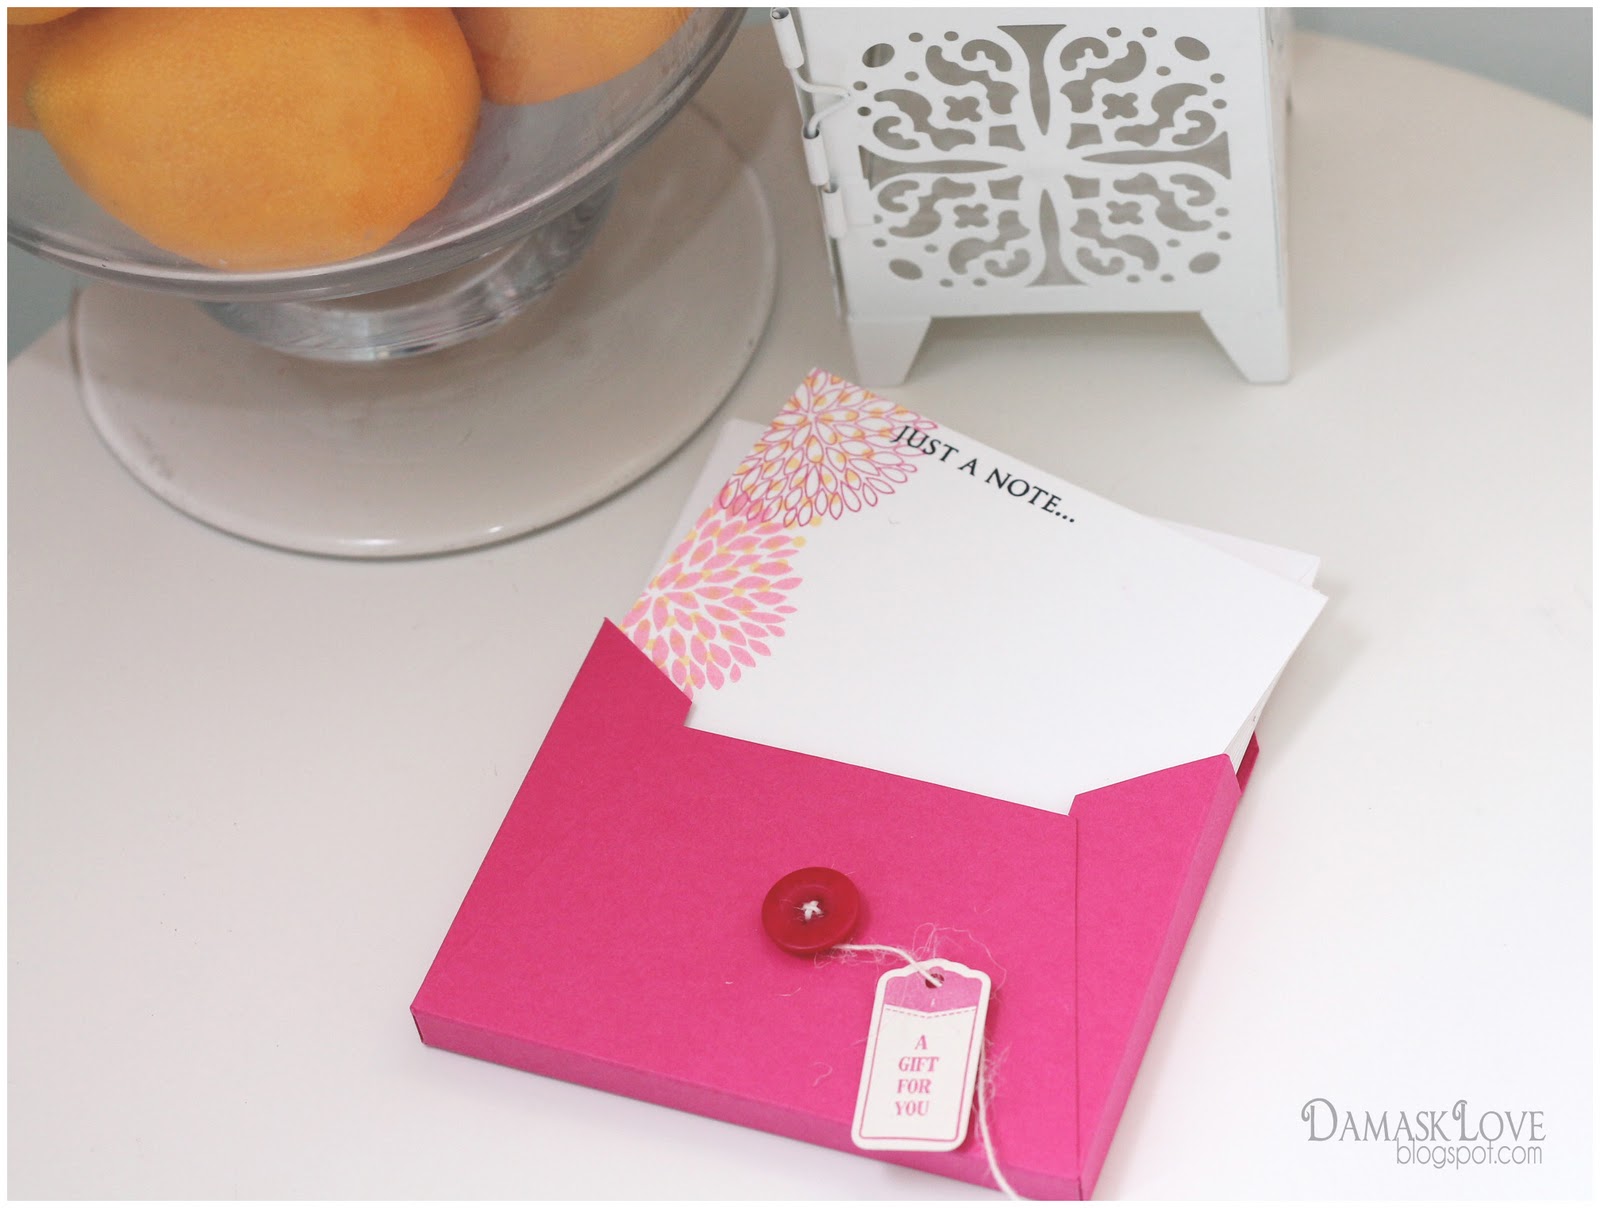
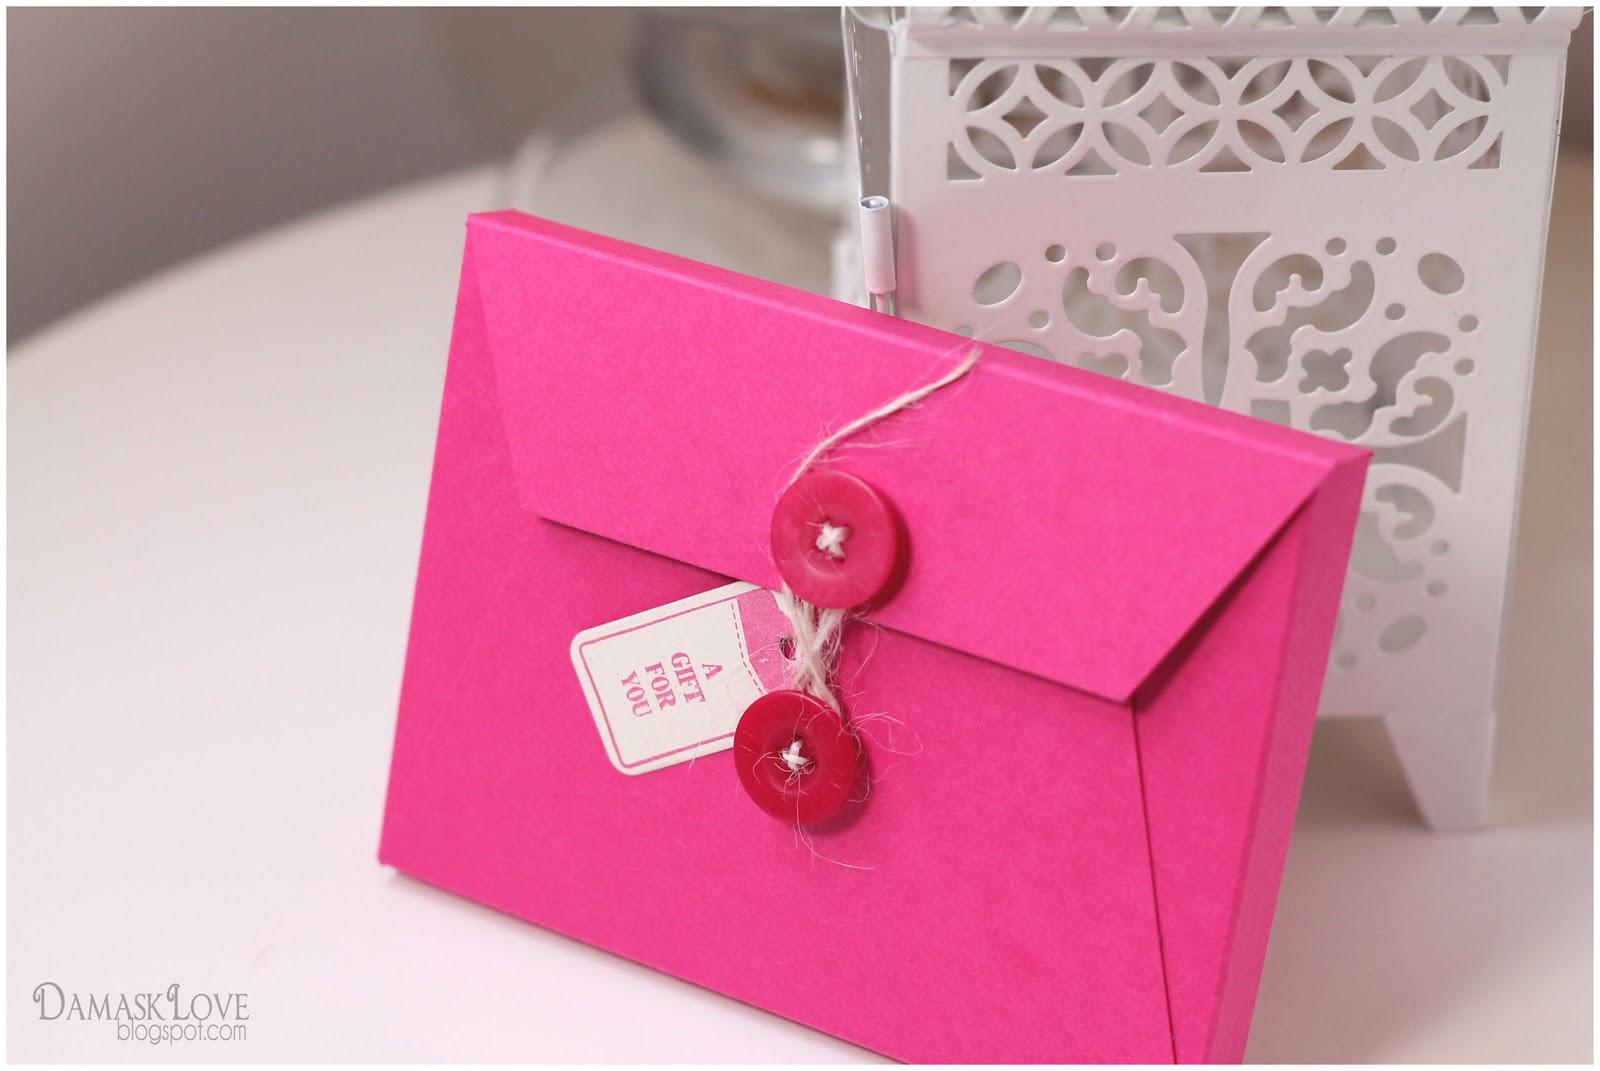
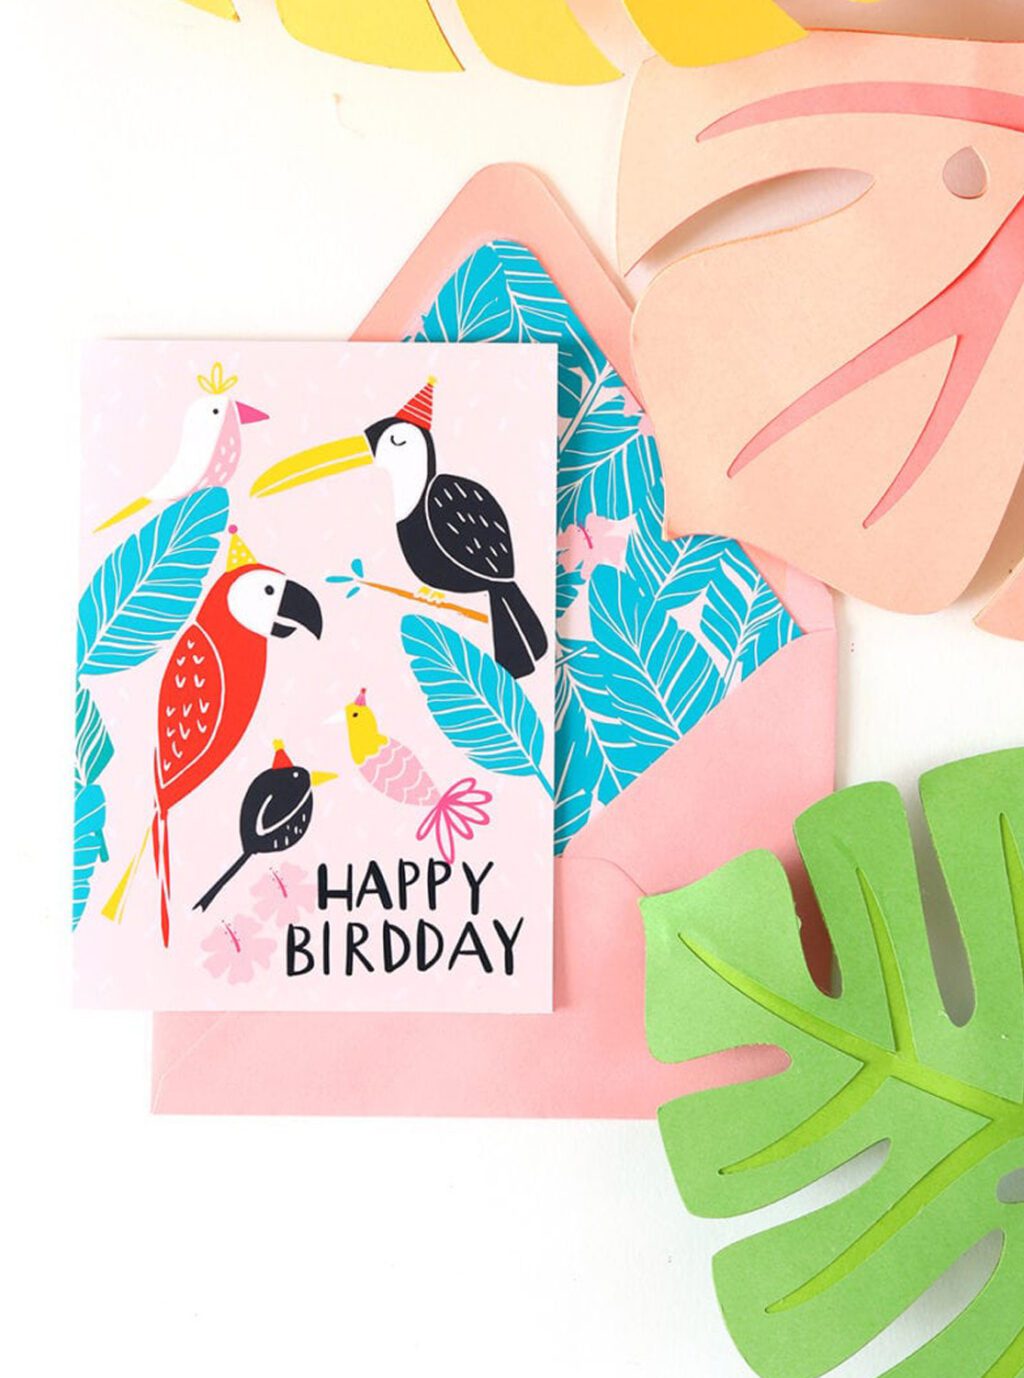
And in the spirit of today’s gift envelope tutorial – I create a A1-sized card set envelope (instructions below):
Now for the tutorial.

- Start with 8 1/2 x 11 sheet of cardstock.
- Along the 8 1/2″ edge, score at .75″ , 1.25″, 7.25″ and 7.75″
- Along the 11″ edge score at 2″ , 2.5″ 7″ and 7.5″
- Cut along pink edges. Turquoise shaded areas represent pieces of cardstock that you will cut off completely.
- Assemble as shown below…
**Updated: I corrected the measurements for this template! I am so sorry about the incorrect measurement! Everything should be correct now and I hope you’ll forgive my slip up!**
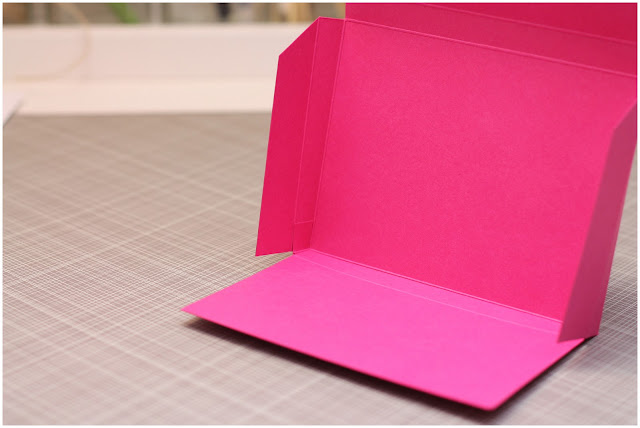 Adhere the small notches to the inside of the envelope.
 - Start with 8 1/4″ x 9 1/4″ sheet of cardstock.
- Along the 8 1/4″ edge, score at 1″ , 1.5″, 6.75″ and 7.25″
- Along the 9 1/4″” edge score at 1.5″ , 2″ , 6″ and 6.5″
- Cut along pink edges. Turquoise shaded areas represent pieces of cardstock that you will cut off completely.
- Assemble.
TIPS:
- To create the twine closure for the envelope, punch two .75″ circles from cardstock and attach using a grommet.
- You can also use buttons for the twine closure. When sewing the buttons into place, place an extra piece of cardstock or felt on the back of the cardstock to help stabilze the button and the stitching.
OK! That is it for today! I hope you’ve enjoyed some or all of this post! If you have any questions – leave a comment or send me an email and I’ll make sure you answer you!
Thanks for stopping by!
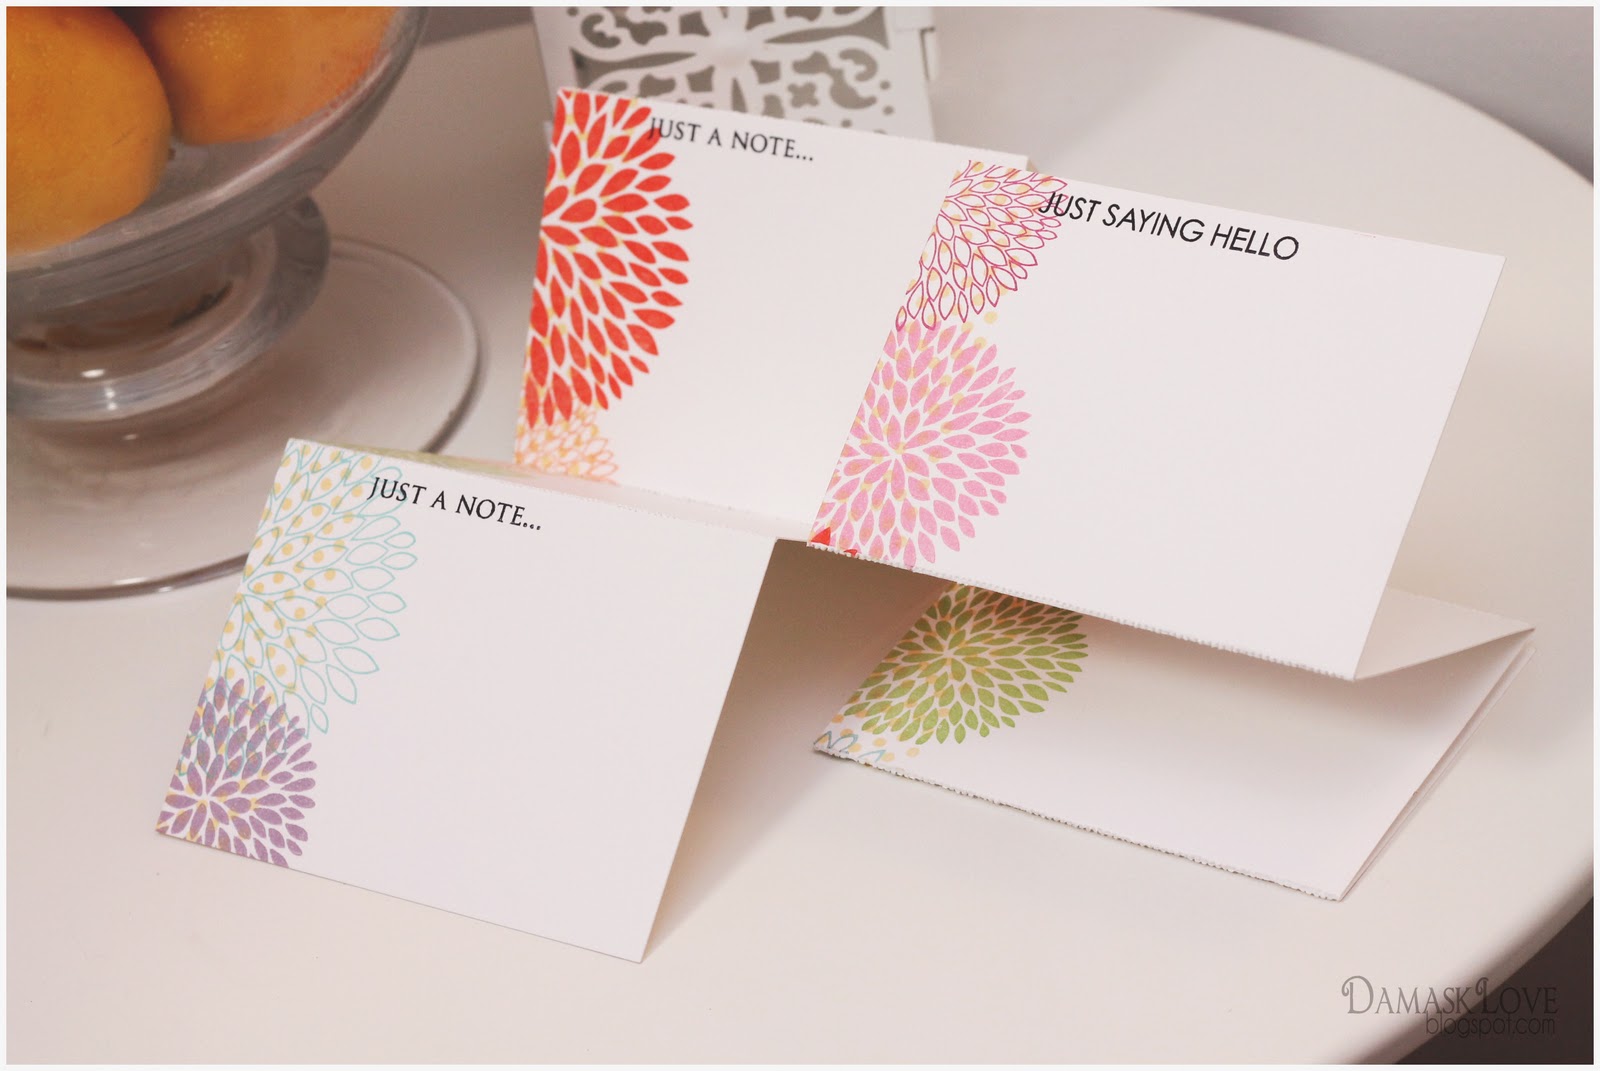
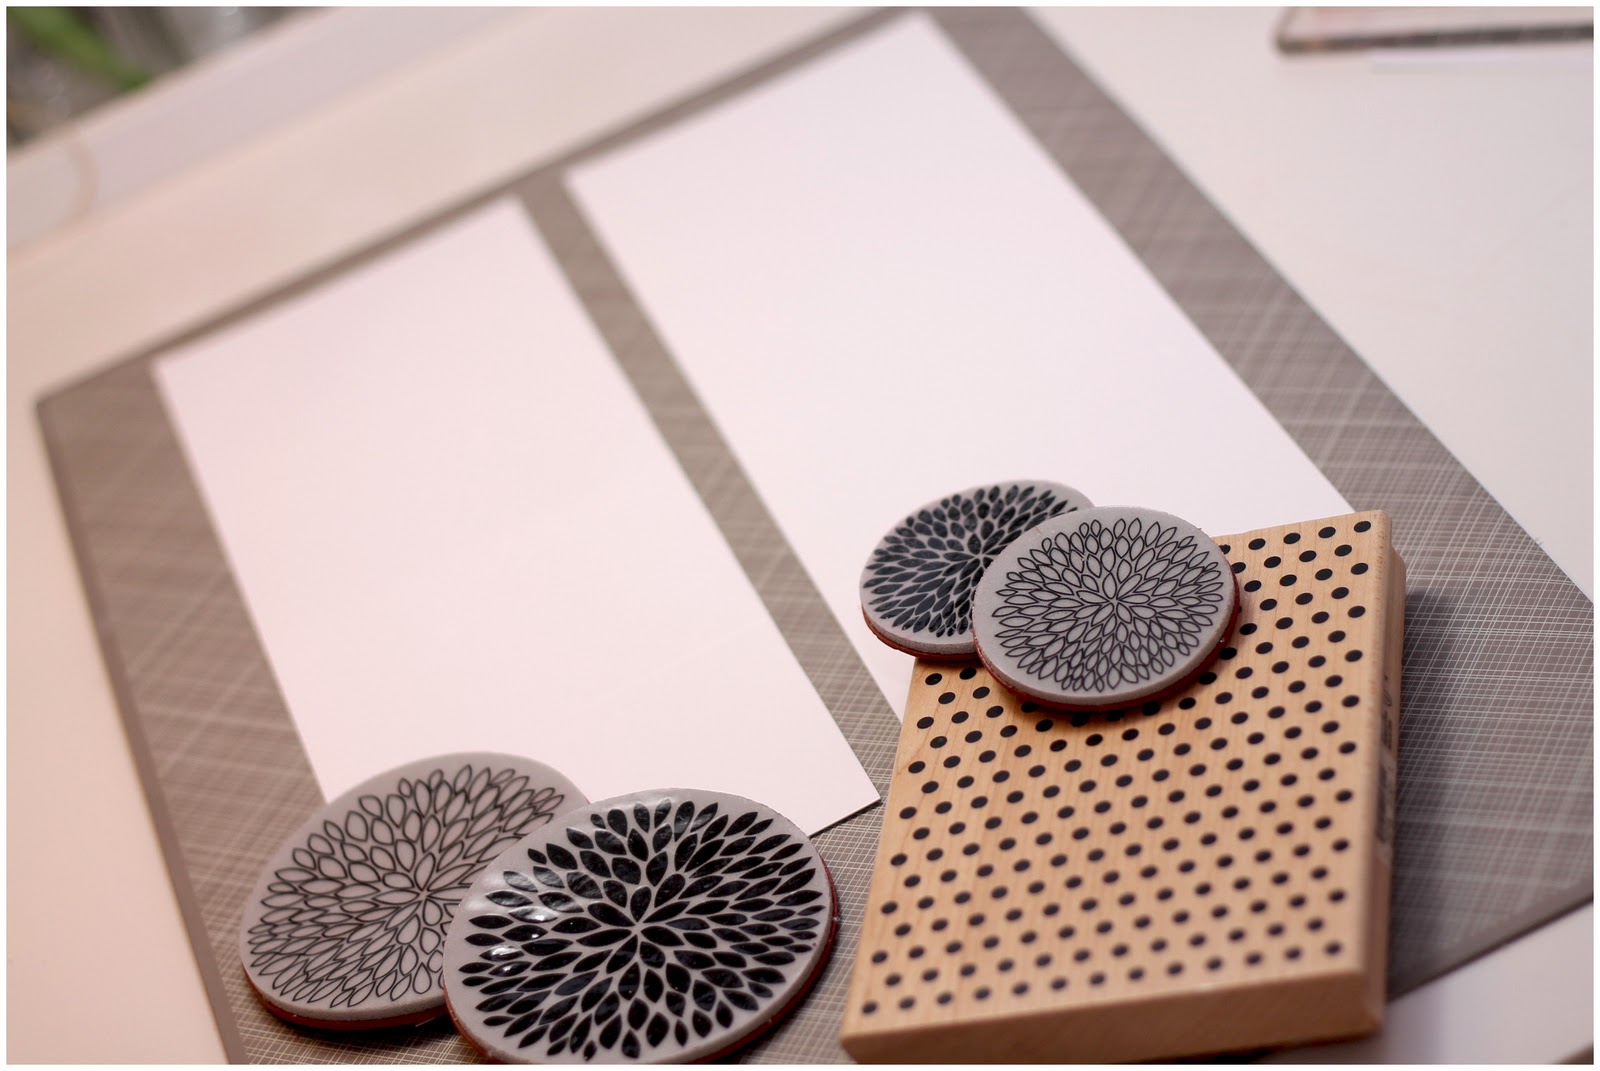
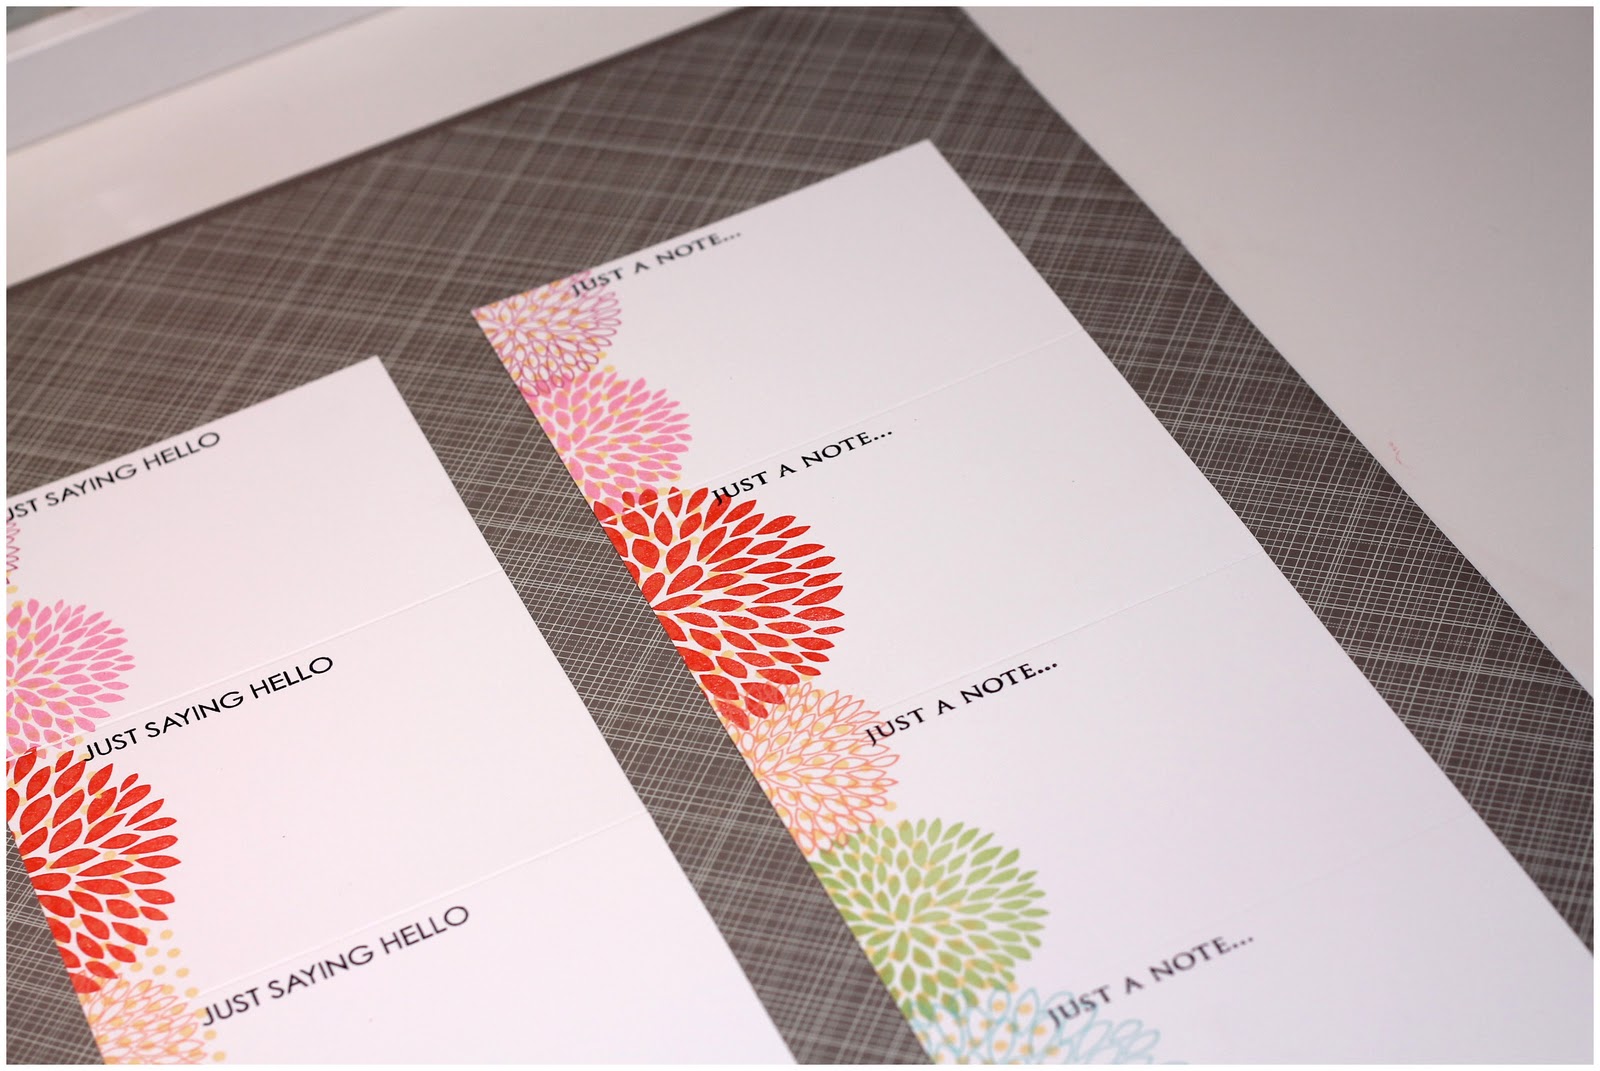
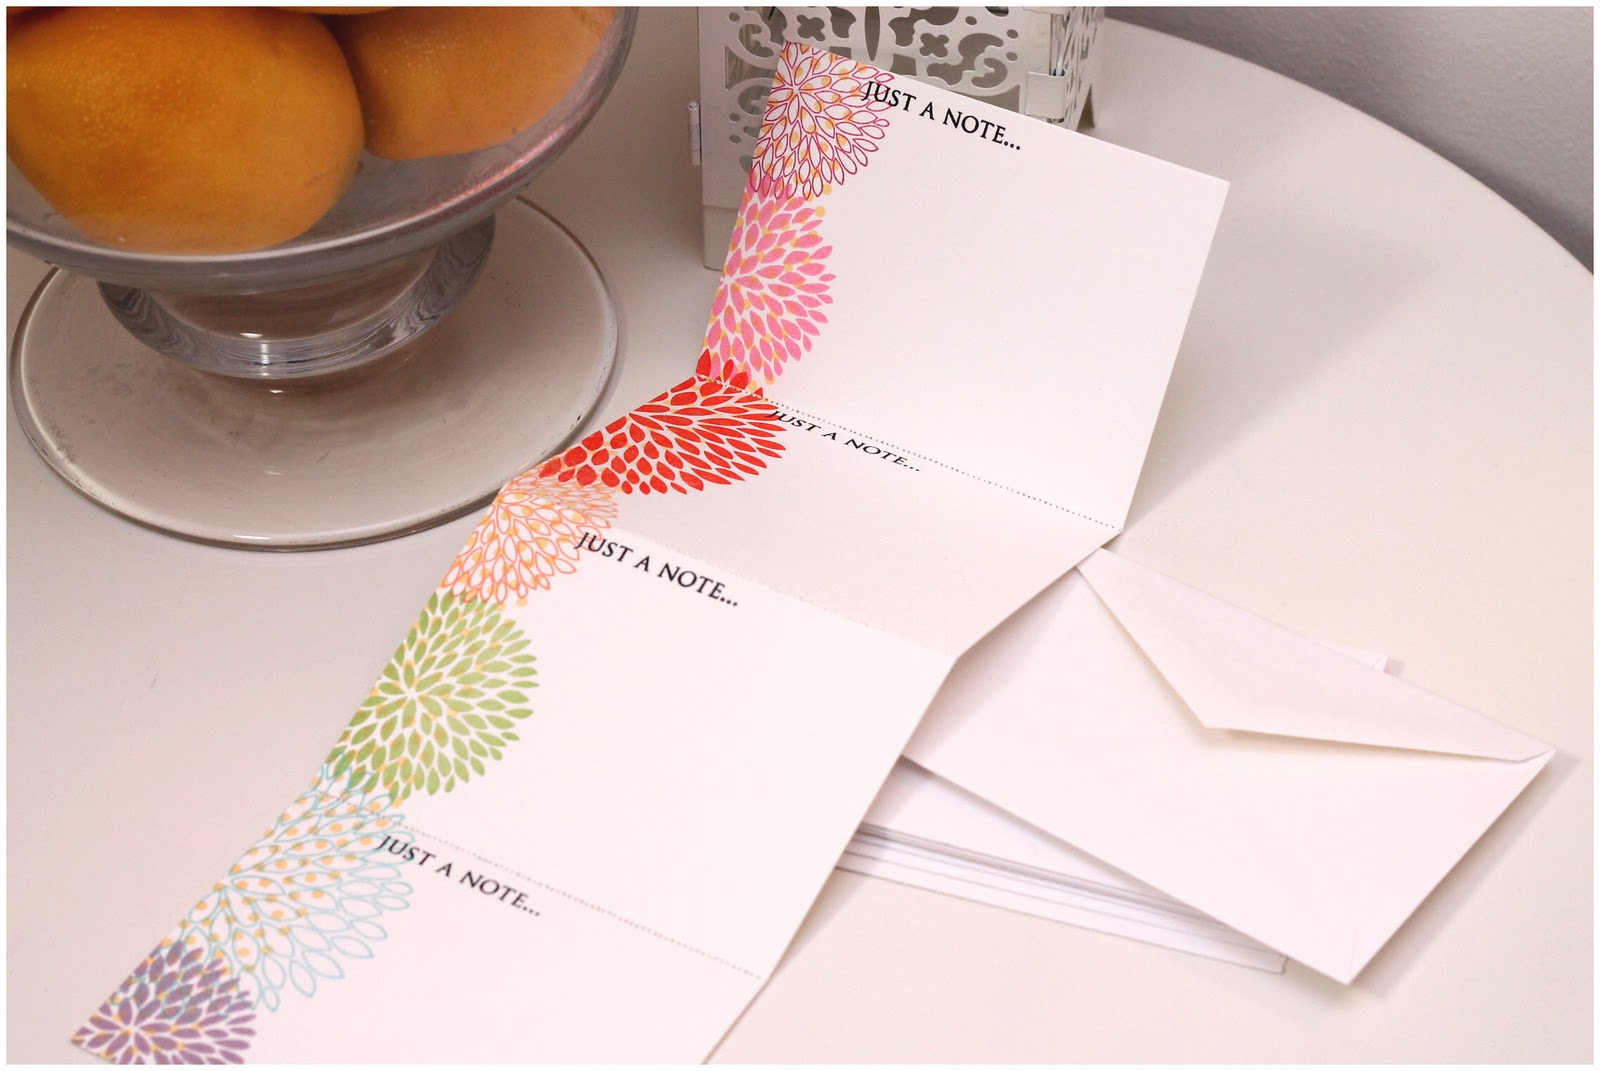
Supplies for perforated card set:
Stamps: Hero Arts (Large Solid Flower, Large Open Flower, Small Solid Flower, Small Open Flower, Woodblock Polka Dot Background, Everyday Messages)
Ink: Impress Ink (Chamomile, Fuchsia, Pink Lemonade, Peach, Mojito, Island, Silver Lilac) Versafine (Habanero)
Cardstock: Paper Presentation (white 130lb 11×17 cardstock)

Amber, absolutely beautiful. Such a clever idea too.
June K
I so love this…thanks for sharing..
Amber…that is dang brilliant. Thanks for sharing this awesome idea
I love the cards and the packaging,
Amber! Lovely CAS design. Thanks for the tutorial and the inspiration!
I used one of your previous tutorials
to make monogram stationary to give
as gifts, so thanks for that idea too!
So cool!!!
Very very cool!!!
Hi Amber… Thank you so much. I love these and will be making some sets to give away. Quick question on the A2 measurements… I think the first score on the 8 1/2″ edge be .75″ rather than .25″, right?
Thanks again!
Awesome! I will have to give this a go, thanks for the inspiration!
Now, I just need to learn how to sew straight…
This is brilliant. I am definitely going to make these. Thank you Lenae
Brilliant! I will have to CAS this idea, Amber. Thanks so much for sharing it 🙂
WOW – I fell off my chair and made a big thud – LOVE this so much – going straight to Pinterest!!
Articles like these put the consumer in the driver seat-very imprttano.
Fabulous having these perforated! Awesome idea!!
The envie template is so great! Thank you for sharing!!
The perforation puts a really unique twist on these cards – very creative!
ditto to what winjes said, I tried twice with those measurements and was off, I am excited to it again!! This is a wonderful packaging idea, and you can even decorate the packaging!! Thanks Amber!
What a brilliant idea and thanks for the envelope tutorial. Truly enjoy your blog even though I seldom comment ~ love your style!
This is amazing can’t wait to try it. TFS I give you an A++++++
Great idea!! And thanks for the link to that fabulous store!!
Great things. Today I have just a scoreboard set up your own card envelope all the details.
postcard printing
Amazing! Thank you so much for sharing!
Oh wow…what an awesome project 🙂
Jenny x
Hi Amber! I just wanted to say thanks so much for posting this tutorial…it’s awesome 🙂 I created my own set of cards and envelope with it! If you’d like to see it, here it is:
http://idreamcreateinspire.blogspot.com/2012/01/denami-valentine-blog-hop.html
Nicki
This is brilliant!
amazing idea! TFS!
absolutely love it!!! like your tutorial too!! thanks for sharing!!
Thank you very much Amber for the template… I made 2 card set box today for my sister to give it to my little niece’s school teachers…
your effort make it easy to follow..I will use it Gift Card envelopes if i remember.
So lovely! The image is so cute. Beautiful card , do you have some more cute cards like that,to share and Plastic Cards Printing
a way to solve many printing problems.
I LOVE the idea of using your sewing machine! I have a stack of paper to try this out, thank you for the simple and great idea 😀
[I never would have thought about using my sewing machine for paper craft, hehe!]
Another fantastic project, tutorial and blog post. Your blog is stellar.
I have a question about the box. It is a great idea and so easy to make. The A2 cards fit perfectly. However…A2 envelopes won’t fit inside.
Suggestions?
Hi to every , because I am in fact eager of reading this blog’s post to be
updated daily. It carries pleasant information.
Hi i am kavin, its my first occasion to commenting anywhere, when i read this paragraph i thought i could also create comment due to this brilliant piece of writing.
Hi Amber
I love the note cards and holder. Can you clarify if the pink holder is the same card stock weight? And since I’m new to card making can you clarify why the weight of the card stock needs to be 110 or 130 lb.?
Thanks
Just found this! It’s easy to understand. I can’t wait to try it out. And I signed up for your newsletter.
When looking for a good calculator app, prioritize user-friendly interfaces and versatile functionalities. Explore reviews of free online calculators https://calculatorprofessional.com/ to gauge reliability and features, such as scientific, graphing, or financial capabilities. Check for updates and support to ensure long-term usability. Remember, a well-chosen calculator app can significantly streamline complex calculations, making it a valuable tool for work or study.
Fantastic beat ! I would like to apprentice whilst you amend your site, how could i subscribe for a blog web site? The account helped me a appropriate deal. I had been tiny bit familiar of this your broadcast offered brilliant clear idea
Another thing is that when you are evaluating a good on the web electronics shop, look for online stores that are continually updated, trying to keep up-to-date with the most current products, the most effective deals, and also helpful information on services. This will make sure that you are doing business with a shop which stays ahead of the competition and provide you things to make knowledgeable, well-informed electronics acquisitions. Thanks for the crucial tips I’ve learned from your blog.
Greetings from Idaho! I’m bored at work so I decided to browse your site on my iphone during lunch break. I really like the knowledge you present here and can’t wait to take a look when I get home. I’m shocked at how quick your blog loaded on my mobile .. I’m not even using WIFI, just 3G .. Anyhow, wonderful site!
I love your blog.. very nice colors & theme. Did you make this website yourself or did you hire someone to do it for you? Plz respond as I’m looking to design my own blog and would like to know where u got this from. thanks a lot
I have taken note that of all sorts of insurance, medical health insurance is the most marked by controversy because of the struggle between the insurance company’s need to remain making money and the client’s need to have insurance policy. Insurance companies’ income on overall health plans are extremely low, hence some firms struggle to make money. Thanks for the ideas you reveal through this blog.
Youre so cool! I dont suppose Ive read anything like this before. So nice to find somebody with some authentic ideas on this subject. realy thank you for starting this up. this website is one thing that’s needed on the net, somebody with a little bit originality. helpful job for bringing one thing new to the internet!
Great goods from you, man. I have take note your stuff prior to and you’re simply extremely fantastic. I actually like what you have got right here, really like what you’re stating and the best way through which you assert it. You make it enjoyable and you still care for to stay it sensible. I can’t wait to learn much more from you. This is actually a great website.