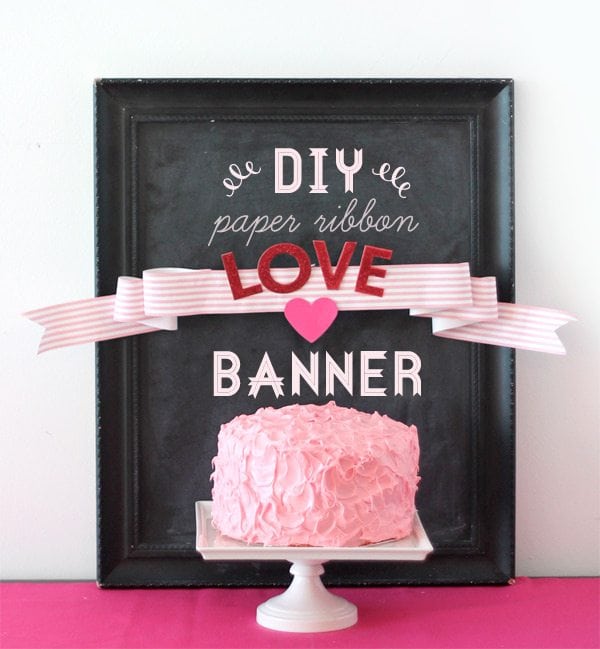
I made that cake. Then it took everything in me to photograph it without taking an itty bitty taste! Thankfully the cake survived and I’m here to share an awesomely simple project with you…
If you’re coming to Damask Love via TomKat Studios, I’m super happy to have you. If we were meeting in real life for the first time, I’d give you a big hug and tell you about my obsession with paper crafting! In lieu of that hug, I hope you’ll just hang out with me for a while so we can do some crafting together.
Today, I’m sharing a two-fer. Over on the TomKat Blog, you’ll find a project that I created using the paper ribbon available in the TomKat Studios shop. Here at Damask Love, I’ve got another project featuring that same paper ribbon in a totally different way!
Banners are pretty hot right now and it just so turns out that paper ribbon is perfect for creating your own cascading banner! Here we go…
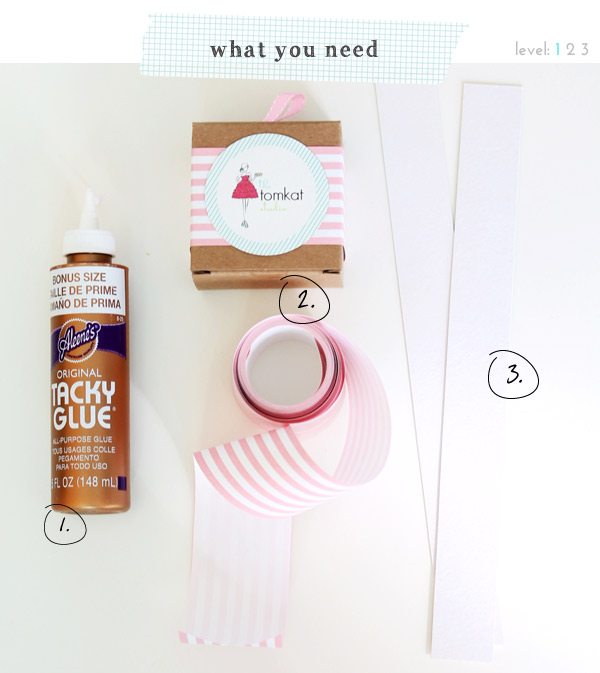
{1} Tacky Glue. I love this stuff! For this particular project, you could use a hot glue gun, but I prefer using a glue that allows for a little “fidgeting” before I commit.
{2} TomKat Studios Paper Ribbon…of course.
{3} Strips of chipboard, cardboard or stiff cardstock. For this particular project, I am using white chipboard strips measuring 12″ x 1″
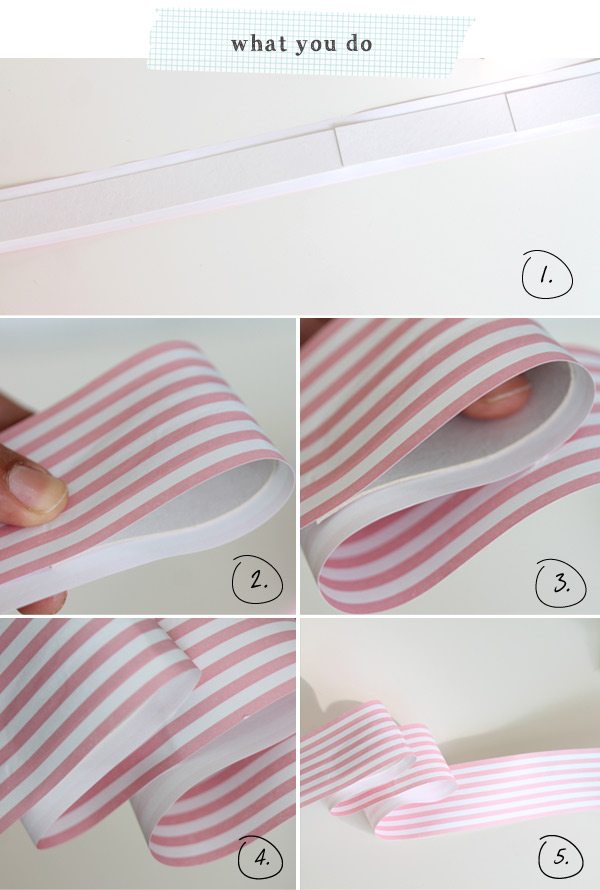
{1} Adhere the chipboard strips to back of the paper ribbon. The length of chipboard you use is completely up to you! I chose to adhere approximately 16″of chipboard. This will give some stiffness to your banner and make it easier to adhere letters to it without sagging.
{2} Create your first loop by curving the paper ribbon at a slight angle, as shown. Adhere. For this first loop, the chipboard should be inside the loop to provide shape and sturdiness.
{3} Turn the paper back onto itself at a slight angle, as shown.
{4} Create a second loop just as you made the first.
{5} Allow the glue to set and repeat this on the other side of the banner.
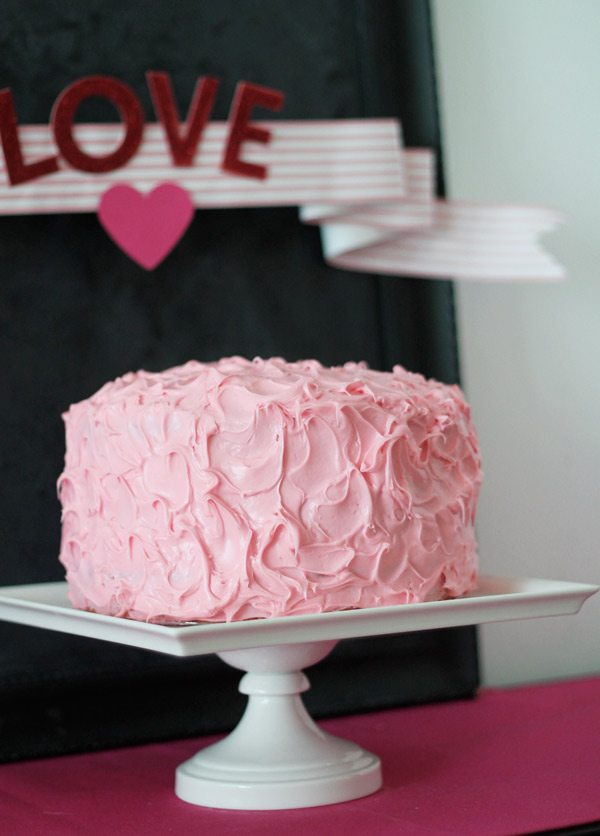
To finish off the banner, I adhered a few chipboard letters and a heart shape punched from cardstock….then of course, there was that cake. I think we need a quick gratuitous shot of that cake, right?






Officiele Kamagra van Nederland [url=https://kamagrakopen.pro/#]Kamagra Kopen[/url] Kamagra
cialis for sale: TadalafilEasyBuy.com – TadalafilEasyBuy.com
https://tadalafileasybuy.com/# Tadalafil Easy Buy
пин ап казино зеркало – пин ап казино зеркало
kamagra kopen nederland [url=https://kamagrakopen.pro/#]Kamagra Kopen Online[/url] kamagra pillen kopen
пин ап казино – пинап казино
пин ап зеркало – пин ап вход
пин ап казино – пин ап казино
pinup 2025 – пинап казино
Generic100mgEasy [url=https://generic100mgeasy.shop/#]buy generic 100mg viagra online[/url] sildenafil 50 mg price
пин ап вход – пинап казино
пин ап казино: https://pinupkz.life/
пин ап вход – пин ап вход
Tadalafil Easy Buy [url=http://tadalafileasybuy.com/#]Tadalafil Easy Buy[/url] Generic Tadalafil 20mg price
пин ап казино: https://pinupkz.life/
pinup 2025 – пин ап вход
kamagra [url=https://kamagrapotenzmittel.shop/#]Kamagra Gel[/url] Kamagra Oral Jelly
ApotheekMax: Betrouwbare online apotheek zonder recept – de online drogist kortingscode
Kamagra Oral Jelly: Kamagra kaufen ohne Rezept – Kamagra online bestellen
Kamagra Oral Jelly kaufen [url=https://kamagrapotenzmittel.com/#]Kamagra Oral Jelly kaufen[/url] Kamagra Oral Jelly
apotek online recept: Apotek hemleverans idag – Apoteket online
Apotek hemleverans recept: Apotek hemleverans recept – apotek pa nett
Kamagra kaufen ohne Rezept [url=https://kamagrapotenzmittel.com/#]Kamagra kaufen[/url] Kamagra kaufen ohne Rezept
https://apotheekmax.com/# ApotheekMax
Apoteket online: Apoteket online – apotek pa nett
Apotek hemleverans recept [url=https://apotekonlinerecept.shop/#]apotek pa nett[/url] apotek online
http://apotekonlinerecept.com/# apotek online
Kamagra kaufen: Kamagra Original – Kamagra online bestellen
https://apotekonlinerecept.com/# apotek pa nett
Hi there, just become alert to your blog via Google, and found that it’s truly informative. I?m gonna be careful for brussels. I will be grateful if you happen to continue this in future. Numerous folks will probably be benefited from your writing. Cheers!
Wow, incredible weblog format! How long have you been blogging for? you make running a blog glance easy. The overall look of your website is fantastic, as well as the content material!
One more thing. I think that there are quite a few travel insurance web sites of dependable companies than enable you to enter your trip details to get you the rates. You can also purchase an international holiday insurance policy on internet by using your own credit card. All that you should do is always to enter the travel particulars and you can see the plans side-by-side. Merely find the plan that suits your capacity to pay and needs and then use your credit card to buy them. Travel insurance online is a good way to do investigation for a reliable company to get international holiday insurance. Thanks for sharing your ideas.
Greetings! I know this is somewhat off topic but I was wondering which blog platform are you using for this site? I’m getting tired of WordPress because I’ve had issues with hackers and I’m looking at alternatives for another platform. I would be great if you could point me in the direction of a good platform.
Great post. I used to be checking continuously this blog and I am inspired! Extremely helpful information specifically the remaining phase 🙂 I handle such info a lot. I used to be looking for this particular info for a long time. Thanks and good luck.
I love your blog.. very nice colors & theme. Did you design this website yourself or did you hire someone to do it for you? Plz respond as I’m looking to create my own blog and would like to find out where u got this from. thanks
Hello, i feel that i noticed you visited my site thus i got here to ?go back the desire?.I am trying to in finding issues to improve my site!I assume its ok to make use of some of your ideas!!
There may be noticeably a bundle to know about this. I assume you made sure good factors in features also.
Your home is valueble for me. Thanks!?
I am extremely inspired along with your writing skills as neatly as with the structure in your weblog. Is this a paid subject or did you modify it your self? Either way keep up the nice quality writing, it?s rare to see a great weblog like this one these days..
Loved this post. For those near quartz worktops St. Katherine’s Dock, I suggest looking into quartz worktops from stoneworktopslondon.com. Their team helped me choose the perfect color for my space.