
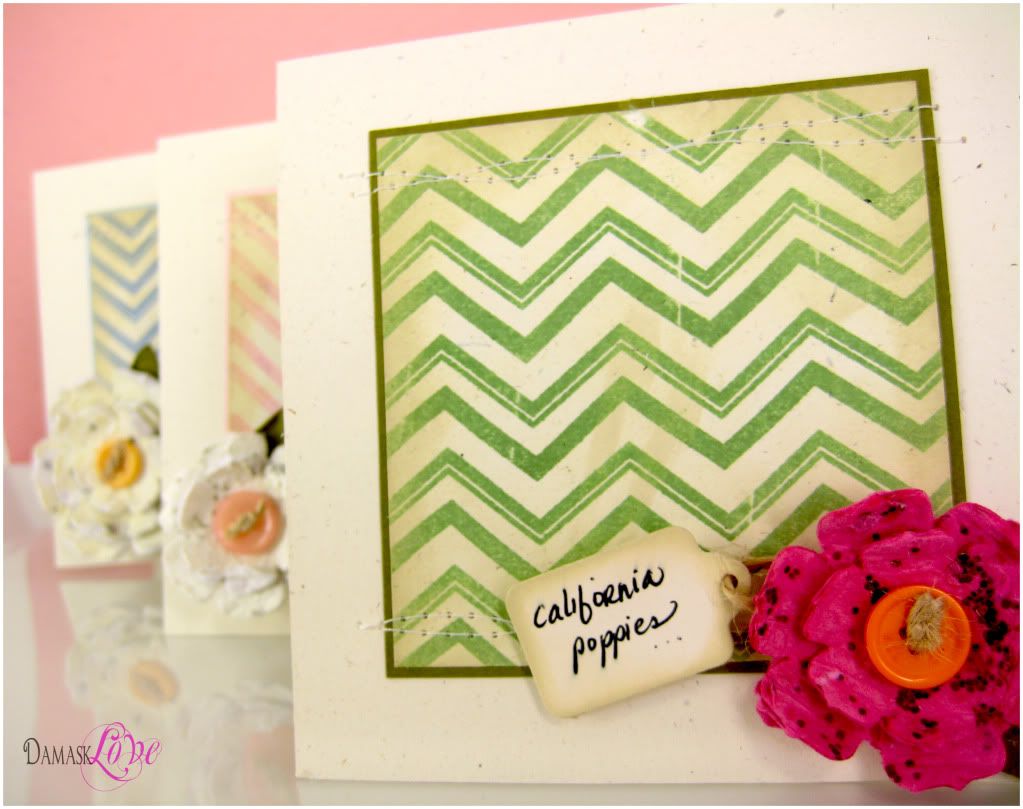
Now that you’ve seen the finished product, let me take you back to the beginning … before these cards were born…when they were just an idea in my head!
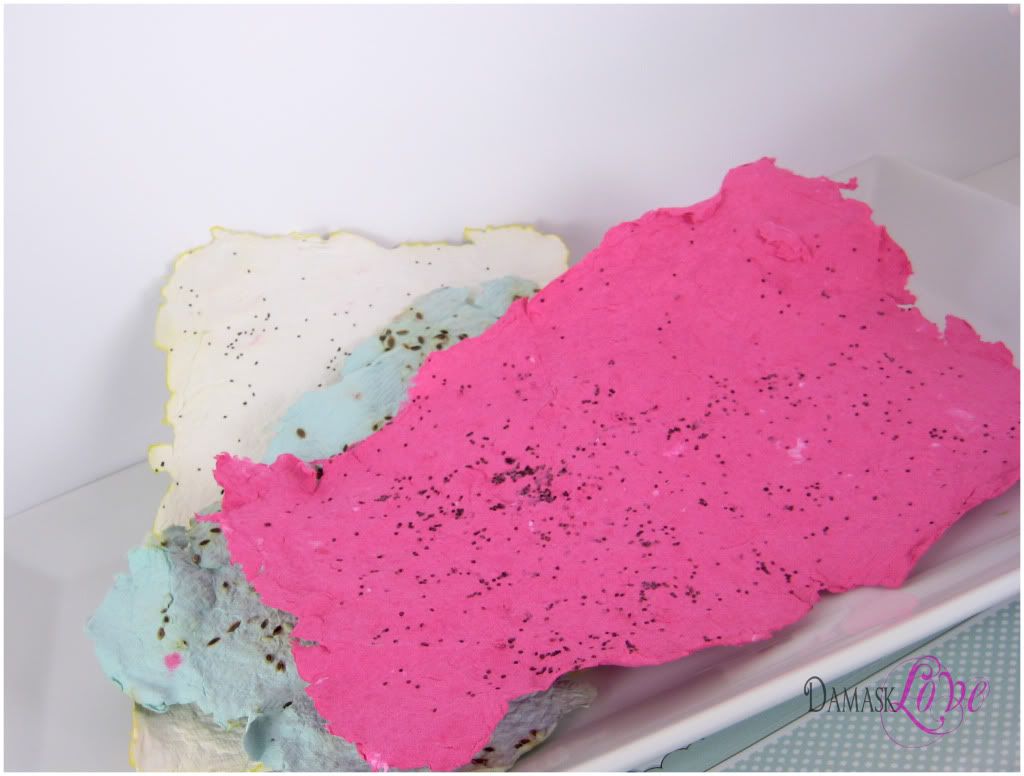
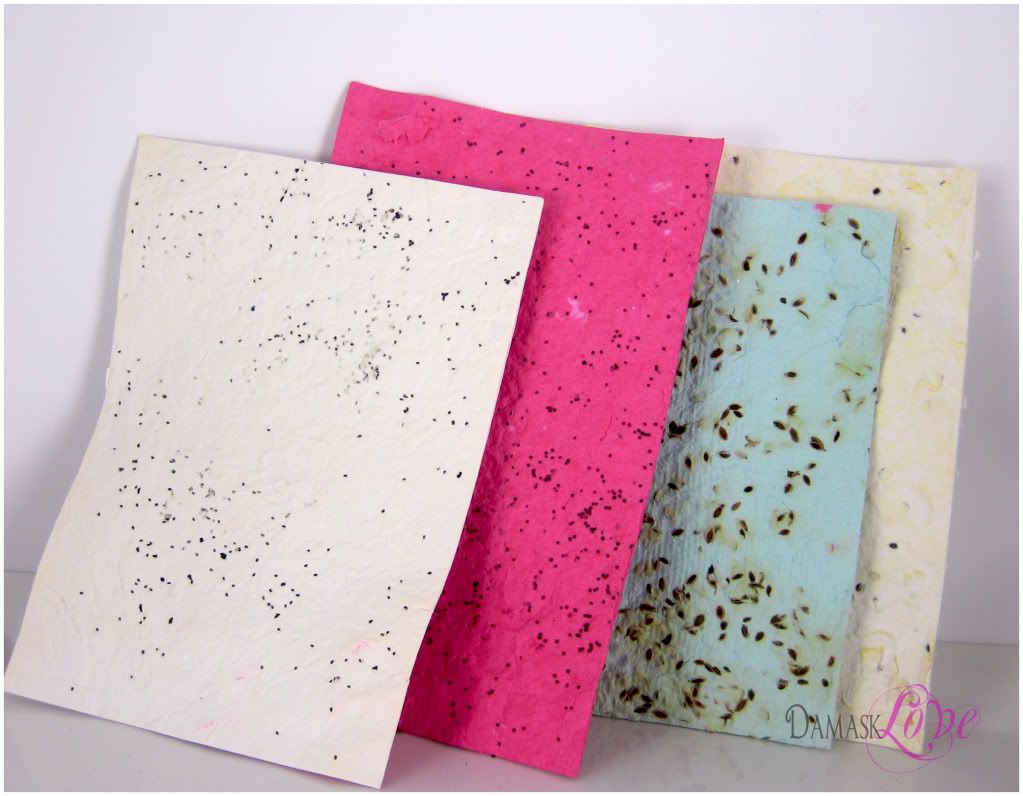
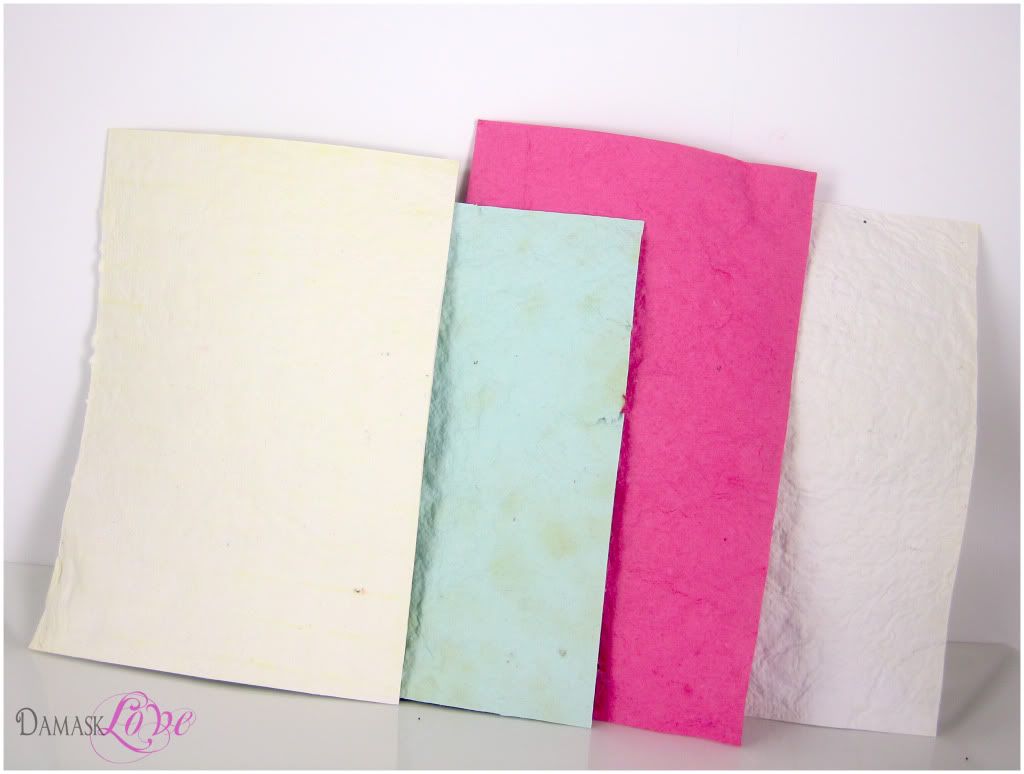
Plantable paper is a great way to extend the longevity of your cards and make sure they’ll serve a special purpose in the life of each recipient.


You can use any paper you like. This is a great way to up-cycle old newspapers, mail or paper crafting scraps.
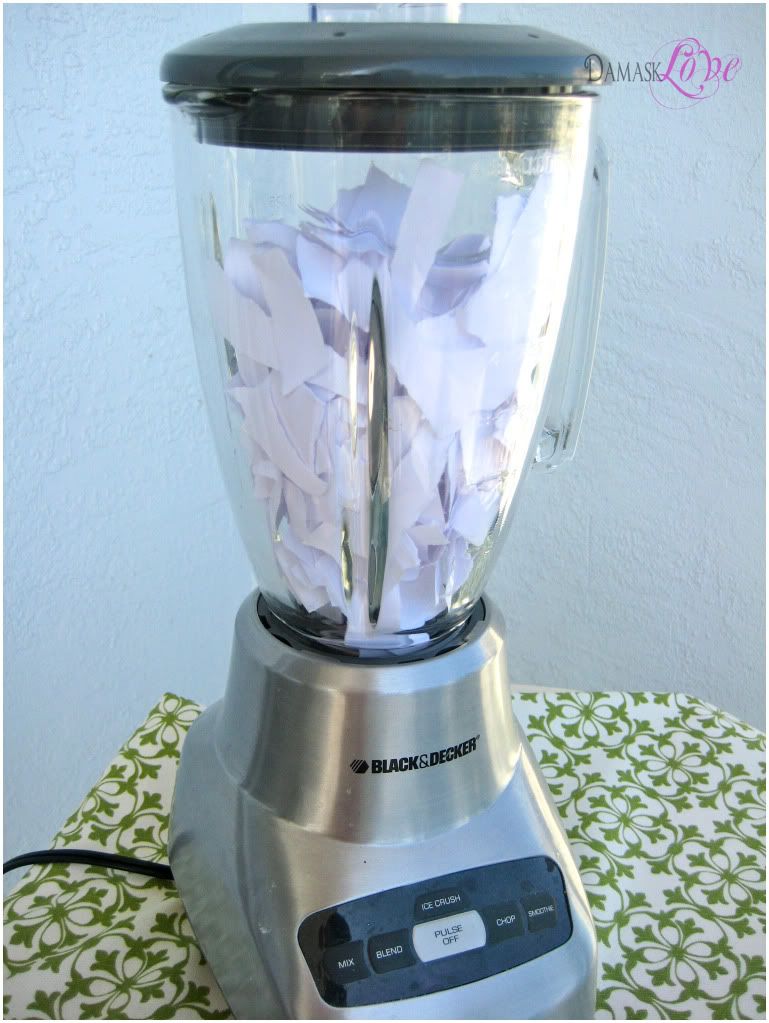
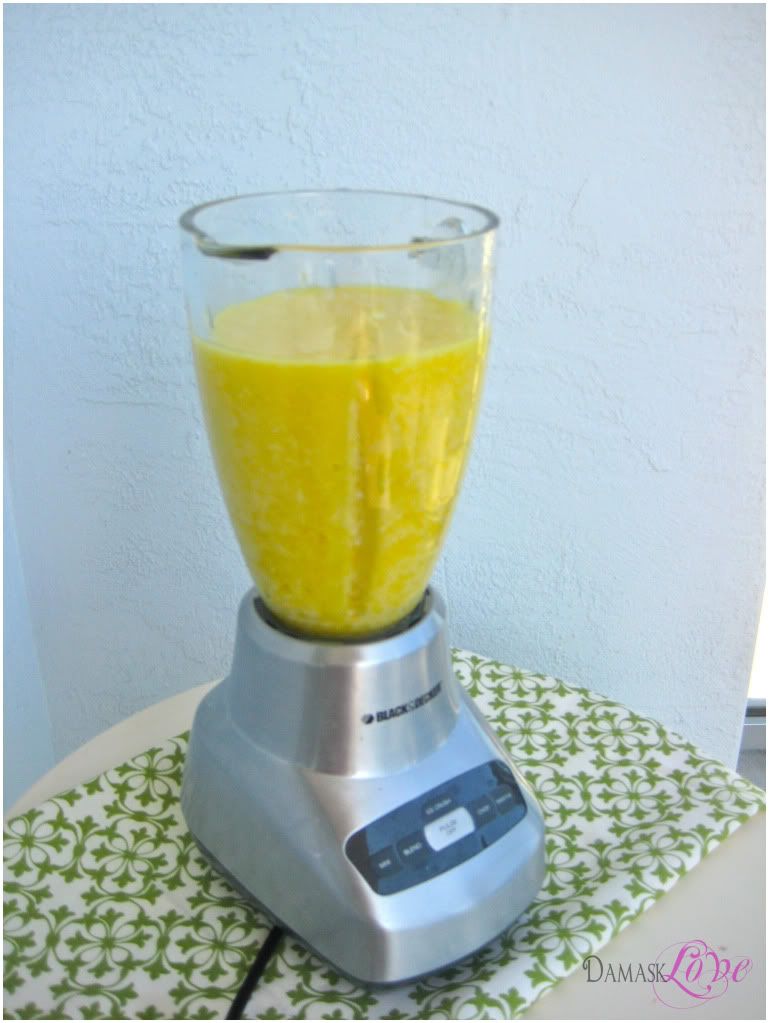
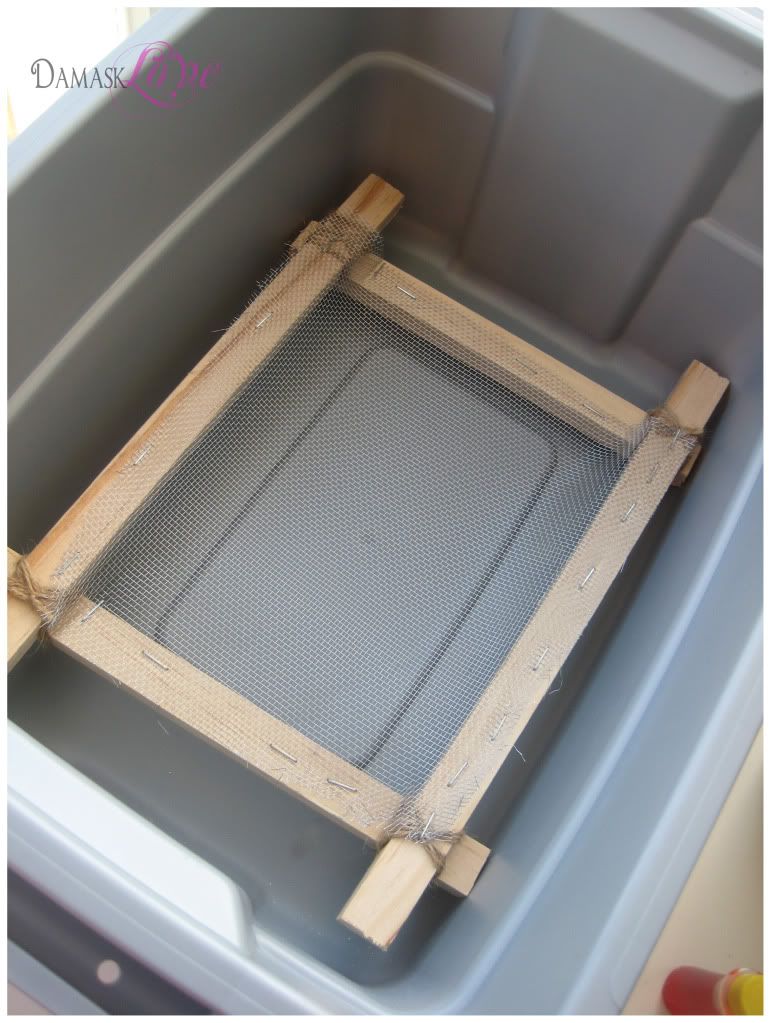
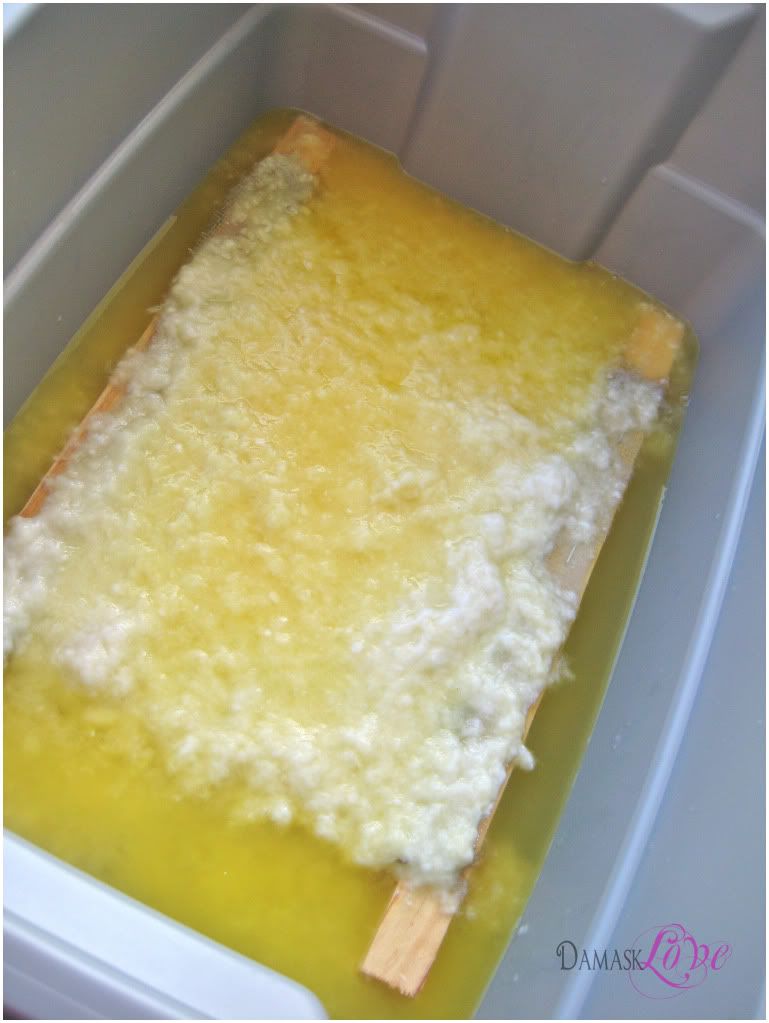
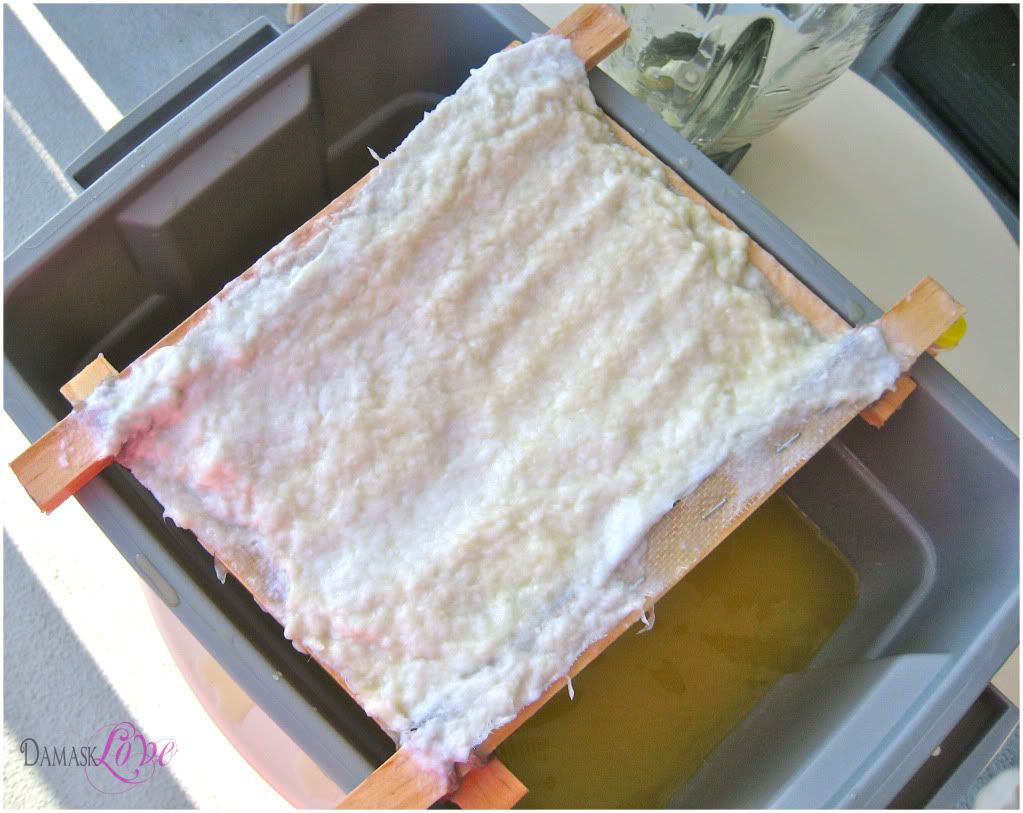


*hint: given the thickness of PTI cardstock, allow the shredded cardstock to soak in the water before blending it. This will soften the paper and result in smoother pulp*
 |
| front |
 |
| back |
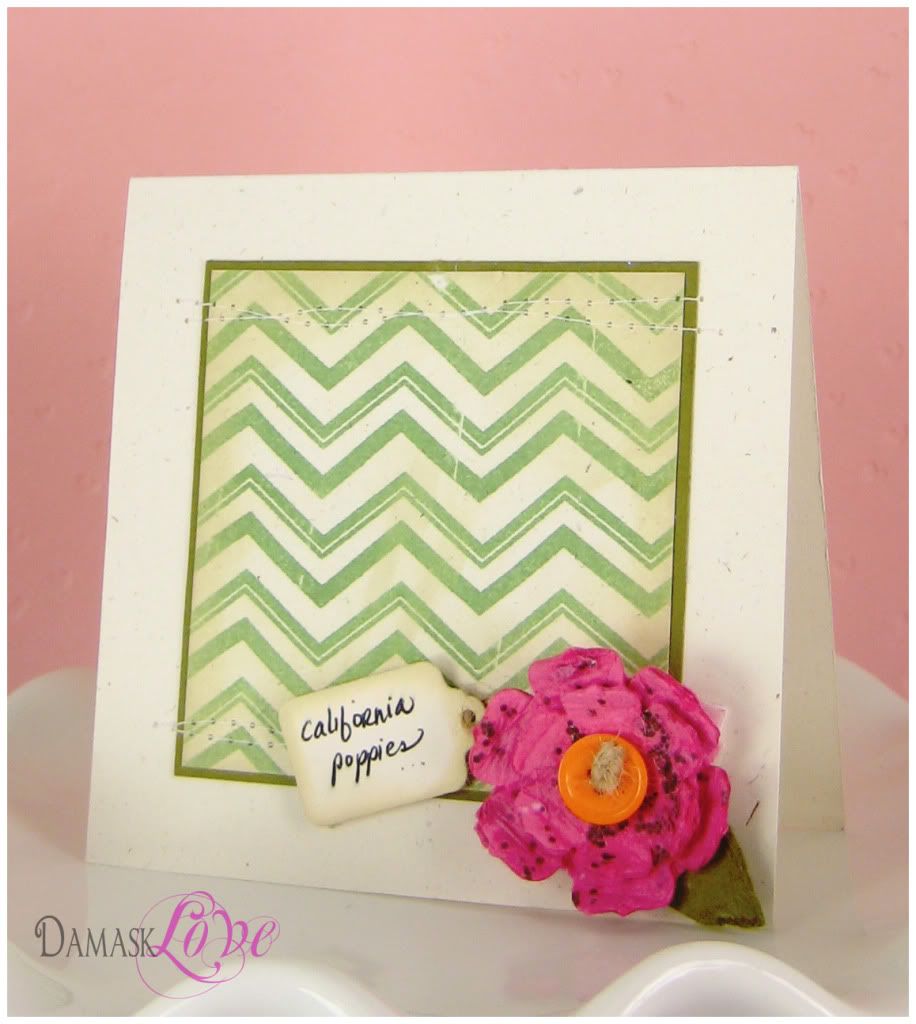
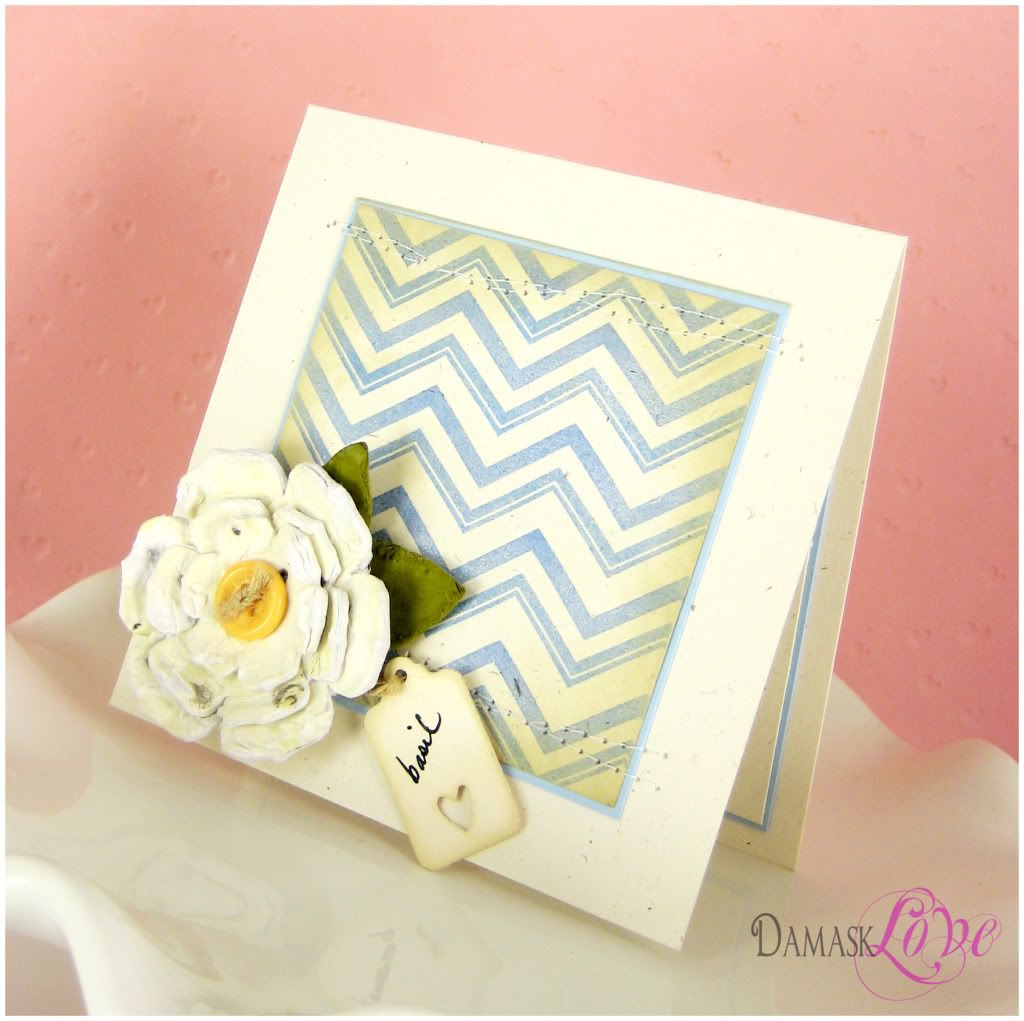
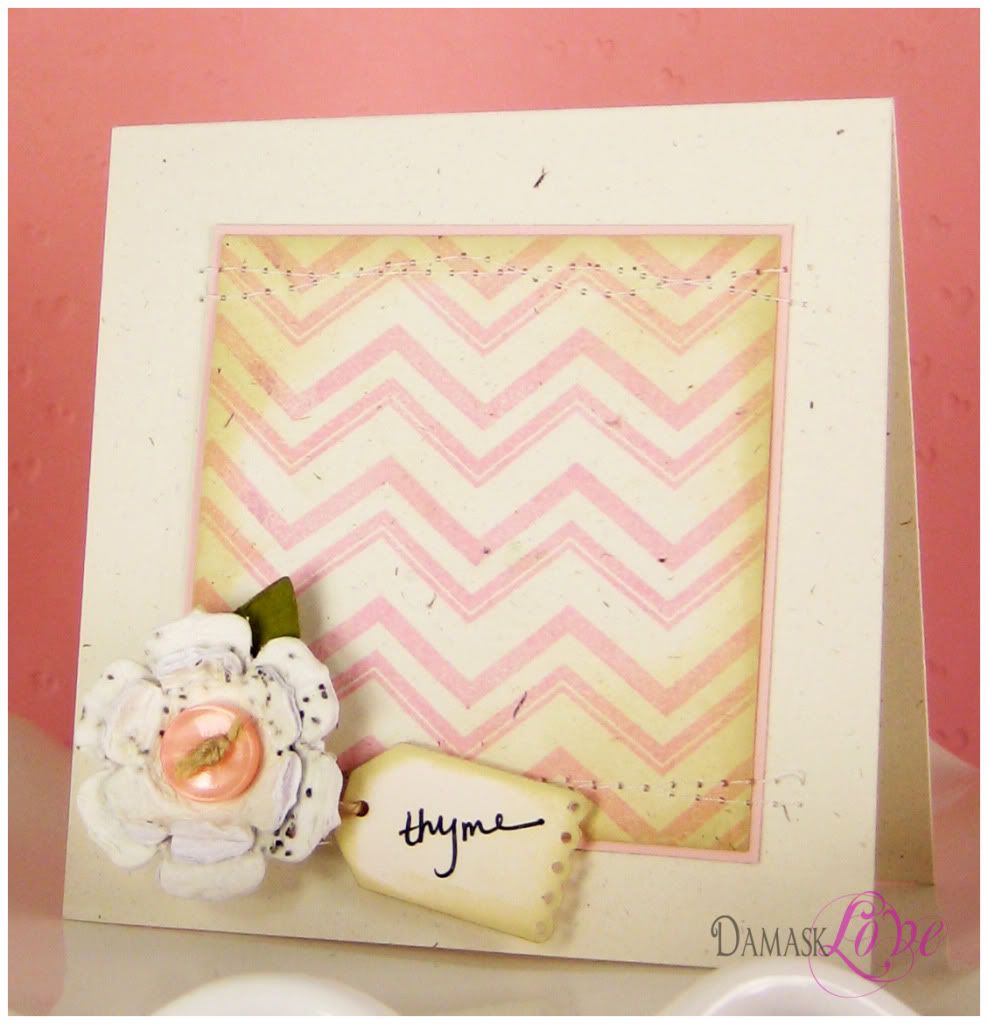
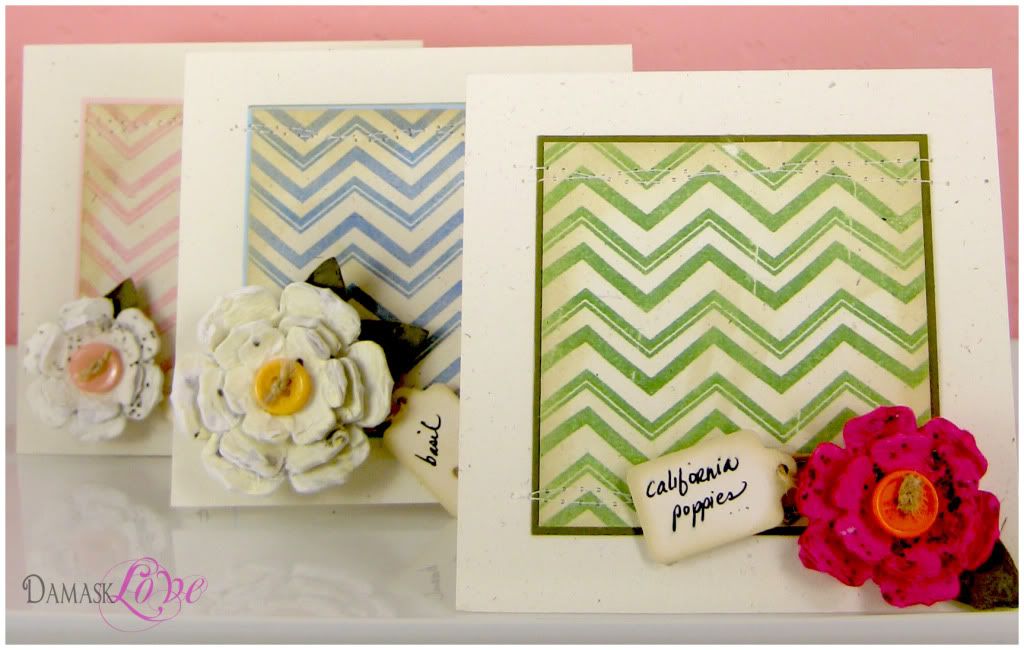
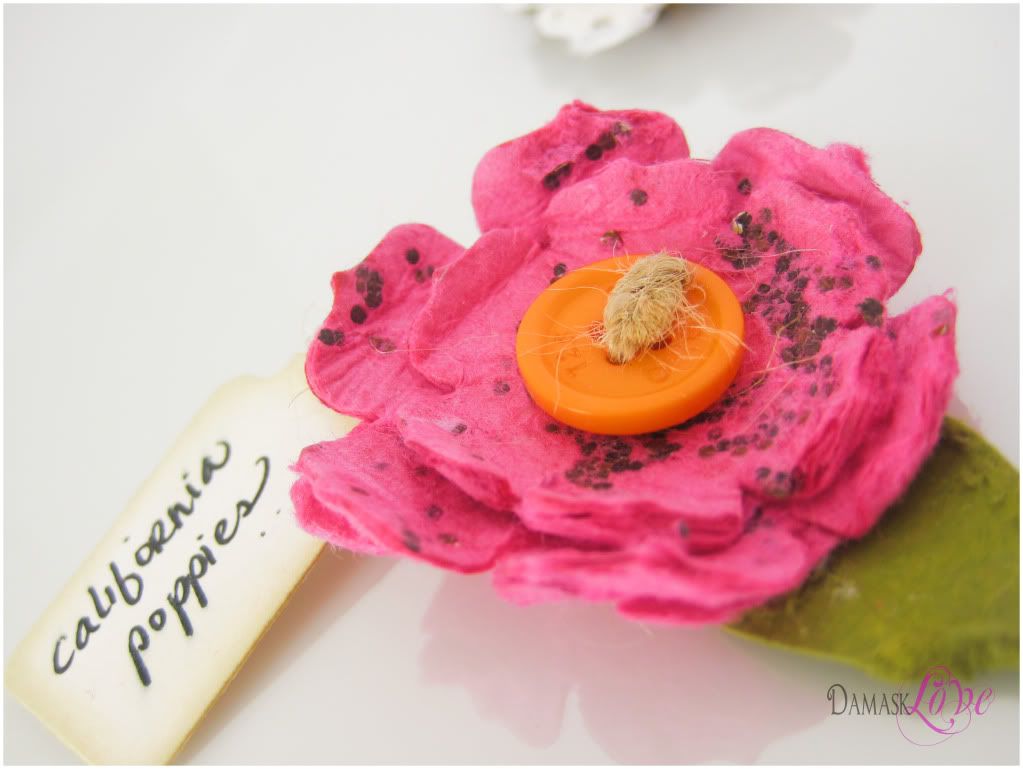
I like the look of the seeds on the flower, so I let them be visible. You can certainly hide the seeds by using the back of the paper as the front of your flower.
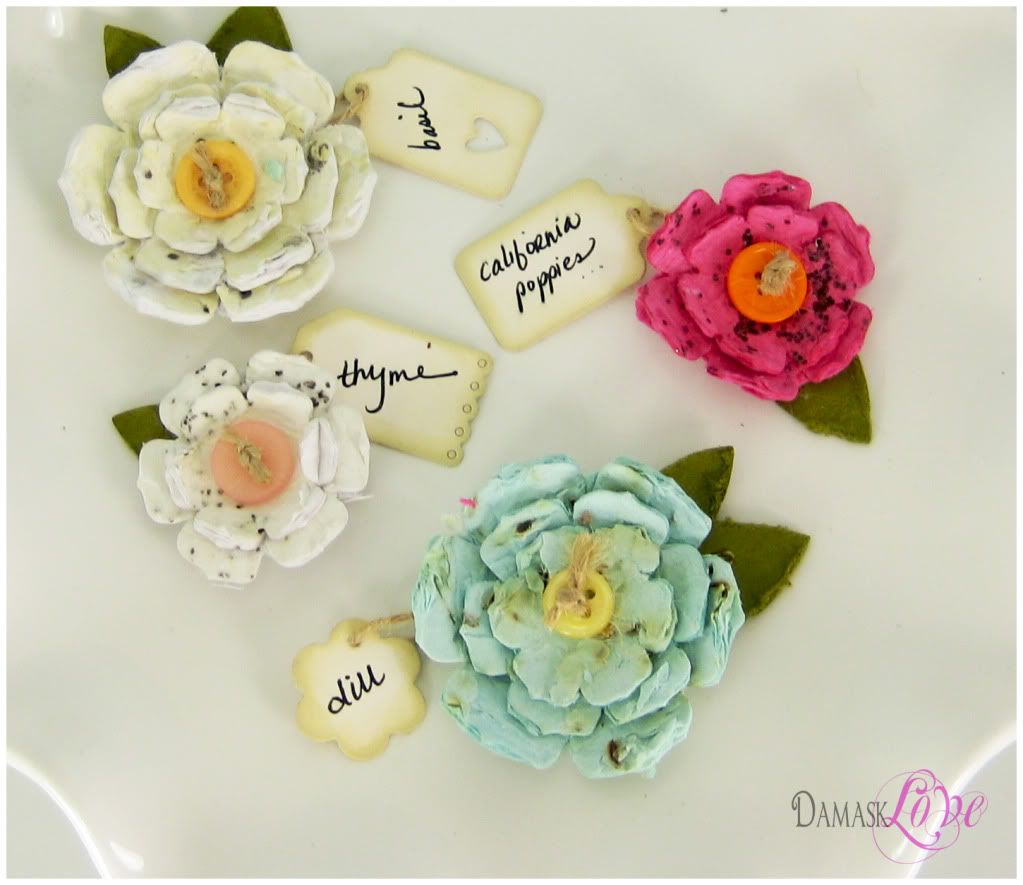
With all of that done – just add the flower embellishments to a card or tag!
You can even pair this up with a sweet miniature terracotta pot, a bag of potting soil to complete the gift.
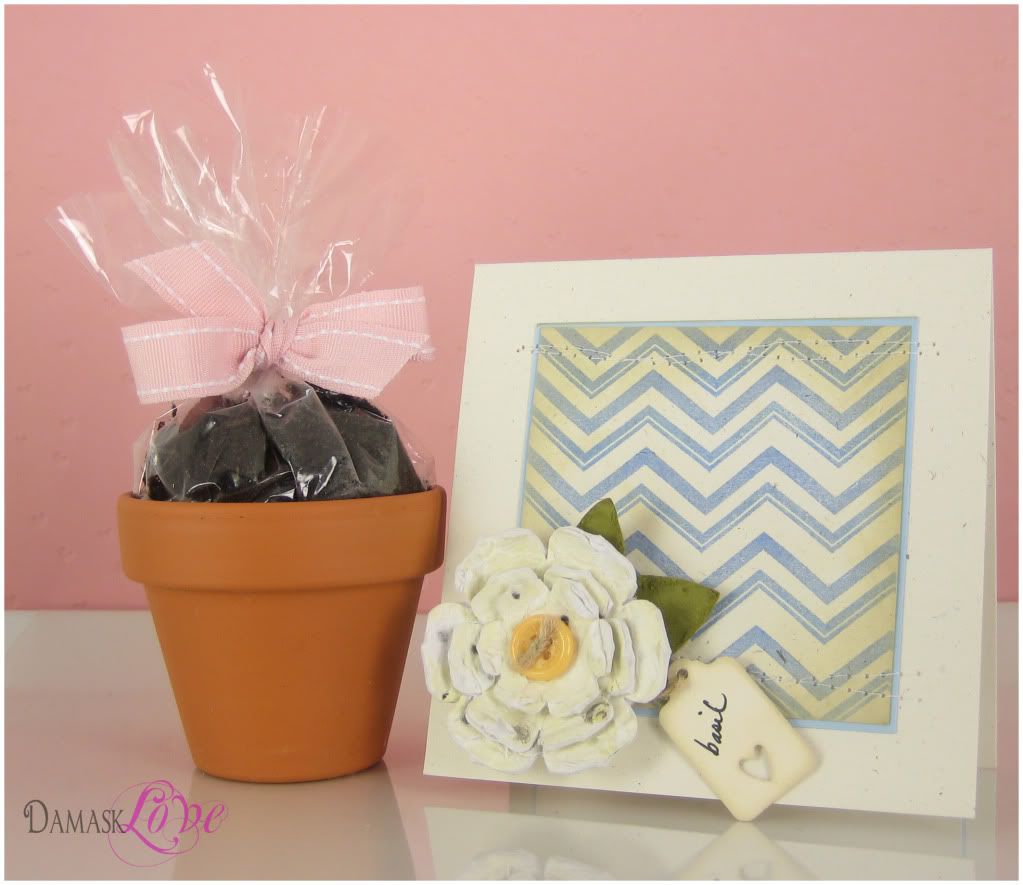
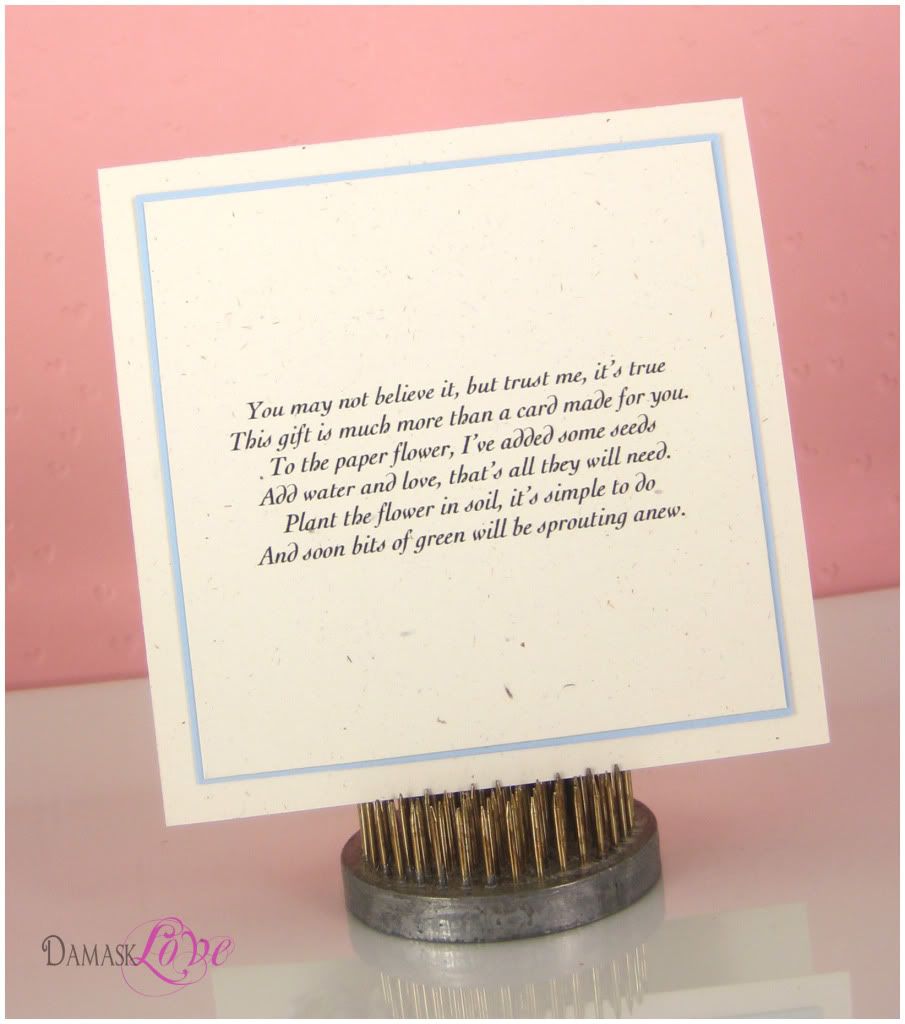
And on the inside of the card – a little rhyming ditty to instruct the recipient!
I’ve been wanting to include more involved projects on my blog for a while, and now, I can finally check that off my list!
Now – get back to hopping through those blogs! There is tons more inspiration waiting for you!
Adios Damask Lovers,
Amber

Woah, Amber! You outdid yourself! You MADE YOUR OWN PAPER? Holy Christmas! Beautiful results, though, and beautiful cards.
Hi Amber I’m new here and I must say you are quite the artist!!! Love the detail and yes I made it all the way to the end of your post and never even thought of … you are just awesome!!! Thanks for the inspiration in every way. I know what I’ll be creating next 😉
Wow, wow, holy cow wow!!! This project is truly incredible. Martha and Oprah should be nervous!!! This is just the most clever idea and I love your packaging with the soil and terra cotta pot. Simply adorable!!!
Fabulous, Amber!! So creative! Love your work. The cards are beautiful and the flowers are gorgeous.
Wow, Amber!! This is beyond cool – how in the world did you come up with this???? I am shocked at your creativity – literally jaw is dropped right now! I am so impressed. The cards are stunning & the idea is just fab.
Way to rock that challenge, Amber. The cards are lovely and even more fun because of the hand-made paper.
WOW! This is FABulous! Love that you made your own plantable paper, and those flowers are gorgeous!
Wow! This is just fabulous! I love this! The flowers are gorgeous and I love that they can be planted to create real flowers. Wonderful submission of this challenge!
This is amazing!! I am thinking of teacher gifts and hostess presents. Thank you so much for sharing. Simply amazing!
Oh my word Amber – I love how your brain is wired!! Fabulous idea and execution. Great! Love it!
Wow, Amber, this is FANTASTIC! What a great idea and great tutorial as well. Your cards are gorgeous!
WHOA — winner — LOL!!! This is simply fabulous and you are sooo clever/creative!!! :~)
This is Fantastic! First, your cards are so Cute and Pretty! I love your idea to make them ‘reusable’. Definitely placing this post in my file to try on a quieter day. Thanks so much for sharing your ‘out of the box’ idea!
OMG. Girl, you are WAAYYY out there in the creative forefront. Seriously. You should have classes. These cards are gorgeous…really beautiful and I love love love your paper. Too cool!
You make me smile {in that, could you be more clever way!} Brilliant gift idea and the distressed chevron is fantastic too!!
Robin
This is amazing. Love the final product. Just beautiful.
This is my first time visiting your site.
http://sweetvintagelady.com
Wow, what a fabulous idea
Jo x
Excuse me while I pick my jaw up off the floor!! Amazing! I would have NEVER thought of that! TFS!!!!
GET OUT!!!! THIS IS AMAZING, AMBER!!! I love that you made plantable paper!!!! BRILLIANT!!! I’m tagging this for sure!!! WOW! Love this idea!!!! Thanks for the inspiration!!!
This is AMAZING! You are so brilliant. Thanks for sharing.
Great project Amber…totally doing this one!
Holy cow, girlfriend! That was really cool! I will be coming back and re-reading this when I am finished hopping. TFS! I really love the vintagey/distressed chevrons on your cards- wonderful 🙂
HOLY PLANTABLE PAPER!!!!! I’m stunned!! you should win an award for this!!! you’re a rock star!
wow! Your flowers are amazing!! I agree with Laura, an award is in order! Love how perfect they go with the chevron print, too!
above and beyond! you are just too much!!! fantastic idea and amazing results.
You are *so* clever… seriously, they look awesome, and what a neat idea!!! I have a friend who would just LOVE this, and she’s totally worth the work. Thanks for the great tutorial!!! (I put in my post today that I felt I was channeling my inner Damask Love because I did something CAS, but now you go an do this to prove I was *so* wrong..!!) hahaha….
Ummmmm….amber? Holy cow girl! This is amazing! What a fun idea!
O.M.G.
Where on earth did you get this idea?!?! Simply out of this world! Super creative! 🙂
Oh. Your cards are great btw! 😛
Wow! Truly unique! Thank you for the fabulous idea and the wonderful design!
Wow! What a fantastic, original and very very clever idea! I love the card design and then you went and made seed flowers! Sheeh, you’re a genious!
NO WAY…..this is sooooo cool!!! I love it! 😉
Wow, this takes the cake for sure, are you sure you’re trying out for Martha’s job?
LOVE!
Absolutely fantastic!!! I am definitely intrigued and want to try this myself! You come up with the most original ideas!
WOW! This is amazing! Love the “green” set of cards!!
Oh, wauw, this is amazing!! I had a close look at the first photos of your card to see what kind of paper that was, but then I saw your tutorial and it’s just perfect!!! It has a gorgeous look this way! Love it with the chevron pattern, perfect flowers, perfect cards!!
Hugs, Wendy
Great post, Amber. Not only is the project great, but the description might be even better.
Like Wendy I was trying to figure out what paper you used at the beginning of your post, that is me being impatient. LOL Then I saw you made it, what an incredible idea! Very Martha Stewart of you, without the impossible. Love it and love your creativity.
Fabulous! Believe it or not, I have made the paper, but never used it to die cut – just as note paper. And your poem is wonderful. Thank you so much for sharing this with us. I’m saving it for some very special friends. (you might find it on Pinterest) I love taking the time to read a well done blog entry. That’s why I seldom finish a huge hop.
How. Very. Cool. Thank you for sharing this fabulous creative idea with us, Amber, and for documenting all the steps! It’s like you gave all the hoppers a gift! 🙂 What beautiful cards you made to showcase your idea! Sigh. Love it all!
Unbelievable! I loved the Chevron Stripes, I had no idea how wonderful this whole project was! Fantabulous…!
this is so cool! what a fabulous idea and the finished product is gorgeous!
What a great idea! Love the finished flowers and they look great on the cards too!
This comment has been removed by the author.
This is all kinds of awesome Amber!! Each paper, each flower, each card a stunner!!
Oh my gosh, I’m squealing so loudly in my head!!! Love, love,love, love LOOOOOOOVE this! Totally doing this with my kids this summer. {swoon}
Just incredible!!! And I think that’s better than Shakespeare… 😉
I can’t promise I would go through all this but the potential recipients keep dancing through my head! Fab idea!!
Amber, you’re a genius!! I love the card design and stitching. Your homemade plantable paper on top makes is just WOW!
Not only are your flower cards practical, but they are beautiful as well! This is an amazing idea!! Good luck with the challenge!
This is amazing!!! The cards are so lovely, and your flowers make a fabulous gift!