Ok – buckle in. This is going to be a long post with lots of photos…but if you hang in there, I think you’ll like it…it’s definitely one of my faves!
Today’s Clean and Simple Card Class lesson is all about creating card sets – and if you know me – you know I LOVE making card sets. When I was a kid, I collected stationery and the only thing that has changed is that now I make my own stationery!
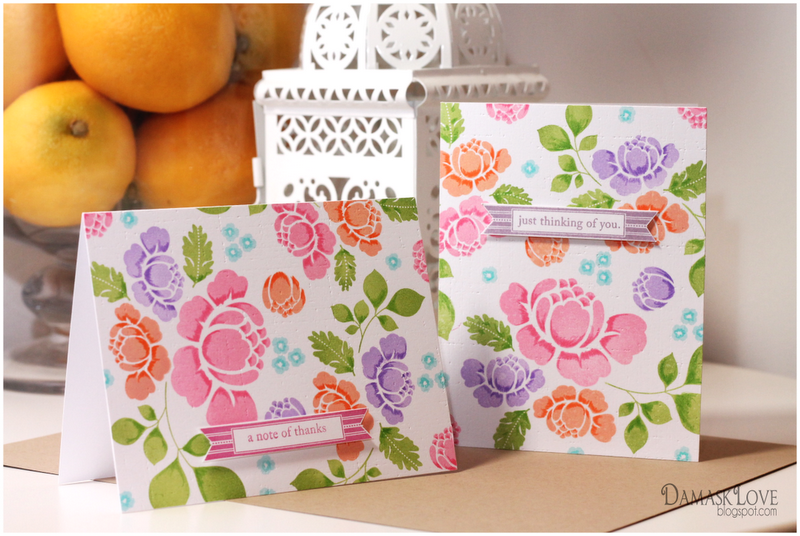
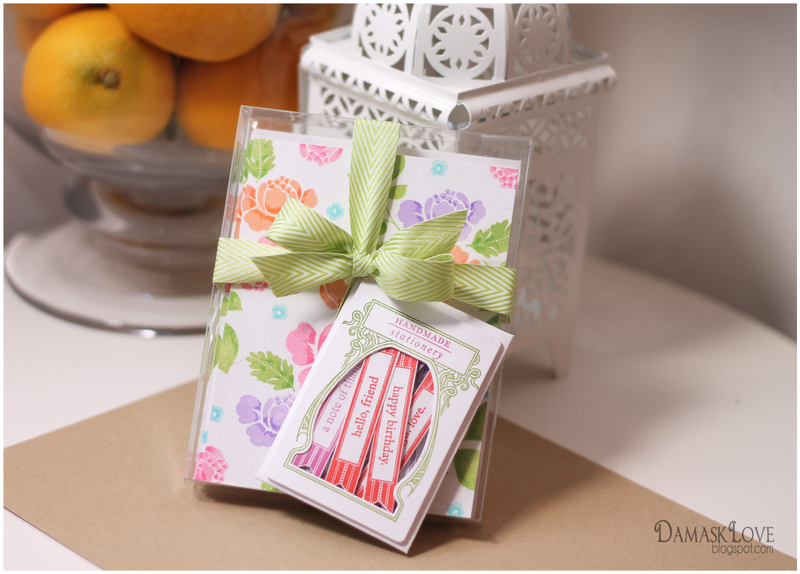
In today’s lesson, Jen McGuire created the most awesome stationery set! She stamped a beautiful background then left space on the card for the recipient to adhere her choice of sentiment strips, which Jen included in the stationery set! So clever and such a fun way to give stationery!
So….for today’s project, I took inspiration from several places. First, I loved the concept behind Jen’s stationery set, which I combined with inspiration that I recently found in an issue of House Beautiful magazine.
I saw this bedding and immediately wanted to replicate it with stamps and paper.


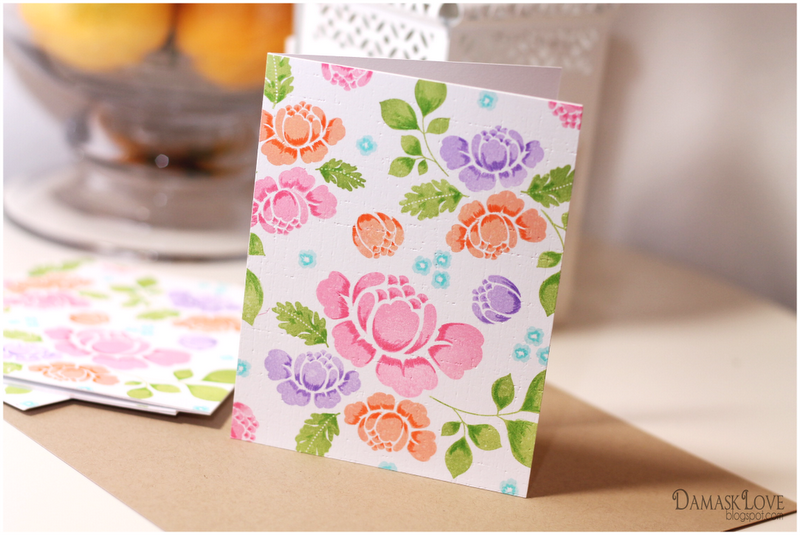
Next, I ran the stamped cardstock through my Cuttlebug along with the Papertrey Ink Canvas/Linen Impression plate. Since I was inspired by fabric, I wanted to add the suggestion of fabric to the card.
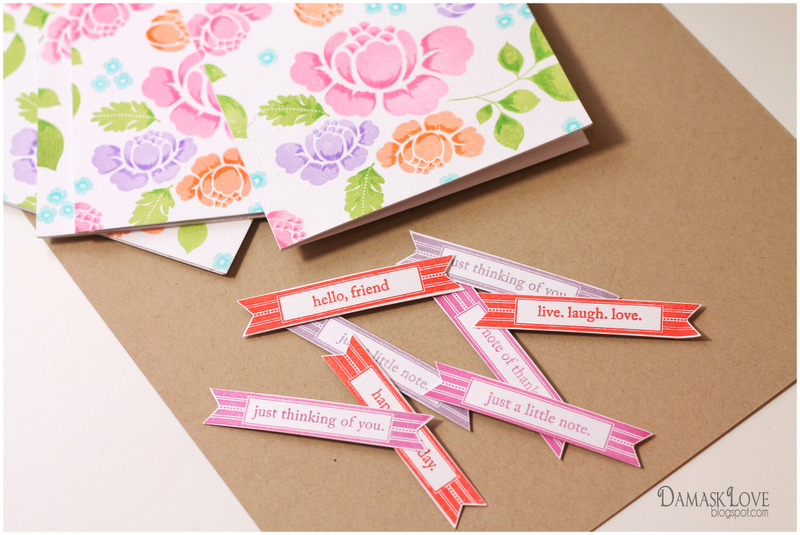
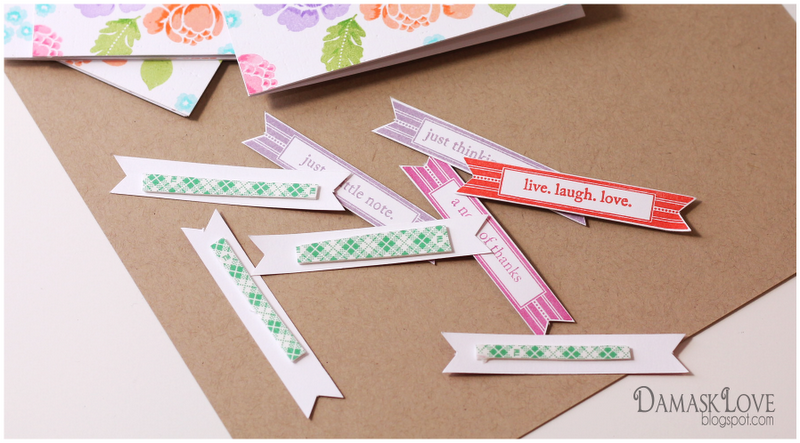
Now of course I had to package these up in a fun way, right?!
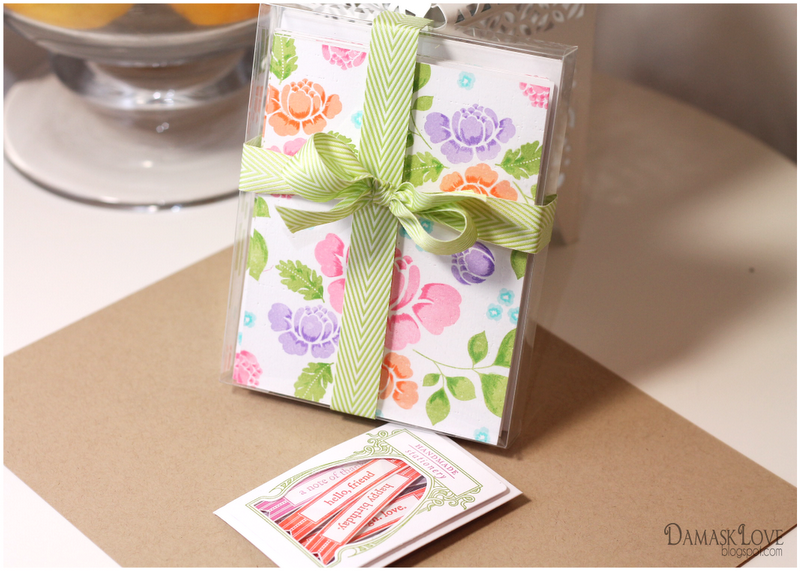
UPDATE: I’ve received a couple of questions regarding the seed packet die – and I’m glad I did because I completely forgot to include the details on this part of the project! To create the windowed seed packet here’s what I did:
1) Die cut the seed packet and frame.
2) Use a rectangle die cut or a craft knife to remove the center portion of the seed packet envelope. Don’t remove the entire front of the envelope. Just enough to account for the size of the opening in the seed packet frame.
3) Adhere acetate to the back of the seed packet frame.
4) Adhere the seed packet frame over the opening in the front of the envelope using dimensional adhesive.

This card set may go down as one of my favorite projects ever! I just love the colorful flowers and the texture of the linen impression! Top it off with assorted sentiments and you just can’t lose!
Hope this project inspires you to create some card sets of your own!!
Stamps: Papertrey Ink (Rosie Posie, Turning a New Leaf, Mat Stack 4, Mat Stack 1, Garden Variety, Simple Stationery)


LOVE it!
Wow Amber – your ideas never fall to amaze me! This set is just beautiful! You’ve just added more things to my next Papertrey order.
Thank you for your inspiring creations x
Gorgeous set of cards Amber…so pleased that I have been introduced to your blog, you are super talented and inspiring..hugs
Oh Amber these are gorgeous! Rosie is such a lovely set and you have created something wonderful with it. Love the tiny encouragement for the recipient to start papercrafting! ;o)
Wow it sure does inspire. I can’t believe the difference with the oloured pencils.
Oh Amber! I LOVE the way you added dimension with colored pencils! I’ve never liked making my own background for that very reason…too flat…but didn’t think to add this technique. I’m off to try it for myself 🙂 Beautiful cards and I know anyone would love to receive this gift.
So bright, cheerful and stunning card! Love them!!
Beautiful set, Amber! Love the colours. Love love it.
OMG, Amber! This is so stunningly, beautifully, AMAZING! You have overwhelmed me with the beauty and creativity of this set. WOW!!!
Can you say Wow! Gorgeous set of cards. Beautiful job.
Beautiful….
really creative…I love it
Beautiful set, Amber. I’ll have to bring out my colored pencils.
Just your usual fabulous! I don’t know how we ever got by without Rosie Posie…this card set proves my point! I love the added touch of letting the recipient choose here own sentiment and the packaging is perfect.
OMG – second card I’ve seen this morning that made me regret not ordering Rosie Posie. This is stunning and you’re right – the extra shading makes all the difference. Love the cheery colour on this drab (in Toronto, anyway) day!
l.o.v.e. it!
You’ve done it again! Gorgeous, my dear.
Love this!!
Gorgeous set!!
LOVE LOVE LOVE~
Beautiful! The pencil really does add so much!
Awesome!
Wow!
Oh, Amber! How you used my favorite Rosie Posie is just amazing! The colored pencil shading added so much! I am definitely going to try that! Very beautiful card set! And I just love how you packaged up the sentiments! Too cute!
This is beautiful! I love how the color pencil shading really makes the flowers pop.
Wow, this is amazing! I love everything about this project!
PERFECT… I have managed to resist Rosie POsie so far, but you’re not helping my resolve…..
I love these!!
No way! Amazing!!! How have I missed you blog all this time. You are nothing short of amazing! Love this set and what you did with the sentiments , is genius ! Thank you so kindly for sharing your projects with us.
Not only your project are always top notch and beautiful, I love the fact that you take the time to explain what you had in mind and exactly how you did each step of the way. Thank you.
Wow, these cards look fabulous. Amazing the effect the coloured pencils have on the overall finish.
I just LOVE getting your posts! You have to be one of the most unique stampers out there! So out of the box and I adore all your hints (shading with pencils for depth) and you AREN’T on PTI Team because………????? 🙂
WOW!! Another jaw dropper from you!! I really do not understand why you aren’t on the PTI DT yet. You do such amazing things with such elegance.
Oh my word. So pretty!!! I love them!!
Who wouldn’t love to receive this card set as a gift! The flower colours are just so pretty and the shading with the coloured pencils really does bring them to life!
Day 10 was one of my favs in this class – actually they all are. LOL
Your card sets are beautiful and would be treasured by anyone receiving them. Just gorgeous!
Theses are just wonderful. I was wondering about how you packaged the sentiments. Did you cut out the window somehow on the seed packet, too? Are the sentiments not in the seed packet envelope? If you could explain this, I would be grateful.
OMG! This is brilliant right down to the amazing packaging that you did!
Between you and Ashley, I am so regretting taking Rosie Posie out of my cart. Fabulous job here!
Ok, this is absolutely ridiculous!!! Like in that good way where you cannot imagine how someone could come up with something so clever!!! I am blown away! You are one amazing crafty genius. I am officially in awe.
This is gorgeous – your fabulous and creative ideas never fail to amaze me! So sad it is so very expensive for us in the UK to purchase Papertrey products 🙁
Just found your blog through Melissa Phillip’s blog and so glad I checked it out! I love the colors you used and how you made the flowers ‘pop’ by using colored pencils!
Absolutely stunning, wish I could see the impression effect, but even with out – these are “drop dead gorgeous”. Love that you put the sentiments in a “seed packet” – pure genius :o)
Very pretty set. Love the vibrant colors!
Stunning…
Absolutely gorgeous! I love the effect you created with the pencil crayons.
Oh.Em.GEE!! So they’re a little busy to be considered true clean and simple – but they are still one layer cards (until ya stick the sentiment on) and simply stunning! Colouring with the pencil totally finishes the card! I love this set, Amber – thanks for sharing. xxx
Absolutely beautiful!
What a beautiful set of cards. I love the colors.
Eveline.
VERY IMPRESSIVE AND BEAUTIFUL!