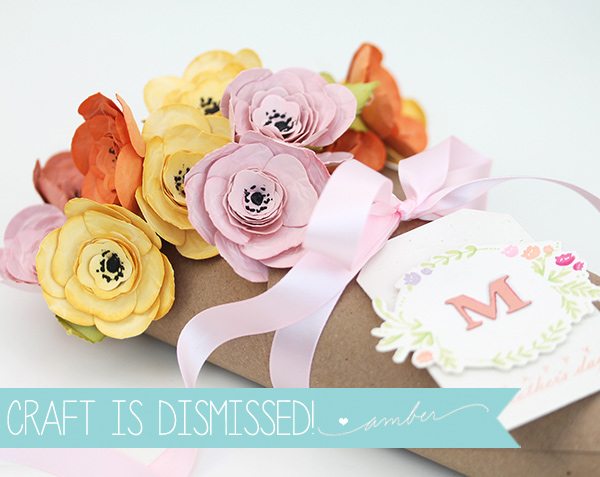
We are no strangers to paper flowers around here. There’s this post, which is one of my favorites…and then there’s this one, that is great for the holidays. Today’s post though…it’s sort of like the Diana Ross, and those other posts were the Supremes. Those other posts were good, but this one is special. It’s awesome.
Now, you’ll need to have some skillz to pull this one off, but honestly, if there were ever a reason to increase your craft room abilities…this paper flower bouquet is the reason. It will take some time to assemble, but with Mother’s Day around the corner, this project is well worth the time to make something special for mom.
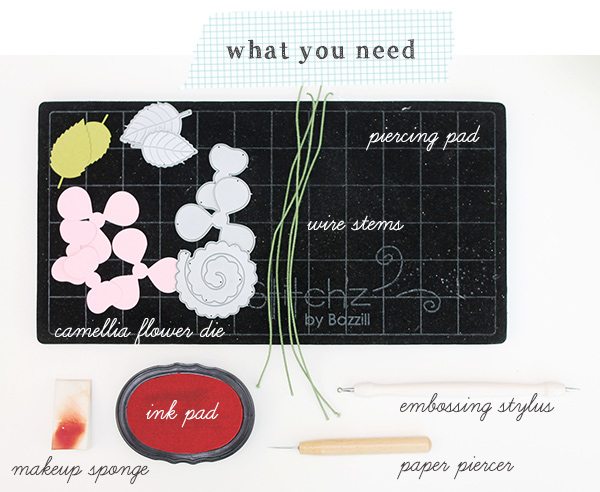
You may already have a well-stocked craft room with these supplies in reach. If you don’t, now might just be the time to get them. With all the bookbinding I’ve been doing lately, I’ve found lots of excuses to use my piercing pad and paper piercer.
Additional Tools: In addition to the supplies shown, you will also need a hot glue gun and glitter glue.
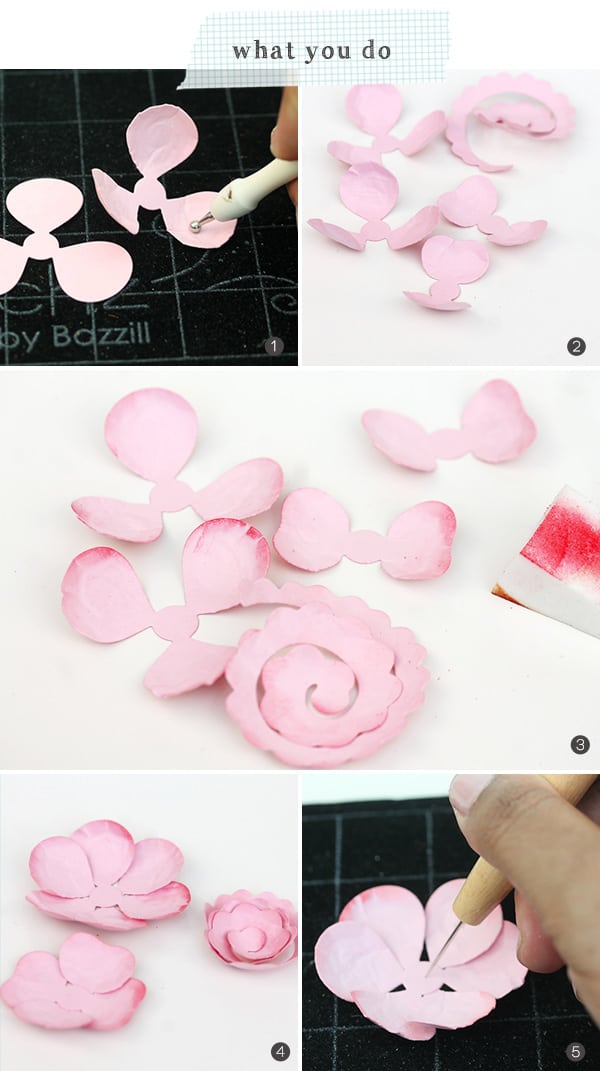 {1}Use the largest embossing stylus to firmly roll over each petal of the flower in a circular motion. This will distress the petal and cause each petal to slightly, curve inward.
{2} Repeat step 1 with all parts of the flower, which should include two large petals, two small petals and one center.
{3} Gently dab the makeup sponge onto the inkpad, then lightly brush the makeup sponge against the edge of each petal to add a bit of color. This adds dimension to the petal, making it more lifelike.
{4} Assemble the large petals, the smaller petals and roll the center as shown.
{5} Pierce the center of the larger and smaller petals with the paper piercer.
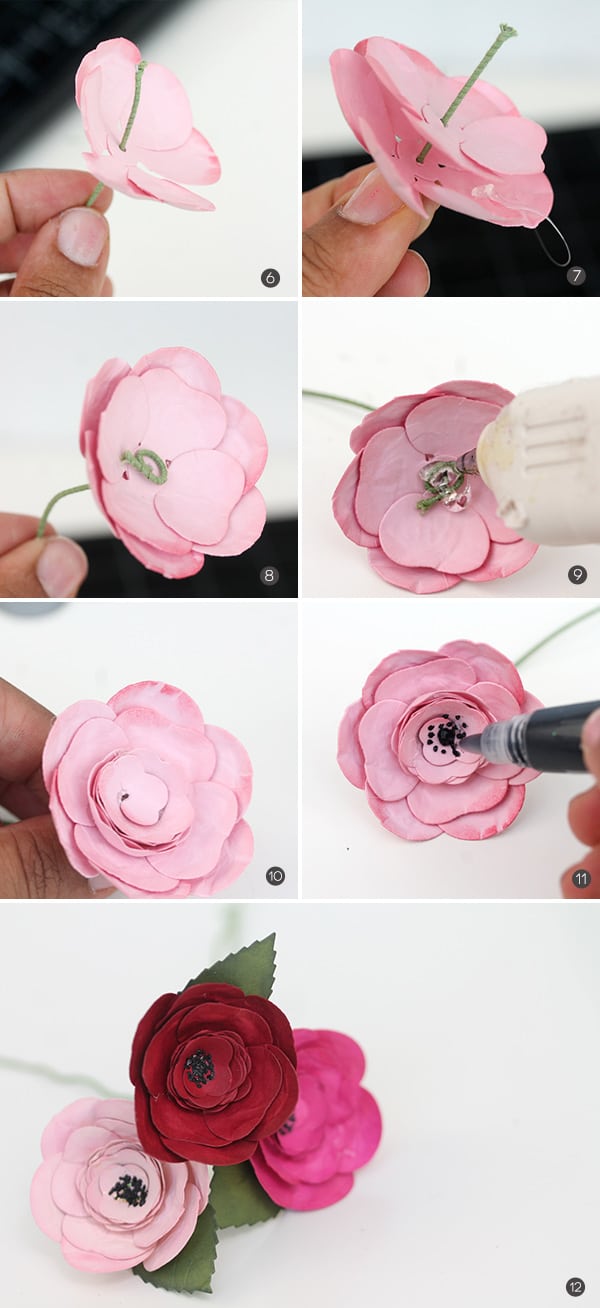
{6} Push the floral stem through the large petal
{7} Push the floral stem through the small petal.
{8} Coil the floral stem in the center as shown.
{9} Squeeze a generous amount of hot glue onto the coiled floral stem center
{10} Place the rolled flower center on top of the hot glue and press into place.
{11} Squeeze tiny dots of black glitter glue into the center of your assembled bloom.
{12} Once the flower is assembled, adhere the leaves to the under side of each flower.
 I was able to settle in with a movie and create this bouquet in about 2 hours. For me , the process was relaxing and once I got into a groove, it was not difficult at all. If you are planning to assemble your own bouquet, I would recommend completing each step on all the blooms before moving to the next. This will save on time, mess and cut down on mistakes or missed steps.
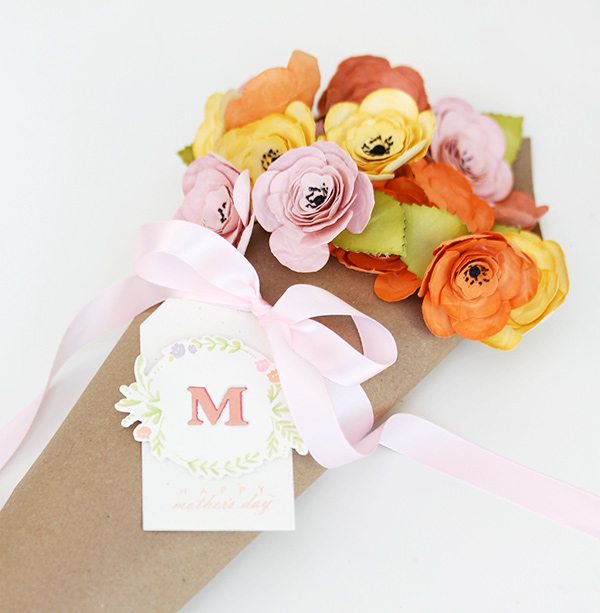
With your bouquet assembled, you’ll want to package it up to hide those not-so-cute wire stems. Here’s what I did:
 To ramp up the packaging of this bouquet, I added a beautiful handstamped tag that I created with the Wplus9 Valentine Wishes stamp set & dies. I love when I can use a stamp set outside of it’s intended holiday. The “M” monogram is a simple die cut using my absolute favorite alphabet die collections from Memory Box (similar here). The font is classic and great for all sorts of projects.



















пин ап казино зеркало: https://pinupkz.life/
Buy Cialis online [url=https://tadalafileasybuy.shop/#]Tadalafil Easy Buy[/url] Buy Tadalafil 20mg
пин ап зеркало – пин ап казино
пин ап вход: https://pinupkz.life/
kamagra 100mg kopen [url=https://kamagrakopen.pro/#]kamagra 100mg kopen[/url] Kamagra Kopen Online
пин ап зеркало – пин ап казино
пин ап вход: https://pinupkz.life/
https://apotheekmax.shop/# Online apotheek Nederland zonder recept
Apotheek online bestellen: de online drogist kortingscode – Online apotheek Nederland zonder recept
Kamagra kaufen ohne Rezept [url=https://kamagrapotenzmittel.com/#]Kamagra Oral Jelly kaufen[/url] Kamagra Oral Jelly kaufen
http://apotekonlinerecept.com/# apotek online
apotek online: apotek online recept – Apotek hemleverans idag
https://apotheekmax.shop/# de online drogist kortingscode
https://kamagrapotenzmittel.com/# Kamagra Oral Jelly kaufen
apotek online recept [url=http://apotekonlinerecept.com/#]Apoteket online[/url] apotek pa nett
ApotheekMax: de online drogist kortingscode – Betrouwbare online apotheek zonder recept
http://kamagrapotenzmittel.com/# Kamagra Oral Jelly
http://kamagrapotenzmittel.com/# Kamagra Oral Jelly kaufen
Beste online drogist: Online apotheek Nederland met recept – Apotheek Max
Online apotheek Nederland met recept [url=https://apotheekmax.shop/#]online apotheek[/url] Online apotheek Nederland met recept
https://apotekonlinerecept.com/# apotek pa nett
http://apotekonlinerecept.com/# apotek pa nett
Apotek hemleverans idag: apotek pa nett – apotek online recept
https://apotheekmax.shop/# online apotheek
New porn sites bring innovative content for adult entertainment.
Explore trusted porn hubs for a modern experience.
Feel free to surf to my web page … Buy Tadalafil Online
Inhoud voor volwassenen is beschikbaar op verschillende adult websites voor vermaak.
Kies altijd voor beveiligde inhoud hubs.
Take a look at my web site … Buy Tadalafil Online