bloglovinBloglovin iconemailfacebookFacebook iconinstagramInstagram iconlinkedinLinkedIn iconpinterestPinterest iconrssRSS iconsoundcloudSoundCloud icontwitterTwitter iconyoutube bananaBanana graphic bananaleafBanana leaf graphic bird-with-leavesBird with leaves graphic blue-chocolate-popsicleBlue chocolate popsicle graphic blue-popsicleBlue popsicle graphic cactus-flower-topCactus w/ flower top graphic cactus-pink-topCactus w/ pink top graphic cactus-yellow-topCactus w/ yellow top graphic cherriesCherries graphic coconutCoconut graphic coffee-cupCoffee cup graphic firecracker-popsicleFirecracker popsicle graphic flamingoFlamingo graphic frozen-bananaFrozen banana graphic kiwi-popsicleKiwi popsicle graphic kiwiKiwi slice lemon-wedgeLemon wedge graphic lime-wedgeLime wedge graphic orange-popsicleOrange popsicle graphic pineapplePineapple graphic pink-chocolate-ice-cream-popPink chocolate ice cream pop grahpic pink-ice-cream-popPink ice cream pop graphic pink-popsiclePink popsicle graphic pink-sundae-conePink sundae cone graphic pink-swirl-conePink swirl cone graphic pizza-slice-basilPizza slice w/ basil graphic pizza-slice-olivesPizza slice w/ olives graphic pizza-slice-onionsPizza slice w/ onions graphic rainbow-swirl-coneRainbow swirl cone graphic rainbow-waffle-coneRainbow waffle cone graphic strawberriesStrawberries graphic strawberryStrawberry graphic sunSun graphic text-helloHello text graphic text-shine-onShine On text graphic text-yayYay text graphic watermelon-largeWatermelon slice (large) graphic watermelon-smallWatermelon slice (small) graphic

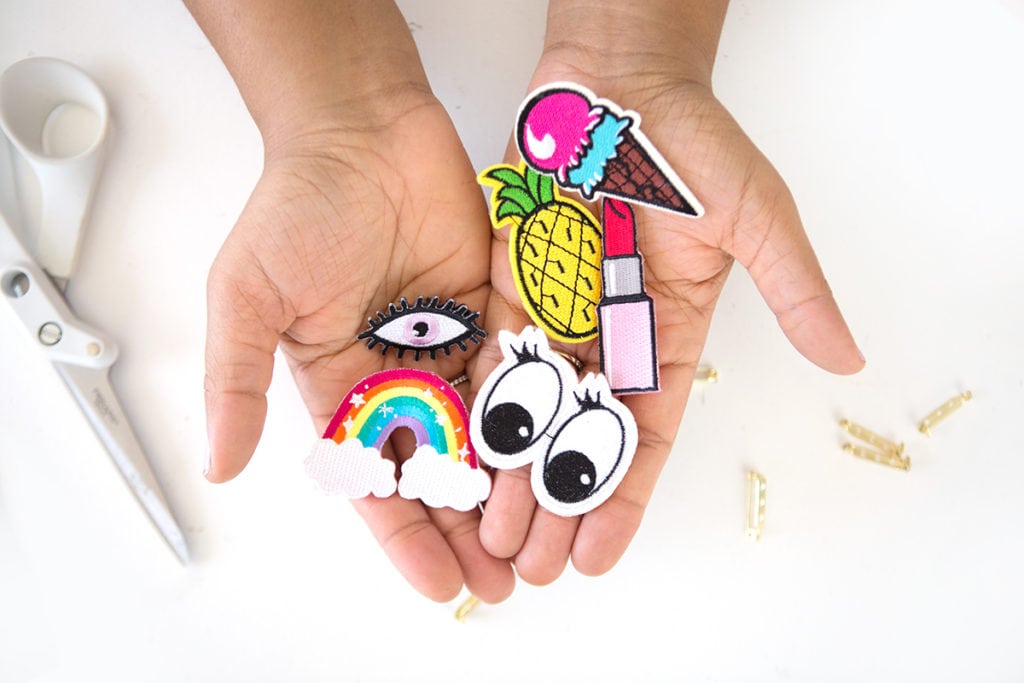
Welcome to the first ever Flair Week. May the flair be ever in your favor.

As promised, we’re making our own flair this week and this project is super easy and super affordable. I used patches purchased from Amazon and Paper Source, then turned it into flair pins. By adding felt to the back of the patch, it sturdier and not so flimsy. Also, with a pin back on the patch, you don’t have to sew and you can move your flair from one outfit to another. Check this out…

How to Turn a Patch into a Pin | damask love

How to Turn a Patch into a Pin | damask love

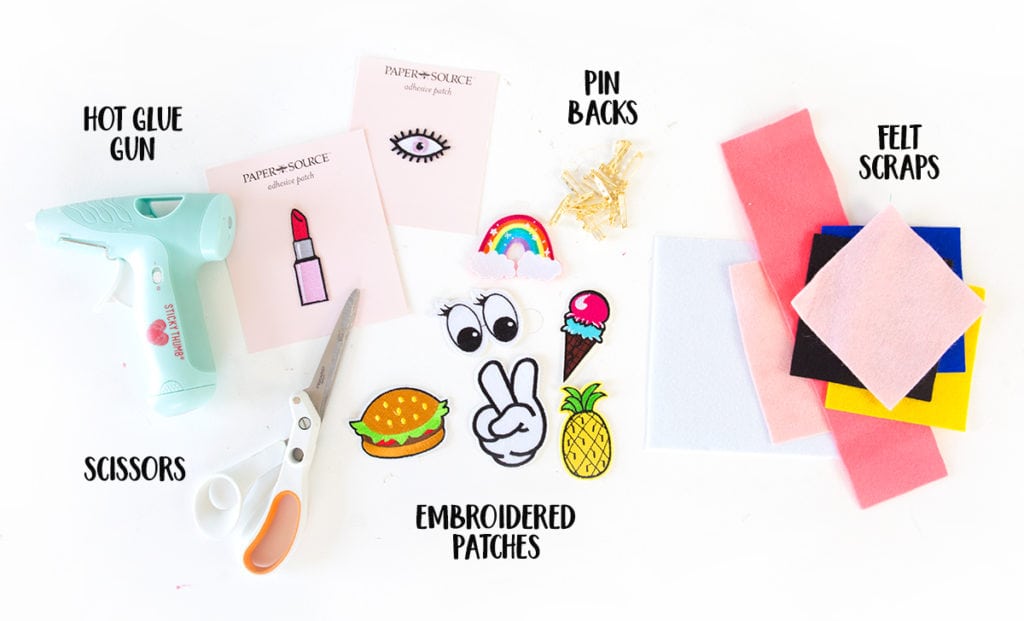
In addition to the tools above, you’ll also need felt glue…I like THIS ONE. It’s super sticky and works great for this project.

How to Turn a Patch into a Pin | damask love

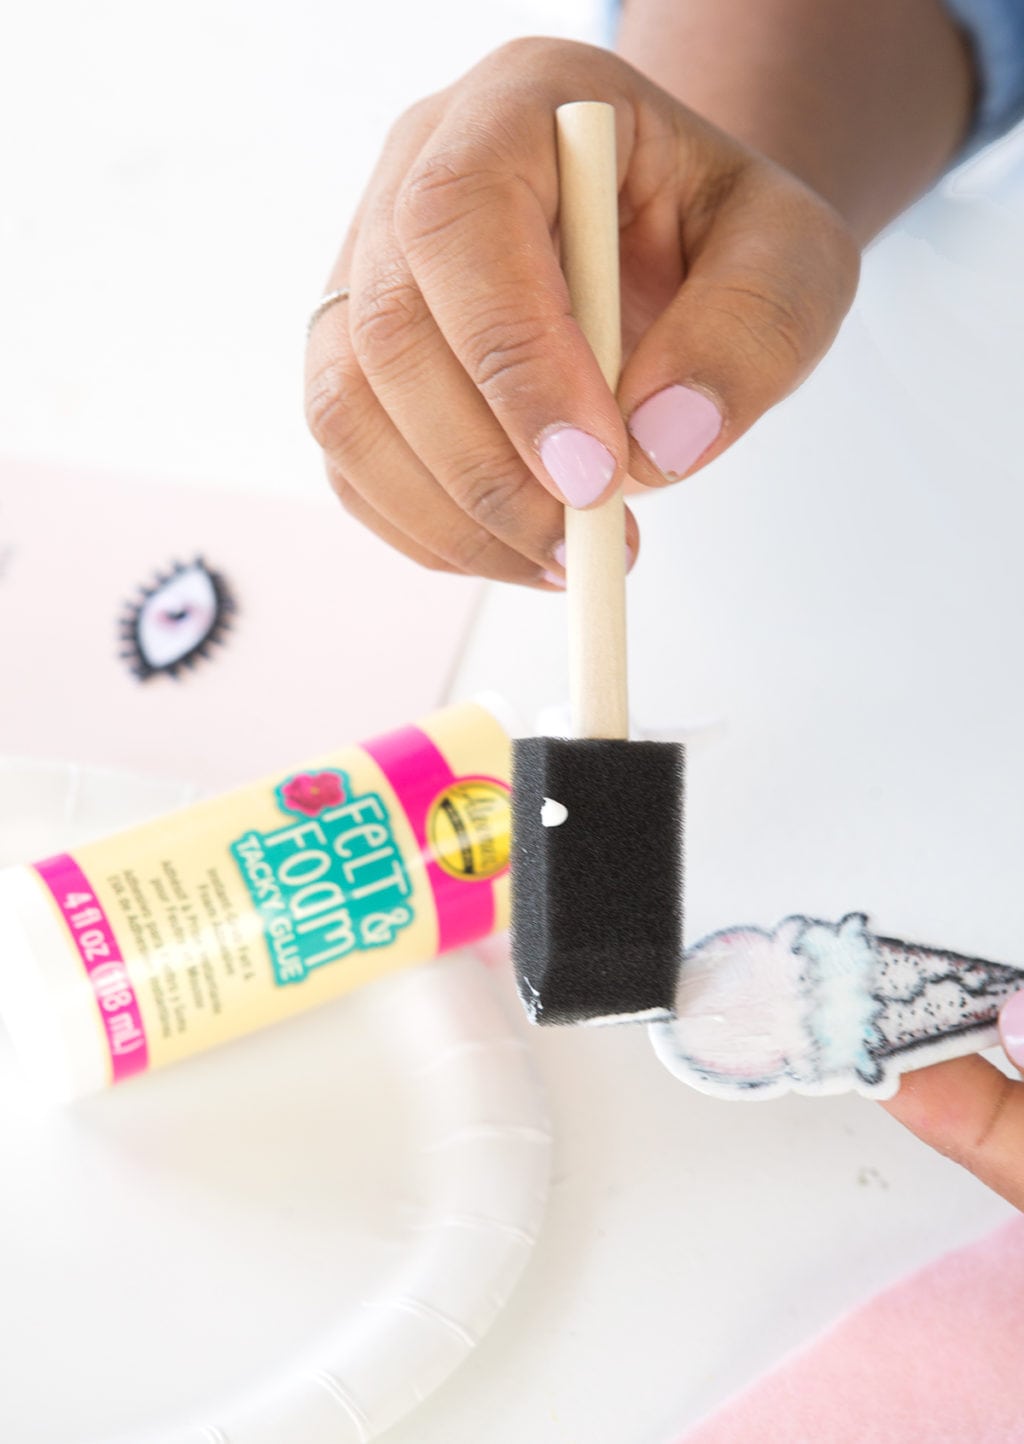
Use the foam brush to apply edge-to-edge coverage on the back of the patch.

How to Turn a Patch into a Pin | damask love

How to Turn a Patch into a Pin | damask love

How to Turn a Patch into a Pin | damask love

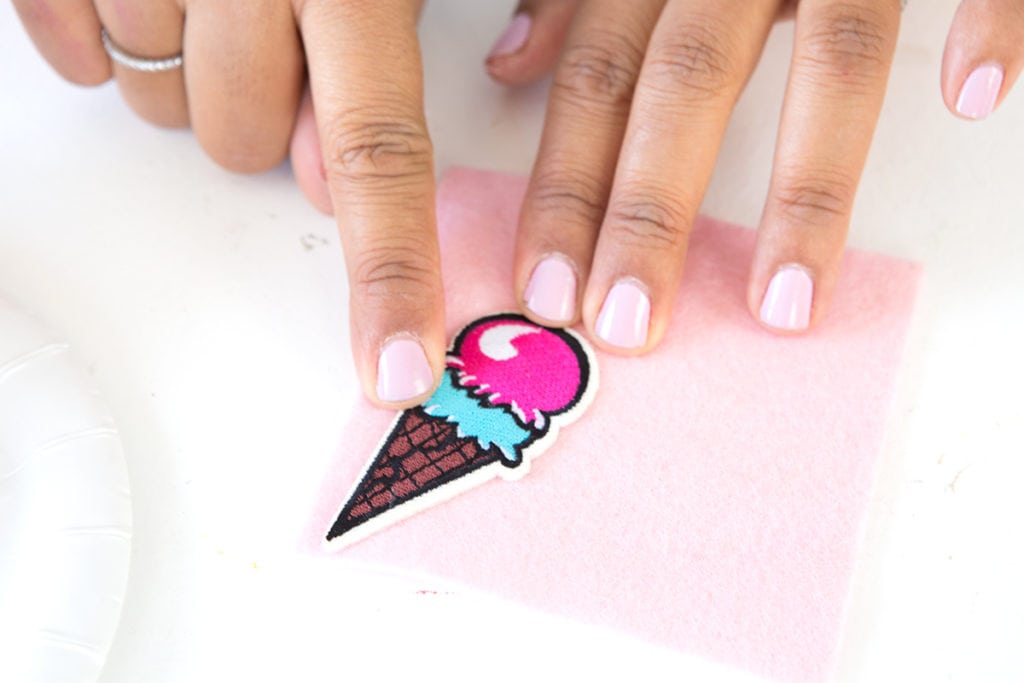
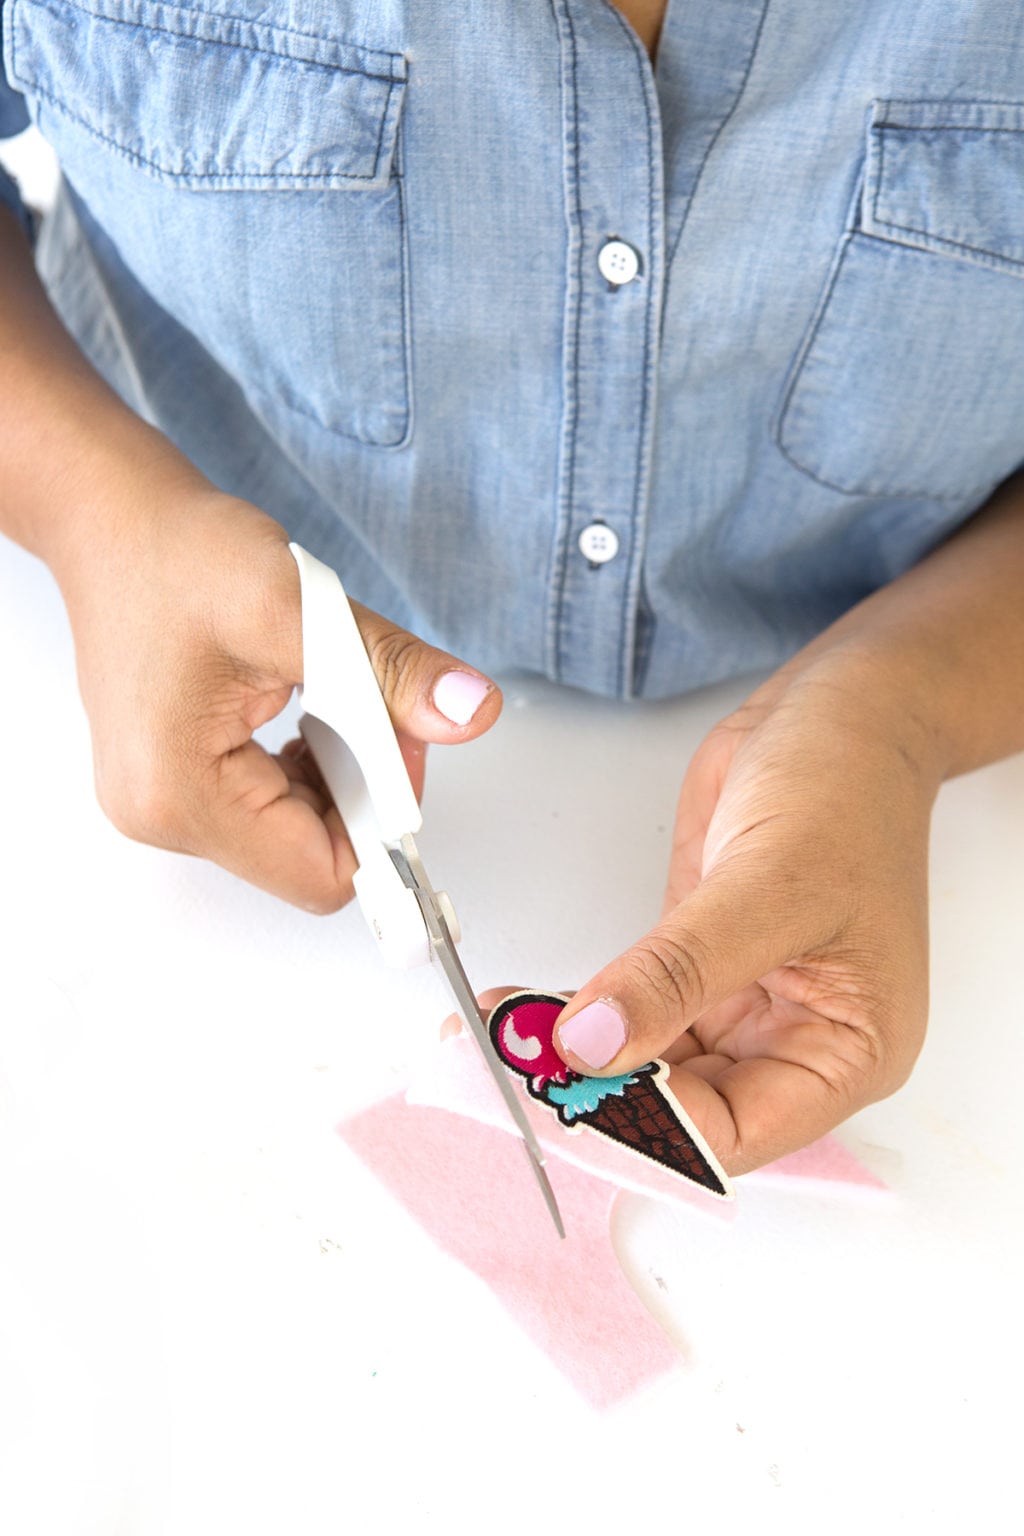
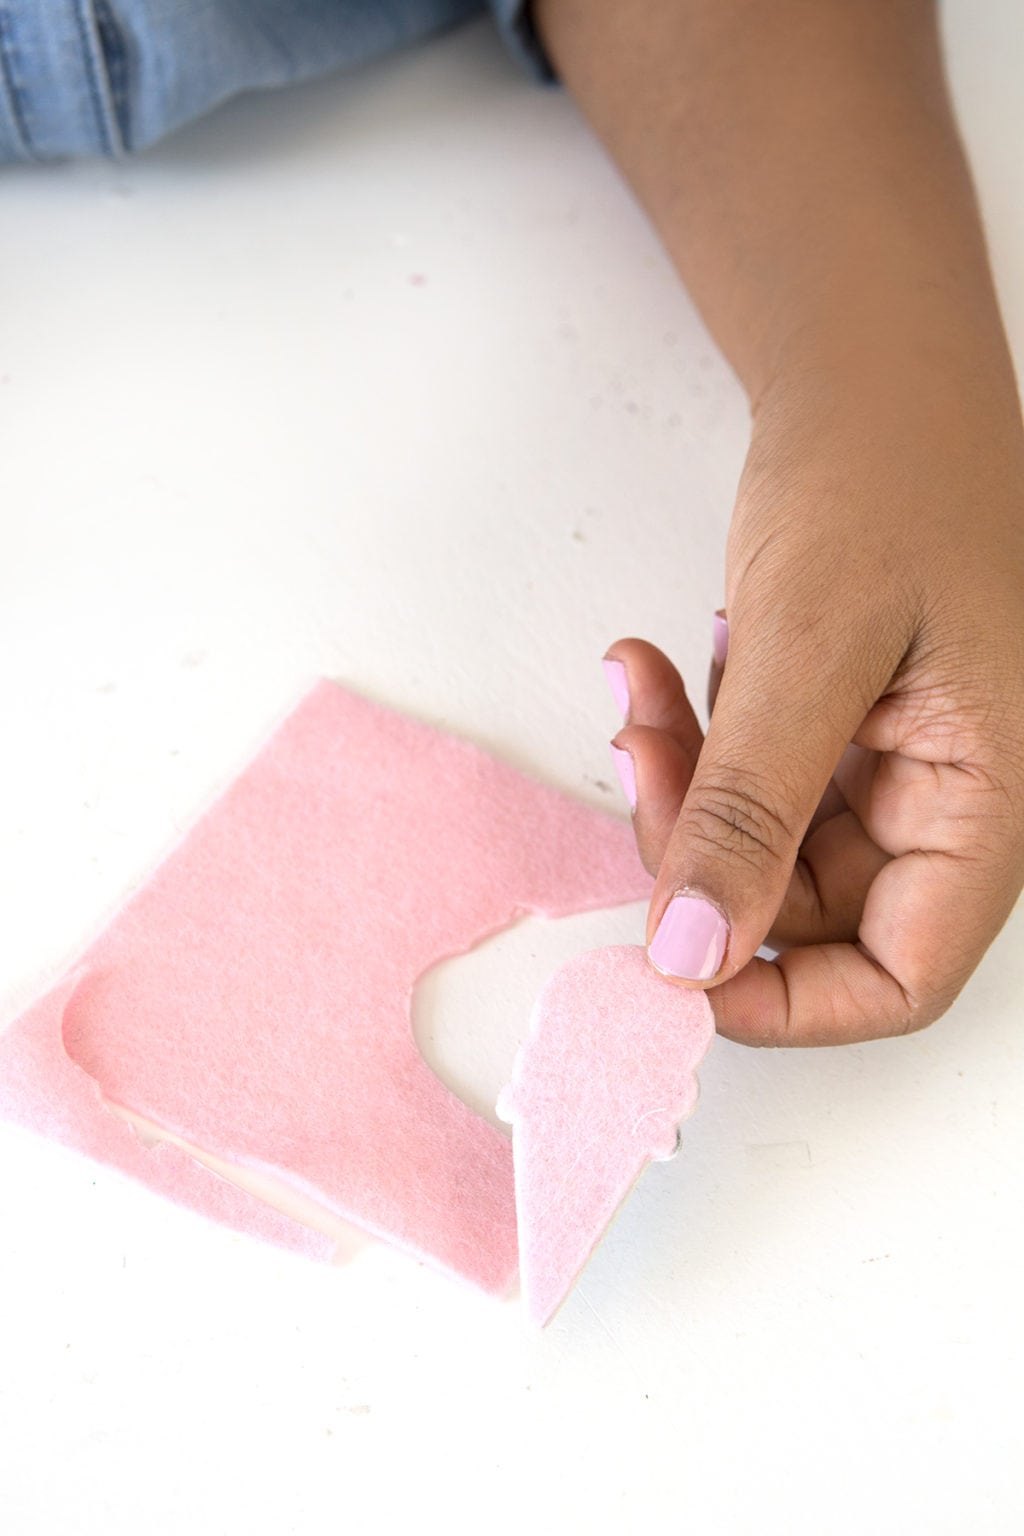
Stick the patch down onto felt then carefully cut around the edges, staying close to the edge of the original patch.

How to Turn a Patch into a Pin | damask love

How to Turn a Patch into a Pin | damask love

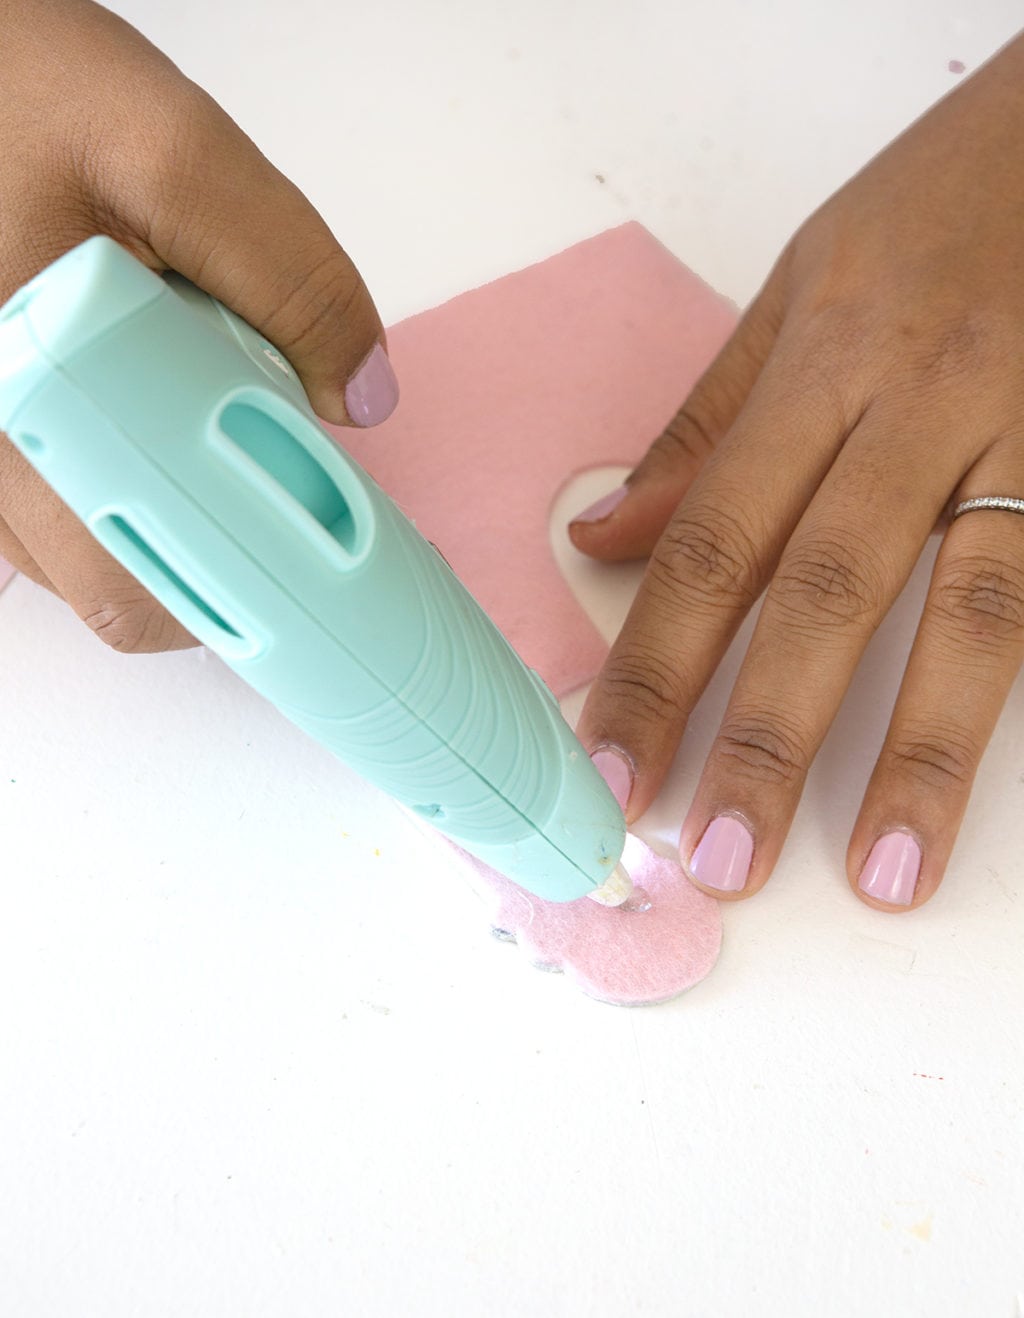
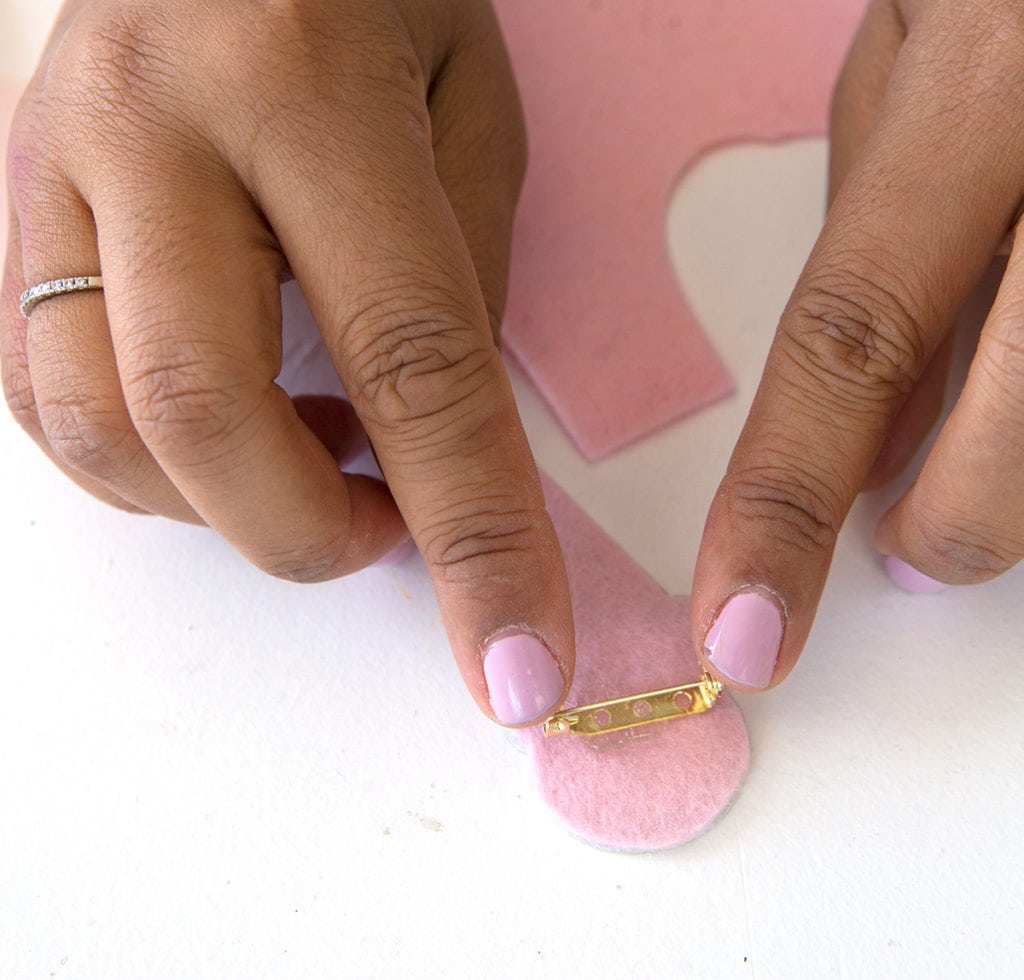
Last up, just glue a pin back onto the felt using hot glue…and you’re done!

How to Turn a Patch into a Pin | damask love

How to Turn a Patch into a Pin | damask love

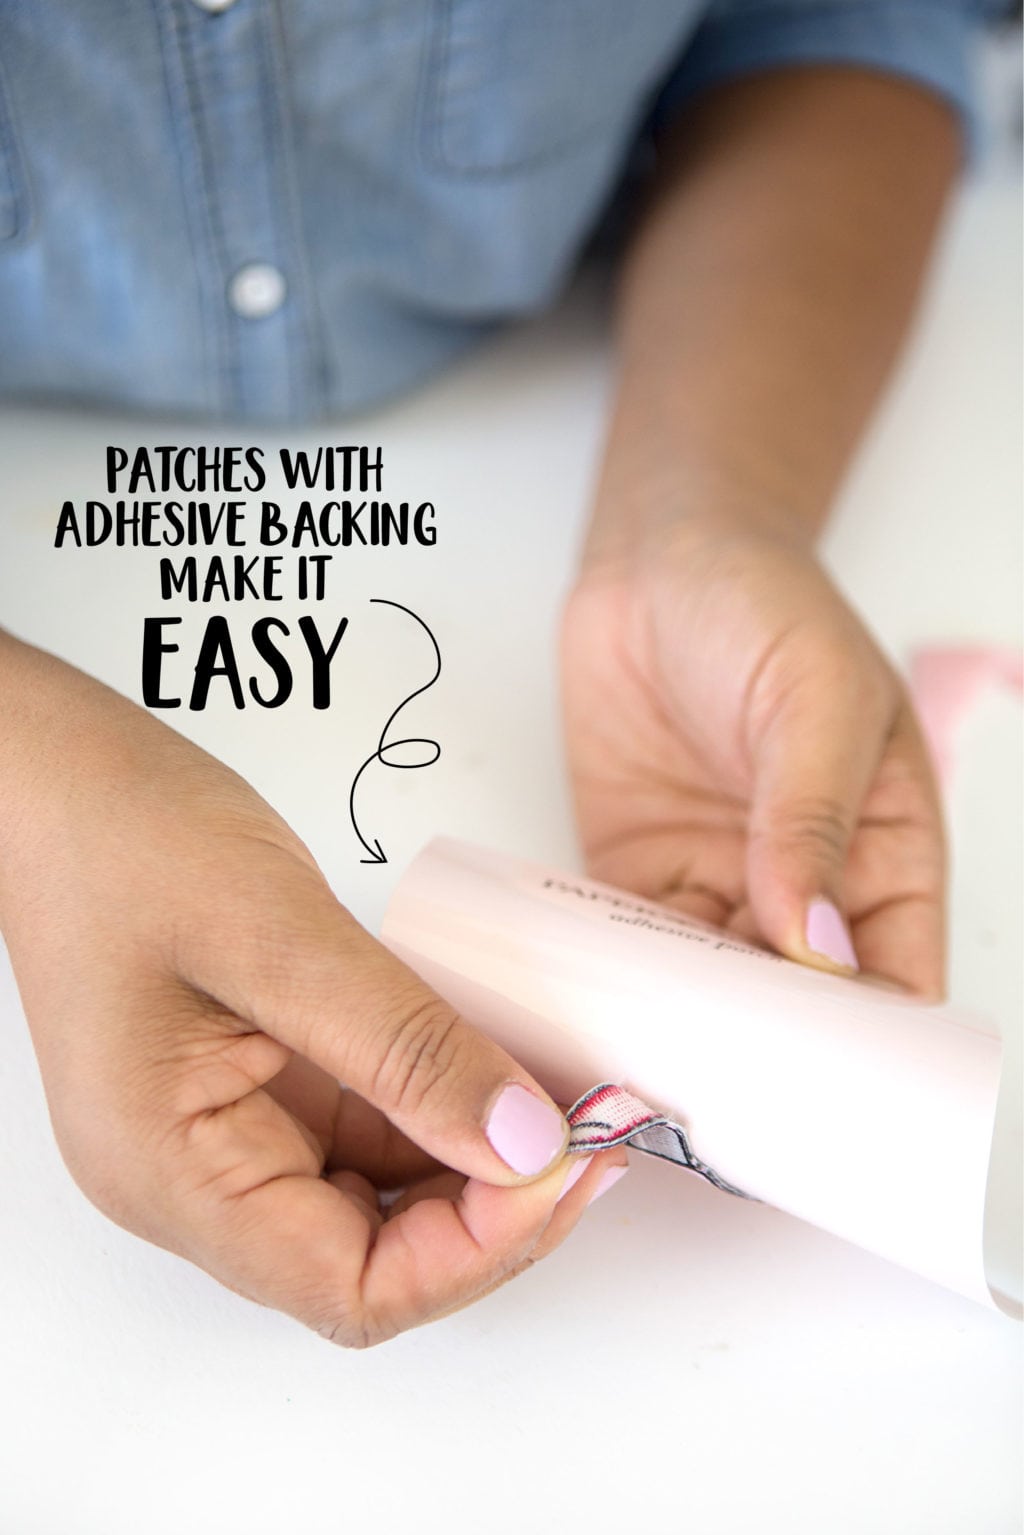
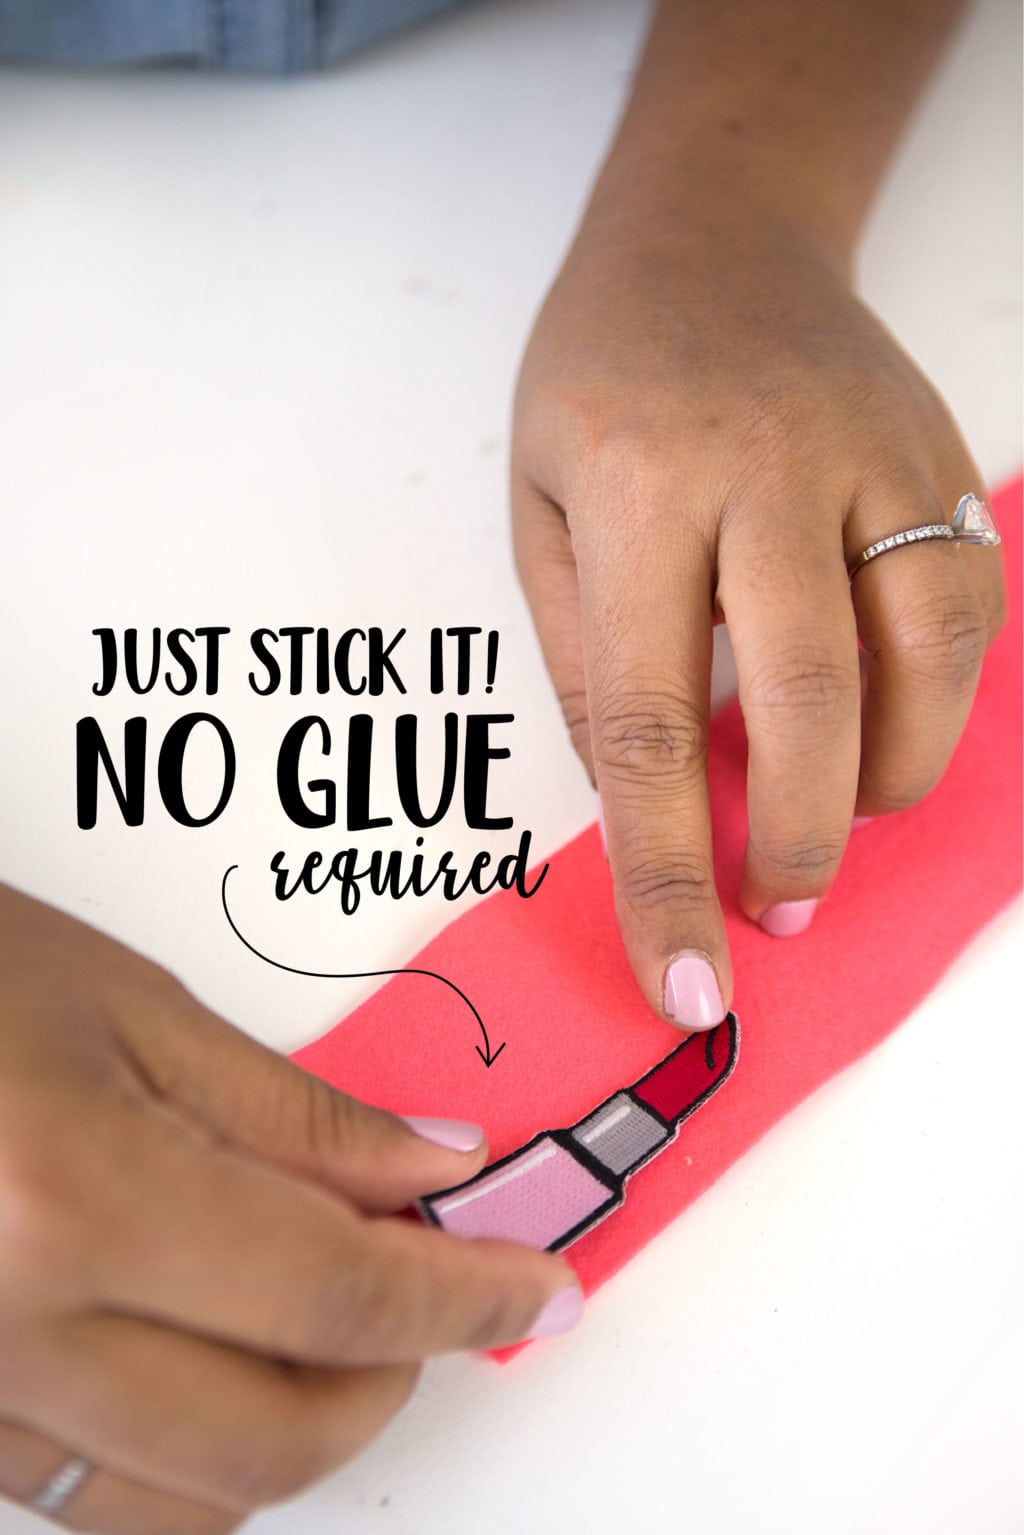
If you’re working with adhesive patches, you can skip the glue and simply adhere the patch directly onto the felt.

How to Turn a Patch into a Pin | damask love

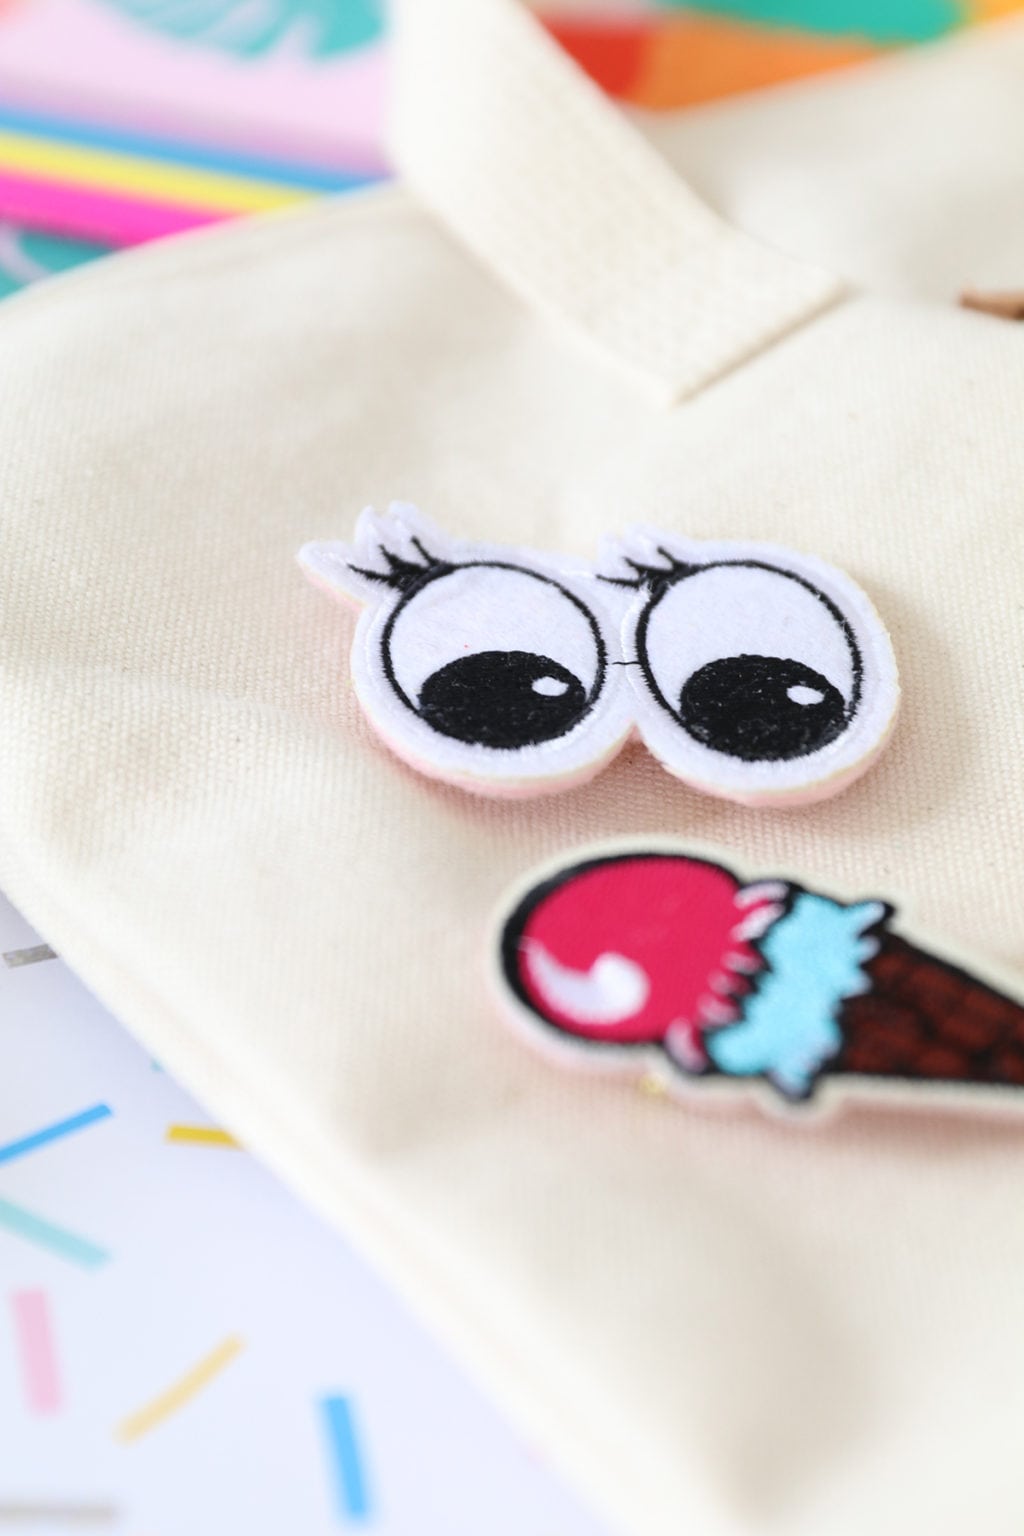
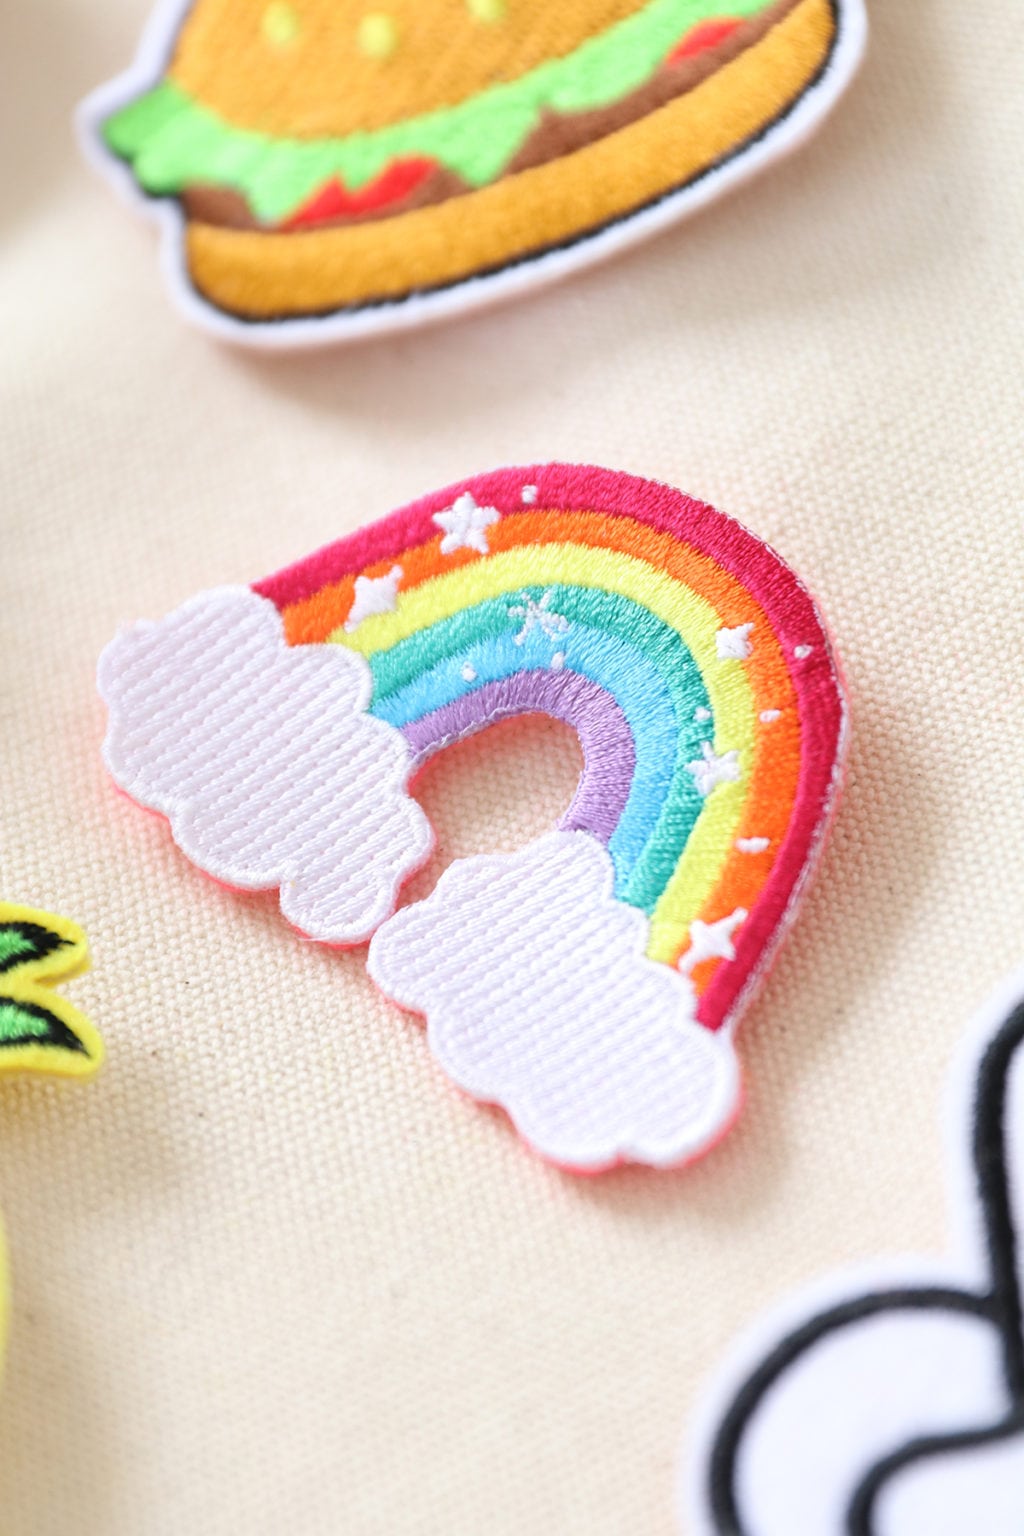
When you’re all done, it’s totally up to you how you want to use your patches. I opted for a fun tote featuring some of my favorites.

How to Turn a Patch into a Pin | damask love

How to Turn a Patch into a Pin | damask love

How to Turn a Patch into a Pin | damask love

How to Turn a Patch into a Pin | damask love

How to Turn a Patch into a Pin | damask love

How to Turn a Patch into a Pin | damask love

Keep on crafting with these other posts

6 thoughts on “How to Turn a Patch into a Pin

  1. OK, silly question here. What is the reason for gluing the felt onto the back of the patches? Man, I wish I had thought of this during my daughters’ Brownie and Girl Scout days. So many patches on so many sashes!!! Really cute idea. Amber! I so love your blog!

    1. Not a silly question at all!! So, if you simply glue the pin back directly onto the patch, you end up with a sort of flimsy, sad thing that will curl up and and get warped over time. Also, with the adhesive backed patches, you’ve gotta cover up all that sticky back with something or else you can only stick it onto one surface. Hope this helps! T

  2. I like the idea of having a pin on a patch so you don’t have to sew it. I’d like to get some for my nephews. They love to play as soldiers with their imaginations so military patches would be fun for them.

  3. Pins are becoming the new patches. A pin is a small piece of metal or other material with a design, symbol or logo affixed to it. Pins have been around for thousands of years, but recently, they’ve become popular as an accessory for casual clothing. You can also get ideas from https://packagingrevolution.net/ideas-for-turning-old-pallets-into-dorm-decorations/ source. Pins are easy to wear and can be put on purses, backpacks, shirts and even hats. They’re also inexpensive, so you don’t have to worry about losing them or breaking them like you might with jewelry.

Leave a Reply

Your email address will not be published. Required fields are marked *

This site uses Akismet to reduce spam. Learn how your comment data is processed.