All I can say is thank God that my mother made me go to graduate school and get a job, otherwise I’m pretty sure I’d be running amok, spraying graffiti on the sides of buildings. Now, don’t get me wrong…it would be pretty graffiti, but I can’t guarantee that it would be 100% legal graffiti. See – I have a spray paint addiction. I want to spray paint everything! Spray paint is the cheap, quick fix for all things plain. I dare you to think of one item that couldn’t benefit from a smooth sheen of gold or neon pink.
Yep…told you.
In my craftroom, I have about twenty cans of spray paint and I’ll take any excuse to use em! Today I’m cashing on my spray paint obsession. Whoever decided that pencils should be yellow clearly did not know me, because we would have had a long talk about that one. Clearly pencils are supposed to be gold. Duh. Enter: spray paint.

For Pencils
- Pencils
- A saw, handheld works just fine
- Metallic Gold Spray Paint (I prefer Rustoleum Metalic spray paint. The coverage is amazing)
- Hot Glue Gun
- Rhinestones
For Packaging
- Clear & Simple Stamps Favor 7 Die
- Clear & Simple Stamps Hearts Die Collection
- Clear & Simple Stamps Love Cupid Stamp Set
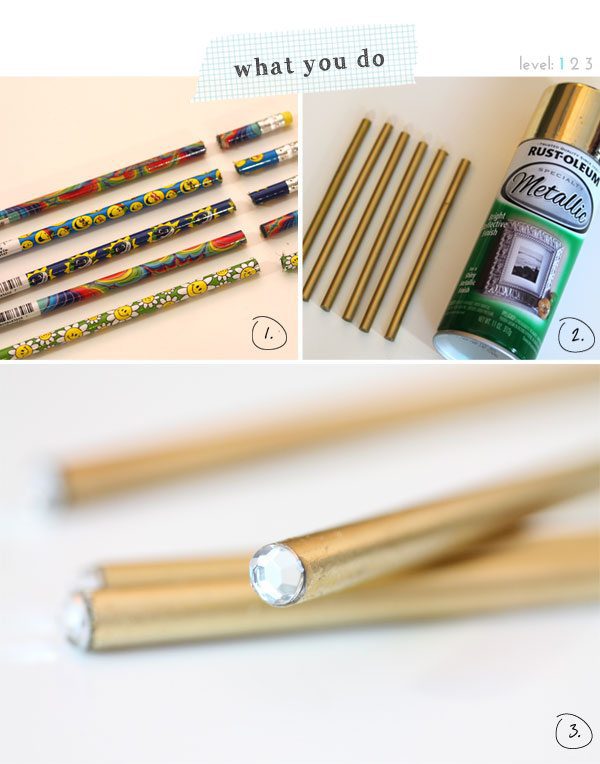
{1} Use your saw to trim off 1.5″ of the pencils. By trimming off this portion of the pencils, they will fit into the Favor 7 box and you will have an end where you can adhere the rhinestone.
{2} Spray paint the pencils with gold spray paint (or color of your choice)
{3} Adhere rhinestones to the “pretty” end of the pencil (the end that would have previously been the sharpened end of the pencil). Sharpen the pencil on the sawed end and you’re all done!
This project is super simple which is why I gave it a Level 1 rating! You can add more elements to this project by stamping a sentiment on each of the pencils, just like I did on this post.
Now, if you’ve been reading Damask Love for …like…um…a day…you probably know how much I love packaging. I guess if that whole graffiti thing fell through, I’d go work in the gift wrap department. Probably less likely to land me in trouble, huh?
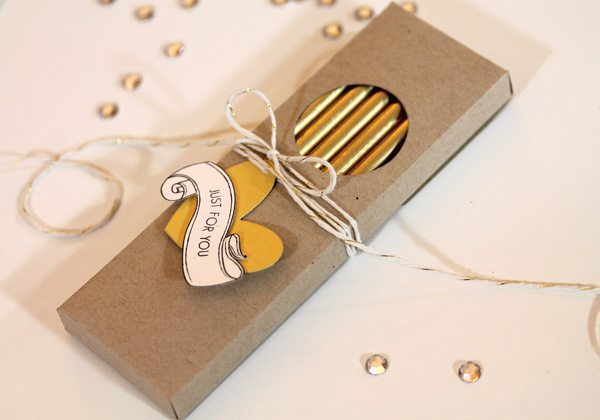
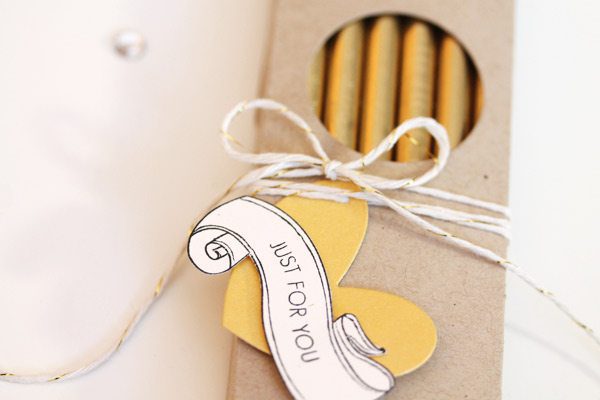
In the spirit of lovely packaging, I used the new Favor 7 die to give these pretty pencils a home. I die cut a circle in the front of the favor box and added a simple metallic tag. Pretty, right?


When I started reading, I thought, “What is Amber up to? Why bother spray painting pencils gold?”. And then I saw gold pencils with rhinestone bottoms and thought, “OMG! I have to do this!” You’re a bad influence, Amber! 😉
I adore the rhinestone on the end. Brilliant!
Amazing! Those kids’ pencils turned into such a pretty gold set.
I have had ideas to some packages with pencils but I never find decorated pencils with the images I want ,,,, dohhhhh …. I never thought on painting them !! You are brilliant! So … Off to Home Depot to find some paints … See ya!
Hope you spray in a well ventilated area…or maybe you don’t and that’s why you love spray paint so much LOL! Either way these are gorgeous and so stylish! Makes me want to break out a #2 pencil and write something.
Just an idea – I think I would stick the pencils (eraser end down) in florist foam or styrofoam, spray paint them THEN cut off the eraser end – easier to get an even finish with the spray paint that way. 🙂
What a genius idea!!!! I was worried that spraying then sawing would create chips in the paint finish but your idea is definitely worth a try! Luckily, the Metallic spray paint by Rustoleum creates an AMAZING finish with great coverage so it’s tough to mess it up! Thanks for your suggestion…I love it!
Brilliant, Amber 🙂 I bought a single pencil like this once and I am sure I paid 6 or 7 dollars for it!!
These are a great idea. You can also trim pencils with large sharp wire cutters but you will have to smooth and sand the ends. I’ve also trimmed pencils with an xacto knife. Lay the pencil on a self healing mat or other surface you don’t mind nicking. Press the knife down into the wood which is usually pretty soft, as far as it will go. Pull the knife out and roll the pencil to a new spot, always keep the knife at 90 degrees to the pencil and repeat. In 5-6 cuts you will get through. It takes longer than a saw but cuts pretty cleanly and if you don’t have a saw, this works.
If you want to keep the erasers, cut the other end. Pencils with white erasers will look the nicest. Cover the eraser with masking tape before painting. You can cover the metal strip with ribbon!
Who even thinks to do this?!
Oh right… you do.
What an awesome gift – and so easy! 🙂
I love the rhinestones at the end. Really takes the project to another level. Great DIY!
Another awesome DIY from Damask Love! I’m with you about lovely packaging and no one make them more pretty then you 🙂
LOVE this idea!! I’d like to do something like this with pens for my own office too 🙂
Managing your Concora Credit Card account is a seamless process, allowing you to easily access and monitor your finances.