Been a looooooong time since I played along with the Papertrey Ink Make It Monday challenge – and in all honesty, I wasn’t planning on playing along at all UNTIL I happened upon THIS entry into the challenge.
To say that I was impressed by Pamela’s creativity would be a huge understatement! I loved her interpretation of the challenge and I was totally inspired by it! So….I hope she won’t mind that I’m recycling her idea for today’s project.
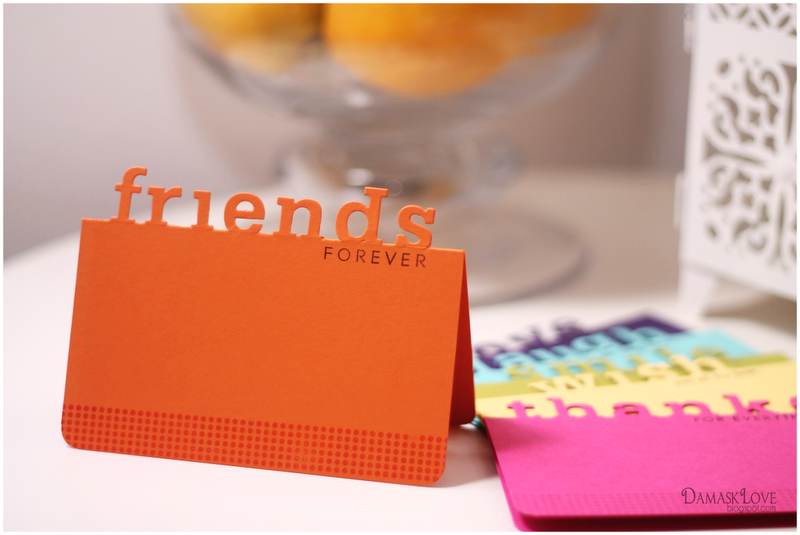
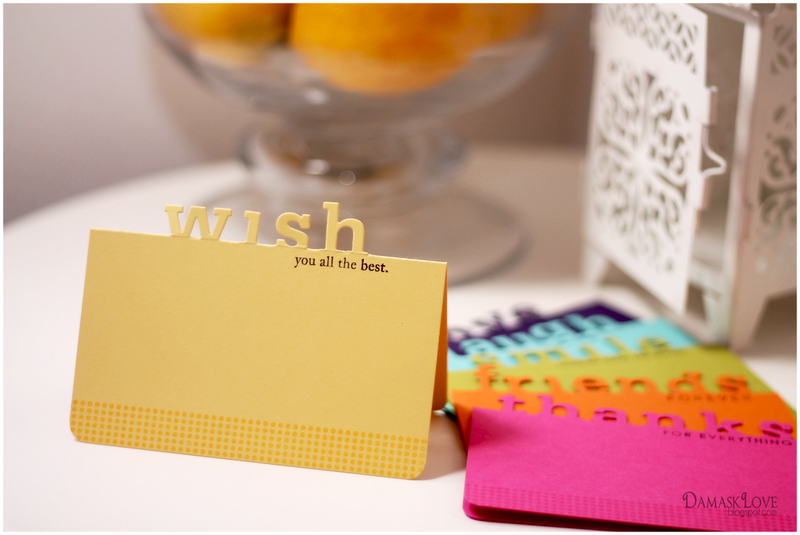
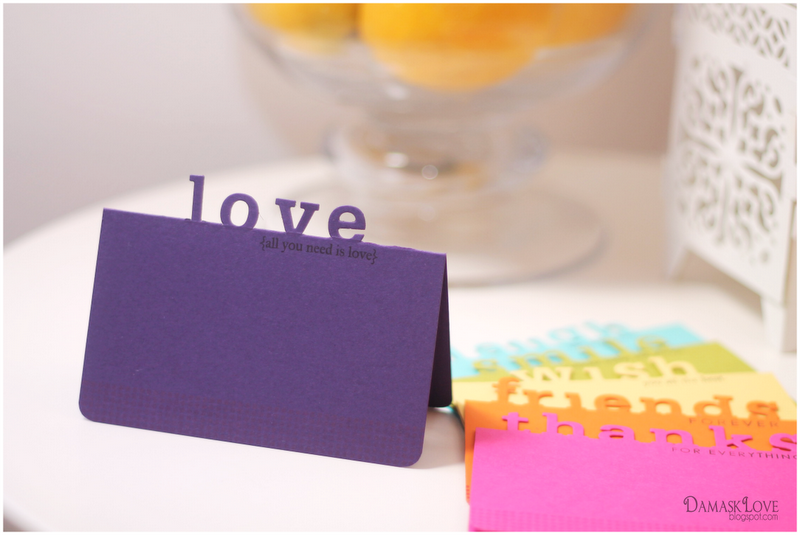
When I saw Pam’s card, my paper crafting wheels started turning and I thought it would be so cool to create a one layer card with a pop-up sentiment – so that’s what I did.
I used the same technique as Pam did (I think), and I’ll share some photos of how I made it work for me.
Note: The prep for this project may seem a tad time intensive, but I promise it is VERY easy and quick to do!
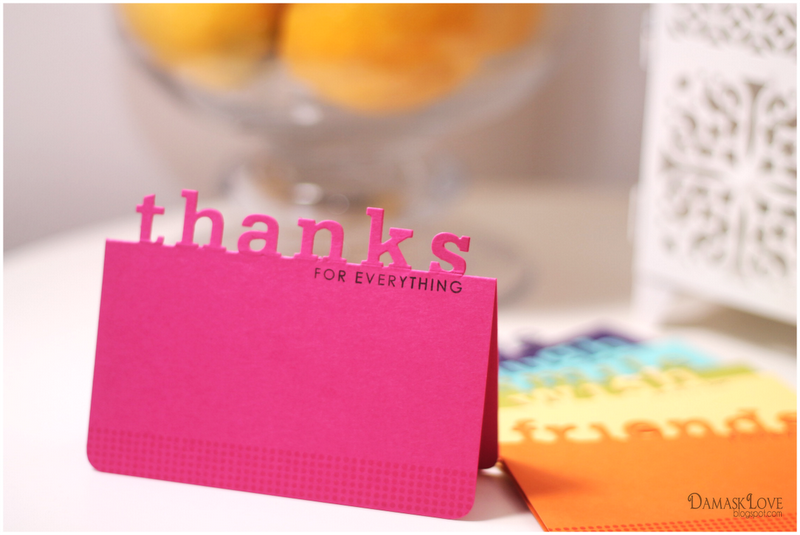
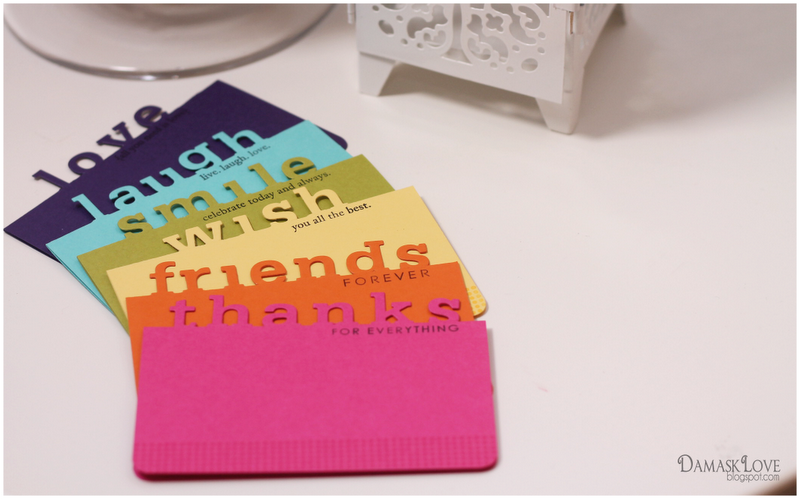
First, though – let me give you a peek at the finished product! Simple but different!
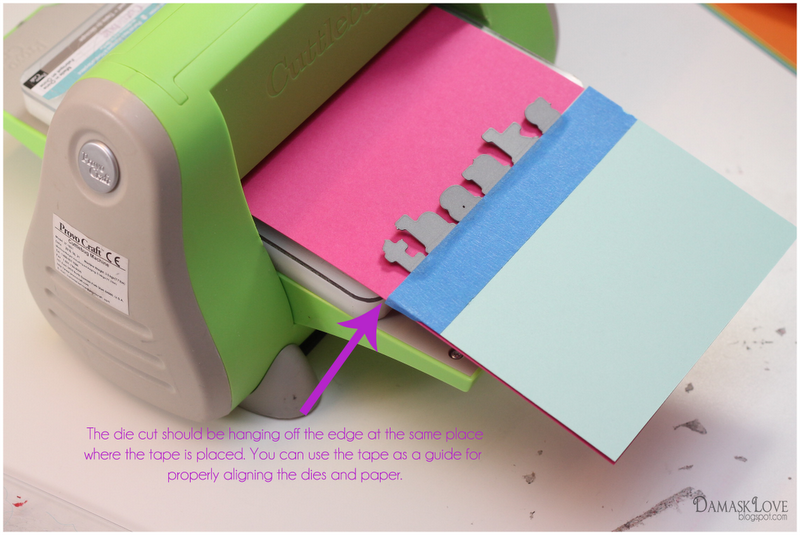
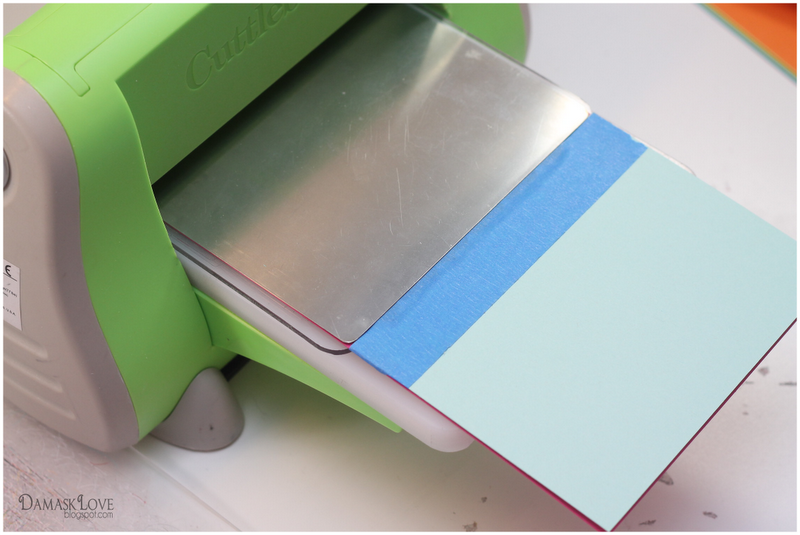
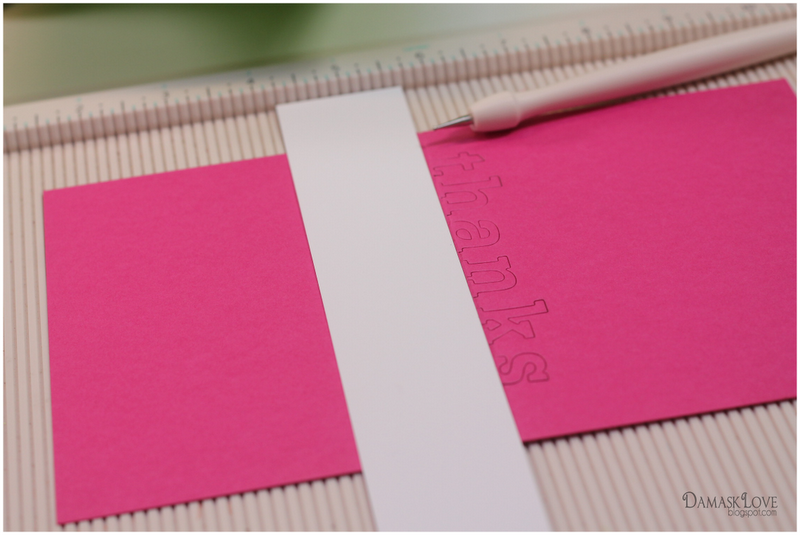
Now for a little photo tutorial on how I did this:


‘Scuse my while I pick my JAW up off the floor………
OMG …. LOVE THIS!!!
amazing! can’t wait to try this out!
eek, LOVE! Thanks for the photo tutorial! I’m so happy Pam inspired you!! You both inspired me…. can’t wait to cut something. 🙂 Oh, and ‘the set’ is the icing on the cake. Love the rainbow of cards.
These are beautiful, so clever and inspiring! Thanks very much for the tutorial 🙂
Penny
Amberrrrrr! Love these!!! You’re so swanky 😉
Fantastic set!! And I love the rainbow of colors!! Thank you for the directions…. I think I can even follow them!
Teri
Are you kidding me right now?!? Oh my word! These are AMAZING!! SO unbelievably creative, Amber!! Wonderful!!
What? WHAT!! Totally amazing! When I first saw these I thought you used the Silhouette. You are so creative and inspiring!!
You are so creative….off to try this!
Simple but clever!
I love these cards, Amber!! You are so clever. Thanks for the tutorial; it really helps to see the step by step process.
What fun! I wondered how this was done. Thanks for the tutorial!
Awesome!!! Thanks for the tutorial. BTY, where did you get the metal shim?
Wow, these are amazing, Amber! Truly brillant!
Ingenious! Love how you were inspired by Pam and I’m sure she is as well.
muy creativo y exquisito!
Oh, how neat! I have some alphabet dies so I think I am going to give this a try! Thanks!
I read every one of your posts, but this one really blows me away. Your creativity astounds me. Seriously, I’m not just saying that.
Brilliant 🙂
FREAKIN’ AWESOME!!!! I am going to try this tomorrow. Thank you so much for posting this.
I vote this my personal favourite project done with this technique, fantastic. Thank you for opening my eyes up of the possibilities on this die. I am embarassed to say I didn’t even think of separating the letters on the die, I always punch the whole set.
Totally amazing. When I first saw this I didn’t think this was a Cuttlebug cut. I am going to have to try this. You are so talented. Thanks for sharing the tutorial.
I just LOVE this. it is simply amazing! LOVE! <3
I just love these, you did a GREAT job. I was wondering where you got your metal shim, I don’t have one, could I use something else?? Thank you again!
OMG. Awesome. Nuff said.
I REALLY DO have to try this – thank you for sharing :O)
Wow. Just wow.
Like my 3 y.o. would say: SO SO very awesome!
Brilliant! Who makes this set of letter dies?
Oh my WORD! These are amazing, Amber!
O.M.G!!! Amber, these are so creative and so amazing, I can barely type! Wow!
Holy. Freaking. Cow. I say that all the time on your blog and I always mean it. So incredibly kick awesome!!!!
What a neat idea!
Wow, these are amazing. Such a wonderful idea. Very clever!
I love this! Fabulous. I partial die cut all the time and the same technique allows you to emboss a larger piece of CS with an embossing folder with no nasty lines! But to use letters is awesome! And it definitely would have taken me screwing up the scoring to realize it should be done after. Clever!
wow, I love the way these cards look, what a cool idea…But I think I am missing something…if you score just at the bottom edge of the letters isn’t the letter negative cutout part on the back of the card then? Sorry to be so dense as I am sure i’m missing something soooo obvious…{sigh} — but love the idea and love the blog so hope you can set me straight! I can’t wait to try this!
Hi Sam! I have the “negative” as you. Did you ever get an answer?
D.
Fabulous cards and a wonderful technique! I really loved the video and butterfly card you shared in the Die Cut class too!!
Thanks for being part of the class and sharing your wonderful talent!!
🙂
What a great technique! And thank you for showing how you made the cards. I love the results.
Eveline.
I agree with Sam. Not sure how you get rid of the cut out part. I’m new to die cutting. Is is on the back?
Thanks
Barbara
Totally brilliant! Thanks for sharing a great tutorial!
Late to the party here, but wow, these are fantastic!! I think I’ve pinned 3 or 4 cards, this will be one of them!
Love, love this tutorial. Just one ??? Where did you get those cute and small dies?
Amber, where have I been. I just came across your web pages. I love this die cut tutorial. My question is do you stamp the rest of the sentiment or computer print… FOR EVERYTHING on the thanks card… FOREVER on friends… etc… ???
Hey Lois! The sentiments are stamps which I purchased from Papetrey Ink. hope that helps!
Amber
Amber – I love this technique. You made go shopping for individual alpha dies at C&SS (love they include extra letters, but sadly no extra Ls for a hello card). Then I had to buy the uppercase and numbers too. But today I was able to whip up a very fun set of cards to give as a hostess gift (to a crafting party I’m going to tomorrow). I don’t have your skills at lining up the letters, so here’s my twist on making everything nice and straight. http://www.splitcoaststampers.com/gallery/photo/2499177
hi,
I am in the uk and new to all this. The fonts I find here are all on one die, not individual. Can you tell me the name of the die you are used here as I LOVE it. I have been trying to do this, create my own words, for ages however my craft club said it can’t be bought. Please help. I am hopeless in love with fonts!
Would love to see the back of one of these cards. Should I cover up the openings in the back?