Everyone needs a little rainbow in their life, right? Well, what if I told you that you could have a rainbow everyday, no matter the weather! That’s the goal of today’s project! Today, I’m showing you how to make a wooden Waldorf rainbow, complete with pom pom clouds.
Waldorf schools are known for having wood toys, and the Waldorf wooden rainbow has become an inspiration for trendy home decor. Problem is…I’m not paying $92 for a wooden rainbow. Not in this lifetime. Instead, I’m going to make one for a lot…lot less. Let’s get crafting!
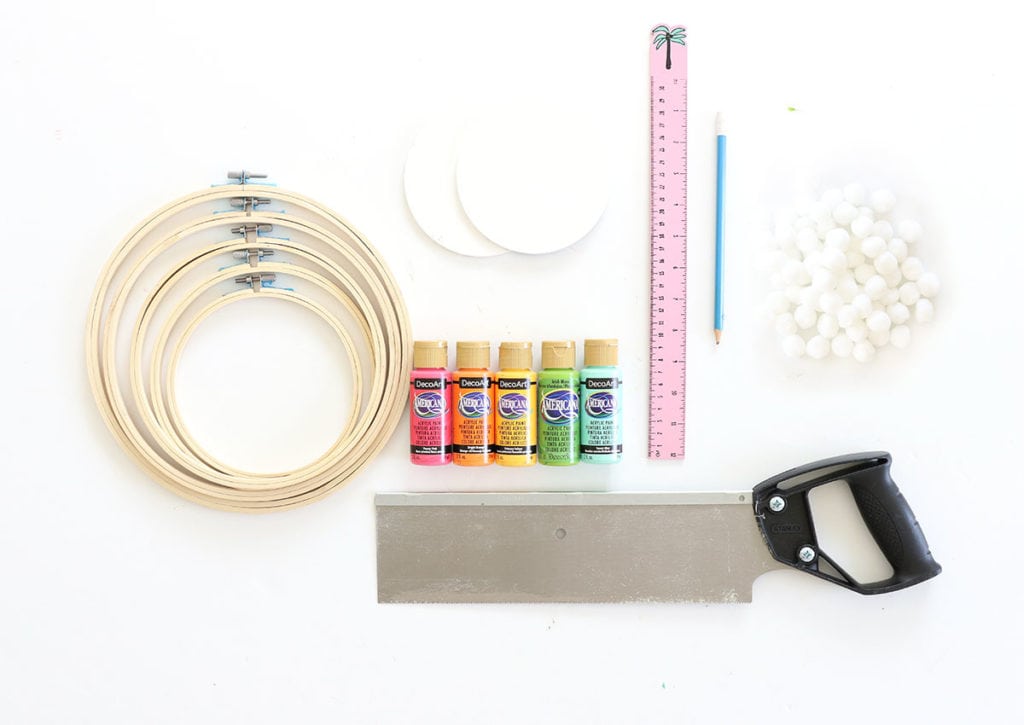
You’ll Need:
- Caydo 5-Piece Embroider Hoop Set
- DecoArt Americana Paints in a rainbow palette
- Wood Rounds – I used these Darice Painted Wood Soccer Balls
- Ruler
- Pencil
- Saw
- Darice Pom-Poms , 1-inch
- Hot Glue Gun (not pictured)
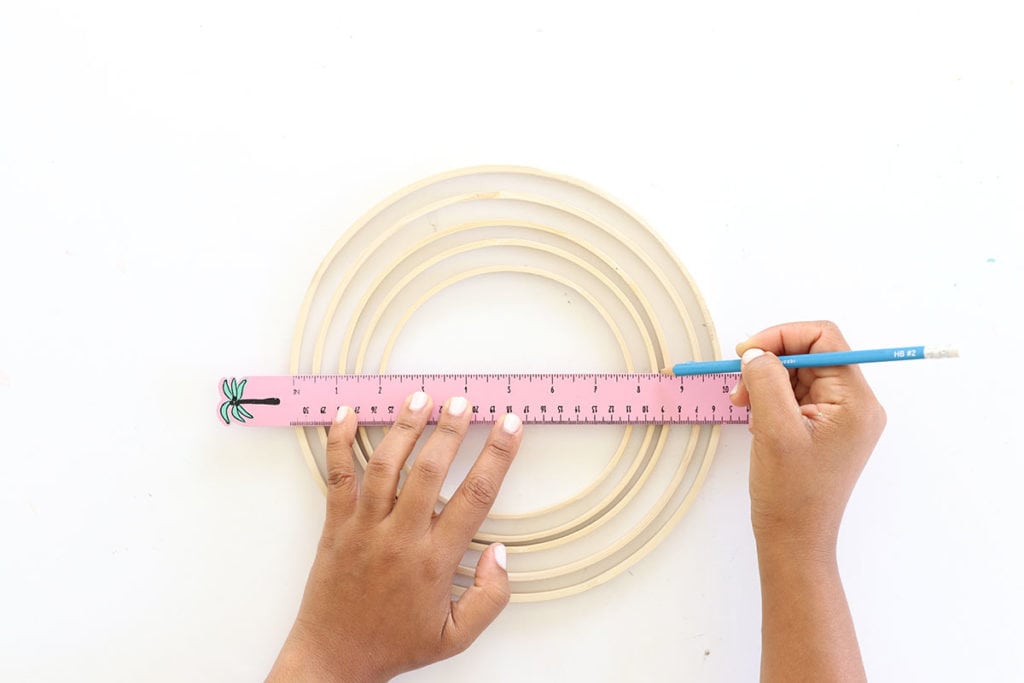
STEP ONE:
Remove the outer ring of the embroidery hoops and set aside. Arrange the inner rings as shown, then use a ruler to draw a line across the middle.

STEP TWO:
Use the saw to cut the rings in half, then paint.

STEP THREE:
USe a hot glue gun to secure the rainbow onto the wood rounds.

STEP FOUR:
Use hot glue or craft glue to adhere the pom poms on to the wood round. The pom poms should completely cover the wood round so you no longer see it underneath.


Can you handle the cuteness?! Now that you know how to make a wooden Waldorf rainbow, you can create one for yourself, for a teacher or for your kids. Like I said: everyone needs a little rainbow in their life.


This is so super cute!! Thanks for sharing!
What a creative way to use embroidery hoops! I love how all of your projects are so colourful!
OMG!!!! what a wonderful project!!!!
Cristina
thehouseoftheblackbirds.blogspot.it
I can’t even stand it – how cute!!! 🙂
I get so wrapped up with writing on the computer that I don’t get time to read and participate in making any of the crafts that I so love!
I cannot believe how clever this idea is, and so cute! I absolutely adore it.
what an amazing idea, thank you so much for sharing. I will definately try this idea.
Medical web design is one of the most exciting fields in web design and development. Medical websites have a special place in the hearts of patients and physicians alike, and for good reason: they provide a powerful tool for promoting health and wellness. I would recommend this medical web design to hire professional web designers. The medical field is one of the most dynamic industries in the world, constantly evolving to meet new challenges and needs. Medical websites must stay up-to-date with the latest advancements in technology and science, but also stay true to their mission of helping patients live healthier lives.
A blunt is a cigar that has been emptied of its tobacco and then filled with marijuana. The tobacco wrapper adds flavor and potency to the cannabis, making for a stronger smoking experience. Blunts are often rolled thicker than traditional joints and can be shared among multiple people. Never try presidential blunts because this is very harmful for you. Blunts are a popular way to consume cannabis, especially among those who prefer a stronger smoking experience. They are made by emptying a cigar of its tobacco and then filling it with marijuana.
We want our consumers to enjoy the luxury of a high-quality jacket at a reasonable price. Our low rates allow us to reach out to audiences all around the country. Customers should be able to purchase the ricky bobby powerade jacket of their desire.
Looking for expert guidance on protecting assets while qualifying for Medicaid? As experienced elder law attorneys near me, our team at Ohio Medicaid Lawyers provides specialized legal assistance with Medicaid planning, estate planning, and asset protection strategies. We help seniors understand medicaid eligibility income charts and navigate the complex 5-year lookback period. Visit our website for comprehensive information about Ohio medicaid income limits 2024 and schedule a consultation with a trusted elder care attorney who can safeguard your future.
One thing I would like to say is the fact that car insurance cancellation is a dreadful experience and if you are doing the correct things being a driver you simply won’t get one. Some individuals do obtain the notice that they’ve been officially dumped by their own insurance company they have to scramble to get additional insurance after a cancellation. Low cost auto insurance rates are often hard to get following a cancellation. Knowing the main reasons pertaining to auto insurance cancellation can help drivers prevent completely losing in one of the most crucial privileges available. Thanks for the tips shared through your blog.
This actually answered my drawback, thanks!
É necessário denunciar este site perigoso.
Wow that was unusual. I just wrote an extremely long comment but after I clicked submit my comment didn’t appear. Grrrr… well I’m not writing all that over again. Anyhow, just wanted to say excellent blog!
It’s my opinion that a foreclosed can have a important effect on the applicant’s life. Home foreclosures can have a 8 to several years negative effects on a client’s credit report. A new borrower who have applied for a home loan or virtually any loans even, knows that a worse credit rating is actually, the more tough it is to secure a decent loan. In addition, it may possibly affect a borrower’s power to find a reasonable place to let or rent, if that will become the alternative housing solution. Thanks for your blog post.
Heya i?m for the first time here. I found this board and I find It really useful & it helped me out a lot. I hope to give something back and aid others like you aided me.
I do not even know how I ended up here, but I thought this post was great. I do not know who you are but certainly you are going to a famous blogger if you are not already 😉 Cheers!
Great blog post. Some tips i would like to make contributions about is that laptop or computer memory has to be purchased if your computer still cannot cope with anything you do along with it. One can install two good old ram boards of 1GB each, as an example, but not one of 1GB and one having 2GB. One should make sure the manufacturer’s documentation for one’s PC to ensure what type of memory space it can take.
I?d should test with you here. Which isn’t one thing I usually do! I enjoy reading a submit that may make people think. Also, thanks for allowing me to remark!
Magnificent website. Plenty of useful info here. I am sending it to some friends ans also sharing in delicious. And naturally, thanks for your effort!
You could certainly see your expertise in the work you write. The world hopes for even more passionate writers like you who are not afraid to say how they believe. Always follow your heart.
Good day! This post couldn’t be written any better! Reading through this post reminds me of my good old room mate! He always kept chatting about this. I will forward this page to him. Fairly certain he will have a good read. Thank you for sharing!
Somebody essentially help to make seriously articles I would state. This is the very first time I frequented your web page and thus far? I surprised with the research you made to create this particular publish incredible. Fantastic job!
You actually make it appear really easy along with your presentation but I to find this topic to be really something which I think I would never understand. It sort of feels too complicated and extremely broad for me. I am looking ahead on your subsequent put up, I will attempt to get the hold of it!
I have really learned some new things from a blog post. Also a thing to I have observed is that in many instances, FSBO sellers may reject people. Remember, they can prefer not to use your solutions. But if you actually maintain a stable, professional partnership, offering guide and remaining in contact for around four to five weeks, you will usually have the ability to win a meeting. From there, a listing follows. Thank you
I have realized some new issues from your website about desktops. Another thing I’ve always believed is that laptop computers have become a product that each house must have for many people reasons. They offer convenient ways in which to organize the home, pay bills, shop, study, listen to music and in some cases watch shows. An innovative method to complete these tasks is a mobile computer. These computer systems are mobile ones, small, highly effective and mobile.
Do you have a spam issue on this website; I also am a blogger, and I was wanting to know your situation; many of us have created some nice procedures and we are looking to trade strategies with other folks, be sure to shoot me an email if interested.
You actually make it appear really easy along with your presentation however I find this topic to be actually something which I think I might by no means understand. It seems too complicated and extremely huge for me. I’m looking ahead on your next publish, I will try to get the dangle of it!
It?s in reality a nice and helpful piece of information. I?m glad that you just shared this useful info with us. Please stay us up to date like this. Thank you for sharing.
Pretty section of content. I just stumbled upon your web site and in accession capital to assert that I get actually enjoyed account your blog posts. Any way I will be subscribing to your augment and even I achievement you access consistently rapidly.
hello!,I love your writing so much! percentage we keep in touch extra about your article on AOL? I need an expert on this house to solve my problem. Maybe that’s you! Having a look forward to peer you.
For quick white screen tests on laptop and external monitors, a practical screen utility is my go-to utility.