Every crafter has her favorite tool. It might be a pair of knitting needles. It might be a crochet hook. It might be a sewing machine. In my case, my favorite tool changes from day to day based on what I’m creating. Lately, I’ve been crushing hard for my Glowforge. If you’re unfamiliar with this powerhouse machine, you can read all about it HERE. The Glowforge allows you to do some heavy duty crafting like cutting through wood, acrylic…and it even does some stellar engraving…which brings us to the reason for this post. Engraving is cool and that’s all there is too it. The only problem with engraving is deciding what the heck to engrave, right? Engraving with your Glowforge opens up an entire world of personalization and gift giving options. If you’re anything like me, engraving with the Glowforge means you’ll never buy another personalized gift again. You’ll make it.
Right now, I’m about to tour you through a series of life-changing engraving projects that will forever alter the way you wander the aisles of IKEA. Every single engraved project in this post is a product I purchased from IKEA! See – the awesome thing about IKEA is that most all their items are packed flat…which means most of their items can be engraved in the Glowforge before being assembled! Genius, right?!
Before we dive into all the awesome items I engraved with my Glowforge – let’s talk briefly about how the heck you do it. You see, the easiest materials to engrave in your Glowforge are their Proograde materials. Proofgrade materials have been pre-calibrated to the machine so you don’t have to tinker with the settings. When you work with other – non-Proograde materials (i.e. stuff from IKEA), there’s a little bit of trial and error that has to happen. Don’t be afraid! I’m about to show you how it’s done!
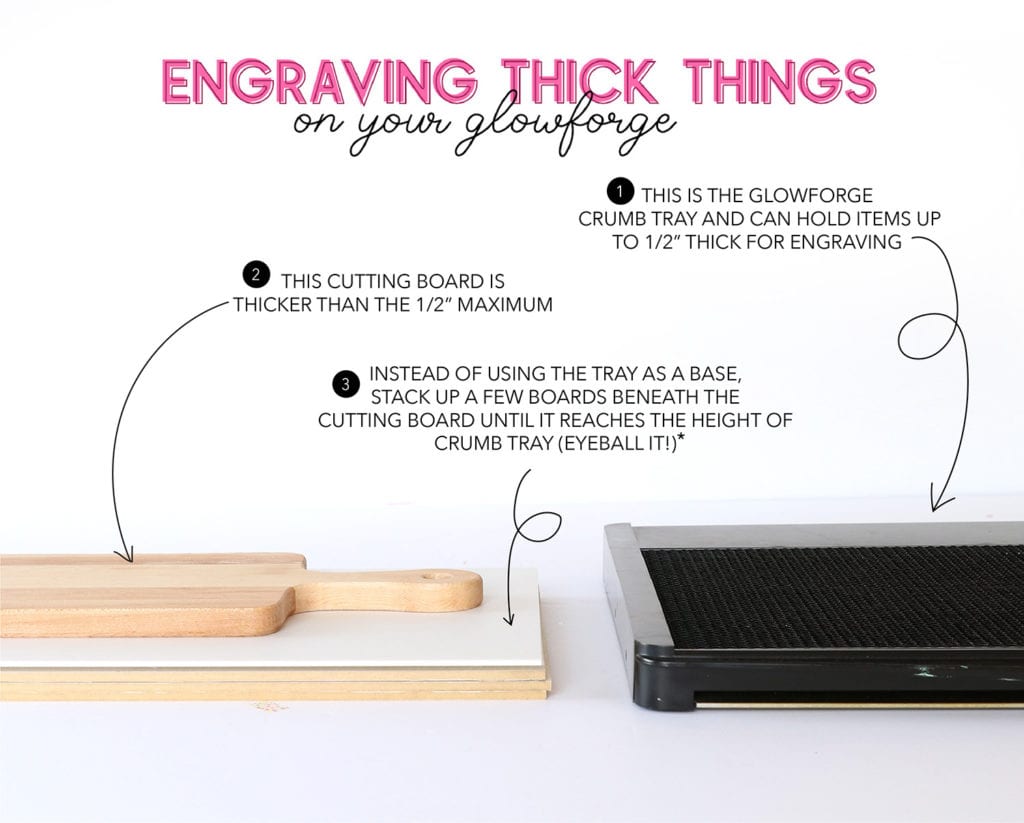
- You’ll need to remove the crumb tray from your Glowforge and place it on a flat surface. Then follow the guide to create your own “crumb tray” using boards as a base
- I’ve only used this technique for engraving! Cutting through non-Proofgrade materials requires a different technique.
- TIP: Purchase duplicates of any non-Proofgrade materials that you’d like to engrave. This way, you can test the settings on one of the materials until you have it just right. Then you can use the duplicate for your final project.
Now – let’s take a look at some of the projects I was able to create using IKEA products in my Glowforge!
[ninja_form id=6]

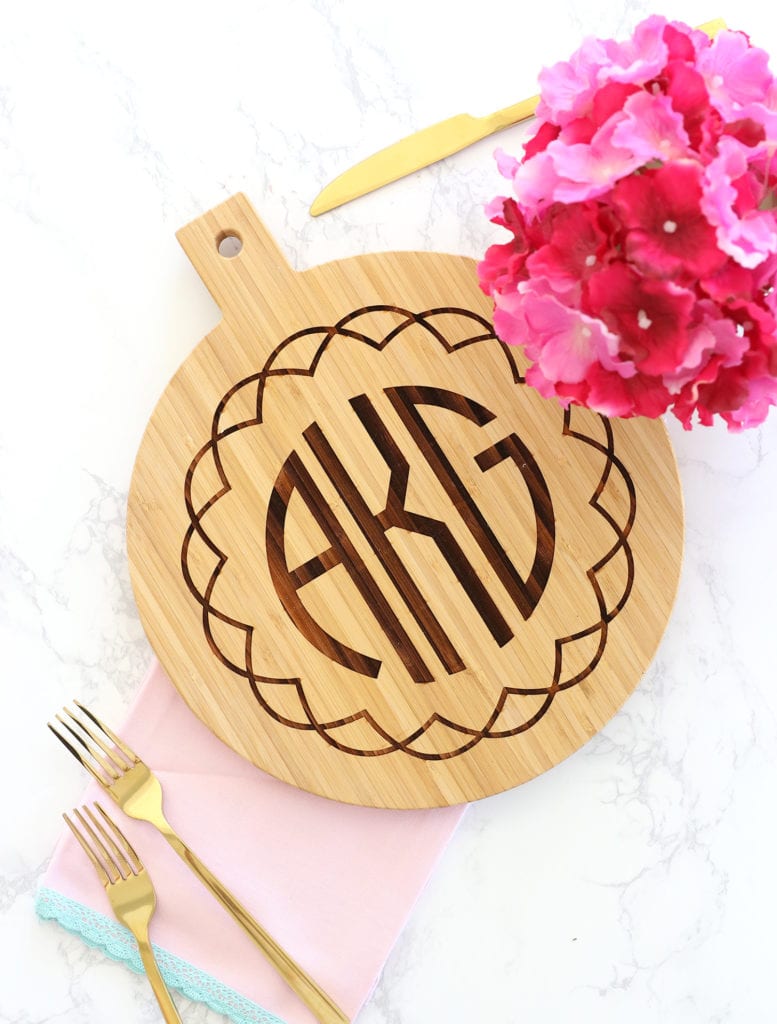
Who to make it for:
- Bride and Groom – this is a great wedding gift!
- Housewarming Gift!
How much?
- The Proppmatt Cutting Board rings in at a whopping $4.99! IKEA has a lot of other cutting board that work great as well!

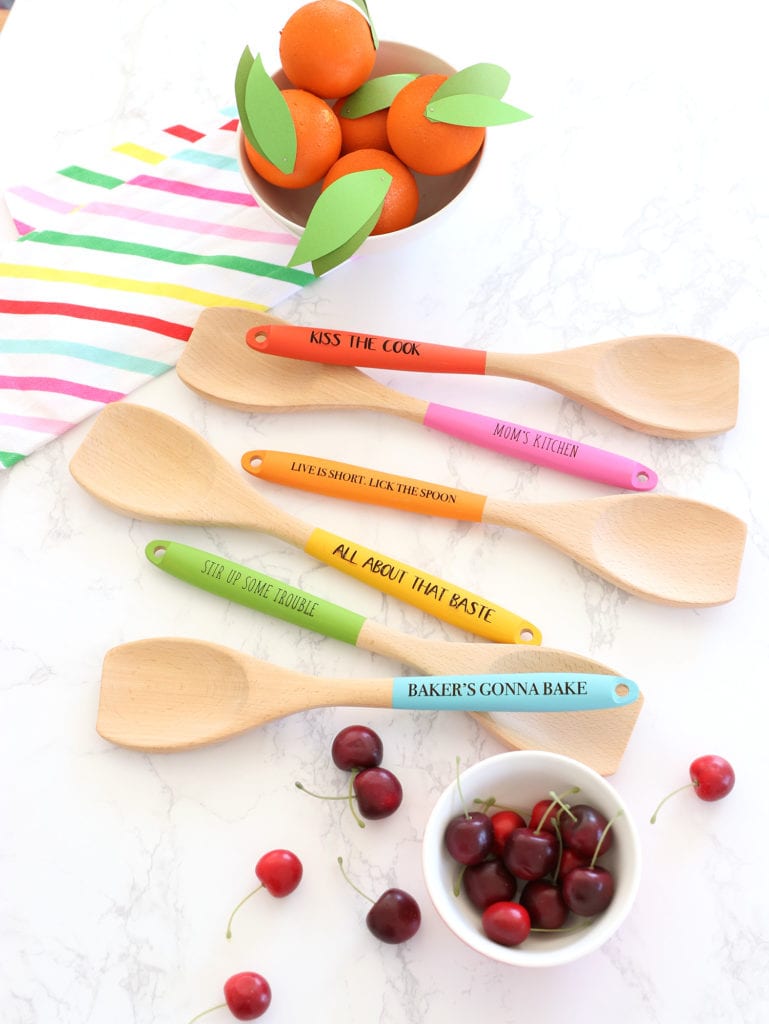
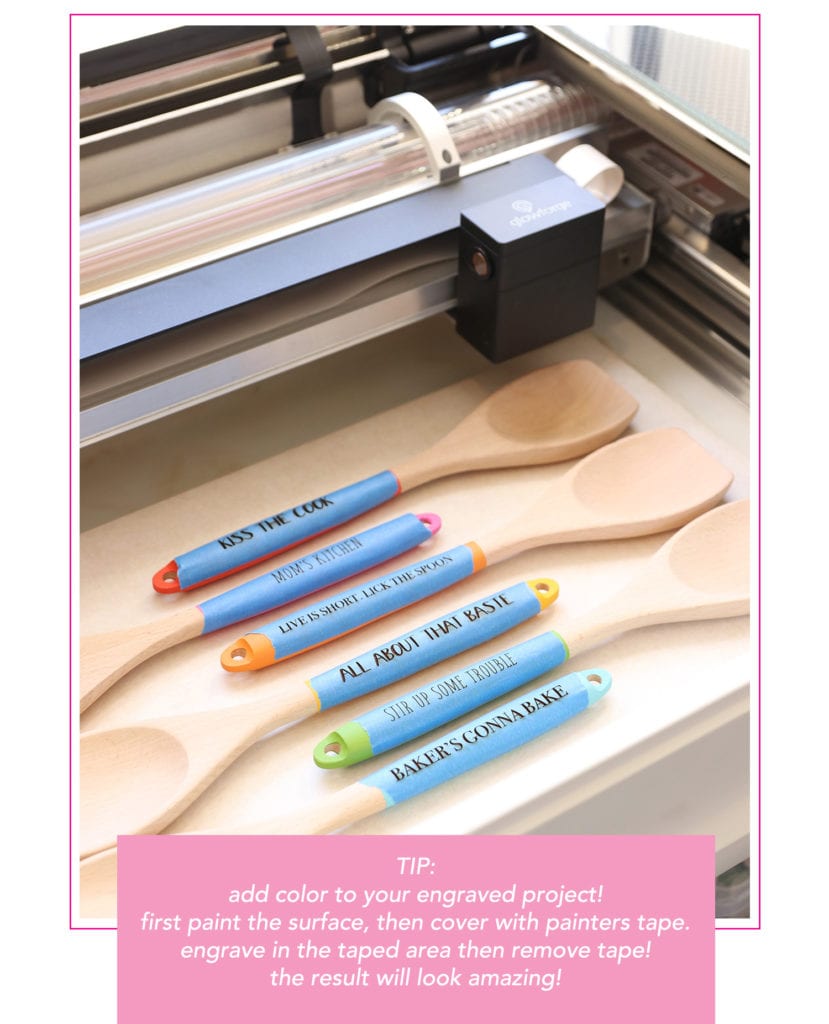
Who to make it for:
- Tie a gift card to the spoon for an awesome quick gift for anyone!
- Make a set for your foodie friend who loves to cook
How much:
- Each Rort spoon costs $1.99, which is basically the cheapest spoon you’re ever going to find unless you steal one.

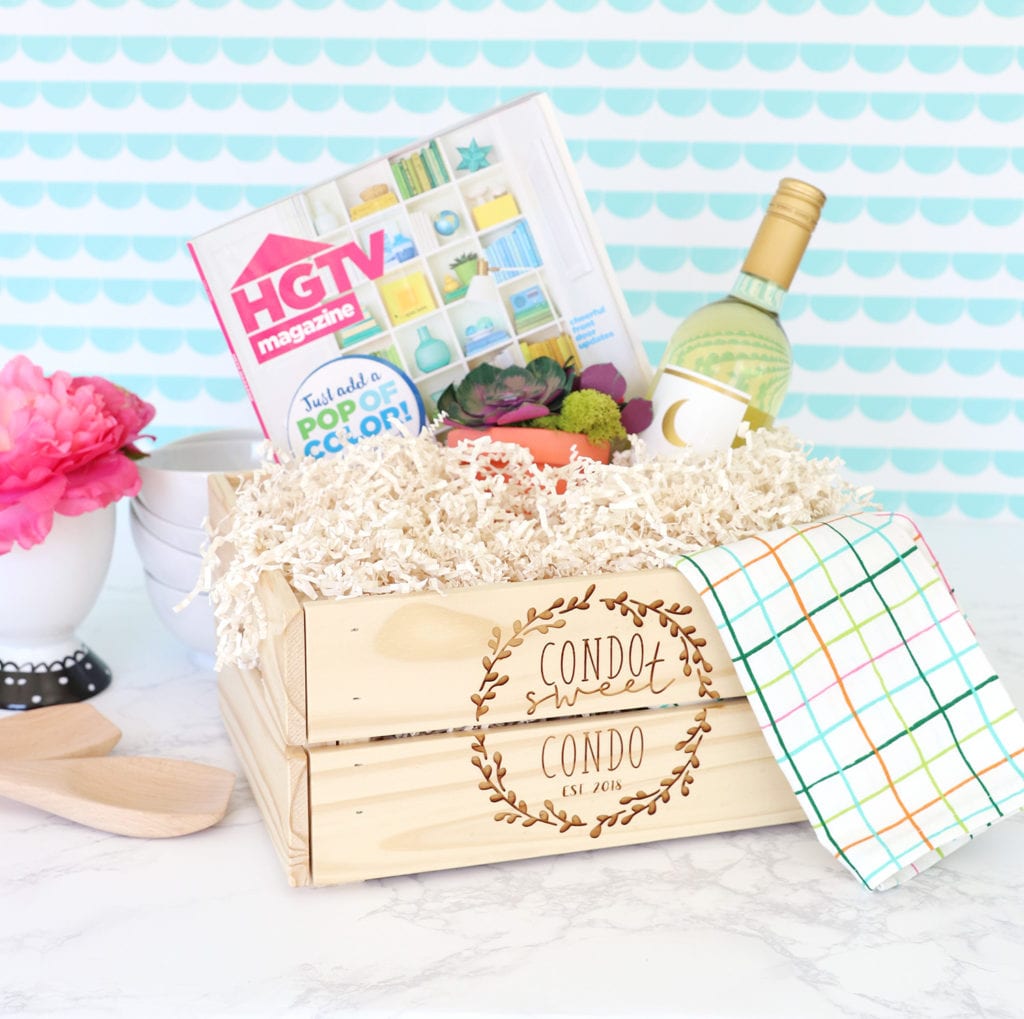
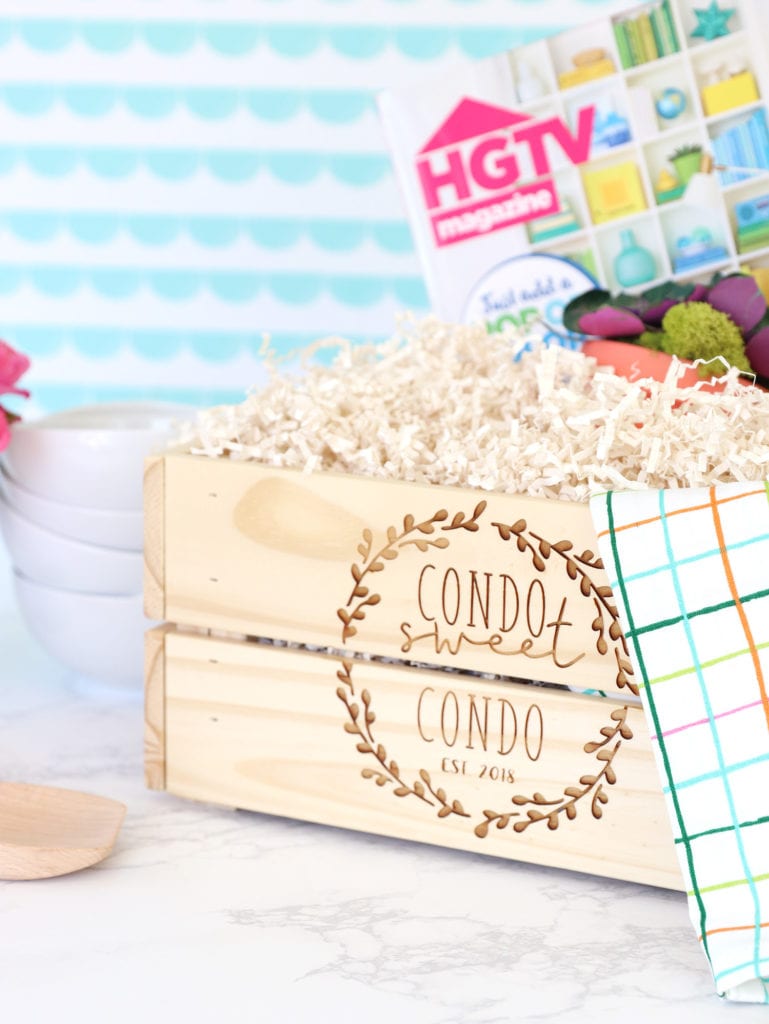
Who to make it for:
- This housewarming gift will make you a favorite for years!
- Engrave a recipe on the outside of the crate and fill it with all the ingredients!
How much:
- The Knagglig crate is $5.99 which is a little pricey for IKEA – but the finished product makes it all worth it!
Tips:
- To engrave this crate, you’ll want to keep the layout of your design in mind. Make sure you account for the two pieces that make up the front of the crate. You’ll want to engrave a little on the top and the rest of the design on the bottom piece.

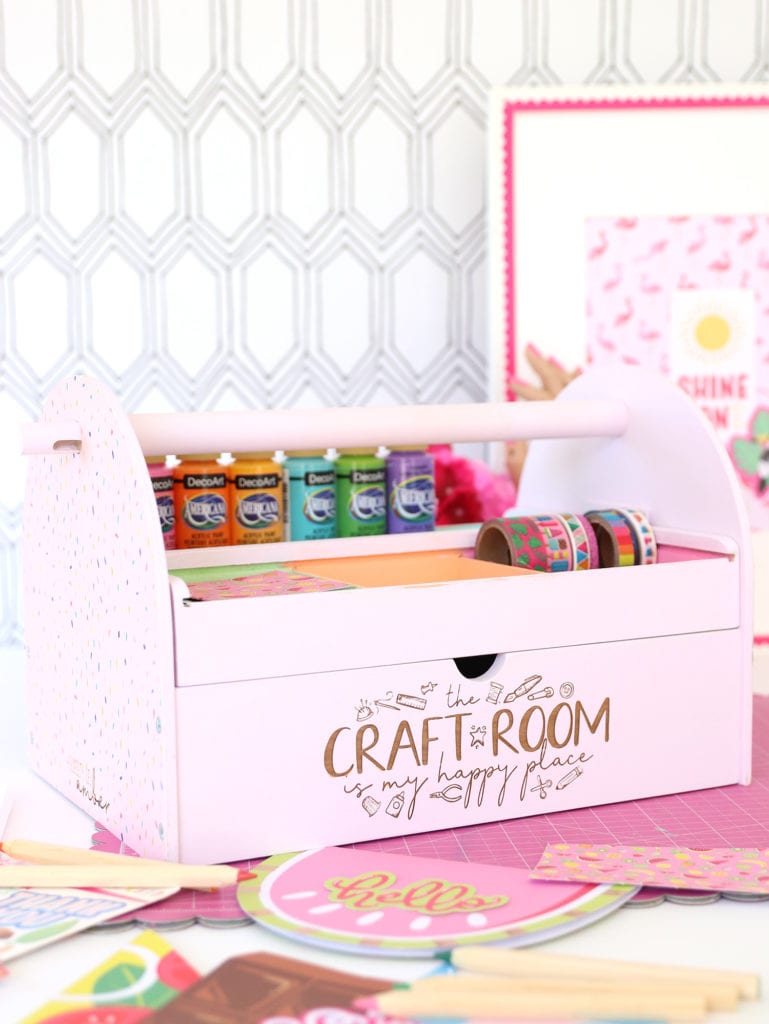
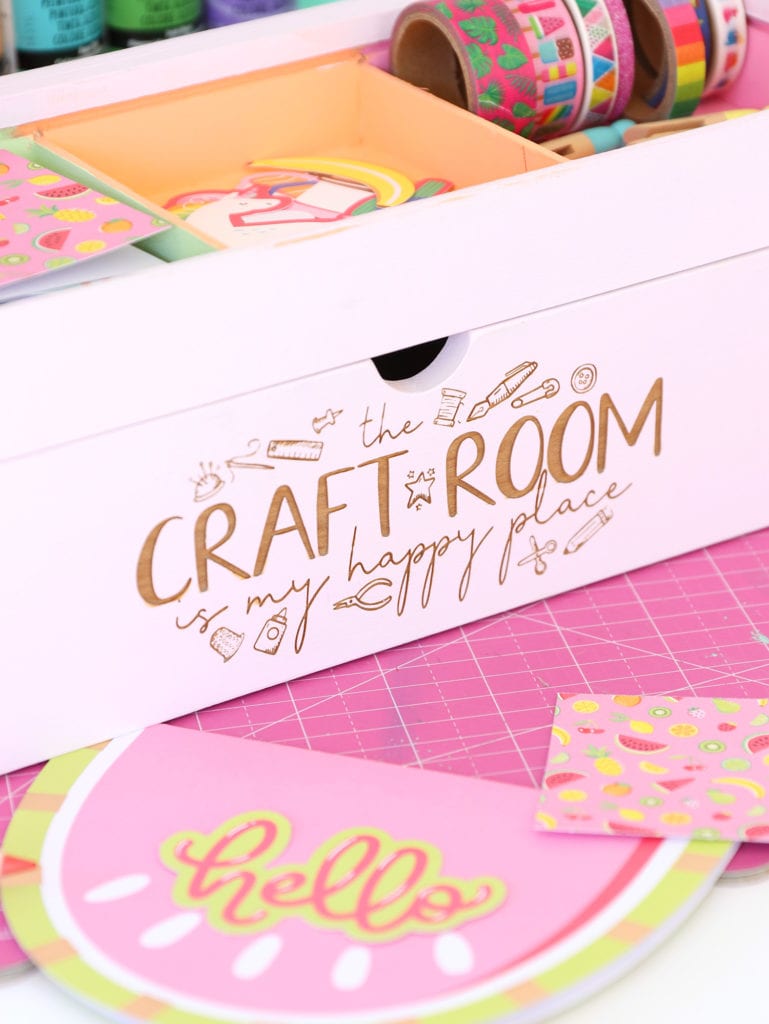
What kind of artist doesn’t have a personalized art caddy?!
Who to make it for:
- well..first…make this for YOURSELF!!! Obviously!
- Make one for your kiddo to keep all of his art supplies in order!
- A great teacher gift! Fill it with treat and supplies!
How much?
- The Lustigt Caddy comes in at $17.99 which ain’t cheap BUT it does assemble into a really impressive, functional organizational tool.

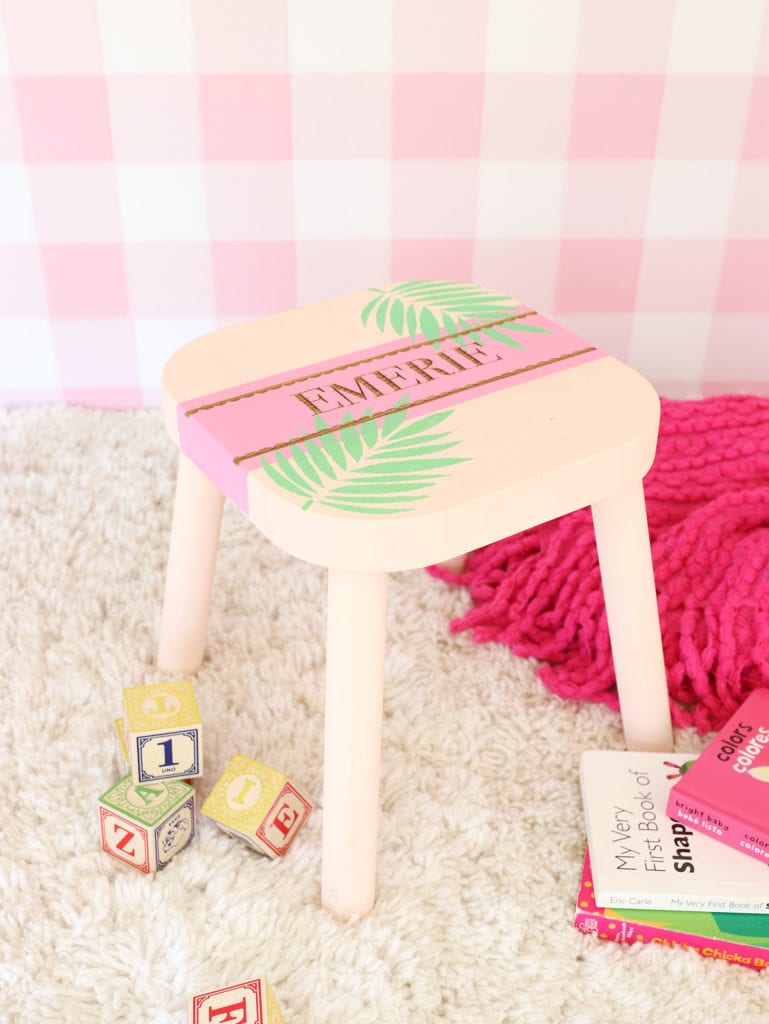
Who to make it for?
- I meeeaaann….can’t you just imagine how cute this would be in any kid’s room?
How much?
- The Flisat stool will set you back $17.99. Sure – Ikea has cheaper stools but this one works best for engraving in your Glowforge.
And there you have it! A parade of inspiration that wil
l hopefully give you some ideas for how to use a Glowforge to create personal gifts for every single person you know! Next time you hit up the local IKEA – take a look at all the other Glowforge-able items! There are a ton!


This engraving tutorial is fantastic! I’ve been curious about the Glowforge for a while now, and your tips make it feel so much more approachable. I spend a lot of time in my workshop on my feet, and I’ve realized that the right support—like Fp insoles europe—is just as important as the right equipment. It really helps you stay productive during those long project marathons. Thanks for the inspiration!
I love this Glowforge tutorial! I’ve been spending so much time at my engraving station lately, and I realized that standing on my hard studio floor for hours was really starting to wreck my back. I actually started wearing FP insoles Canada in my sneakers while I work, and it’s been a total lifesaver for my posture and energy levels during long projects. Thanks for the clear engraving tips!
I’ve been diving into some really creative projects lately, especially with my Glowforge, and I can’t get enough of the amazing things it can do! If you’re curious about getting into engraving, you’ll definitely want to check out this duo spin casino site for some inspiration and ideas. Engraving opens up so many opportunities for personalizing gifts or decor, and it’s a fantastic way to add a special touch to everyday items you might find at places like IKEA. It’s truly exciting to see how crafting evolves with tools like the Glowforge, making every project more unique and meaningful!
This Glowforge tutorial is incredibly helpful! The precision you can get with engraving is just mind-blowing. As someone who works on technical product development, I’m always looking for ways to blend high-tech manufacturing with creative branding. I’m actually exploring similar high-precision designs for our latest project. For anyone in the maker community who values gear that is as technically advanced as their tools, I’d love for you to check my site at https://fpfootwear.com/. Thanks for the great walkthrough!
I really enjoyed reading “How to Engrave with your Glowforge” because it explains a creative and modern way to personalize materials using laser technology. I liked how it breaks down the engraving process in a beginner-friendly way, showing how users can design, set up materials, and achieve precise results on wood, acrylic, leather, and more. It also highlights how tools like Glowforge make professional-quality crafting accessible to hobbyists, small businesses, and designers. I personally think laser engraving is exciting because it combines creativity with technology in a very practical way.
I enjoyed this guide because it shows how creative tools like Glowforge can make engraving more approachable for beginners while still offering plenty of possibilities for experienced makers. The step-by-step approach to preparing materials, adjusting settings, and testing designs is especially useful because small details often make the biggest difference in the final result. It also reminds me of platforms like Tarjeton IMSS Activos, where clear instructions and an easy-to-follow process help users complete tasks with more confidence. What type of project would you recommend as the best first engraving experiment for someone new to Glowforge?
Such a beautiful and elegant floral arrangement!
I love the soft colors and natural beauty in these photos.
I really appreciate the step-by-step guidance in this post.
The engraving results look absolutely amazing!
This article has inspired me to try a new Glowforge project
Your tips make the engraving process much less intimidating
I love how detailed and beginner-friendly this tutorial is.
The finished project turned out beautifully
Thanks for sharing your creative ideas and techniques.
This is a fantastic resource for Glowforge users.
This is a fantastic resource for Glowforge users
I learned several helpful tips that I hadn’t considered before
Your creativity is truly inspiring!
The photos make it easy to understand each step.
I appreciate the practical advice for achieving clean engraving results.
This tutorial is both informative and enjoyable to read.
Great job explaining the process so clearly.
I can’t wait to experiment with these engraving techniques myself.
Your projects always provide wonderful inspiration for makers and crafters
Thank you for taking the time to create such a helpful guide.
This article is full of useful information and creative inspiration.
Excellent tutorial! It makes Glowforge engraving look both fun and approachable