You can do this. I promise you can. If crafting isn’t your strong suit, you can do this. “Easy Like Sunday Morning”, apart from being an awesome tune, is your weekly installment of doable DIY made especially for all the hesitant, would-be crafters out there. And for all you experts, I’ve got a little something for you too. Since I’m in the throes of Valentine’s Day crafting, you’re gonna have to bear with me for the next few days as I get it all out of my system, starting with these incredibly easy paper punch cupcakes that require only a few very basic tools.

 You really don’t need much here, and the tools you do need are great basics to add to your beginner stash. Trust me. You’ll use these a ton and get your money’s worth! If you need to order some of these, I’ve got you covered. Just click these links:
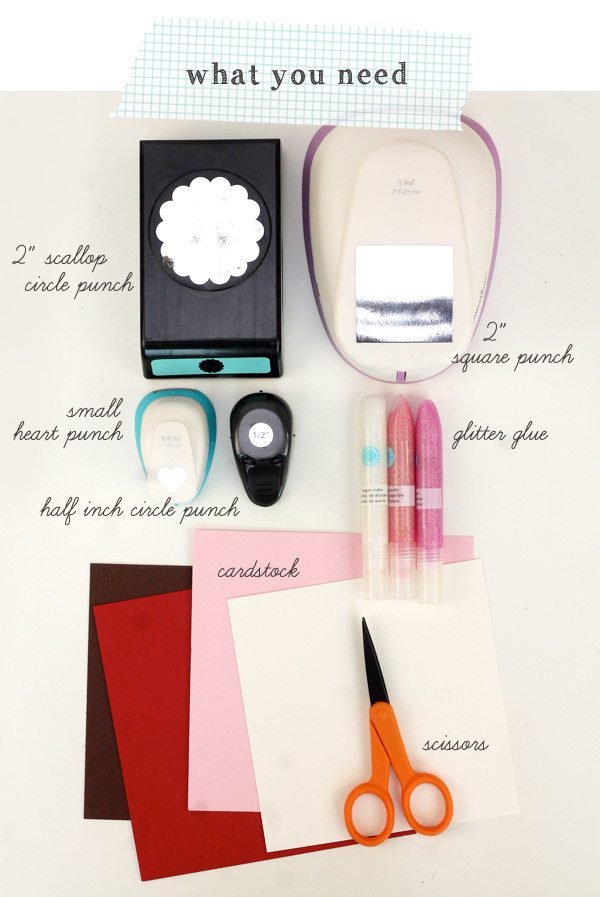
- 2″ Scallop Circle Punch
- 2″ Square Punch (available at Michael’s, but this is the sort of thing you can just cut out with scissors)
- 1/2″ circle punch
- Small Heart Punch (Available at Michaels Craft Stores)
- Martha Stewart Glitter Glue
- Cardstock
- Scissors
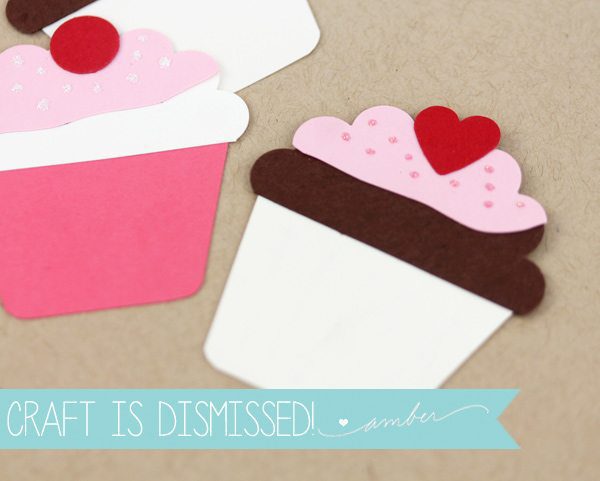
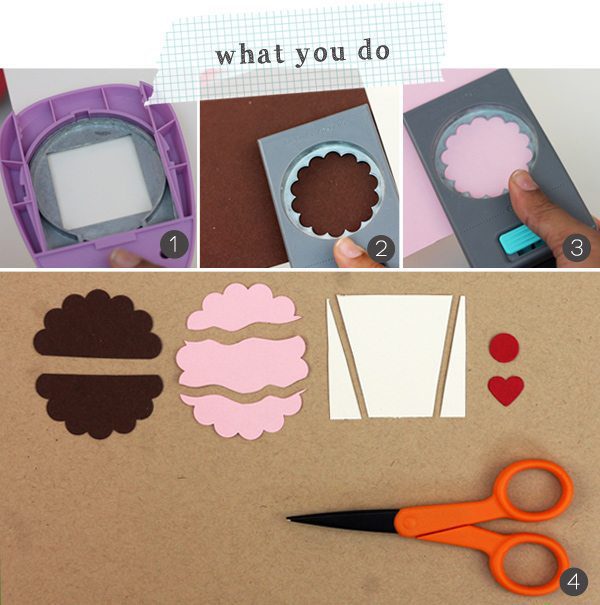 {1} Punch or cut a square from white cardstock {2} Punch a scalloped circle from brown cardstock {3} Punch a scalloped circle from pink cardstock {4} Use scissors to cut shapes as shown. First cut the brown cardstock in half as shown, then cut the pink scalloped circle in a wave pattern as shown. Trim the sides of the square at an angle. Last, punch circle or heart from red cardstock.
 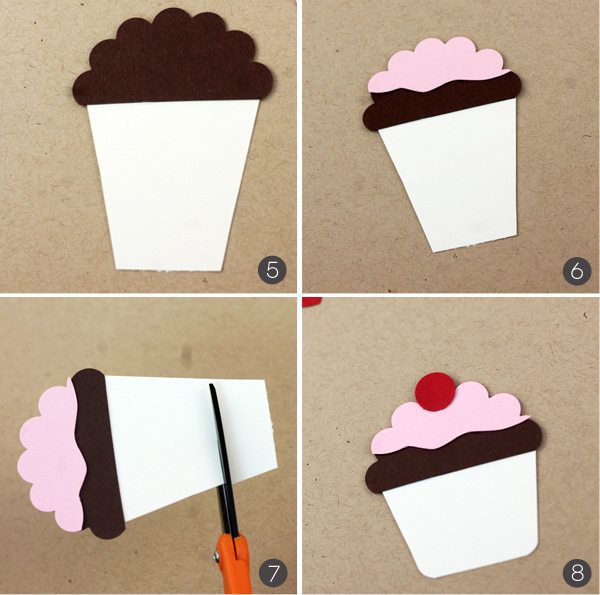 {5} Adhere the brown scallop circle half to the white square that has been trimmed. {6} Adhere the cut pink scalloped circle as shown. {7} Cut off some of the bottom of the white cardstock as shown. {8} Add the red circle (or heart) to the top of the cupcake as shown.
  {9} Use glitter glue to add dots of “sprinkles” on the cupcake “frosting”
So, if you’re not sold already, paper punches are a must have for any beginner stash! They allow you to create custom shapes in just a few seconds and are perfect for mass producing tags…or in this case, cupcakes! Here’s a look at what you can do with your cupcakes once they are all done.
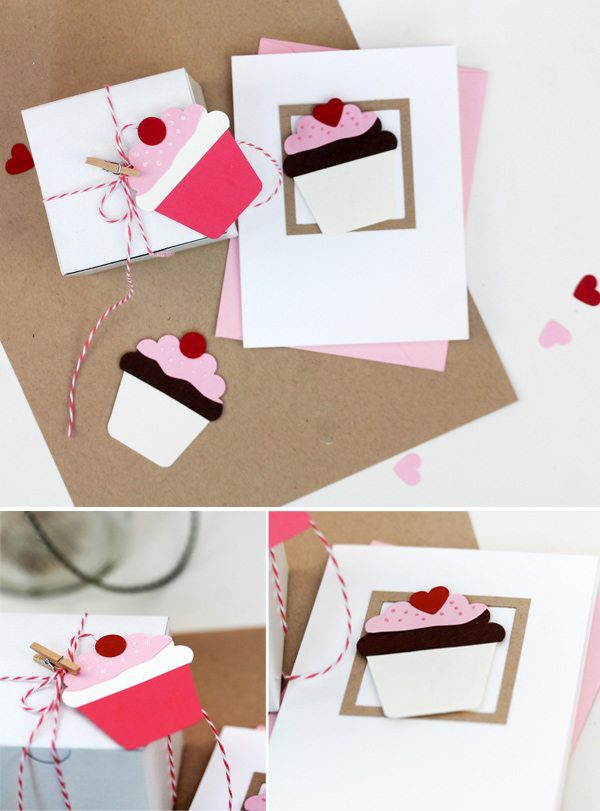
 Now, if you are a seasoned crafting veteran, you may have a few stamps on hand to give these projects a little extra “oomph.” If you do, go ahead and stamp the back of your cupcake to make it a tag, or add a sweet sentiment to your card for a more personalized touch.
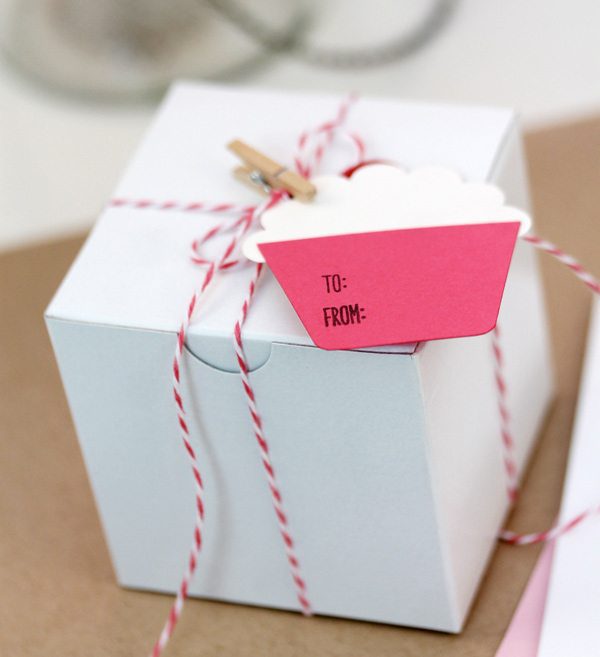

 So what do you think about the newest addition to your Sunday morning? I hope you’ll be back because I’ve got a bunch of easy projects that I think you are going to love!
 2″ Scallop Circle Punch | 1/2″ circle punch | Martha Stewart Glitter Glue

As I web-site possessor I believe the content matter here is rattling excellent , appreciate it for your hard work. You should keep it up forever! Best of luck.
I would like to thnkx for the efforts you’ve put in writing this site. I’m hoping the same high-grade blog post from you in the upcoming also. Actually your creative writing skills has inspired me to get my own website now. Really the blogging is spreading its wings quickly. Your write up is a great example of it.
Thanks a ton for your post. I’d prefer to comment that the cost of car insurance differs a lot from one insurance policy to another, given that there are so many different facets which contribute to the overall cost. For example, the make and model of the vehicle will have a large bearing on the price. A reliable old family auto will have a lower priced premium over a flashy sports car.