Ever since Markus was born, photos have become a regularly requested item from the grandparents. They never get bored with new photos. They ask for them constantly and we’re happy to oblige.
With my Canon PIXMA TS9020 printer on hand, it’s really simple to print off photos from home and pop a few in the mail as a surprise for Grammy and Papa. Recently, though, I came up with a fun, easy and creative way to gift photos…and the best part…this gift still fits in an envelope
These DIY paper easel frames will quickly replace traditional cards when you see how easy they are to make. If you’re a paper crafter, you already have everything you need to make these happen! Here…I’ll prove it:
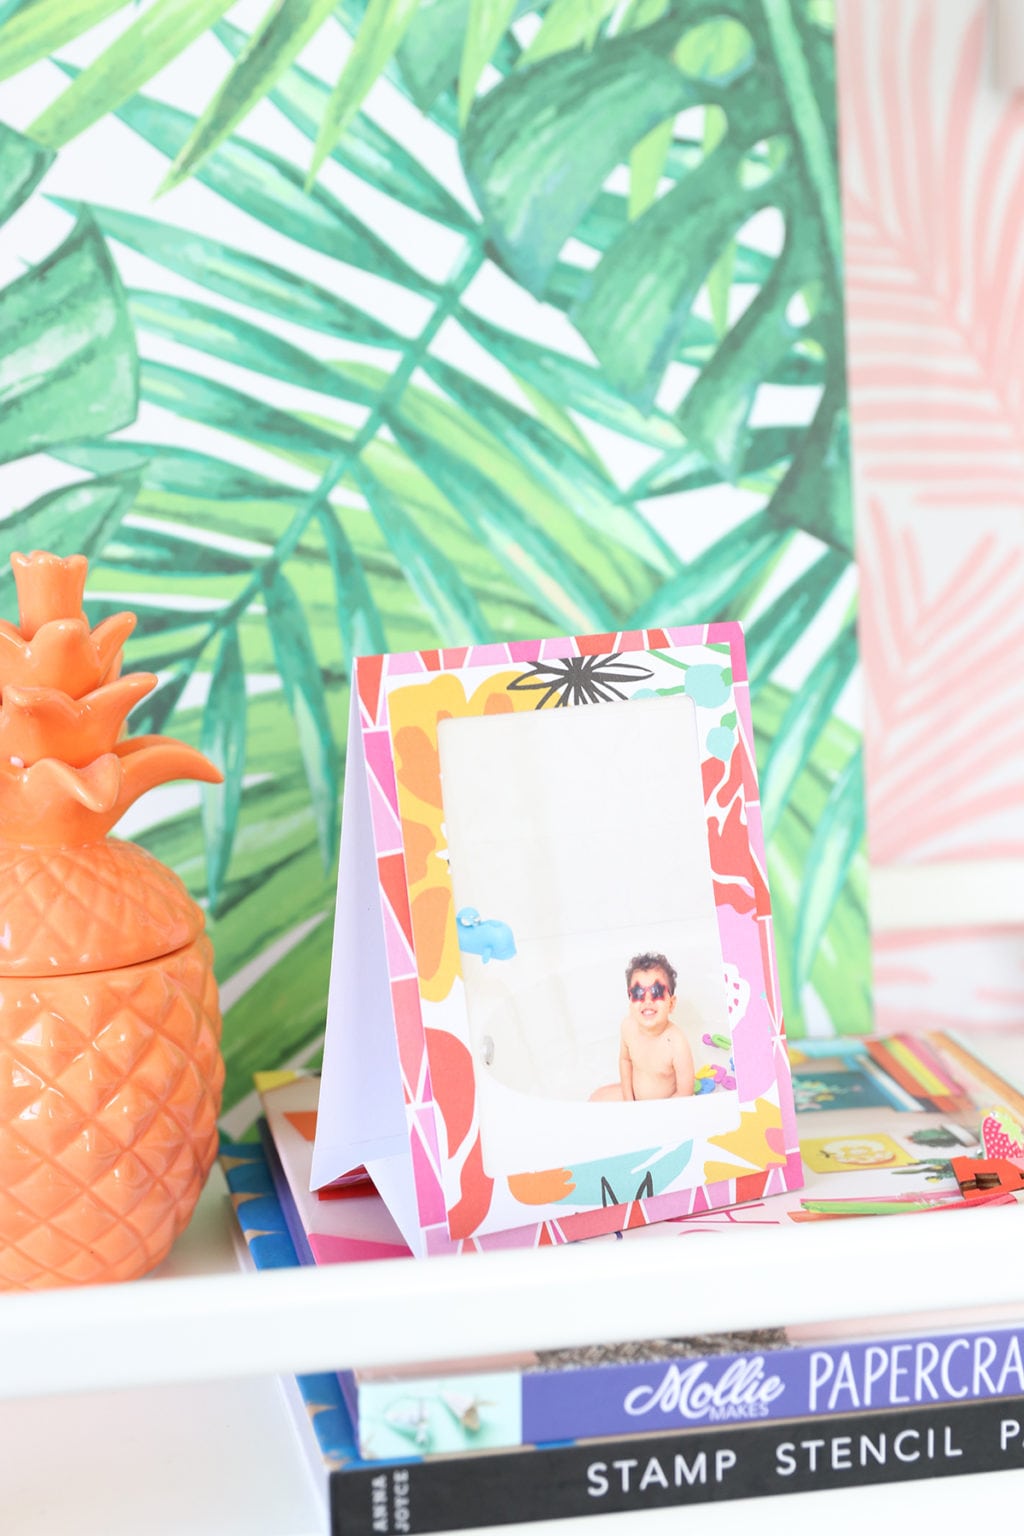

You’ll need:
- A scoring board like THIS one
- Two sheets of patterned paper
- A We R Memory Keepers Frame Punch Board
- A roll of dimensional adhesive – I like THIS one
- 3×5 photos printed on your Canon printer – I printed on 4×6 and trimmed

PRINTING TIP:
Use your phone or mobile device along with the Canon Print App to quickly access your photos and wirelessly send them to your PIXMA.
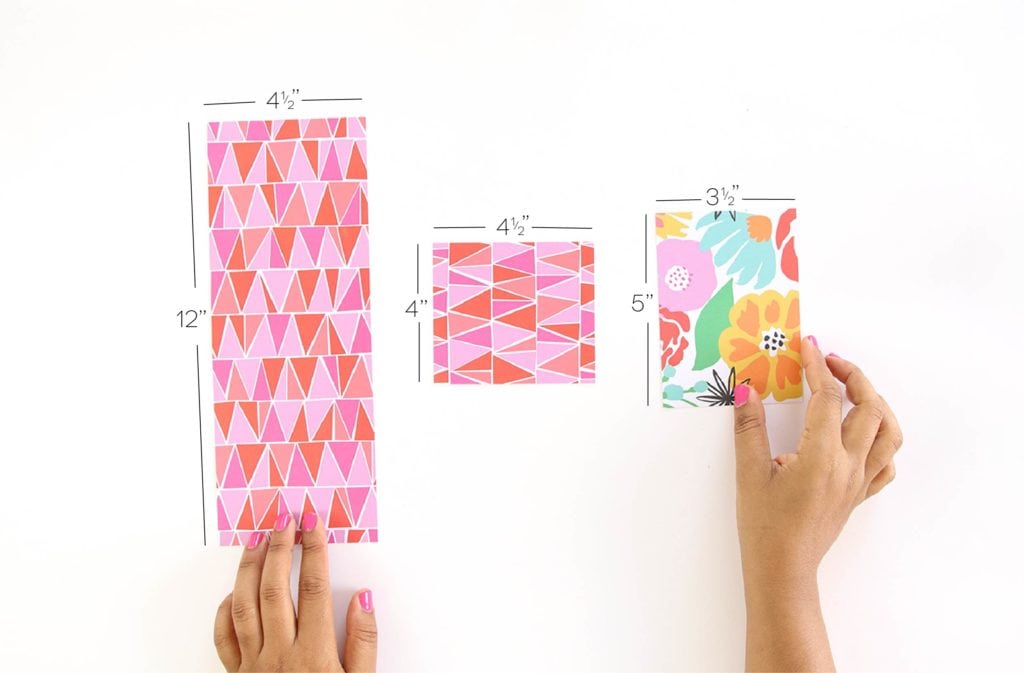
STEP ONE:
Trim your cardstock to the dimensions shown.
- Pattern A: 12 x 4.5”
- Pattern A: 4 x 4.5”
- Pattern B: 5” x 3.5”

STEP TWO:
Score the 12 x 4.5” piece of cardstock at 6” along the 12” side

STEP THREE:
Score the 4 x 4.5” piece of cardstock three times at .5”, 2” and 3.5” along the 4” side

STEP FOUR:
Fold the long piece of cardstock at the score line as shown

STEP FIVE:
Fold the smaller piece of cardstock along the score lines as shown


STEP SIX:
Use the tape runner to adhere the two piece of cardstock together as shown. This will create the base of your easel frame.

STEP SEVEN:
Use the punch board to create a frame from the remaining piece of cardstock


STEP EIGHT:
Trim the foam tape into thin strips and adhere around three of the edges of the paper frame, leaving the top open.


STEP NINE:
Adhere the paper frame to the easel base then slip your photo into the frame. You may need to trim the edges of your photo for an easier fit.

Now for the fun! Since this DIY paper easel frame folds flat, you can use it as a card. Just add decorations and a note to the back of the easel!


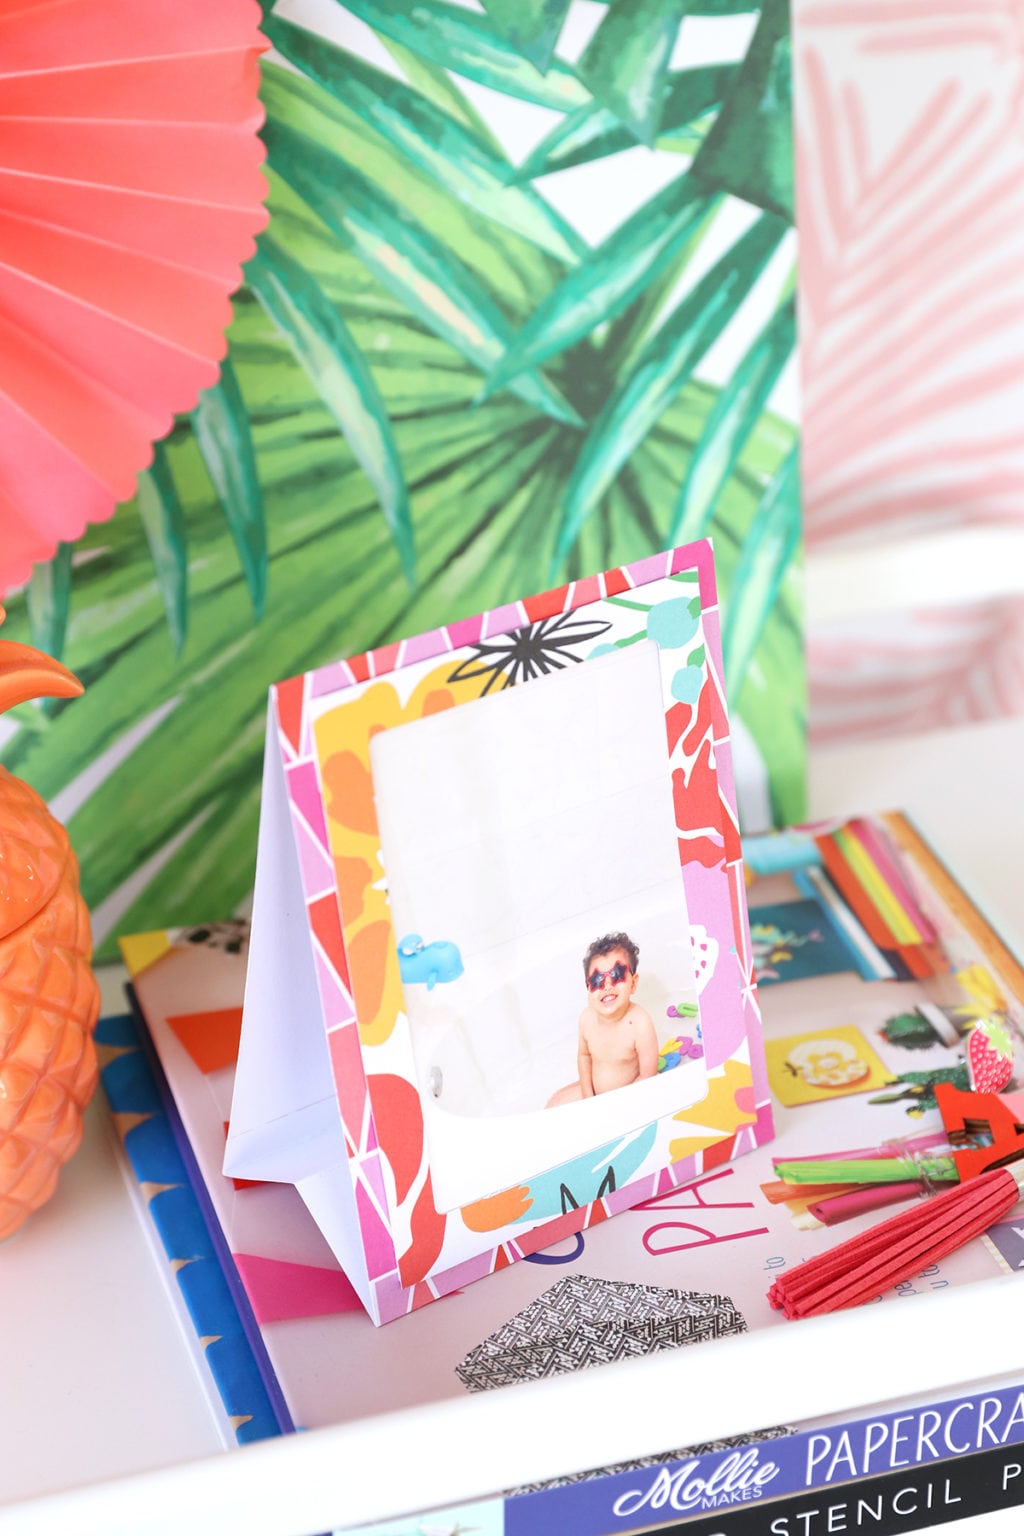
It’s a card! It’s a frame! These diy paper easel frames for displaying photos in your home. I love how versatile these little frames are and you will too! Forgo the birthday card and create one of these for a friend instead.
This project was completed in partnership with Canon. All projects, photos and opinions are mine, mine, mine! Thanks for supporting the collaborations that keep the lights on in this joint!





apotek pa nett: apotek online recept – apotek pa nett
https://apotheekmax.com/# Online apotheek Nederland met recept
http://apotheekmax.com/# ApotheekMax
apotek pa nett: Apoteket online – Apoteket online
It’s appropriate time to make some plans for the future and it’s time to be happy. I have read this post and if I could I desire to suggest you some interesting things or suggestions. Maybe you could write next articles referring to this article. I want to read even more things about it!
Thank you a bunch for sharing this with all of us you really understand what you’re talking approximately! Bookmarked. Please additionally discuss with my website =). We will have a link trade arrangement between us!
I do consider all the ideas you’ve offered in your post. They’re very convincing and can certainly work. Nonetheless, the posts are very short for novices. May just you please prolong them a little from subsequent time? Thanks for the post.
I have realized some new items from your website about desktops. Another thing I have always assumed is that computers have become something that each residence must have for many reasons. They provide convenient ways in which to organize households, pay bills, shop, study, focus on music and also watch tv programs. An innovative approach to complete all of these tasks is with a mobile computer. These pcs are portable ones, small, powerful and transportable.
Wonderful work! This is the type of information that should be shared around the web. Shame on Google for not positioning this post higher! Come on over and visit my site . Thanks =)
Hey there would you mind stating which blog platform you’re working with? I’m looking to start my own blog soon but I’m having a difficult time making a decision between BlogEngine/Wordpress/B2evolution and Drupal. The reason I ask is because your design seems different then most blogs and I’m looking for something completely unique. P.S Sorry for being off-topic but I had to ask!
Its like you read my thoughts! You seem to understand so much about this, such as you wrote the e book in it or something. I think that you just can do with some p.c. to force the message house a bit, however other than that, this is fantastic blog. An excellent read. I will definitely be back.
Thanks for the suggestions you are discussing on this website. Another thing I’d really like to say is getting hold of some copies of your credit rating in order to inspect accuracy of the detail will be the first activity you have to accomplish in fixing credit. You are looking to clean your credit file from damaging details errors that spoil your credit score.
What?s Taking place i am new to this, I stumbled upon this I’ve found It absolutely helpful and it has aided me out loads. I am hoping to contribute & assist other users like its helped me. Great job.
One thing I want to comment on is that weight loss program fast is possible by the suitable diet and exercise. Your size not only affects appearance, but also the entire quality of life. Self-esteem, melancholy, health risks, as well as physical skills are impacted in weight gain. It is possible to do everything right and still gain. Should this happen, a condition may be the culprit. While excessive food and not enough physical exercise are usually responsible, common health conditions and trusted prescriptions could greatly increase size. Thanks a bunch for your post in this article.
Good site! I truly love how it is easy on my eyes and the data are well written. I am wondering how I might be notified whenever a new post has been made. I’ve subscribed to your RSS which must do the trick! Have a great day!
Hi, Neat post. There is a problem with your website in internet explorer, would check this? IE still is the market leader and a good portion of people will miss your magnificent writing because of this problem.
There are certainly loads of details like that to take into consideration. That may be a great level to carry up. I supply the thoughts above as general inspiration however clearly there are questions like the one you bring up where the most important thing can be working in sincere good faith. I don?t know if finest practices have emerged around things like that, however I am positive that your job is clearly identified as a fair game. Both girls and boys feel the impression of only a second?s pleasure, for the remainder of their lives.
Hey there! Would you mind if I share your blog with my zynga group? There’s a lot of folks that I think would really enjoy your content. Please let me know. Many thanks
Fantastic goods from you, man. I’ve understand your stuff previous to and you are just extremely fantastic. I really like what you have acquired here, really like what you’re stating and the way in which you say it. You make it enjoyable and you still care for to keep it wise. I can not wait to read far more from you. This is really a wonderful web site.
An attention-grabbing discussion is value comment. I think that it’s best to write more on this subject, it won’t be a taboo topic but typically people are not sufficient to talk on such topics. To the next. Cheers
There are definitely quite a lot of particulars like that to take into consideration. That may be a great level to carry up. I provide the ideas above as general inspiration but clearly there are questions just like the one you bring up the place crucial thing will be working in sincere good faith. I don?t know if best practices have emerged around issues like that, however I am sure that your job is clearly recognized as a good game. Both girls and boys feel the influence of just a moment?s pleasure, for the remainder of their lives.
I just like the valuable information you supply in your articles. I will bookmark your weblog and take a look at again right here frequently. I am slightly certain I?ll learn lots of new stuff proper right here! Good luck for the next!
This site can be a stroll-by means of for all the information you wanted about this and didn?t know who to ask. Glimpse right here, and also you?ll definitely uncover it.
Fantastic beat ! I wish to apprentice whilst you amend your site, how could i subscribe for a blog website? The account aided me a appropriate deal. I had been tiny bit acquainted of this your broadcast provided bright clear concept
Thank you for any other informative website. The place else may I am getting that type of information written in such a perfect manner? I have a mission that I’m just now operating on, and I’ve been at the look out for such info.
I do enjoy the way you have presented this particular challenge plus it does indeed supply me personally a lot of fodder for consideration. However, because of just what I have observed, I simply just wish when the actual remarks pack on that folks keep on point and in no way start upon a soap box regarding the news du jour. Anyway, thank you for this superb piece and although I do not really concur with this in totality, I regard the perspective.
Outstanding post however I was wondering if you could write a litte more on this subject? I’d be very thankful if you could elaborate a little bit more. Appreciate it!
great issues altogether, you just won a new reader. What could you recommend in regards to your post that you just made some days ago? Any certain?
Wow, this article is mind-blowing! The author has done a fantastic job of presenting the information in an compelling and educational manner. I can’t thank her enough for sharing such priceless insights that have undoubtedly enriched my knowledge in this subject area. Hats off to her for producing such a work of art!
At this time it appears like BlogEngine is the preferred blogging platform out there right now. (from what I’ve read) Is that what you are using on your blog?
you’re in point of fact a excellent webmaster. The site loading pace is amazing. It seems that you are doing any unique trick. Furthermore, The contents are masterwork. you’ve performed a great activity on this subject!