First order of business! If you are here in search of the Drawn Together project for Newtown, CT – keep on scrolling! You’ll find everything you need just below this post or by clicking HERE.
Next order of business, Glitter Twine! With all the sadness of the Newtown, CT tragedy, there is a little bit of solace that comes with returning to routine. Today, I’m happy to return to the routine of sharing my love of making stuff!
When I came across the Glimmer Twine available at the TomKat Studio Shop – I sort of did that internal scream you do when you’re really excited about something but can’t scream out loud because the people around you will freak. Yep. That’s what I did.
Then I found out that I would be sharing this project as a guest on the TomKat Studio Blog. Then I just did the scream for real. At that point, who cares if anyone thinks you’re crazy, right?
I knew I needed this twine in my life – because only amazing things happen when glitter and twine come together. Today’s project is proof of that theory. Don’t believe me? Keep scrolling…
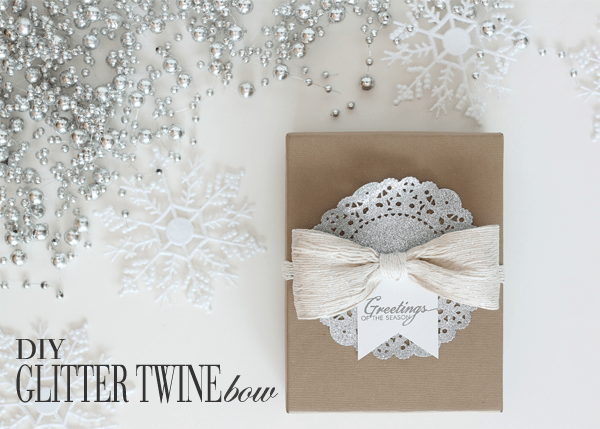
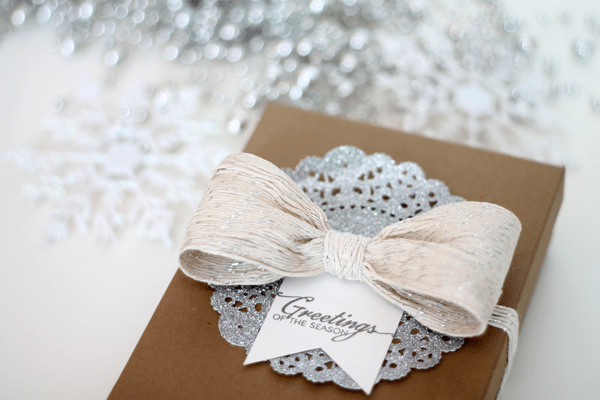
With just three supplies: a mason jar, twine and glue, I was able to create this beautiful twine bow that is a really fun & unique way to dress up your gifts. The bow served as the focal point for this gift box full of fun gift wrapping goodies.
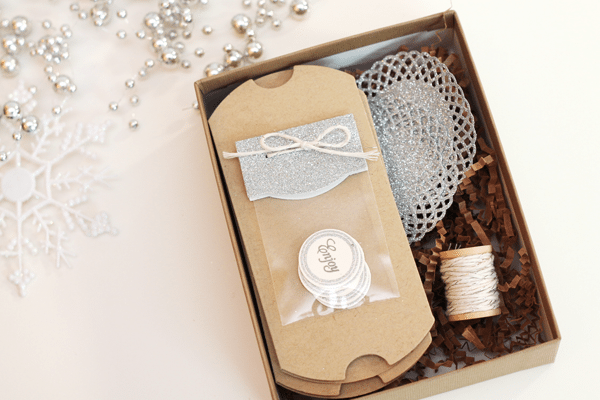
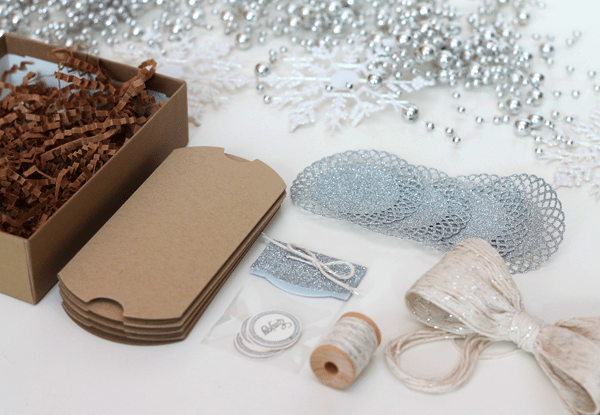
Inside I assembled a grouping of items that are perfect for making a few treat containers for gift giving.
SUPPLIES
TomKat Silver Glimmer Twine | Paper Source Glitter Wrapping Paper in Silver | A2 Kraft Invitation Box | Kraft Cardstock | Lifestyle Crafts Pillow Box Die | Papertrey Ink Doily Details Die Collection | Papertrey Ink Parisian Die | We Love Citrus Twine Mini Spool | Clear & Simple Stamps Topper Die
…and in case you are wondering how to create this bow on your own, I’ve got a short video tutorial for you!
[ylwm_vimeo height=”400″ width=”600″ class=”MyCustomClass”]55751772[/ylwm_vimeo]
- The outpouring of support for Drawn Together has been unbelievable! If you could see my email inbox!!! If you have sent me an email, but have not received a response. Sit tight. I promise to respond!
- This afternoon, I will update the Drawn Together post with a PO Box where you can send cards and supplies!
- Thank you to each and every person who has shared this via Twitter, Pinterest, Instagram and Facebook. This project has reached every corner of our country and has even traveled up to Canada and hopped the pond to a few international friends! Thank you to those who have donated time, money and supplies to making this meaningful. I was incredibly nervous about Drawn Together – unsure of what people would think. My nerves are gone and have been replaced by gratitude and excitement about providing some tools for healing to the children and family of Newtown, CT. I think we can all agree that if these supplies help one child heal from this event – the project is more than worth our time and effort.
- If Twitter is your thing, feel free to use #drawntogetherforCT as you spread the word.





Okay, so the first thing I did when I saw this post when I woke up this morning? Go over and buy some of this twine. This was at 6:45am! Now that I’m properly awake I wanted to say how *amazing* I think your twine bow is. I may well have to try it out myself!!
This is probably one the best ideas for twine that I have seen yet! Thanks for the great idea……I WILL be at Hobby Lobby today looking for this twine and making a lot of the bows for decorating! Thanks again for sharing! Ciao 🙂
I love your Christmas ideas. When I taught third grade, it was my class’s ronepssibility to decorate the tree in the log cabin where Santa comes to our little town. Of course, we would always string popcorn and cranberries and then we would have to make an old fashioned looking ornament or two for each child to put on the tree. It was fun to think up something different each year. I help the new third grade teacher. She calls herself the anti-craft.
Hi Amber, I’m in the UK so am making 5 girls cards and 5 boys cards. I’ve posted on Facebook and telling everyone I know. Thanks so much for enabling us to help, you’re an angel xxx
This is one magnificent bow, Amber – BRILLIANT idea 🙂 I have some similar twine that I got from paper Presentation – I am going to try it with that.
I am so very happy that your “project” has reached such levels, the response is very heartwarming, to say the very least 🙂
Thanks for the bow video and I love your doilies.
That’s so great. I’ve never seen anything like that!
Hi Amber! Thanks so much for sharing how you made the twine bow…such a clever idea. I really liked your video showing the steps. I found your blog via “Tom Kat Studio” blog…love that twine.
What a fabulous idea! TFS!
So pretty!
This glitter twine bow tutorial is fantastic! My advice for anyone attempting this craft is to take your time and be patient. It’s those meticulous details that make the final result so beautiful. Additionally, consider experimenting with different colors of glitter and twine to match the occasion or your personal style. Have fun and get creative – your handmade bows will add a special touch to gifts and decorations. Thanks for sharing this delightful project!
This is a gorgeous way to wrap. I adore the doilies and glitter twine. Thanks for sharing.
pharmacy com canada
https://expresscanadapharm.shop/# canadian neighbor pharmacy
ordering drugs from canada
Medicament prescribing information.
how can i get generic cipro prices
They provide access to global brands that are hard to find locally.
Always a step ahead in international healthcare trends.
buy cheap cytotec without a prescription
Their online portal is user-friendly and intuitive.
Some trends of drugs.
cheap clomid pills
Outstanding service, no matter where you’re located.