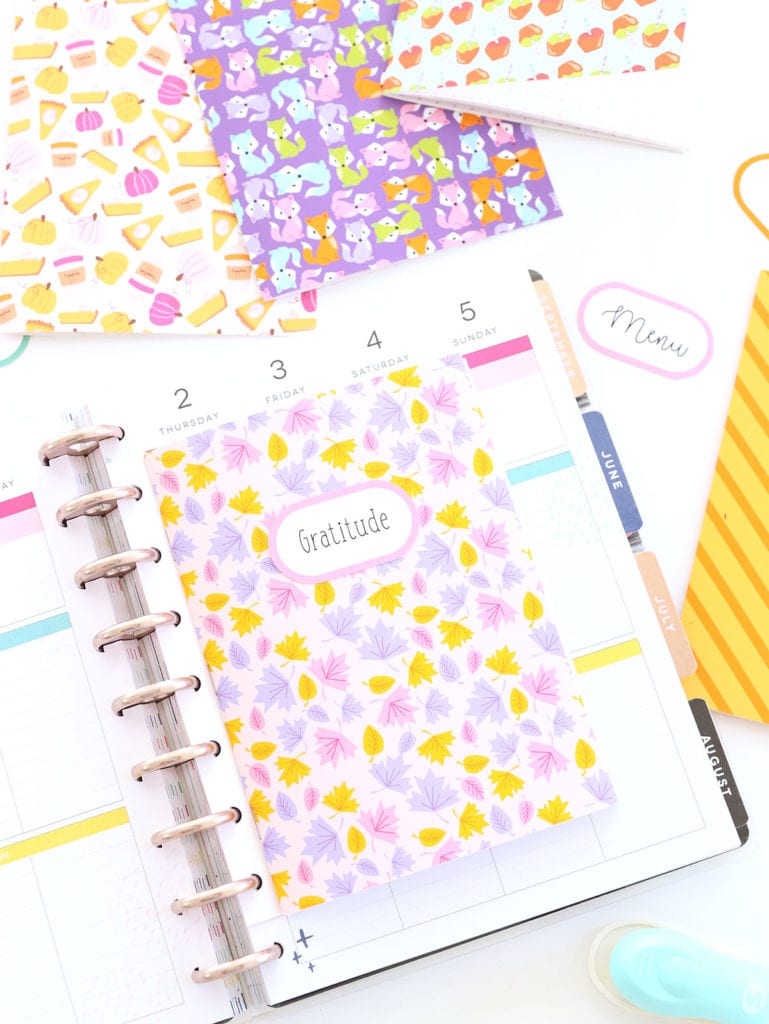
There is always a good reason for a notebook…which is why I am a self professed notebook hoarder. I have them in every color, pattern, size and shape…and after today’s post, I’ll have five more…and you will too.
Today I’m showing you how to print your own notebook using the Canon PIXMA TS9521C Printer. This snazzy printer can create borderless 12×12″ designs… but it also makes borderless 7×10″ designs which means…hello DIY greeting cards…and hello DIY notebooks! By folding the 7×10″ paper in half, you get the perfectly sized notebook for your purse or planner. Let me show you how simple it can be!
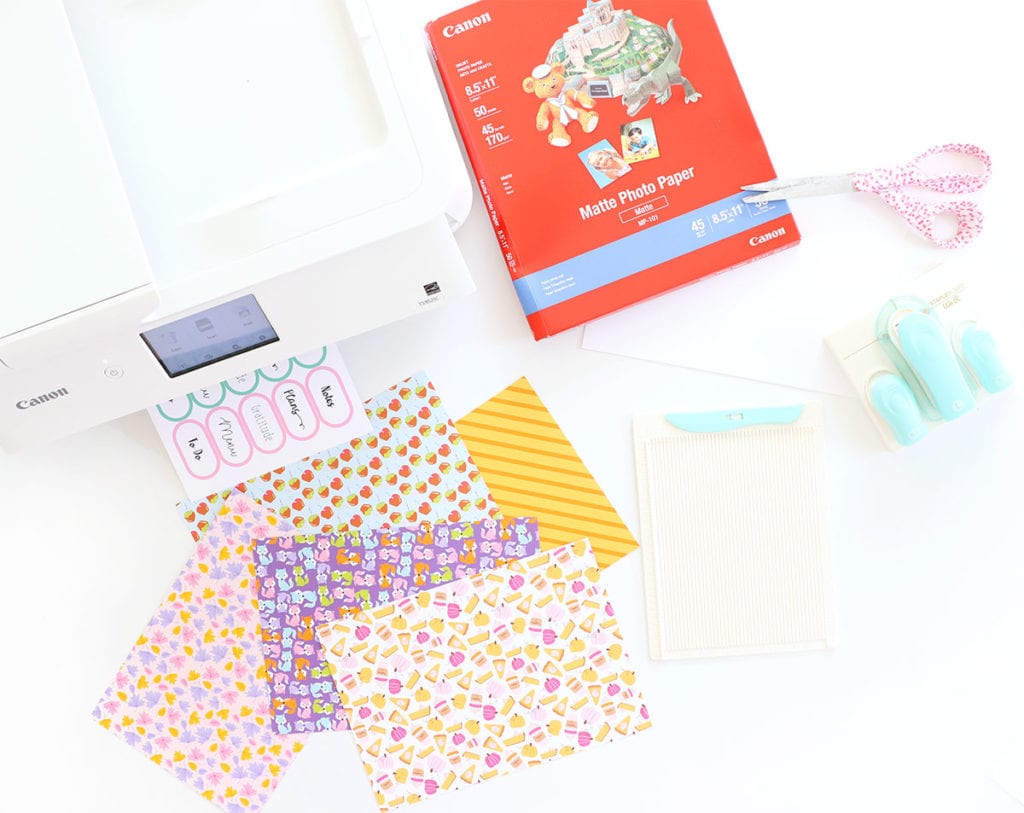
You’ll need:
- Canon PIXMA TS9521C Printer
- Canon Matte Photo paper trimmed to 7×10″
- Text Weight computer paper trimmed to 7×10″
- Scissors
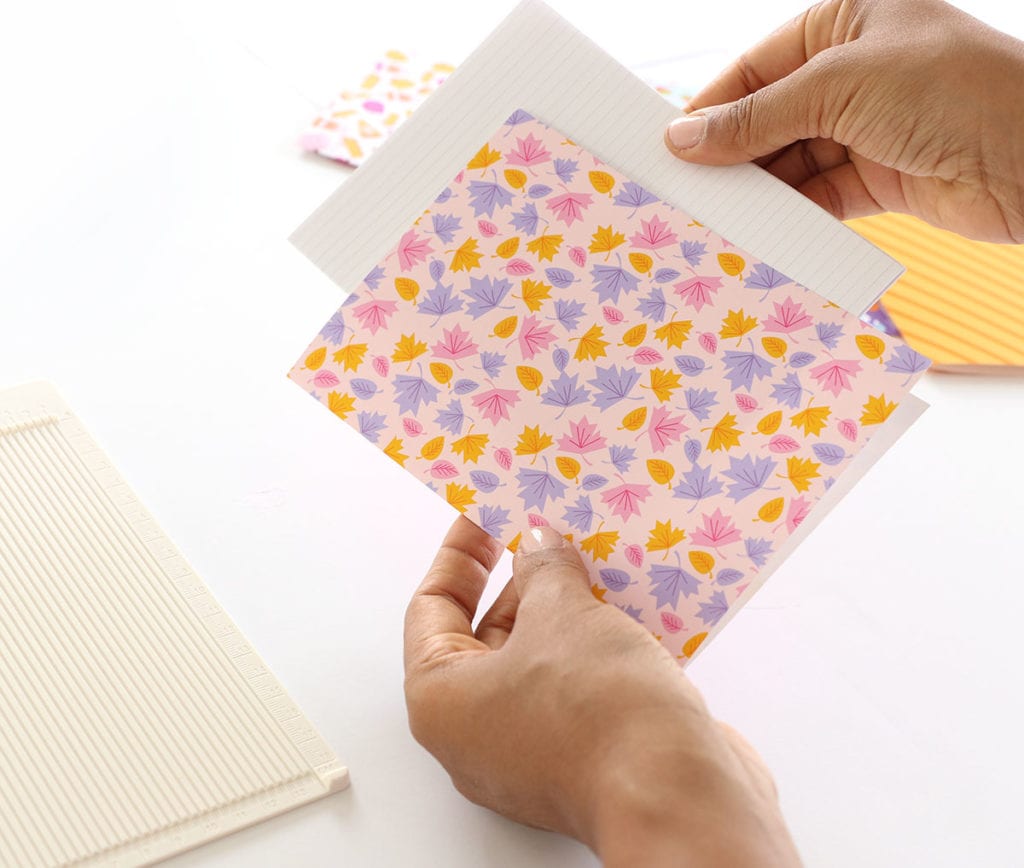
- A scoring board
- A WRMK Magnetic Staple Board or Long Arm Stapler
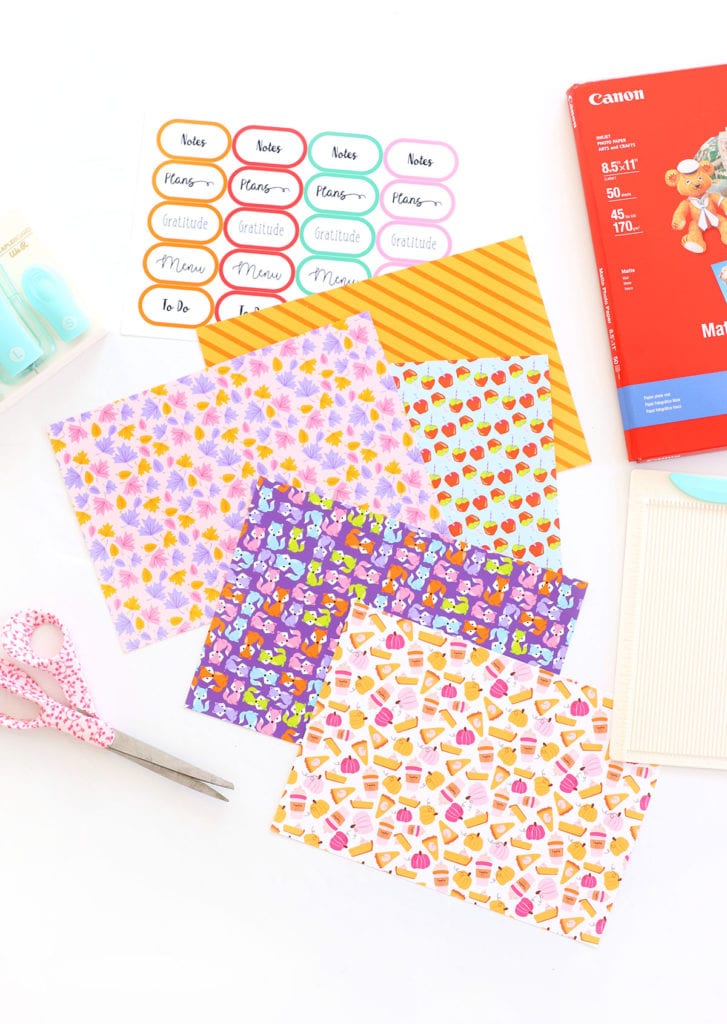
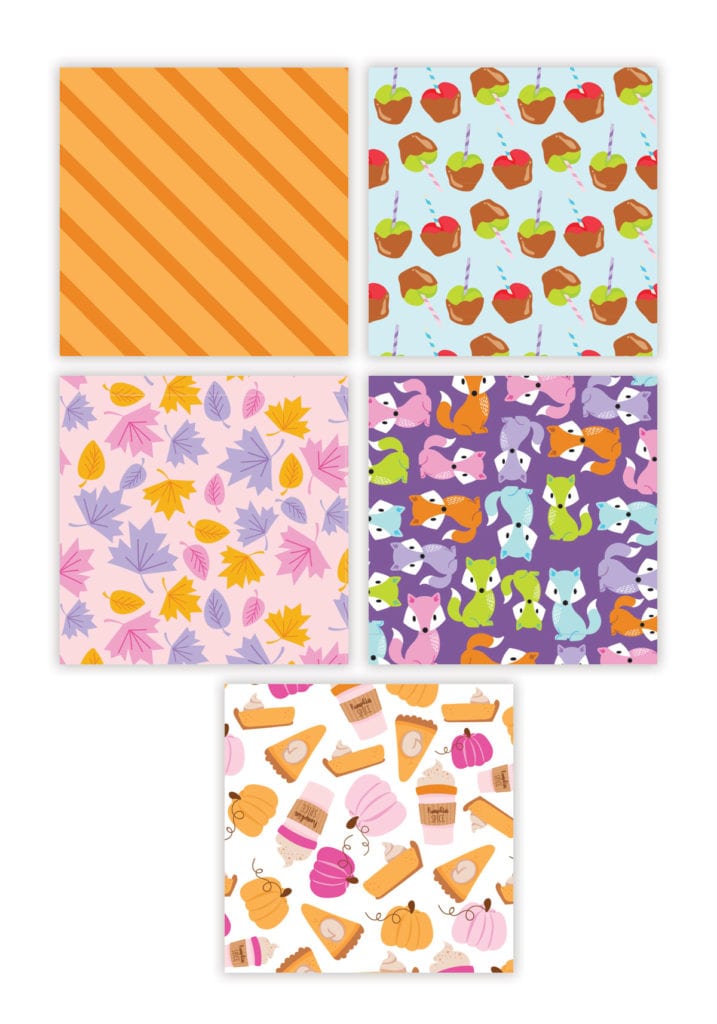
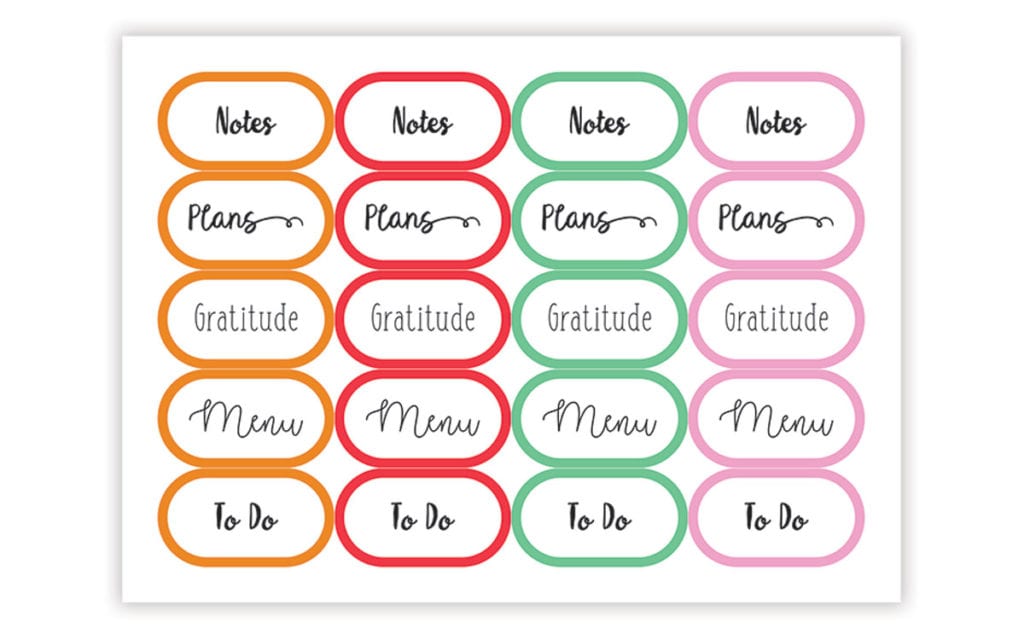
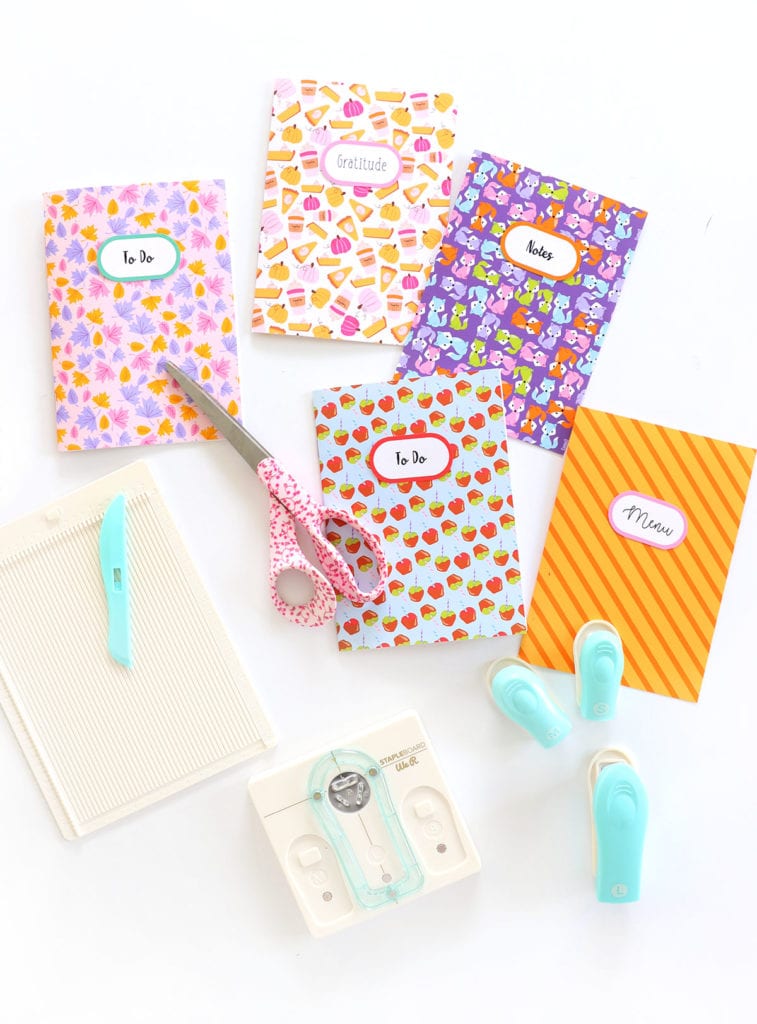
First, go ahead and print out all the pretty borderless designs we’ve created for you …FOR FREE! They are already sized to print borderless onto 7×10″ paper! You’ll also want to print out the sheet of labels so you can customize each notebook!


You’ll also want to print out the filler pages…YEP…we even created filler pages! These will also print borderless onto 7×10″ paper. For these pages you’ll want to print onto standard text weight computer paper.
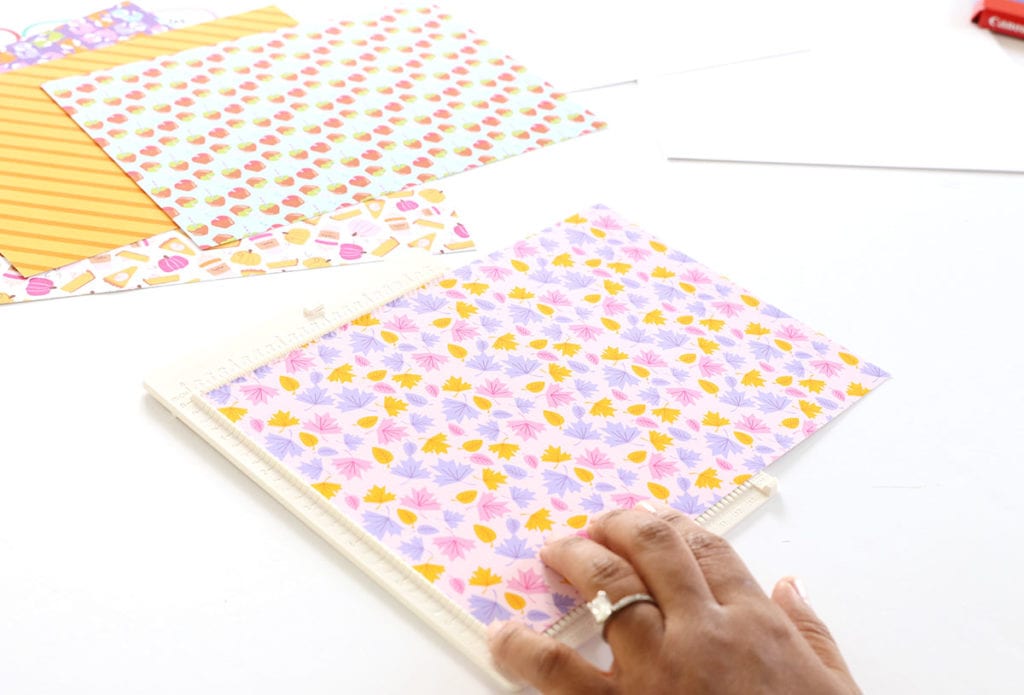
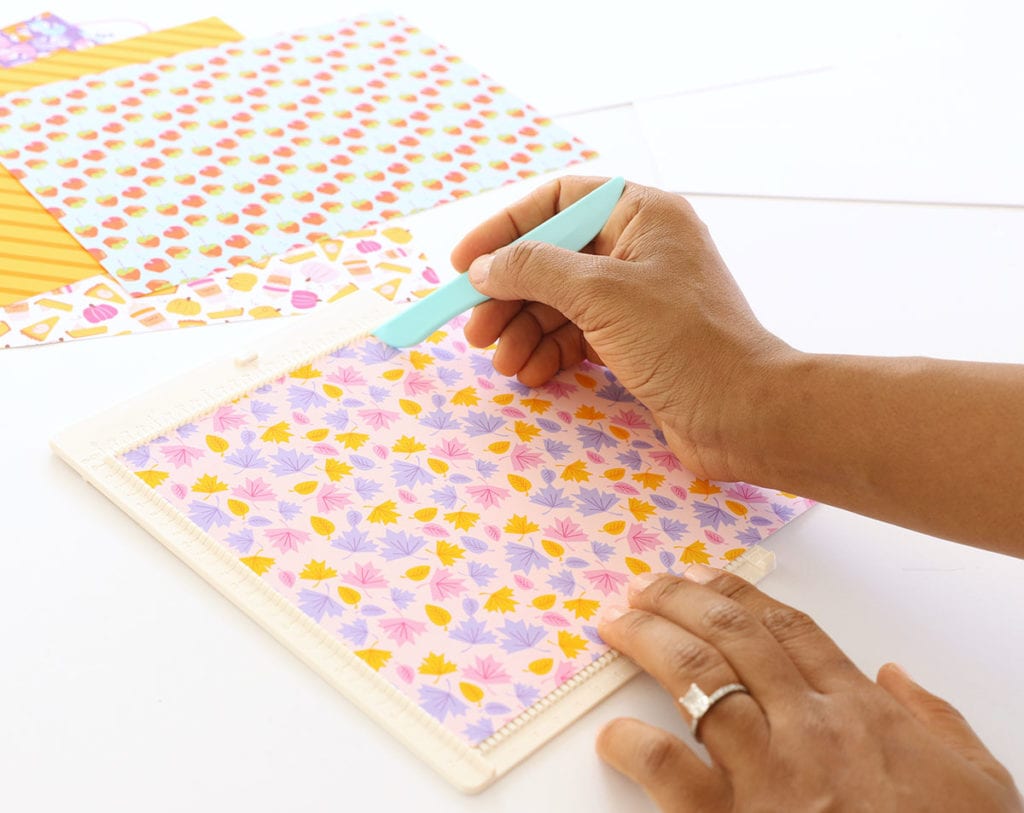
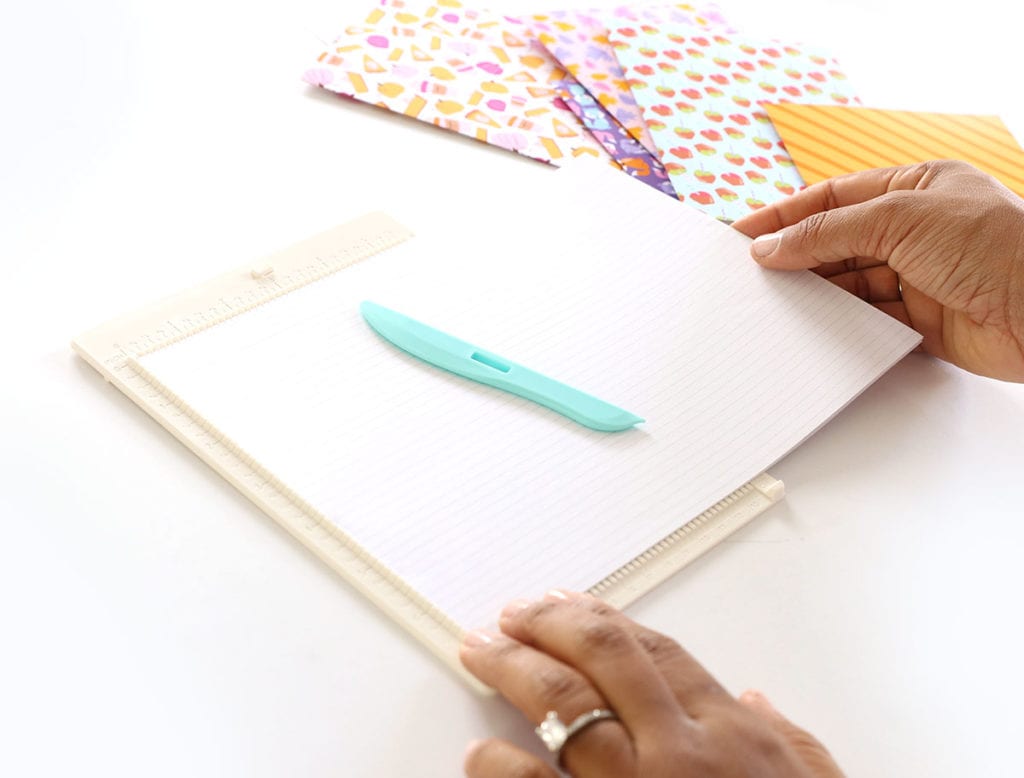
Now it’s time to assemble! Place the patterned paper onto your scoring board and score in the middle at 5″. Do the same with the filler pages.
Fold everything in half, and insert the filler pages into the patterned cover.
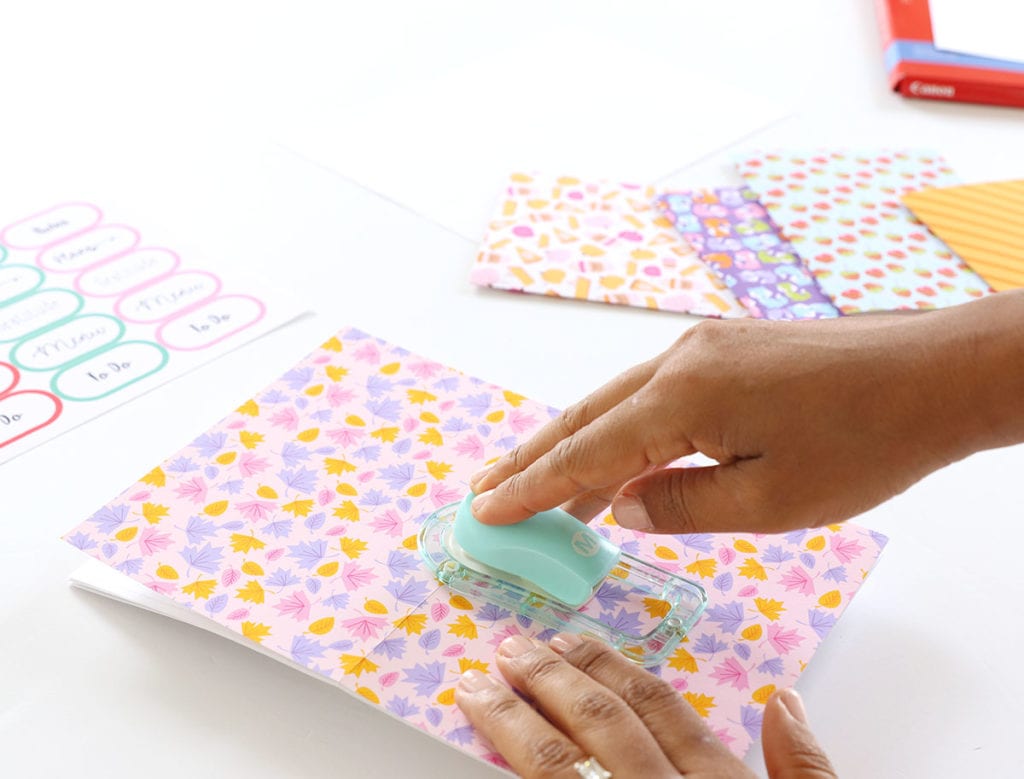
Align the outer crease of the notebook with the arrows on the staple board. Repeat this along the crease until you’ve placed three staples.

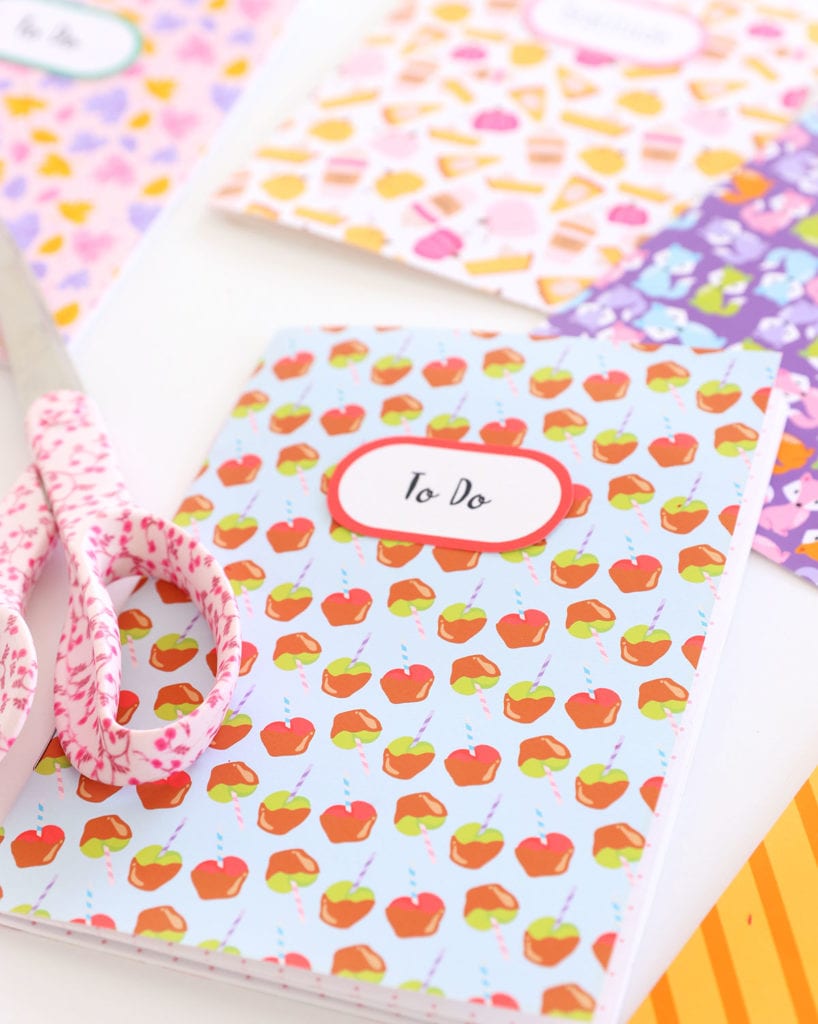
If you want to add a label, simply cut them out with scissors and adhere with glue or tape.

This is a sponsored conversation written by me on behalf of Canon. The opinions and text are all mine.


This is the right weblog for anybody who desires to search out out about this topic. You notice a lot its nearly onerous to argue with you (not that I truly would want?HaHa). You positively put a brand new spin on a topic thats been written about for years. Nice stuff, simply nice!
Wow! This blog looks exactly like my old one! It’s on a totally different topic but it has pretty much the same layout and design. Wonderful choice of colors!
hello!,I like your writing very much! percentage we be in contact more approximately your article on AOL? I need an expert on this house to unravel my problem. May be that is you! Looking forward to see you.
I’ve learned many important things through your post. I will also like to say that there may be situation where you will apply for a loan and do not need a co-signer such as a National Student Support Loan. In case you are getting credit through a conventional banker then you need to be made ready to have a cosigner ready to make it easier for you. The lenders can base their very own decision on the few aspects but the most significant will be your credit standing. There are some financial institutions that will additionally look at your work history and choose based on this but in many cases it will be based on on your report.
Hello, Neat post. There is an issue with your site in web explorer, would test this? IE nonetheless is the market chief and a good portion of other people will omit your fantastic writing because of this problem.
Great post. I was checking continuously this weblog and I’m inspired! Extremely helpful information specifically the last phase 🙂 I care for such info much. I was seeking this certain info for a very lengthy time. Thanks and good luck.
Today, considering the fast chosen lifestyle that everyone is having, credit cards get this amazing demand throughout the economy. Persons throughout every discipline are using credit card and people who are not using the credit cards have prepared to apply for even one. Thanks for sharing your ideas about credit cards.
I’ve been browsing online more than three hours today, yet I never found any interesting article like yours. It is pretty worth enough for me. Personally, if all web owners and bloggers made good content as you did, the net will be much more useful than ever before.
I’m really impressed with your writing skills as well as with the layout on your weblog. Is this a paid theme or did you modify it yourself? Anyway keep up the nice quality writing, it is rare to see a great blog like this one nowadays..
Thanks a lot for your post. I’d prefer to comment that the tariff of car insurance varies widely from one insurance policy to another, mainly because there are so many different issues which contribute to the overall cost. One example is, the make and model of the motor vehicle will have an enormous bearing on the cost. A reliable older family automobile will have a more economical premium than just a flashy fancy car.
This really answered my downside, thank you!
Another thing I’ve noticed is the fact for many people, below-average credit is the reaction of circumstances over and above their control. For example they may are already saddled with illness so they really have more bills for collections. It can be due to a occupation loss or inability to do the job. Sometimes separation and divorce can send the finances in a downward direction. Thanks sharing your notions on this weblog.
Thanks for your posting on the travel industry. I will also like to include that if you are one senior contemplating traveling, it really is absolutely crucial to buy travel cover for seniors. When traveling, golden-agers are at greatest risk of getting a health emergency. Getting the right insurance plan package to your age group can safeguard your health and provide you with peace of mind.
Hey would you mind sharing which blog platform you’re working with? I’m planning to start my own blog in the near future but I’m having a tough time choosing between BlogEngine/Wordpress/B2evolution and Drupal. The reason I ask is because your design seems different then most blogs and I’m looking for something unique. P.S Sorry for being off-topic but I had to ask!
Hi there would you mind letting me know which webhost you’re using? I’ve loaded your blog in 3 completely different internet browsers and I must say this blog loads a lot quicker then most. Can you recommend a good web hosting provider at a fair price? Kudos, I appreciate it!
This is without a doubt one of the best articles I’ve read on this topic! The author’s comprehensive knowledge and enthusiasm for the subject are apparent in every paragraph. I’m so grateful for stumbling upon this piece as it has enriched my comprehension and sparked my curiosity even further. Thank you, author, for investing the time to create such a remarkable article!
One thing I’d like to reply to is that weightloss program fast can be performed by the perfect diet and exercise. Ones size not only affects appearance, but also the entire quality of life. Self-esteem, major depression, health risks, and physical capabilities are influenced in weight gain. It is possible to do everything right whilst still having a gain. In such a circumstance, a medical problem may be the primary cause. While an excessive amount of food rather than enough body exercise are usually responsible, common medical conditions and widely used prescriptions can easily greatly amplify size. Thanks for your post here.
Amazing! This blog looks exactly like my old one! It’s on a totally different topic but it has pretty much the same page layout and design. Great choice of colors!
I was searching online for the Best Dentist near me, and I’m glad I came across Oh Dental Care – truly a great experience.
It’s refreshing to see a Psychologist Sydney practice that focuses on both emotional well-being and personal growth — definitely a great choice for anyone needing professional support.
Yorkville Smiles provided me with a Dental Bridges Toronto that restored both function and aesthetics. The procedure was completed in just two visits, and the results have been life-changing. Highly recommend their expertise!” Dr. Judy Sturm & Associates