I swore I wouldn’t do it. I said I would hold out. But then I went to Home Depot one afternoon. And there they were, all pretty and oh so reasonably priced.
Succulents.
They are pretty much the mason jars of gardening. Very trendy and you see ’em everywhere. Well…here I a giving in to the trend. Going back on my word. But I think it’s totally worth it. Today’s post is one of those posts that I truly love. If this post gets zero comments, I will still love it. If you tell me that this project is the ugliest you’ve ever seen, I will still love it…and then we probably won’t be friends anymore.
When I brought home my little succulent babies, I wanted to come up with a creative way to display them. There is no shortage of succulent projects out there in blogland, but I think I’ve come up with a simple variant that will speak to all you stampers out there.
{1} Oven-bake clay
{2} Clay roller
{3} Scallop edge cut from chipboard. This scalloped edge was created using Clear & Simple Stamps Border Scallop Dies
{1} Roll out the clay to 1/4″ thickness
{2} Trim the clay into a long rectangle. You can freehand this, but I would suggest using a piece of chipboard as a guide for your cuts.
{3} Place your scallop edge on your clay rectangle and follow the scallops with you knife tool.
{4} Smooth the scalloped edges if needed to create even scallops along the top edge of your rectangle.
{5} Using the stamp of your choice, press the stamp into the clay with your hands. Do not use an acrylic block stamping.
{6} Gently peel the stamp away from the clay.
{7} Wrap the rectangle around a circle cut from clay to create a cylinder.
{8} Use a shaping tool to join the edges of the clay together.
{9} Use a paper straw to create a hole in the bottom of your clay pot.
BAKING: Finally, bake the piece according to package instructions.
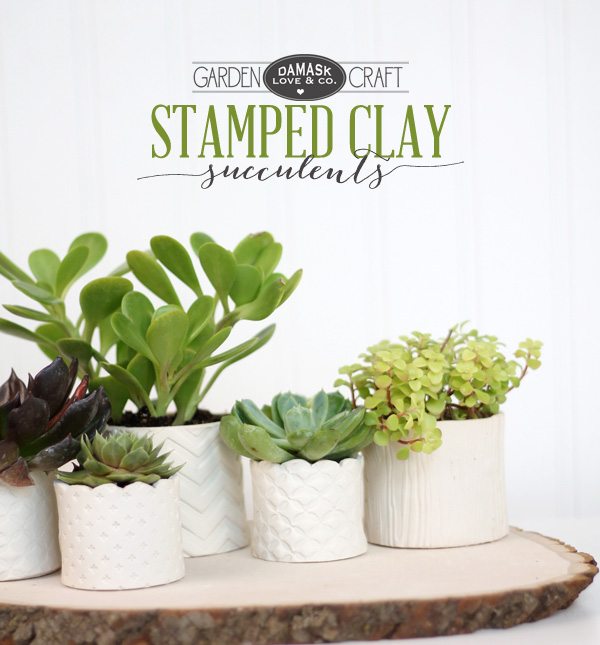
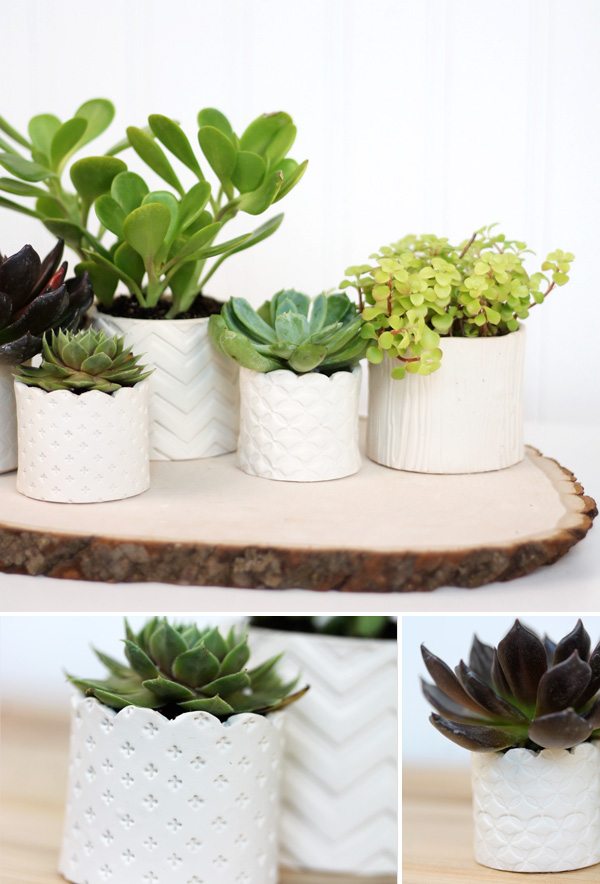
 Once you get started making these, it’s pretty hard to stop. I had fun playing with different stamps to create a variety of modern, fun textures on each pot. With so many of these completed, it only made sense to package a few of them up to give away.
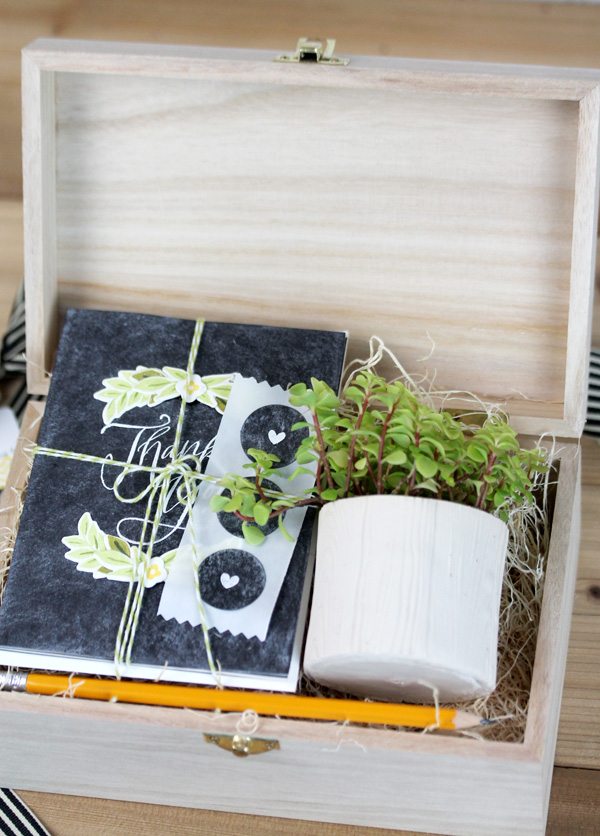
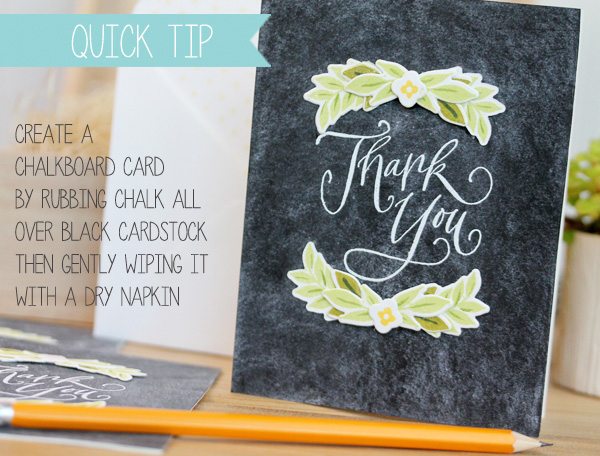
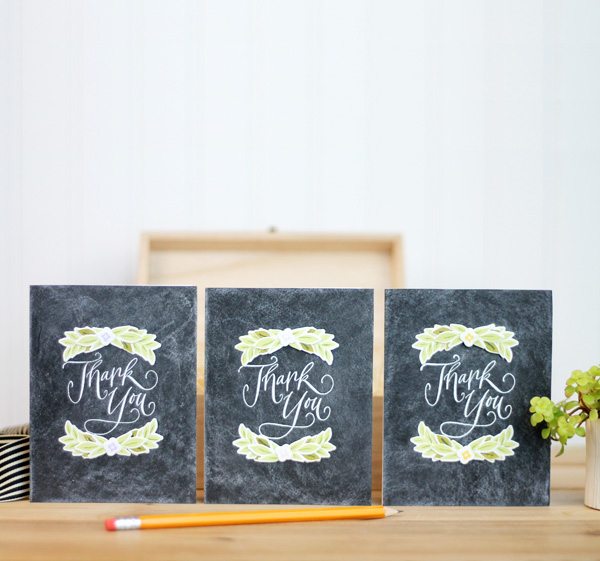
For some reason, succulents and chalkboard were a natural combination for me, so I created a coordinating set of chalkboard stationery and boxed everything up in a pretty wood gift box.
And while we’re at it, I should probably warn you that I am completely and utterly obsessed with THIS “Thank You” stamp from Paper Source. You’ll be seeing a lot of it around here.
And so ends our little study of garden themed crafts! Hope you had fun with this theme. I know I did.
SUPPLIES:
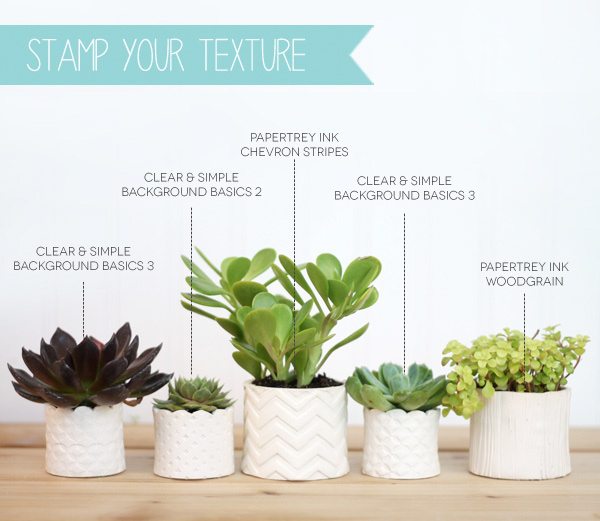
Clay Pots: Sculpey Oven Bake Clay | Clear and Simple Stamps Background Basics 2 | Clear and Simple Stamps Background Basics 3 | Papertrey Ink Chevron Stripes | Papertrey Ink Woodgrain // Chalkboard Card Set: Paper Source Thank You Woodmounted Stamp | Wplus9 Fresh Cut Florals






Totally in love with how simple these are! I love the chevron vase especially since I already own that stamp. Thanks for the idea about using chalk straight on the black cardstock. Gonna try it! I did want to know: does everything fit in wooden box when it closes? Thanks in advance.
Hi Rae! Yes! The cards and pot do fit in the box. You’ll just need to turn the cards . I photographed them facing a different direction, for the sake of styling, but you can just turn them and nestle them into the gift box without a problem!
so clever and well done and beautiful!
Great project. You are so creative! You can do anything!
This is just beyond gorgeous!
How do you come up with such good ideas, in so many different techniques – and it always look awesome?
You leave me staring at your masterpieces with my mouth open 🙂
I love this. It’s a great idea. I bought some clay a little while back to do an Artsy Activity with the Cubs Scouts but my kiddos and I also had some fun with it. I too did some stamping with stamps. Here is a link if you want to check it out. http://happystampingdesigns.blogspot.com/2012/09/playing-with-clay.html
I still have some clay and will have to give your clay pot idea a go, so cool!
LOVE your clay project, Wendy! I especially love the bowl with the wavy edge!
I’ll say it again. You are a genius. I must try this. Totally love these. Please come to Illinois and do a class.
Love it, Amber! We have lots of succulents around here, but I think it will be hard to found the clay you used. Otherwise I’d be trying this project right now 🙂
Amber, you have outdone yourself this series. So many really great ideas. I love anything white with a texture, so these pots are amazing.
Brilliant! These turned out beautifully. I am definitely going to try this one.
I am over the top impressed with your project. Your pots are amazing as are your cards. WOW!
However I would probably kill the little plants so I wont follow suit!
Thanks for sharing
Susan
NO! You won’t kill them! Succulents are incredibly resilient! If I can keep them alive, you can too! I promise!
LOVE these Amber! Does it take a package of clay for each pot??
I just shouted, BEAUTIFUL! I love these little pots. I am like you I love succulents. I must try this for sure. Making my materials list NOW.
OMG Amber. You are the queen of crafting! These are amazing!!! And your cards look like they came from Paper Source!!! 🙂
I’ve been wanting to do something like this. Your tutorial just gave me the motivation I needed. Thanks!!!! Great work!
get out! i mean, over here. to my house. with these pots please. 🙂
Amber, these are amazing!!!! xoxox
Oh My!!! I had always wanted to play with Scupley but the project seemed way to overwhemling ….but these pots are (1) adorkable (2) great for gifts and (3) easy to do. Thanks, love your emails by the way.
I have a succulent garden in the backyard and have been trying to figure out a way to bring my favorites in for the winter but didn’t want plain ol’ regular pots… now I have the perfect solution! Thanks for the wonderful idea.
So adorable! No shame in giving in to the cute simplicity of succulents 😉
I have a question I’ve been meaning to ask, since I see this font pop up a lot: What is the font you used for the word “succulents” in the first picture in the post?
I’m DYING to know! Thanks so much 🙂
These are fabulous! My son loves those little succulents. This would be a great gift for him & I need to use up some of that sculpey clay! Thanks so much.
Oh, good grief. I’m going to have to get some succulents. This project is the best!
You’ve achieved the impossible…you’ve actually made me like succulents!
I have that “thank you” stamp from Paper Source and it’s one of my most-used stamps – that and the “happy birthday” stamp in the same swirly font:-)
Love love it. Can’t wait to make the pots and love the chalkboard cards. Thanks Amber!!!
Amber you have excelled once again. When I saw the first photo I thought – wow you managed to find some nice co-ordinating pots. Then I read on and saw that you made them! Much better than shop bought. Your ideas are endless!
I don’t care if they are all over blogland and I haven’t seen any so I shall remain your friend. I just started following you a few days ago. Love it. Love it all!
Cheers!
Q!
Love this project! As I love plants I’ll try this. Thanks so much for th einspiration
.
Jaw dropped. You crafty genius!
Amber you have done a wonderful job. I love the pots they turned out awesome. I love coming to your blog everyday just to see what dreamed up the night b4. Love you gf keep up the good work.
Oh.My.Gosh. I can’t believe you made little plant pots!!! I adore them! I am a succulent lover – I seem to keep them alive easier – LOL! I love the look of them and that really stand out with those gorgeous white pots you made. Great job!
I have long suspected you are not human, Amber – and after today’s tutorial I am convinced! Your creativity is beyond description – THANK YOU, for another fabulous project. Your instructions are so clear and concise – it all looks so easy – LOL!
Wow, these are great! I fell in love a while back with your “milkglass” post and promised myself that I’d try it – now I have another awesome project on my to-do list. This would definitely make a great from-the-heart present. Love it!
What a great project, just love it.
What a fun idea Amber. I love these. Hen and chicks are about the only one I can keep alive. LOL
I am in love! Such a clever idea, and beautifully presented and photographed. You have raised the bar for DIYS my friend!
Yes, you’re right…I do LOVE this!!! Now, I just need to give Gracie a year or two so we can do these fun crafts together! Or, better yet, have Auntie Amber come to do them all together!!! 🙂 Very impressive!
Hi Amber,
Just found your blog today through this post on Pinterest – I just had to drop you a comment to tell you that I find your blog such a breath of fresh air. Your projects, as well as the way you stage and photograph them, are breathtaking. I loved looking back through your blog and am excited to be a new follower! Just beautiful!
Megan
Oh my goodness! These are simply divine.
Like Megan I also found your blog on Pinterest. Love your tutorials! I’m definitely inspired and will keep on crafting – starting with this project!
LOVE it ALL!
um, I have been checking my mail for my “gift” and it hasn’t arrived yet…..are you sure you have my address?? LOLOL
AMAZING as always!!
These are so cute! I love how simple and clean they look while still having a lot of texture. Great gift idea too!
AMAZING!!!!!! This is so great. Do you put them straight in the clay or did you line them some how?
These are just gorgeous. Thank you for sharing.
Does anyone know if these need to be sealed?
You may not get back to this due to all of the previous comments but were your pots still somewhat bendable? Instead of rock hard?