Presently, ChezKG is a pitiful display of holiday cheer. The tree is up and the ornaments are hung; we did get that far. Our menorah is missing a candle, and I’m not sure what happened to it. It was there a few days ago. There are a few remnants of Thanksgiving decor on the dining room table. I’ve decided that autumn leaves do have a certain Christmassy spirit to them…that’s what I’m telling myself.
This year has just been busy – especially the last couple of months. Next year, I plan on hiring a holiday decorating specialist to get this place into ship shape. Clearly, I can’t be trusted to make it happen!
On top of all my terrible holiday preparation, I have yet to purchase one.single.gift. I’m embarrassed for myself. I have really slacked on my usually holiday crafting. It’s bad people. I have a name for this: Procraftination. I’m a Christmas Procraftinator. I’ve waited until the last minute to get anything done – so I’m here to share an idea for procraftinators like me.
I was inspired by this post on the Clear & Simple Stamps blog to create some yummy and creative chocolate bark candy bars. It’s very easy and you likely have all the supplies on hand!
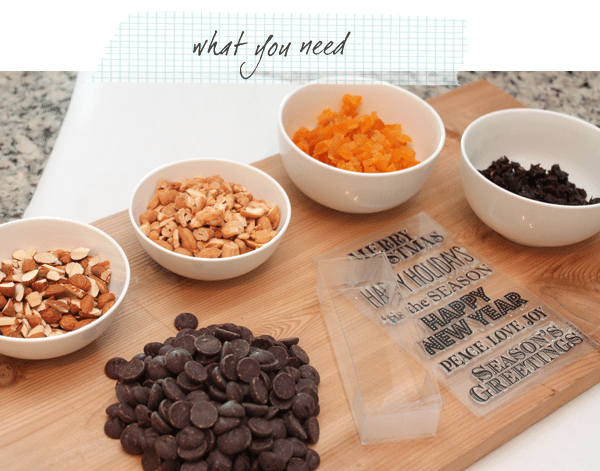
- Dark Chocolate Chips, which you will melt over a double boiler or in the microwave.
- A large-sentiment stamp set (I used Hero Arts Greetings for the Holidays)
- A clear, food-safe box (I used these boxes from Clear Bags. This site offers a wide selection of food safe boxes.)
- Assortment of chocolate bark toppings (e.g. dried apricots, dried cherries, toasted almonds, toasted cashews)
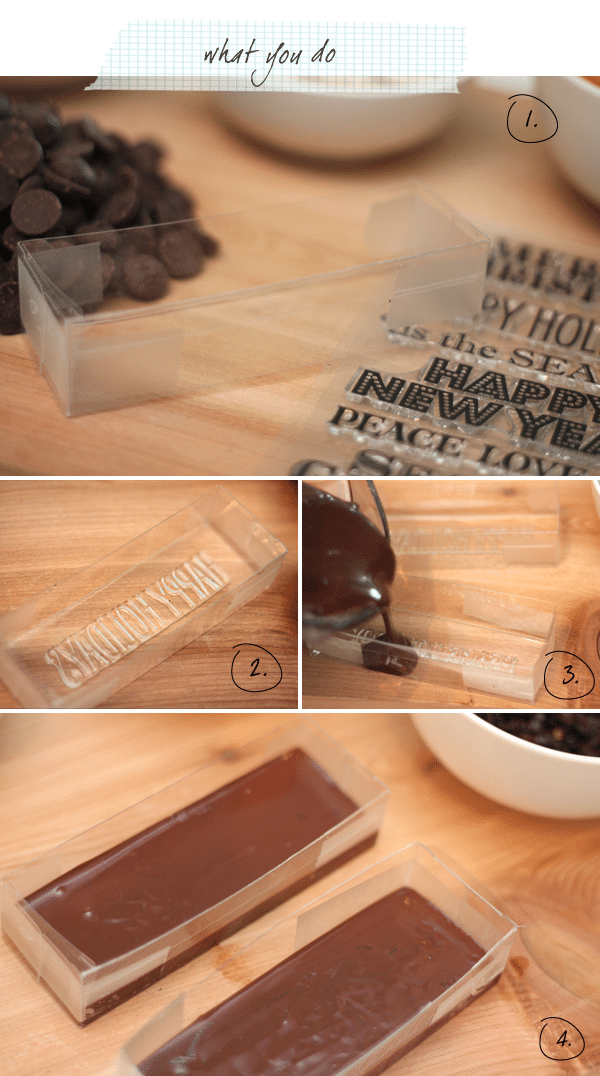
1) Trim off one of the sides of the box as showed, then use tape to secure the flaps on the outside of box lid.
2) Place one of the sentiment stamps inside of the box
3) Pour melted chocolate into the “mold”
4) Tap the mold gently to get a smooth finish on the top of your candy bars.
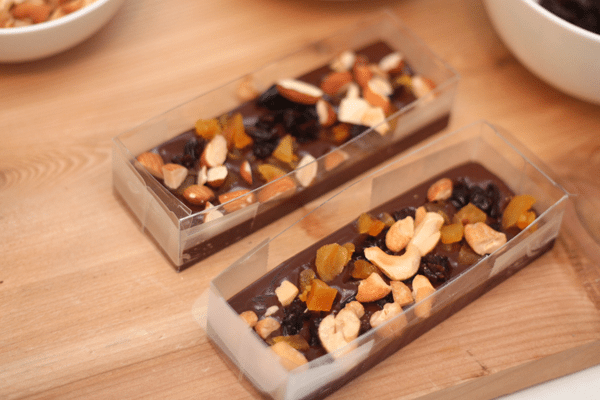
Last, you’ll sprinkle the toppings on the melted chocolate then place the mold in the refrigerator until the chocolate is solid. Now for the reveal!!
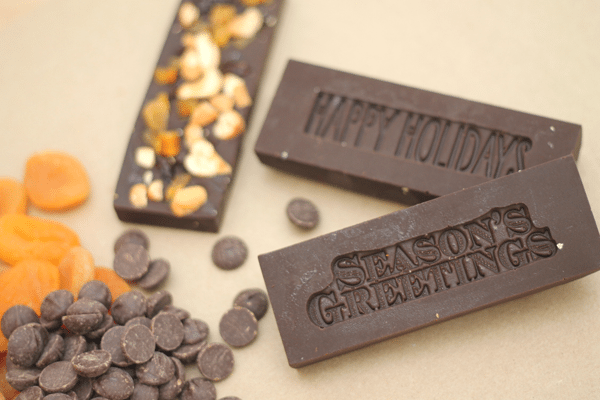
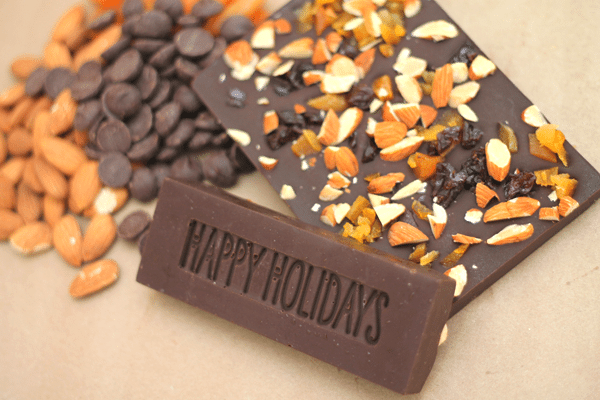
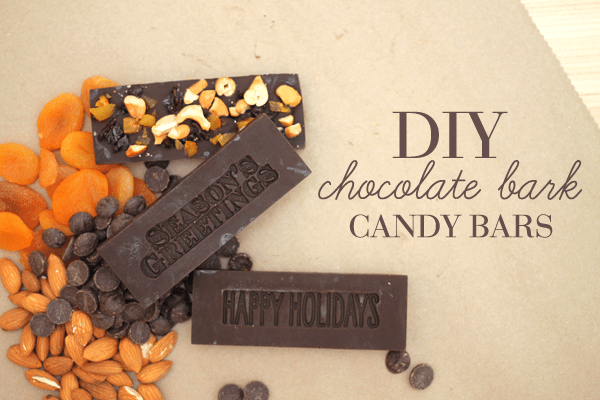
One you remove the chocolate from the mold, you’re left with an AWESOME customized candy bar! Pretty cool, right?
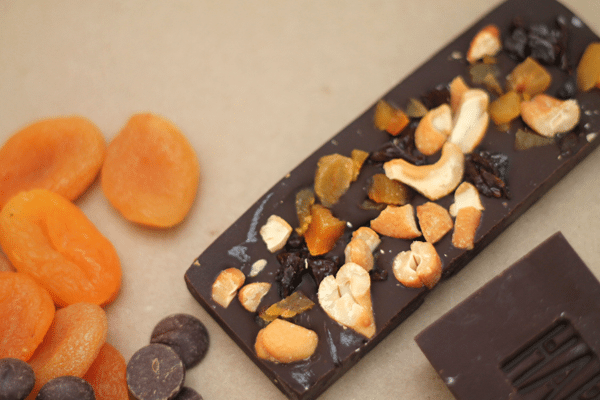
And on the back of the chocolate bar are those yummy topping that make this treat extra special.
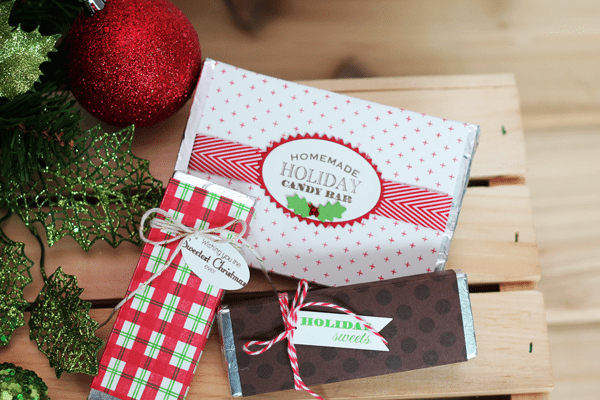
When your chocolate bars are all done, grab your craft supplies and start creating some fun packaging!
I first wrapped each bar in chocolate, then created stamped wrappers and labels onto cardstock! These were super easy to make, so don’t be afraid to give it a try!
And before I go….
- We’ve continued to have awesome support for Drawn Together! The dollar donation total is up to $4087.48 – I get chills typing that. I cannot believe your generosity! This money will go toward assembling additional kits beyond our initial goal of 50 as well as the assembly and delivery of these kits!
- Join me on Instagram and Twitter to see photos of the process as more and more supplies arrive to the Drawn Together Project!
- DoodleBox and Ribbon Carousel are both donating 10% of their sales to this cause! Damask Love sponsor, Lilly Belle Paperie has also joined the cause to supply ribbon for our kits! Lilly Belles will match your order yard for yard and send that ribbon directly to Drawn Together. If you buy one yard for yourself, Lilly Belle will send us one yard. If you buy 50 yards for yourself, Lilly Belle will send us 50 yards! When placing your order, please mention the Drawn Together project.
- Given the immense response the Drawn Together, I will be reserving some of the assembled kits to share with the children of Newtown in the coming months after this tragedy. Yesterday, I spoke with a board member of the Everwonder Children’s Museum in Newtown who relayed the following message: “What I’m hearing from the families is that they feel okay right now, but they are scared for what will happen in a few months when everyone has forgotten.” Sadly, it is all too common for the donations to wane in the months and years following a tragedy like this, and I want to be sure that our efforts continue to be meaningful to this community well after the media has left and the donations have subsided.



Thanks for your submission. I also believe laptop computers have grown to be more and more popular lately, and now in many cases are the only kind of computer employed in a household. Simply because at the same time that they are becoming more and more inexpensive, their working power is growing to the point where there’re as strong as personal computers coming from just a few years back.
An interesting discussion is worth comment. I feel that you should write extra on this topic, it won’t be a taboo topic however typically people are not sufficient to speak on such topics. To the next. Cheers
I was suggested this website by my cousin. I’m not sure whether this post is written by him as no one else know such detailed about my difficulty. You’re wonderful! Thanks!
Hello There. I found your blog the use of msn. That is a really smartly written article. I will make sure to bookmark it and come back to read more of your useful information. Thank you for the post. I?ll definitely return.
Someone essentially assist to make severely posts I would state. That is the very first time I frequented your website page and so far? I amazed with the analysis you made to make this particular publish extraordinary. Wonderful job!
I was recommended this blog by my cousin. I’m not sure whether this post is written by him as nobody else know such detailed about my difficulty. You are amazing! Thanks!
The subsequent time I read a weblog, I hope that it doesnt disappoint me as much as this one. I mean, I know it was my option to read, but I actually thought youd have one thing attention-grabbing to say. All I hear is a bunch of whining about something that you possibly can fix should you werent too busy in search of attention.
of course like your website but you have to check the spelling on several of your posts. Many of them are rife with spelling issues and I find it very troublesome to tell the truth nevertheless I?ll definitely come back again.
Hey there! I’ve been reading your weblog for a long time now and finally got the courage to go ahead and give you a shout out from Dallas Texas! Just wanted to tell you keep up the excellent job!
Fantastic post but I was wanting to know if you could write a litte more on this topic? I’d be very grateful if you could elaborate a little bit more. Cheers!
I just added this blog to my feed reader, excellent stuff. Cannot get enough!
You made some decent factors there. I looked on the internet for the problem and found most individuals will go together with with your website.
It is really a great and useful piece of info. I am glad that you shared this useful information with us. Please keep us informed like this. Thank you for sharing.
Thanks for another great post. Where else could anyone get that type of information in such a perfect way of writing? I have a presentation next week, and I am on the look for such info.
This actually answered my downside, thank you!
I do like the way you have framed this issue and it really does provide me personally a lot of fodder for consideration. However, coming from what I have witnessed, I basically wish when the actual feedback stack on that individuals keep on issue and don’t start upon a soap box of some other news of the day. Anyway, thank you for this outstanding piece and whilst I do not concur with the idea in totality, I value the viewpoint.
Wow, incredible blog structure! How lengthy have you ever been running a blog for? you made blogging look easy. The whole glance of your site is wonderful, let alone the content material!
Wow that was strange. I just wrote an incredibly long comment but after I clicked submit my comment didn’t show up. Grrrr… well I’m not writing all that over again. Anyway, just wanted to say excellent blog!
Excellent post. I was checking continuously this blog and I am impressed! Extremely useful information specially the last part 🙂 I care for such information a lot. I was seeking this certain info for a long time. Thank you and best of luck.
I like the valuable information you provide for your articles. I?ll bookmark your blog and test again right here regularly. I am rather sure I?ll be informed lots of new stuff proper right here! Good luck for the next!
Neat blog! Is your theme custom made or did you download it from somewhere? A theme like yours with a few simple tweeks would really make my blog shine. Please let me know where you got your design. With thanks
The “Procraftinator” label is too relatable! My holiday prep in 2026 is just as messy. While you’re planning to hire a decorator next year, I’m looking at logistics. I found https://affordablewastemanagement.co.uk/commercial-bin-collection/ commercial bin collection while trying to clear out my crafting clutter today indeed! Great candy bar idea—it is exactly what I need for gifts now. Simply great!!