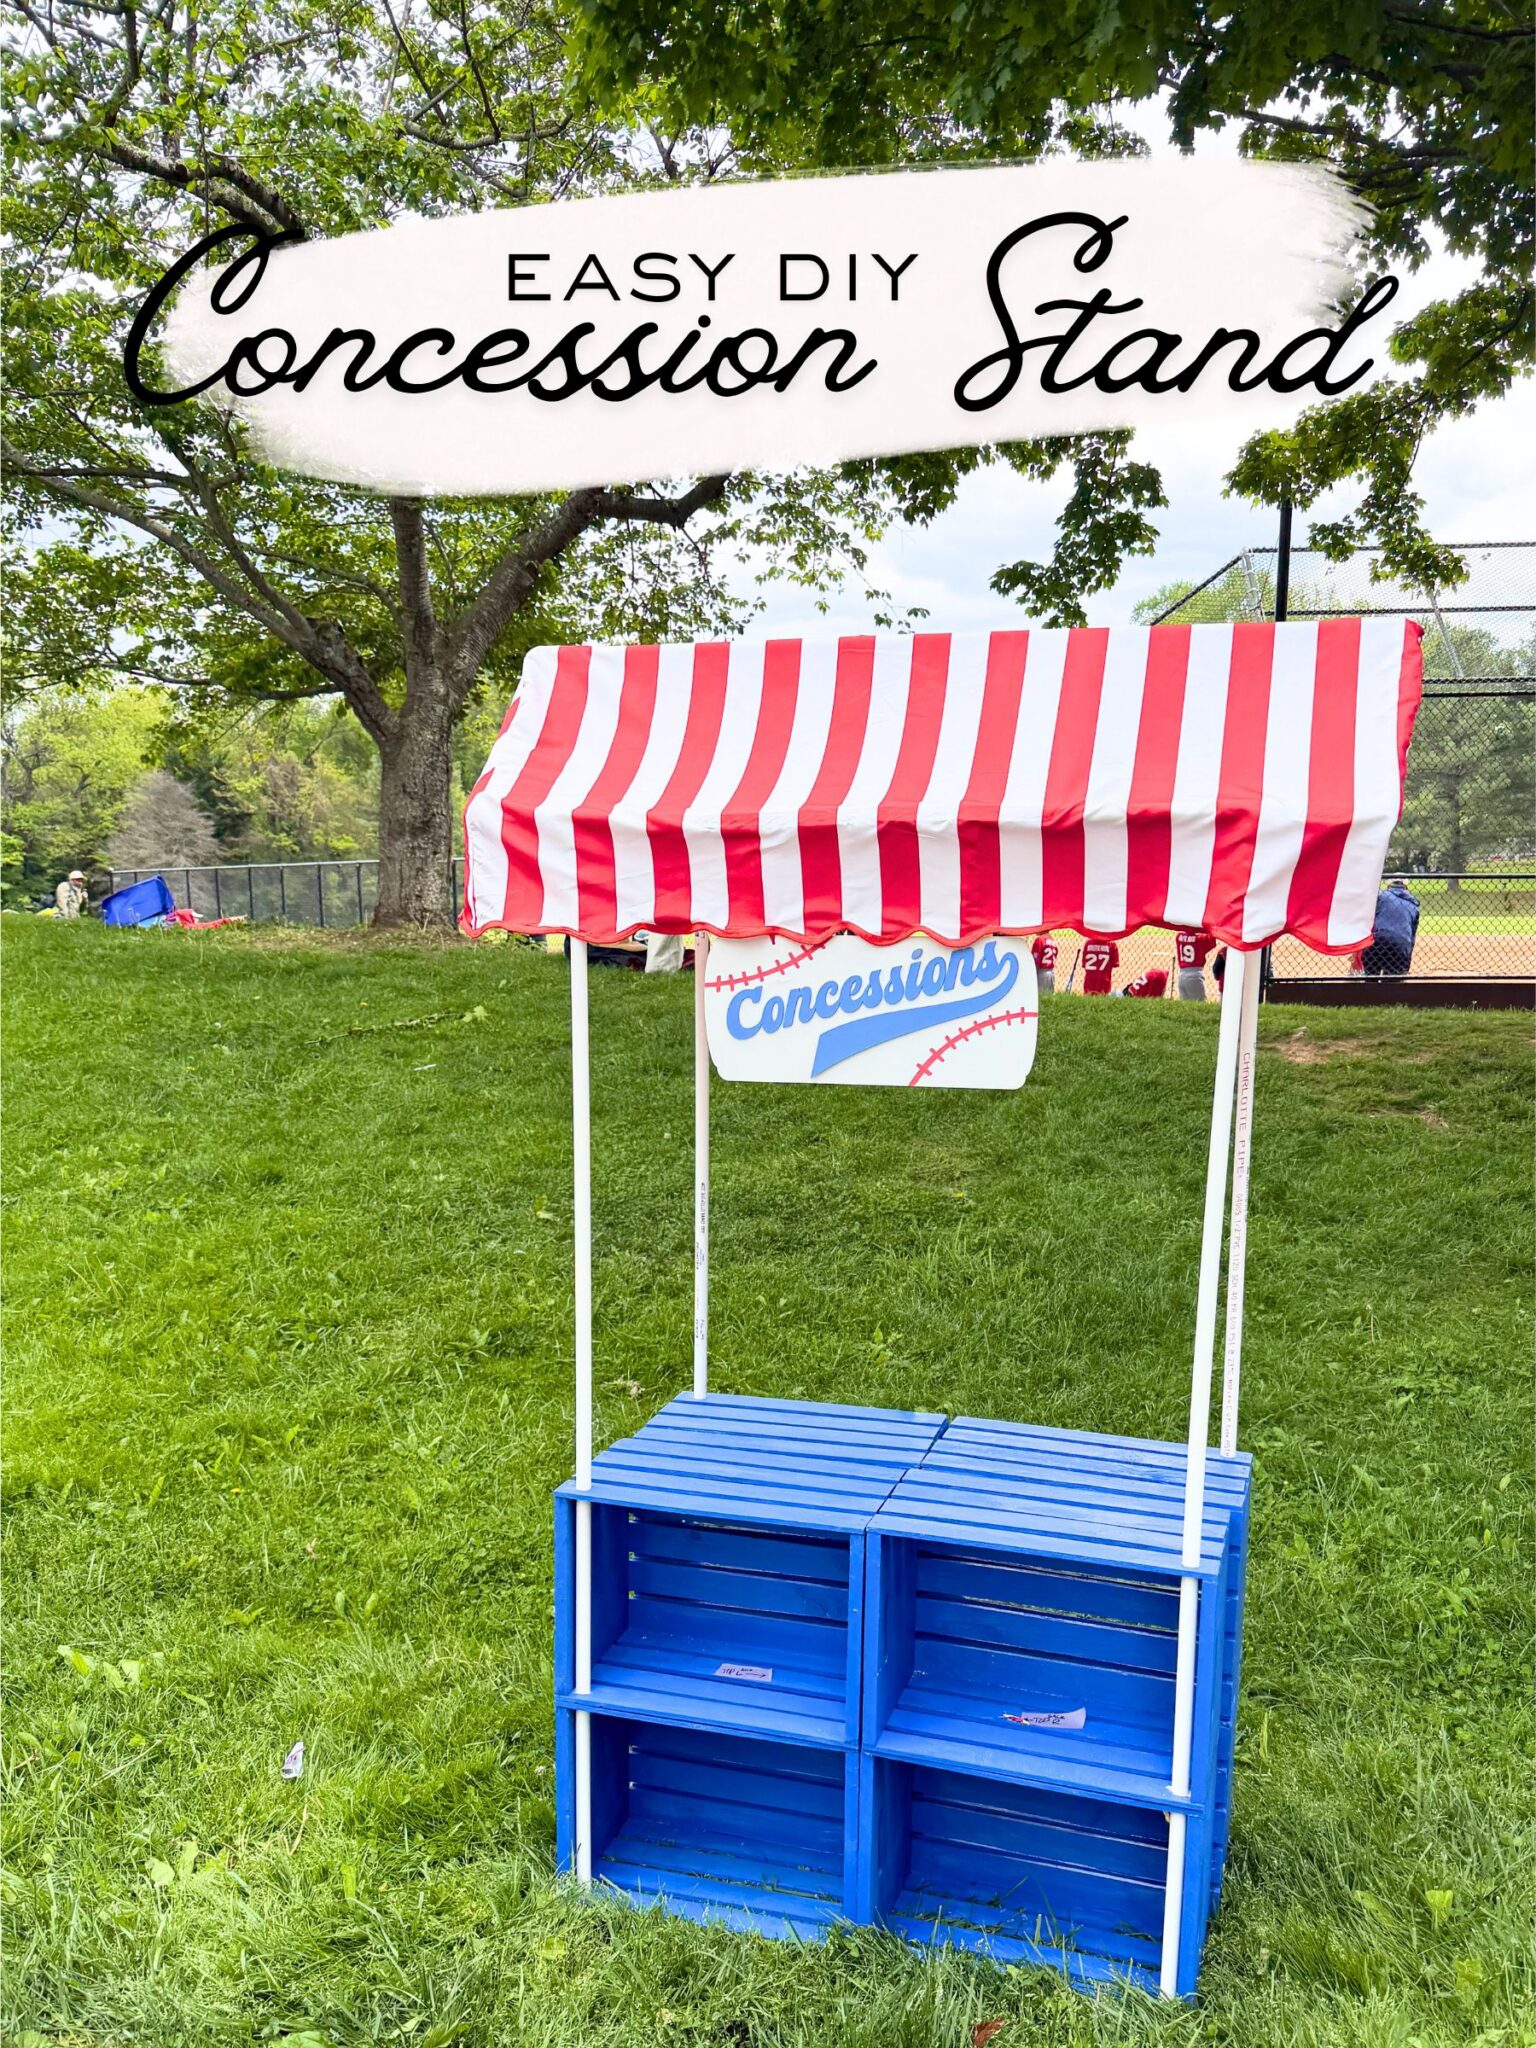
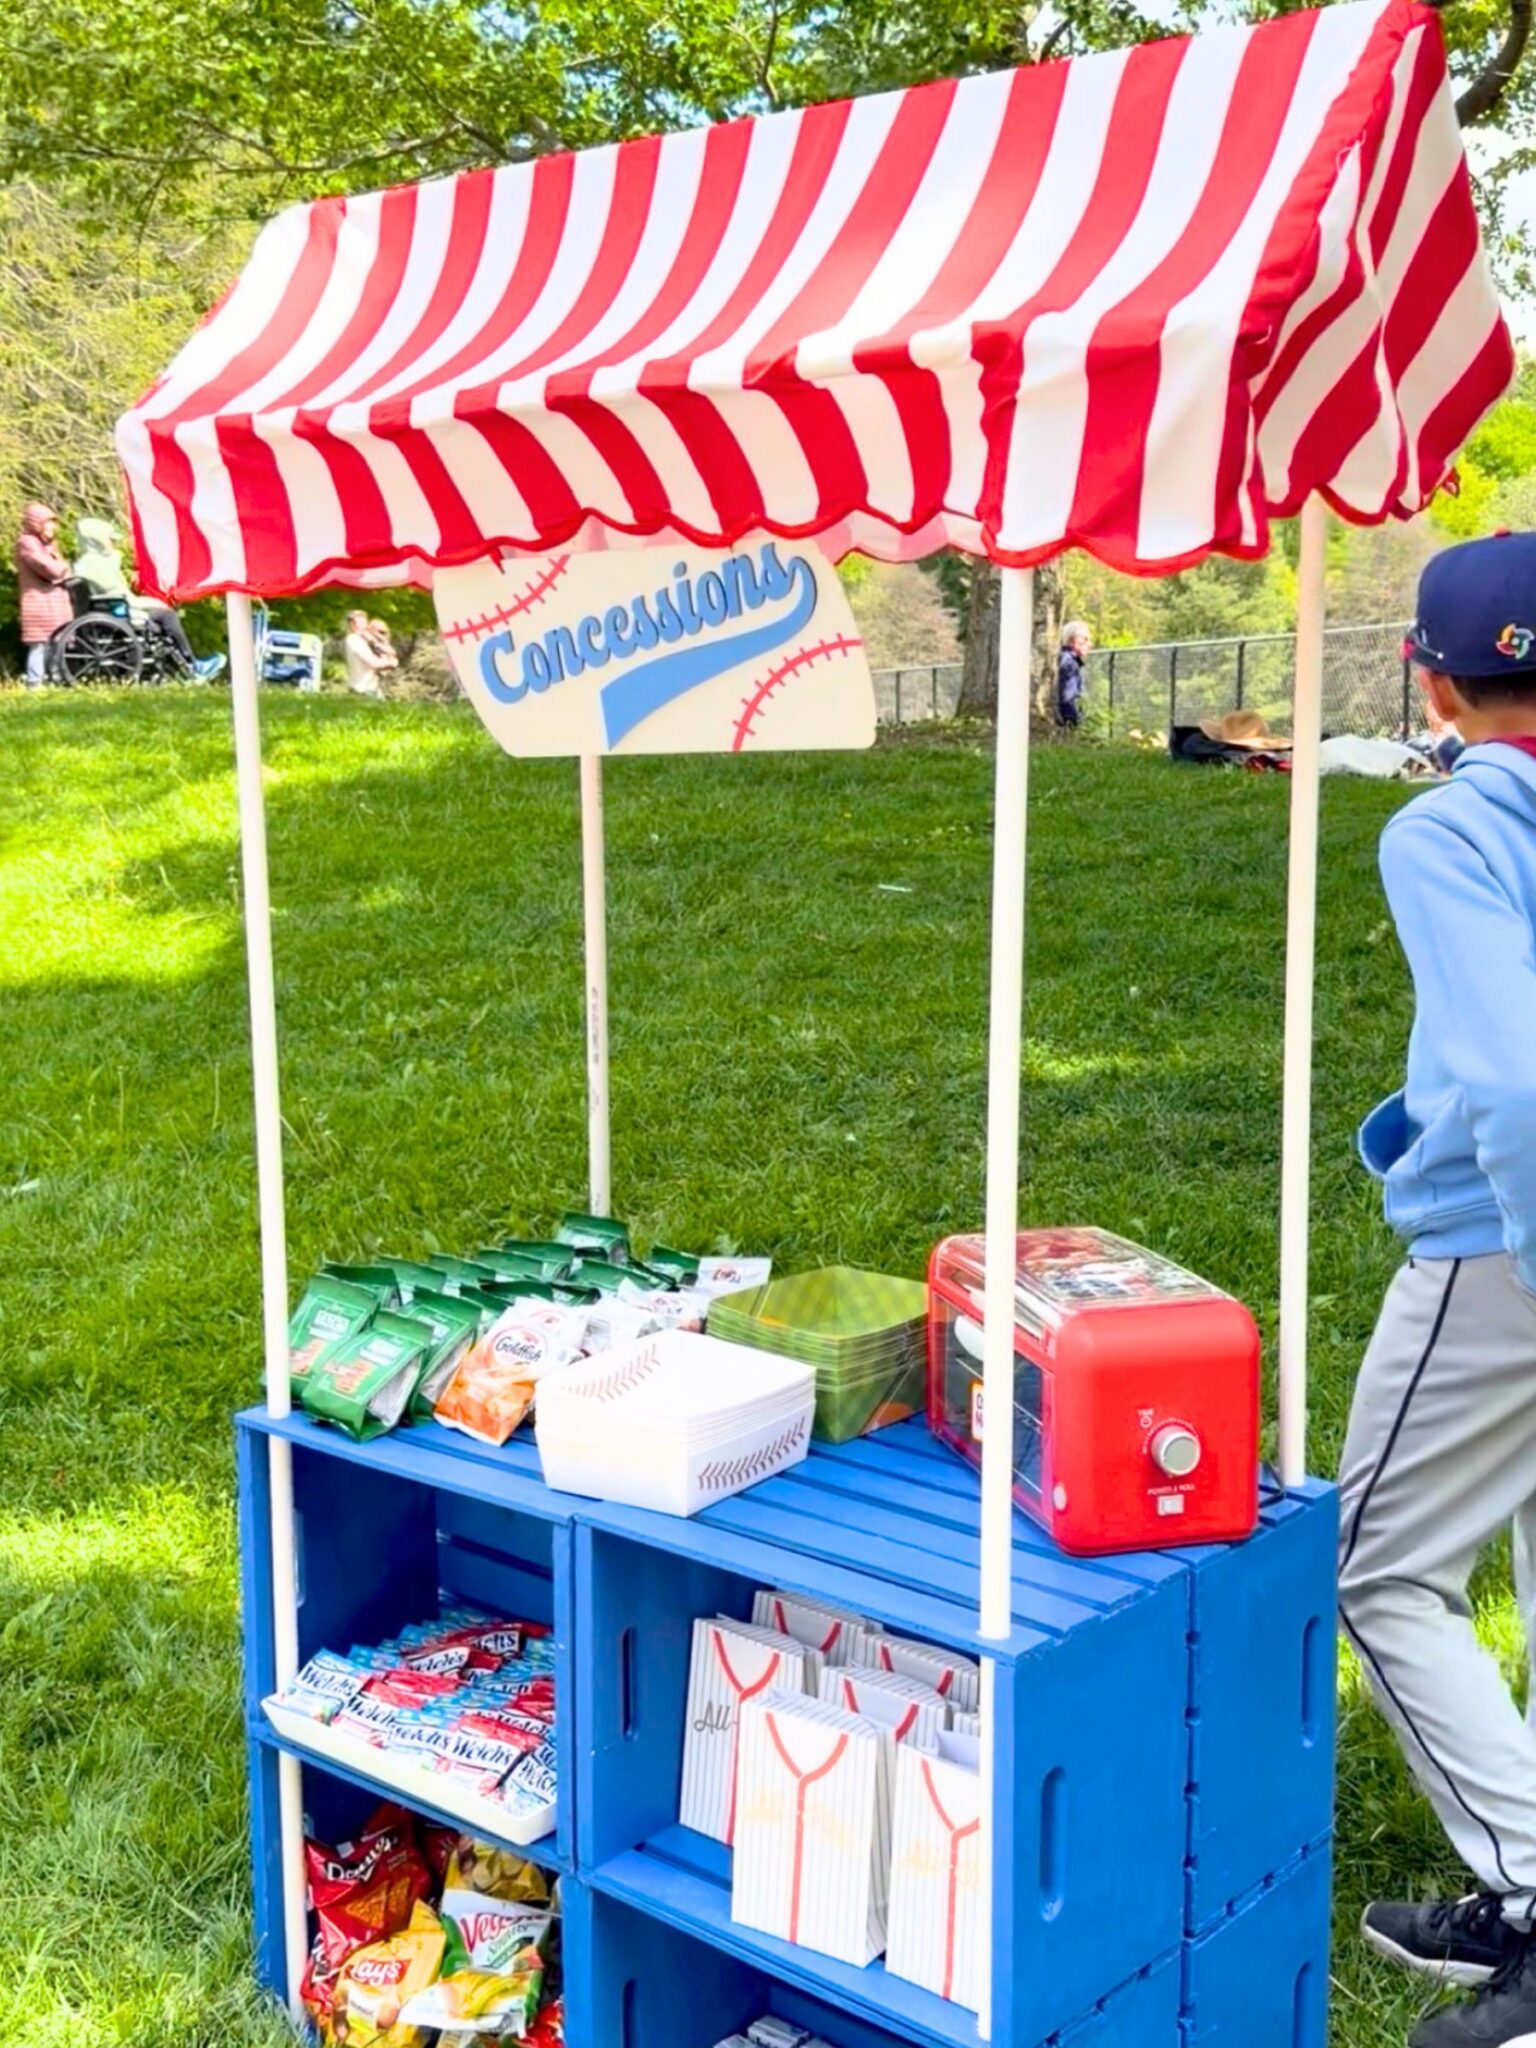
I’m a baseball mom. Perhaps the most baseball mom to ever baseball mom. If it’s a day that ends in “y”, you can find me on a baseball field watching my kids practice or play. If it’s summer, my kids are at baseball camp. If we’re at home, they’re both hitting off the tee in the garage or inside watching a game on TV. There’s only one problem: I never grew up playing baseball. But you know what I did grow up doing? Crafting. This DIY Concession Stand is where baseball and crafting meet. You can gather all the supplies from the hardware store and the craft store. So, while I may be a crappy pitcher, I do know how to make core memories for my kids and this DIY Concession stand is exactly that.
Every week one of the little league parents brings snacks for the team. When my week rolled around, I started looking for DIY concession stand ideas and snack station ideas. I wanted to create something special and memorable for the kids. I immediately was inspired by DIY lemonade stand projects that use wooden crates that you can get at the craft store! I knew I wanted to elevate the idea a bit, to create something similar to the Bunny Hop Shop that I create for Easter!
Materials & Diagram to build an easy DIY Snack Stand
- Four Large Wood Crates (paint them in your choice of outdoor paint color)
- Drill fitted with a 3/4″ drill bit
- 1/2″ diameter PVC Pipe in the following lengths:
- Four pieces that measure 60″
- Four pieces that measure 4 1/2″
- Four pieces that measure 11″
- Two pieces that measure 32″
- One piece that measures 41″
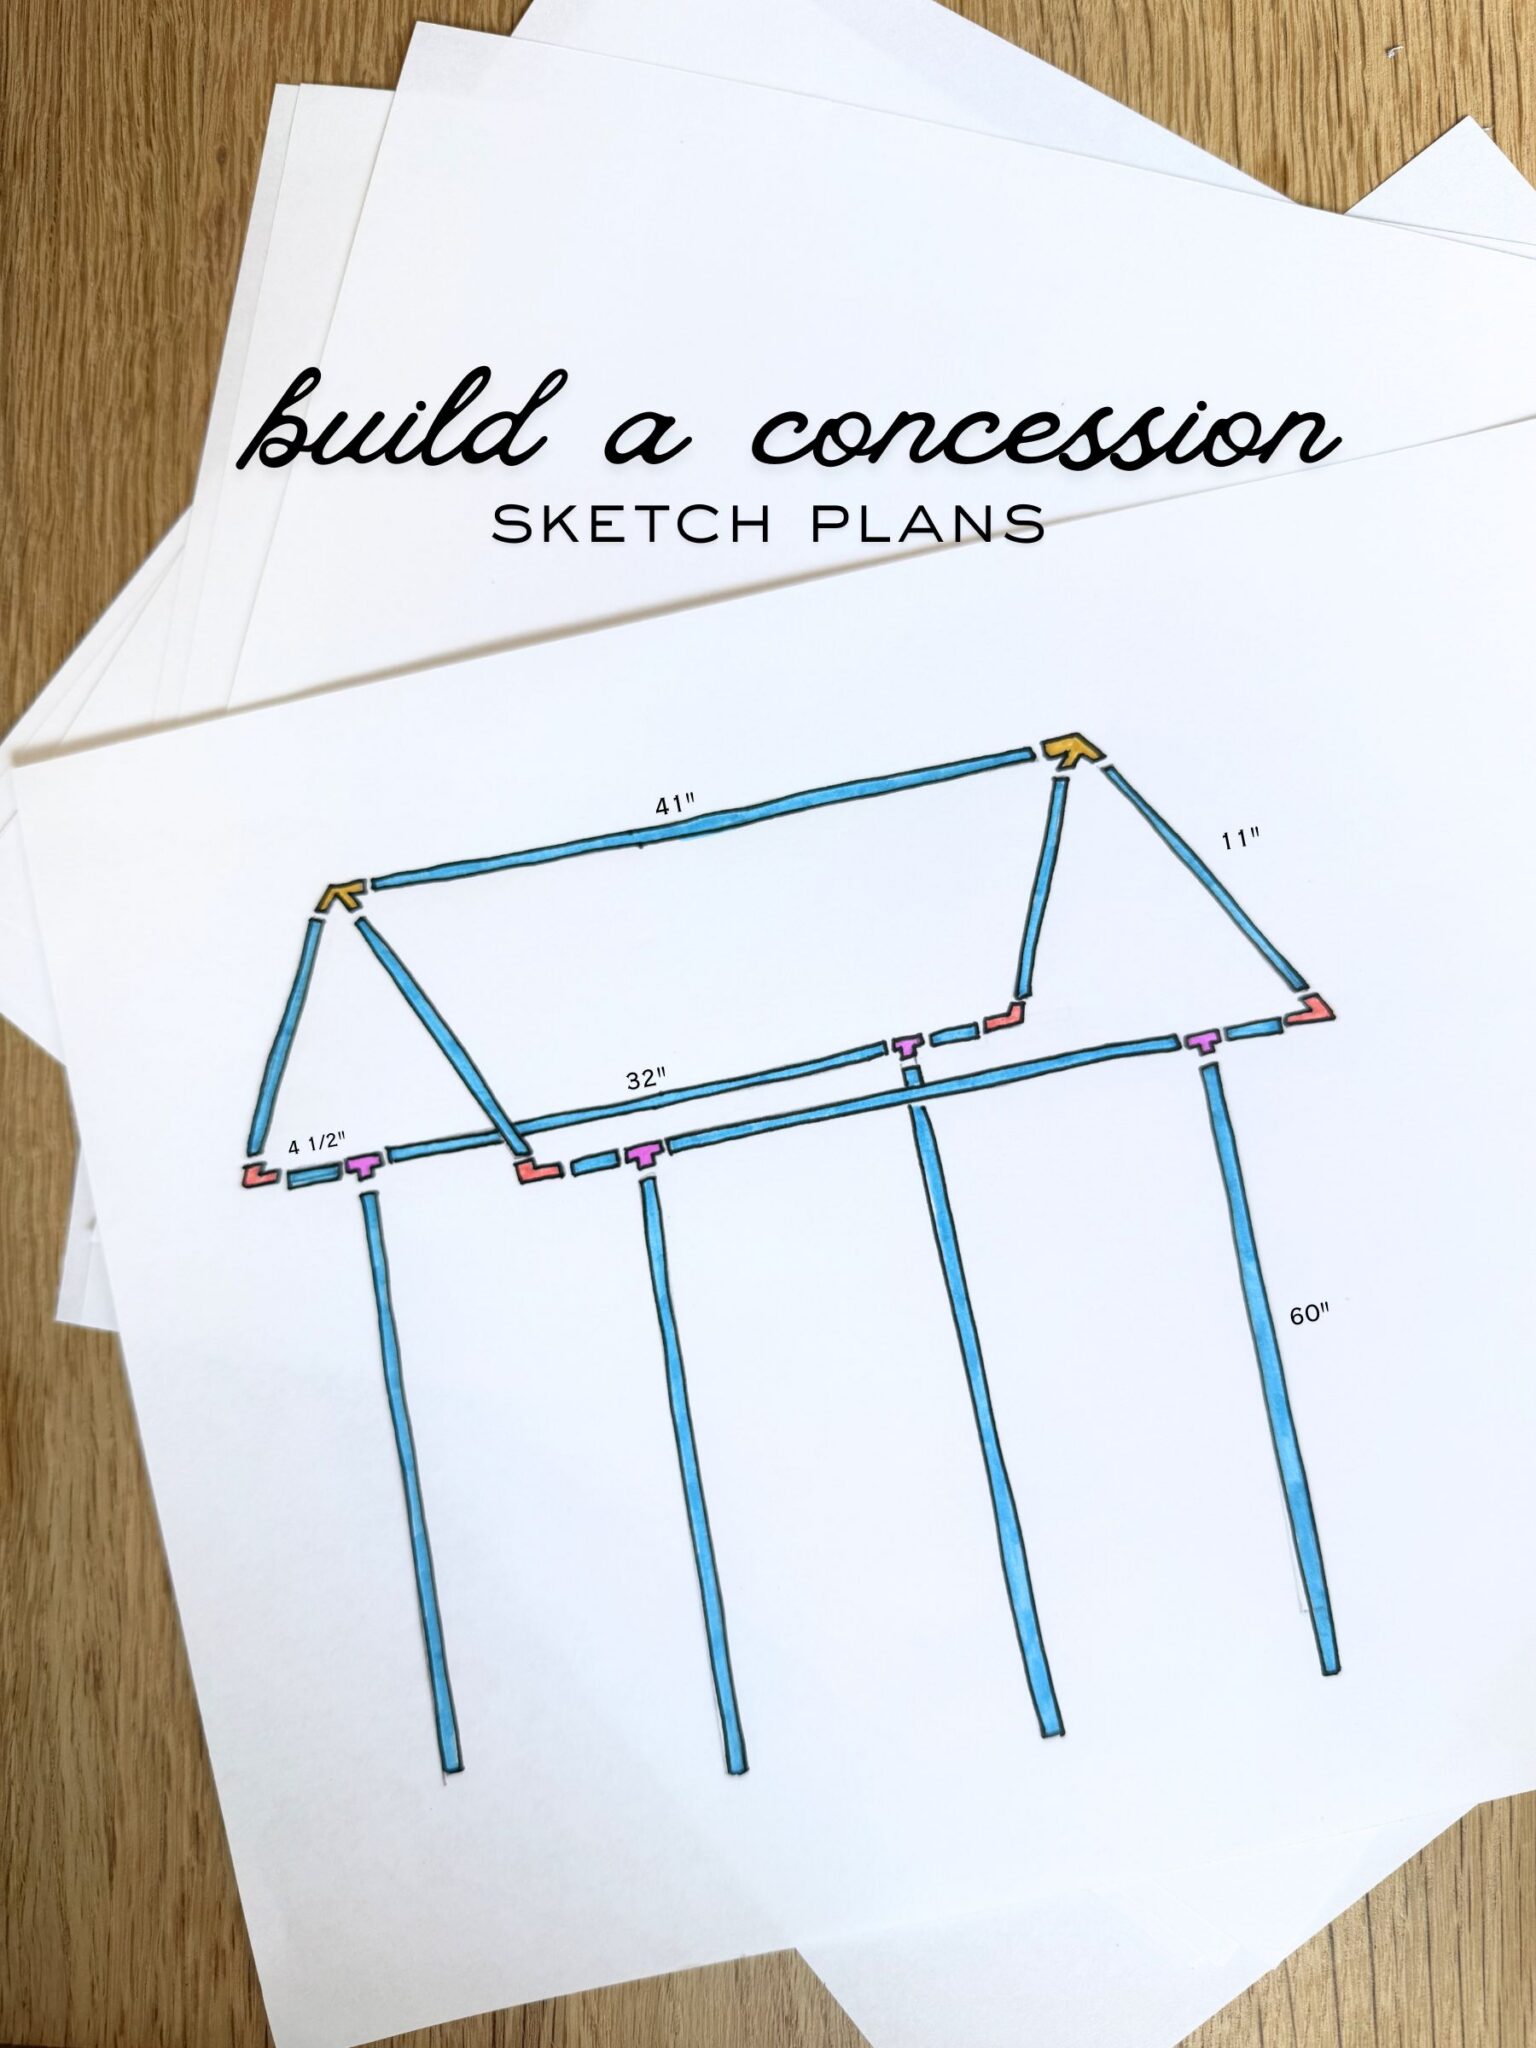
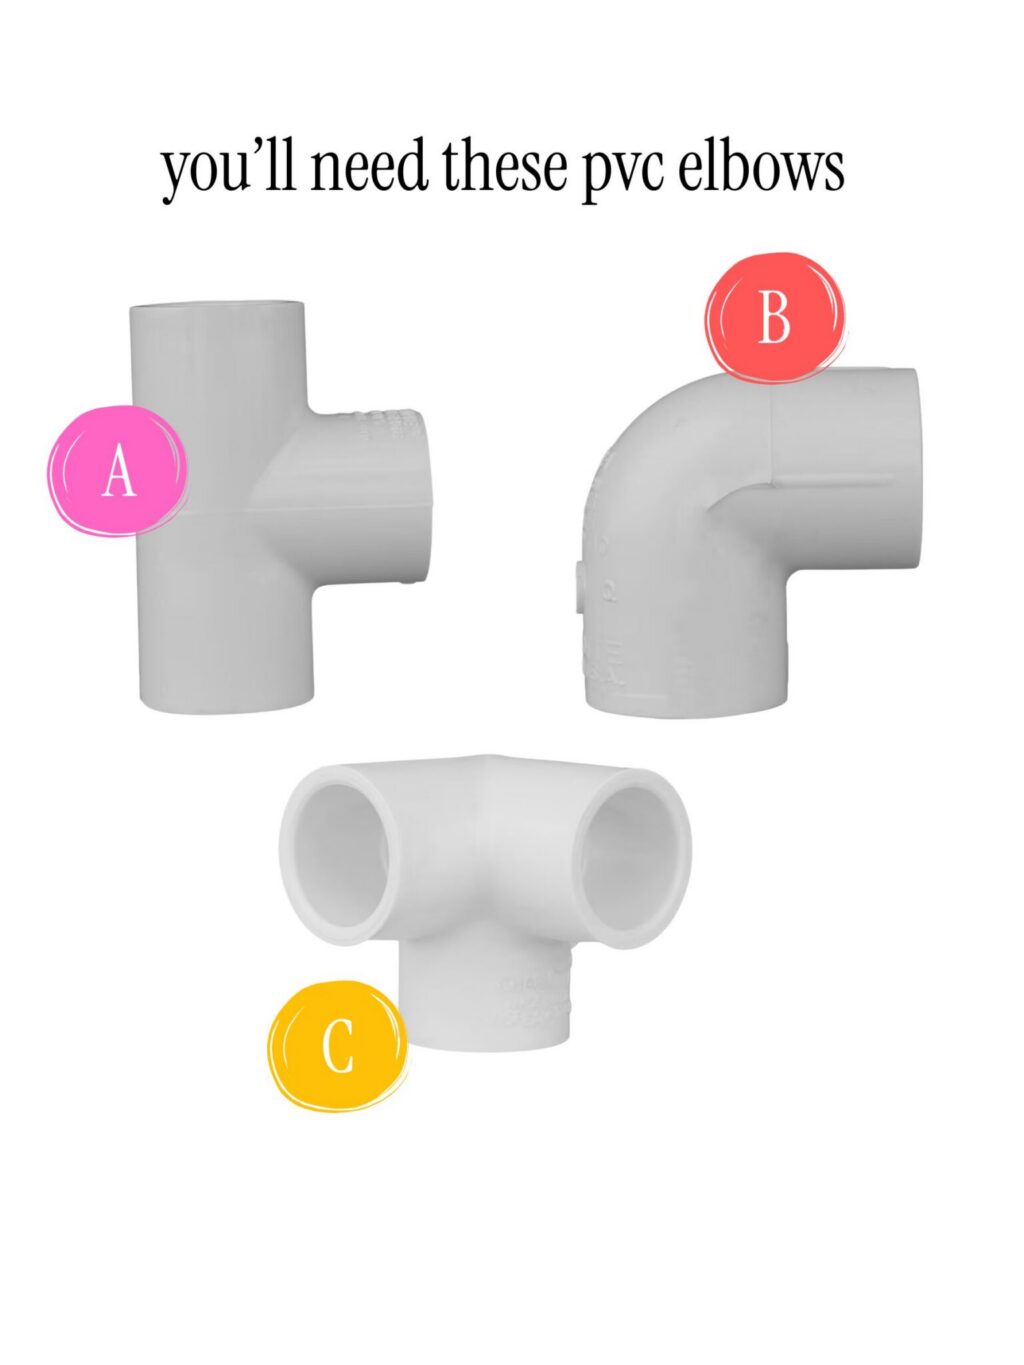
- PVC Elbows. See the image below for which PVC elbows you need to assemble this DIY concession stand. The colored circle next to each elbow corresponds to it’s color in the diagram above.
How to Assemble
Now that you know what materials you’ll need, here’s how to assemble. I’ve created a short video that shows how I put it together.
How do I make the awning for the DIY Snack Stand?
I don’t have a template or pattern for sewing the awning, but I do have a few tips.
- Use a fabric tablecloth for the awning. I used a red and white striped awning since that fit the theme.
- To create an awning like mine, you’ll need to enlist some machine sewing skills. First drape the tablecloth over the PVC frame. It should be upside down with you do with (i.e. wrong side facing up) Then, use straight pins to attach sides to the awning. Sew everything into place and then cut along the edge of the awning to create scallops.
- Hide the raw edge of the awning with decorative fabric trim which you can easily find at the craft or fabric store.
What Should I Serve in the Concession Stand?
I had so much fun coming up with a menu for our baseball game concession stand! I knew I wanted a variety that would excite the kids.
- Serve something hot…like hot dogs!! I used my Oscar Mayer Hot Dog Roller to serve up fresh hot dogs for the kids. The Jackery Portable Power Station was perfect for using the hot dog roller outdoors.
- For the other snacks, I loaded up on bulk boxes of Welch Fruit Snacks, Tate’s Chocolate Chip Cookies, Goldfish snack crackers and Juicy Juice boxes.
- For the adorable servingware, I found baseball themed serving trays along with baseball jersey treat bags.
Ways to Use This DIY Concession Stand for Different Parties
Once baseball season is over, this project lives on! There are so many ways to use a snack station throughout the year!
- Backyard Movie Night
- Halloween Candy Station
- Memorial Day or Fourth of July Concessions
- Lemonade Stand
- Coffee or Apple Cider Cart during the cooler months
- Mini Book Shoppe
- Ice Cream Stand
The ideas are endless, and this easy project is one you can enjoy again and again. Create lasting memories with your kids and family!