We live two blocks from a Starbucks. I can walk there in five minutes. I don’t drink coffee, though, so I don’t have many reasons to stop in…except for the occasional cake pop…because they are delicious.
Well, recently things have changed and the barristas at our Starbucks have gotten to know me quite well. Now because I started sipping java. Nope. I’ve stopped in there no less than three times asking (in my very nicest nice voice) for a few empty paper cups with lids. They always give me a few, sometimes with a curious look. They have no idea about the crafty awesomeness that is about to happen to those paper cups. That’s where today’s Style Watch comes in.
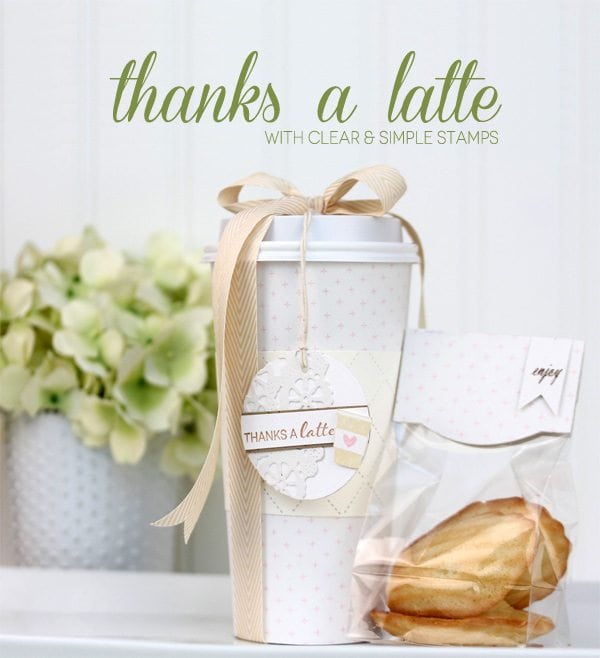
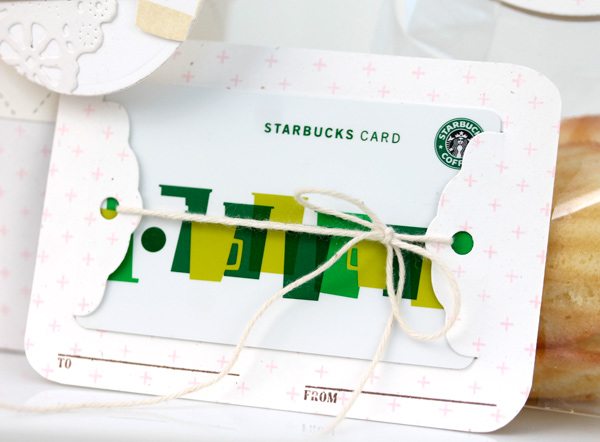
I combined the Beverage Cozy die with a few simple embellishments to make an easy coffee themed set…complete with a gift card holder that is easy to create yourself.
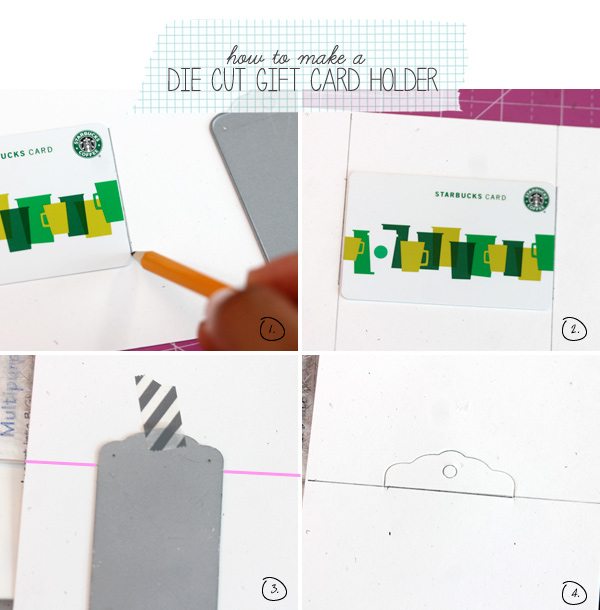
{1} On a sheet of cardstock, draw a line on either side of your gift card.
{2} Extend the line so that it reaches the edge of the cardstock
{3} Place the cardstock onto your manual die cutting machine with the pencil line (shown in pink here) lining up with the edge of the bottom cutting plate. Then place your die on top (washi tape is helpful for keeping everything in place)
{4} Run through your die cutting machine. The result is a notch cut from the cardstock, just above the line. Repeat this on the other line that you drew, then erase the pencil lines and place the gift card between the notches.
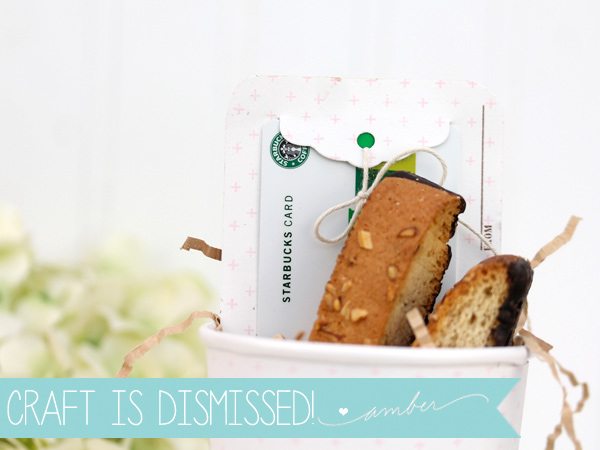
Once you’re done with your gift card and have assembled some treats, fill up the paper cup and it’s ready to give away!
SUPPLIES:




Swoon…. I love ALL things coffee… you’ll appreciate the fact that I often upcycle the coffee holders in projects (it’s a great background for die cutting), but I don’t do take out coffee very often at all and am particular to bringing my own mug. So my brother (who drinks take out coffee all the time) spent the last 6 months collecting the holders (from a variety of shops in Southern California) and sent them to me with a box of other upcycled goodies for my birthday. I’m off to pin this project on the May Arts around the web board 🙂
Fabulous ideas. Will try them today!
Cute, cute, cute, clever girl.
Genius! Love the die you used for the gift card holder. I think I have a very similar one and can’t wait to try.
So cute, Amber! Great idea to make a simple gift card feel more like a gift. (I know people love them, and so do I, but I always feel like I took the easy way out.) Just in case the baristas stop being so friendly (smile) I have actually purchased similar cups with lids at Costco and even seen the sets on the shelf at Walmart.
I know you’ve said you’re not a coffee fan, but these are some of my faves of your posts. I’m always inspired by what you do for us coffee lovers! 🙂
thanks so much!
What a wonderful crafty site you have. Just full of great ideas. Just love it. This idea for gift cards is very cute with the dollie. Come check out my craft journey, too. See you around. ksimonedesigns.blogspot.com
Whatever you do, *don’t* try a Very Berry Hibiscus refresher (easy ice), and *don’t* pair it with a raspberry lemon loaf.
I am not a coffee drinker either. But Starbucks does well by me…
Love, love love it. But I had a question. One you die cut the notch and put the gift craft with the help of twine, did you put it on another rectangular piece of cardstock. Because in the picture it feels like only one cardstock. I don’t know if my question confused you but can you please let me know if you placed the notched gift holder on another piece of card stock
Hi Amishi! Your question makes complete sense! I did not mount the paper onto another piece of cardstock. It’s only one piece with the notches cut into it and the gift card placed between them. Hope this helps!
Hi Amber
So if its one cardstock. How did u make the notch in the middle as there is quiet a gap between the rectangle n where the notch is. Please help as I really want to try this please
Hi Amishi! The photo tutorial will walk you through how to create a die cut that is in the middle of the cardstock. If you follow each step just as shown in the photos, you should be able to get it just right! Good luck!
beyond fabulous.
Wow! So clever and cute!
Good blogs constantly have new and interesting material, and I get the impression that this site has all the qualities that qualify a blog to be a blog.