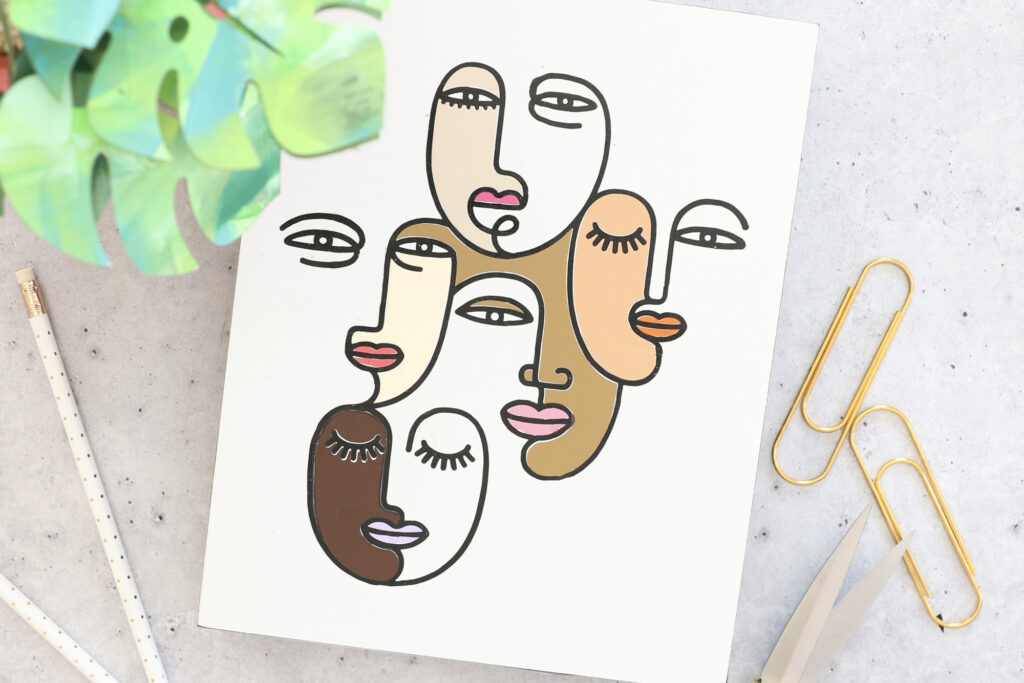
Perhaps the most popular DIY I’ve ever shared on Instagram! After posting THIS high paced tutorial, I got a TON of questions about what materials, tools and which SVG file I used to create this stunning wall art.
I wish I could take credit for it, but truth is, this art was created by Rob + Bob and it’s been hiding in plain sight right over in Cricut Design Space!
That said, I did make some pretty significant alterations to this project so you’ll likely want to just use my link so you can access it directly and save yourself a LOT of time!
As for the other materials I used, here’s the rundown:
A couple tips when assembling your art:
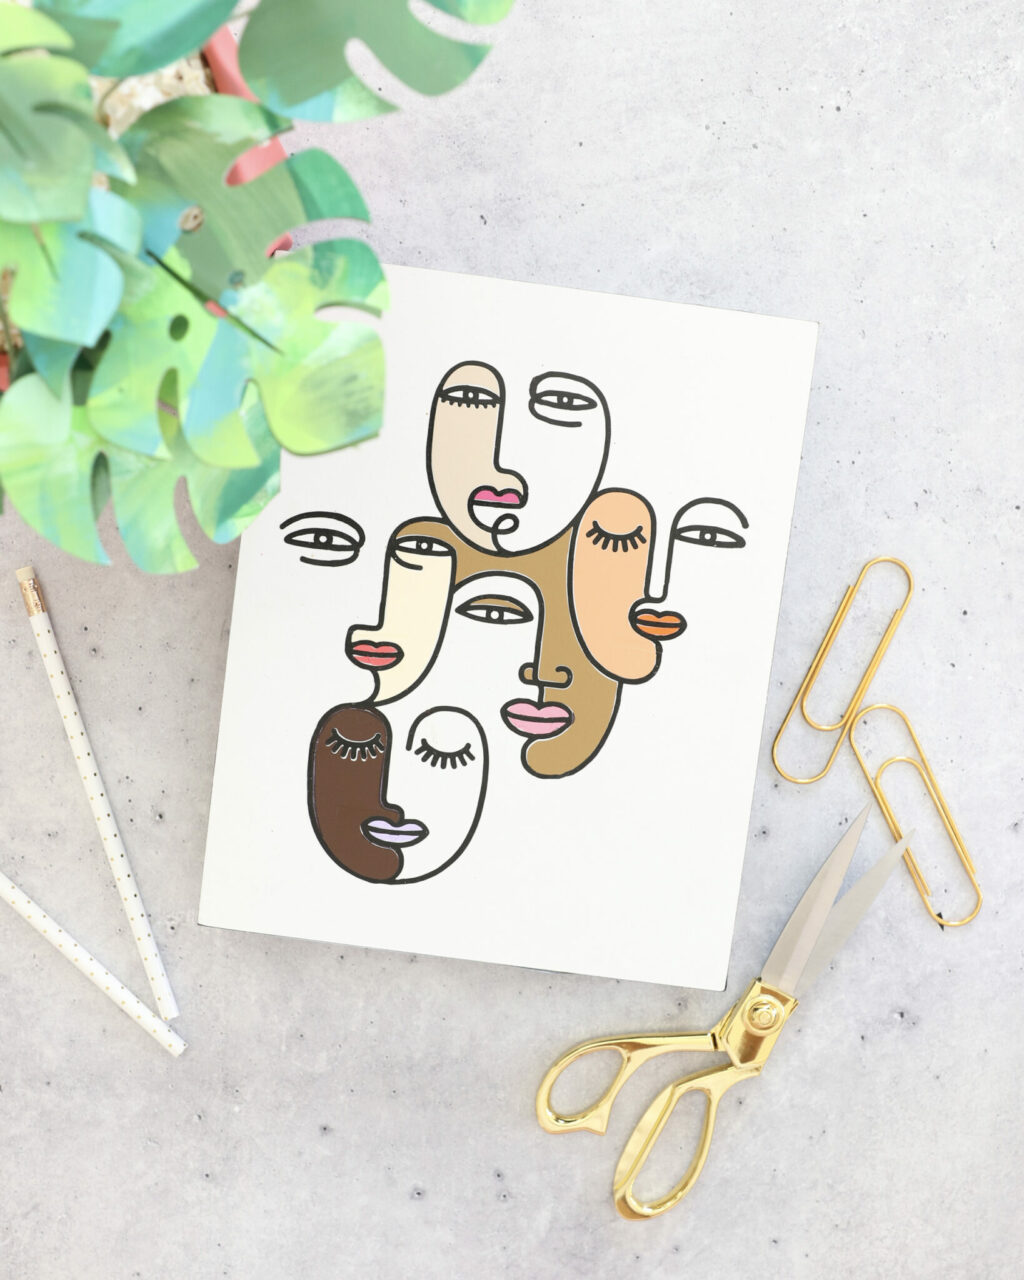
- I used the Cricut Joy for my artwork, but the Cricut Joy can only accommodate projects that are 4.5″ across. This is why you’ll see a version of this project where the faces are split into two. This will allow you to cut it on the Cricut Joy.
- Take your time placing each of the elements and do your best to get them even! It doesn’t have to be perfect!


buy generic 100mg viagra online: generic sildenafil – Generic100mgEasy
https://tadalafileasybuy.shop/# Cialis 20mg price
cheapest cialis: buy cialis pill – Tadalafil Easy Buy
Cialis over the counter [url=http://tadalafileasybuy.com/#]Tadalafil price[/url] Tadalafil Easy Buy
https://generic100mgeasy.com/# buy generic 100mg viagra online
Officiele Kamagra van Nederland: KamagraKopen.pro – kamagra gel kopen
Generic100mgEasy: buy generic 100mg viagra online – buy generic 100mg viagra online
пин ап вход – pinup 2025
pinup 2025: https://pinupkz.life/
Generic Tadalafil 20mg price [url=http://tadalafileasybuy.com/#]TadalafilEasyBuy.com[/url] cialis without a doctor prescription
пин ап вход – пин ап зеркало
пин ап: https://pinupkz.life/
пин ап зеркало – пин ап казино официальный сайт
пин ап зеркало – пин ап зеркало
пин ап вход: https://pinupkz.life/
пин ап казино зеркало – pinup 2025
пин ап зеркало: https://pinupkz.life/
пин ап: https://pinupkz.life/
cialis without a doctor prescription [url=https://tadalafileasybuy.shop/#]Tadalafil Easy Buy[/url] Buy Tadalafil 10mg
пинап казино – пинап казино
пин ап зеркало: https://pinupkz.life/
пин ап зеркало – пин ап
Generic100mgEasy [url=https://generic100mgeasy.shop/#]Generic100mgEasy[/url] Generic100mgEasy
пин ап вход: https://pinupkz.life/
пин ап вход – пин ап казино зеркало
Online apotheek Nederland met recept [url=https://apotheekmax.shop/#]Betrouwbare online apotheek zonder recept[/url] Apotheek Max
apotek online: apotek pa nett – apotek online recept
https://kamagrapotenzmittel.com/# kamagra
http://kamagrapotenzmittel.com/# Kamagra Oral Jelly
Beste online drogist: ApotheekMax – Online apotheek Nederland met recept
apotek online recept: apotek online recept – Apoteket online
https://kamagrapotenzmittel.shop/# Kamagra Original
http://kamagrapotenzmittel.com/# Kamagra Oral Jelly kaufen
online apotheek [url=https://apotheekmax.shop/#]Betrouwbare online apotheek zonder recept[/url] de online drogist kortingscode
kamagra: Kamagra Gel – Kamagra online bestellen
https://apotekonlinerecept.shop/# Apotek hemleverans recept
http://apotheekmax.com/# ApotheekMax
Kamagra Oral Jelly: Kamagra online bestellen – Kamagra Gel
https://apotheekmax.com/# de online drogist kortingscode
Kamagra Oral Jelly kaufen: Kamagra Oral Jelly kaufen – Kamagra Gel
https://kamagrapotenzmittel.shop/# Kamagra kaufen ohne Rezept
Kamagra online bestellen: Kamagra kaufen ohne Rezept – kamagra
http://apotekonlinerecept.com/# Apotek hemleverans idag
Kamagra Gel: Kamagra online bestellen – Kamagra online bestellen
https://kamagrapotenzmittel.shop/# Kamagra online bestellen
https://apotheekmax.com/# Online apotheek Nederland zonder recept
kamagra [url=https://kamagrapotenzmittel.shop/#]Kamagra Oral Jelly[/url] Kamagra Oral Jelly
The three piece suit for boys is a full ensemble featuring a blazer, waistcoat, and trousers. It is a dressy option for young men who desire to dress like Dad on a .three piece suit for boys