I have no business being around power tools. It is a recipe for lost appendages. The thought of a table saw makes me want to grab some gauze and a tourniquet. This is precisely why I am here to share some ideas for craftroom organization …sans power tools.
I’m not gonna lie – I am envious of other crafters with handmade cabinetry and storage with all sorts of fancy schmancy moulding and whatnot. It looks so purty. But let’s be honest, that is just not going to happen in this house. Unless the little man in the Ikea booklet is going to tell me how to assemble it – there is no construction happening in this home.
For the next few weeks, I’ll be bringing you my ideas for creating cute & functional organization for your craft supplies using your power-less tools.
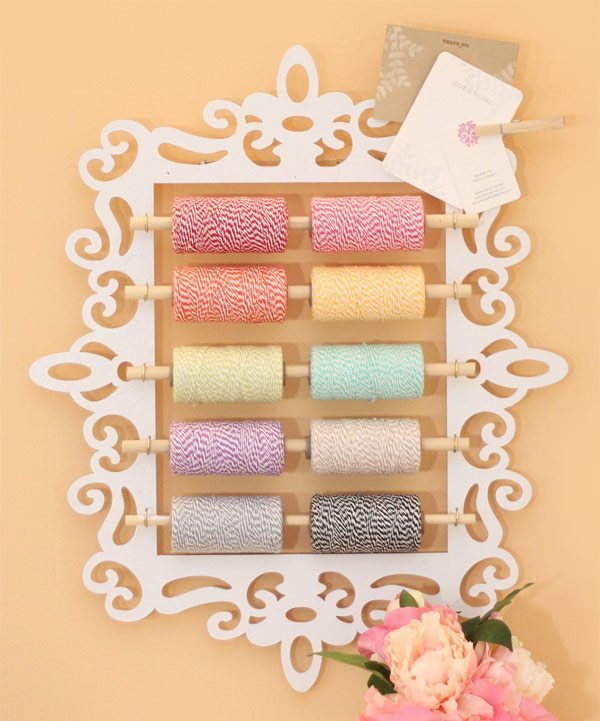
First order of business, the pile of baker’s twine spools that took up residence in the middle of our floor. Very pretty to look at. Very messy. Very annoying to husbands who don’t quite understand the awesomeness of baker’s twine. One day, he will learn.
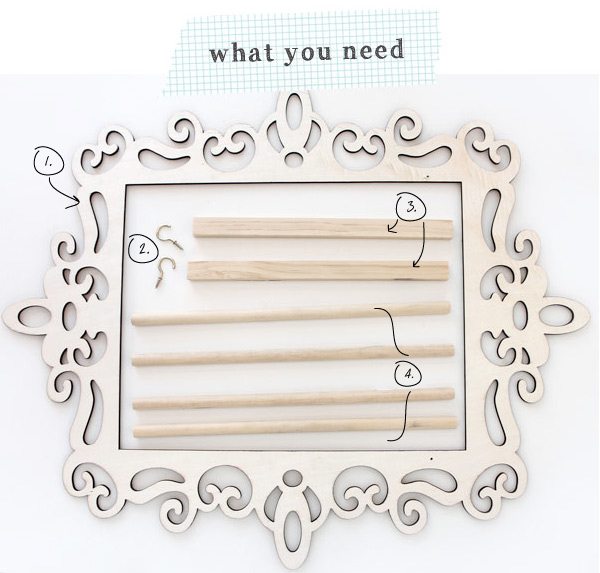
{1} Laser cut frame from Michaels – they carry several shapes and sizes of these awesome frames!
{2} 1″ Brass Plated Cup Hooks – you will need 10 of these for this project. I purchased mine at Home Depot in packages of 3.
{3} Square dowels. These are available at Home Depot in the same aisle as traditional circular dowels.
{4} 1/2″ circular dowels
{5} Small nails (not shown)
Additional Tools: Hammer, Hand saw, Spray Paint (optional)
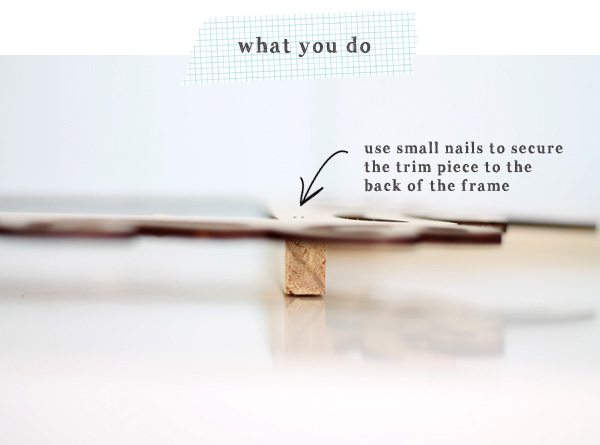
{1} Saw the square dowel down to be slightly smaller than the width of the frame. If you do not own a saw, you can ask the nice people at Home Depot to do this for you and they usually are happy to help.
{2} Nail the square dowel into place as shown above.
{3} Spray paint the frame in any color you wish (optional)
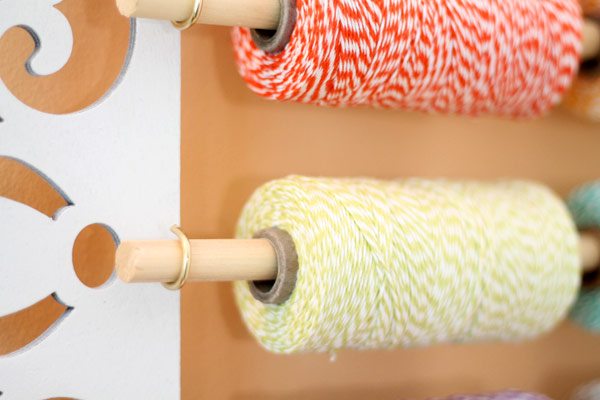
{4} Screw the cup hooks into place on either side of the frame. I was able to do this with my hand and some elbow grease! You’ll want to measure the distance between each hook before screwing them into place , to be sure they are all even.
{5} Saw the circular dowels down to be slightly longer than the width of the frame opening. Slide dowels into place on the hooks and add spools of twine.
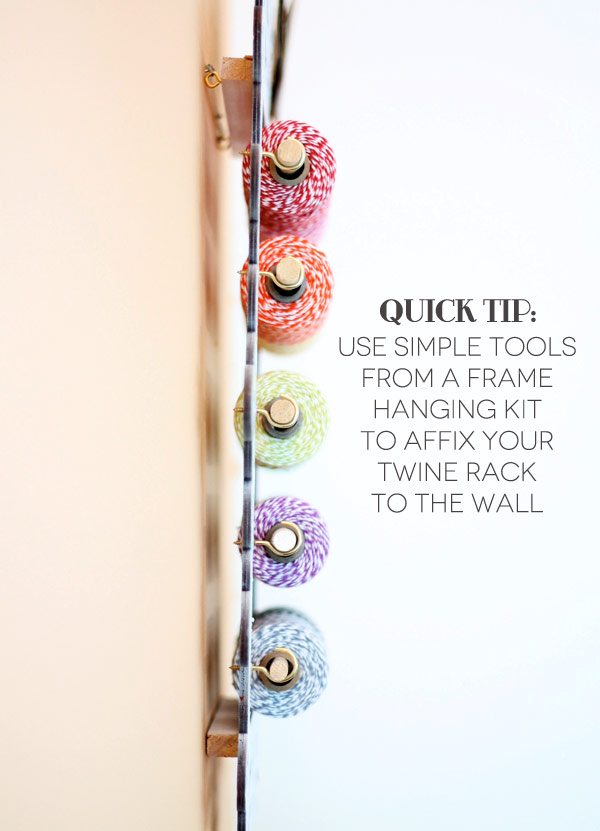
Once you hang your frame on the wall, you’ll see just how useful those square dowels are to making this functional. Without the dowels on the back, the frame would be flush to the wall and the spools would not have room to rotate.
My twine rack does double-duty by also holding a few flat notecards and business cards that I can grab quickly when I need to.
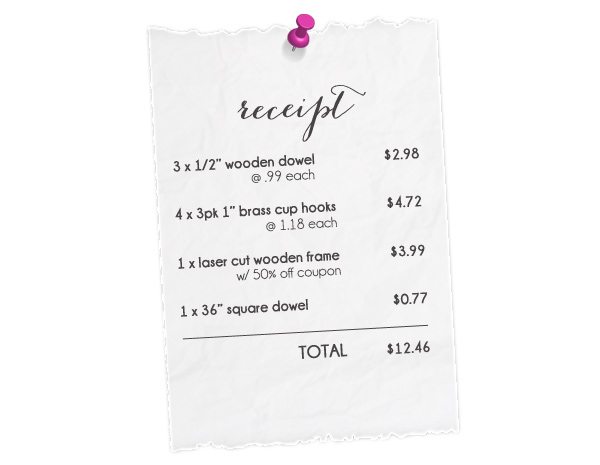
Oh…and before I go…did I mention how inexpensive this project was to create?!
I’d love to hear your thoughts on this project along with your own craft supply organizational needs! What would you like to see in upcoming posts? Personally, I need something that will organize all my envelopes! They are all over the place!!!







Such a great idea! Now I just need to get enough bakers twine….
Brilliant…thanks for sharing!
thanks for the wonderful idea-this got made today! 🙂 one question-seems like the dowels fall out of the hooks really easily. how do you keep that from happening??
On my rack, I cut the dowels to extend about 1″ beyond the hooks. This helps from having the slide out. HTH!
You can buy those colored rubber end caps at Home Depot or Menard’s type stores. They carry different sizes for different circumferences of dowels! They work great!
That is seriously adorable! I need something to organize my twine but I can’t be trusted around power tools! This is going to the top of my to do list. Thanks!
Love this. I think that I might use your square dowel back idea with this frame but then add some chick wire (or something similar) and create some lovely earring storage too.
Wow, love it! I don’t use twine but this makes me want to go out and buy some.
BEAUTIFUL! I’m not into twine, have no wall space in my craft/mess room, but will have to make one of these and find a use for it. Thanks for the easy peasy tutorial.
Came this way thru Paper Boutique. So glad I did. Your idea is simply beautiful. So many possibilities to go with this idea. Thank you for posting. I will be following your blog.
This is sheer genious! I JUST bought those from Michael’s on a crazy sale (99 cents). I dont have twine but I have a billion rolls of washi tape. I assume the same idea could apply? going to do it this weekend. Thanks for sharing the idea.
Love! I am going to make one to hold my washi tape!
I’m truly enjoying the design and layout of your website. It’s a very easy on the
eyes which makes it much more enjoyable for me to come
here and visit more often. Did you hire out a developer to create your theme?
Outstanding work!
Orderly and cute! I love it! : )
Amber, I can never get enough of your clever ideas! Bought the supplies and will put two together next week! One for me and one for my daughter. Thanks so much for sharing, sweetie!
Melinda
Winter Bear Trading
I think this idea is awesome!! I’m thinking beyond the box here… how about a picture frame of whatever size needed to place on the wall next to the toilet holding 4-6 rolls of toilet paper??? 🙂
Thanks for sharing your darling idea!!
This is going to be my Dirty Santa (Clean Santa) gift this year for our demonstrator Christmas party. I am so excited. Do you buy your Baker’s Twine somewhere special? I get it at Whisker graphics, but it’s a bit pricey. I don’t want to fill the rack at $12 a spool.
Check out the Gift Guide link at the top of the blog! There is a coupon code inside for 50% off baker’s twine from http://www.bakersstock.com!!!
Très bonne idée, facile à réaliser
Which style must work great. But i could have changed it’s foundation a a quick bit.
I always sensed that various related with your alternative companies
work a little much better than this. However i imagine
the couple have their particular problems.
Notebook coolers with enthusiasts are commonly made from plastic or perhaps metal and also
some actually have a mix of both.
I really think this is my kind of style…I am going to get the largest frame and use it for sewing and embroidery thread. Thanks so much. Have a great day<
For a play such as that i think an individual did a great job.
Providing car are a typical glance in the neighborhood and additionally around the manufacturing development areas.
Rather than simply keeping your tools within a milk kennel or something messy, precisely why not make
a case?
I was just watching this on PBS today. They discussed the same things you wrote about.
i read on an earlier post about organizing rubber stamps. I have mine in a special made hutch with drawers. My drawers are unique! They are plastic poster/picture frames. Taker the cardboard out and toss or keep for something else ( we crafters through nothing away) lol! Turn the frames upside down as if u were going to put a picture in them, now u have a drawer! You an get these frames/ drawers I all sizes. You can stack or store them anywhere. One caution! Wood rubber stamps are heavy so you can’t stack more that a couple on top of each other without releving some weight off the bottom ones! Now take this one step further…. Organize all stamp upside down so runner is facing up. Take it to your local Kinkos, etc.,have them make copy. Then empty out drawer, lay paper in drawer now you know where all your stamps go so you never know what drawer they were in or if someone borrows them! My good stamps I. Don’t loan out! Too expensive to replace. Enjoy and goo luck. I hope u understand my directions! Have a good day!,
How big is your laser cut frame?