 It doesn’t take much to create beautiful monograms with the Cricut Explore, but you will probably need a little direction. So I’m here for you. Let’s do this:
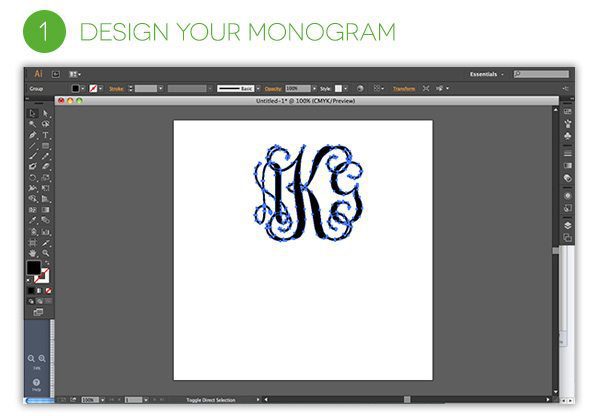 First you’ll need to design your monogram – and if you’d like to customize your monogram, you’ll need to design it in a program such as Adobe Illustrator. Here’s how I designed mine:
- Type out your monogram in Illustrator. I chose to use the Vine Monogram font. If you’d prefer a free monogram font, I’ve got your back. HERE’S a list of fonts that you’ll love!
- Next go to Type > Create Outlines. This will outline your font as shown in the above grapic.
- Save your design as an .svg file
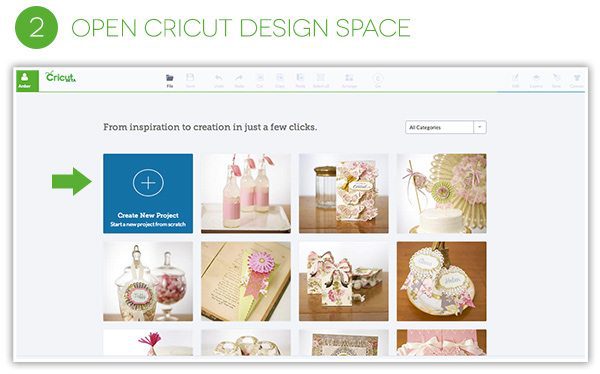
- Open Cricut Design Space (which is not yet available to the public) but will open up to users in a week. Cricut Design Space is the main interface for cutting with your machine. You can upload premade project, design your own, or upload images from the Cricut Image Library.
- Click on “Create New Project” to open a blank canvas
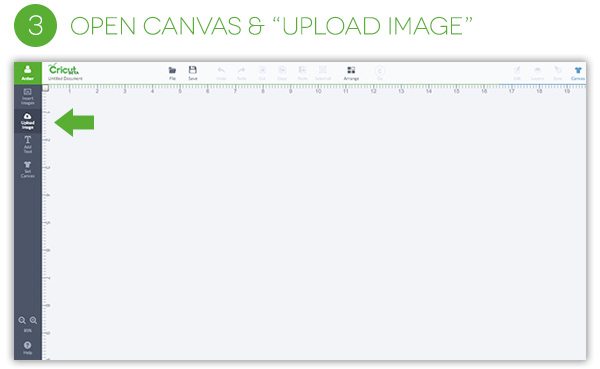
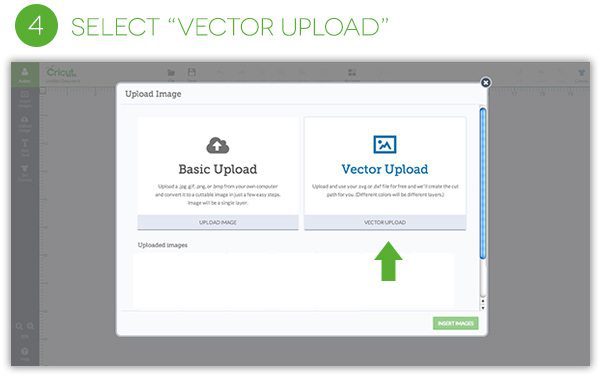
- Click “Upload Image” from the blank canvas
- You will open a window like the one pictured above, allowing you to upload a vector image or a basic jpg/png file.
- For this monogram project, click “Vector Upload”
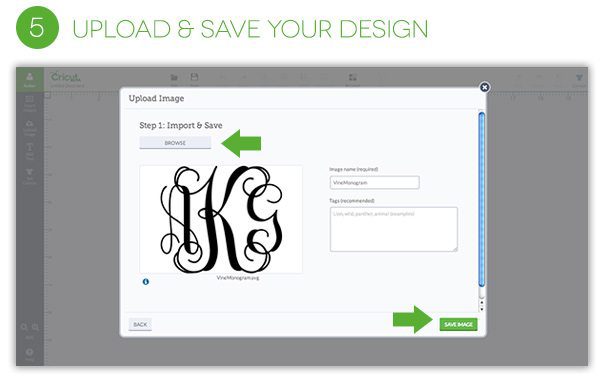
- Browse you files and select the monogram file you created. The image will show up in Design Space
- Then click “Save Image”
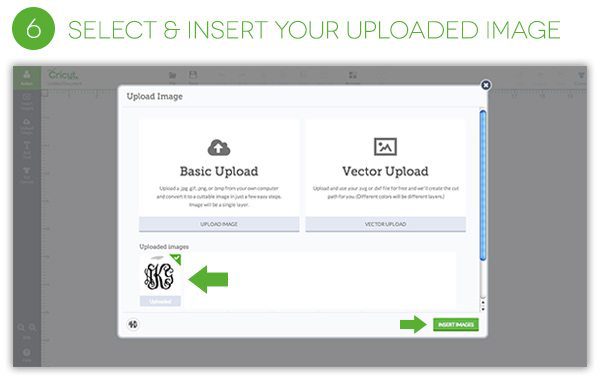
- Once you have clicked “Save Image” the monogram will appear in your “Uploaded Images” menu.
- Click “Insert Image”
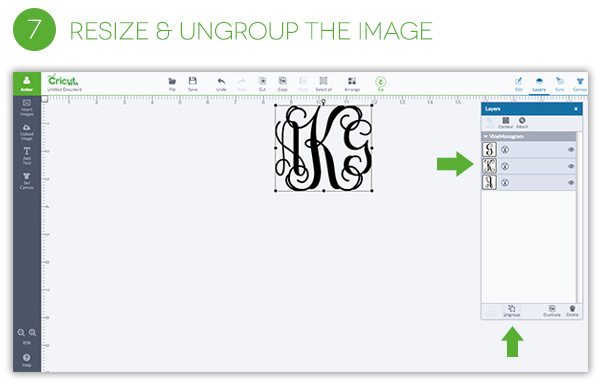
- The image will then appear on your canvas, however the letters will still be individual.
- Highlight each of the letters, then click, “Ungroup” on the bottom of the layers palette.
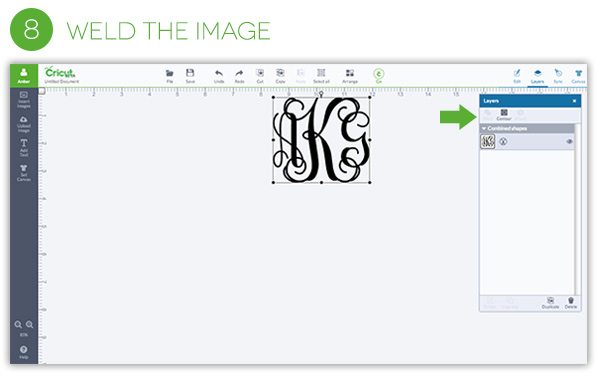
- Once the letters are ungrouped, select them all again, then click “Weld” in the upper top left corner of the Layers palette.
- You’ll also want to resize the monogram to fit whatever project you are working on.
- Then you’re ready to click the “Go”
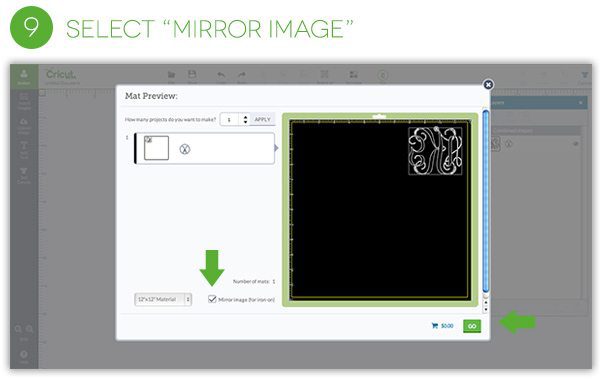
- Once you click, “Go” – this is where Design Space takes over and walks you through the process.
- Since you are making an iron-on, remember to click the “Mirror Image” checkbox on the center bottom of the screen!
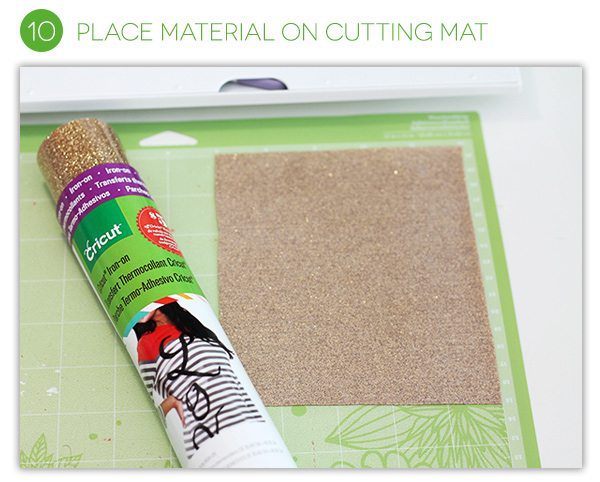
- Prep your mat by placing the iron on material with the matte side facing up.
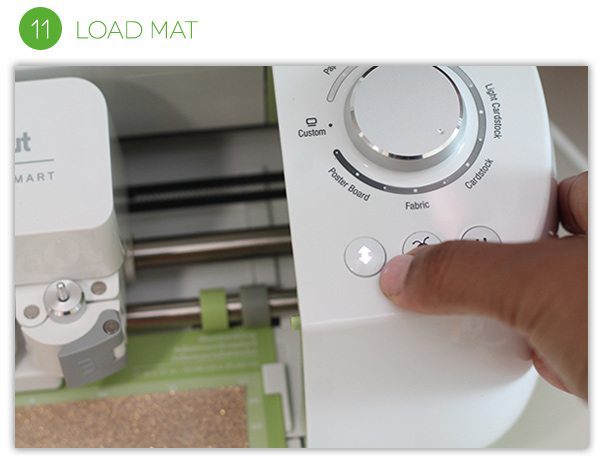
- Design Space will then prompt you to load the mat and the “Load” button will be flashing. Go ahead and push your mat onto the platform and press the flashing load arrow
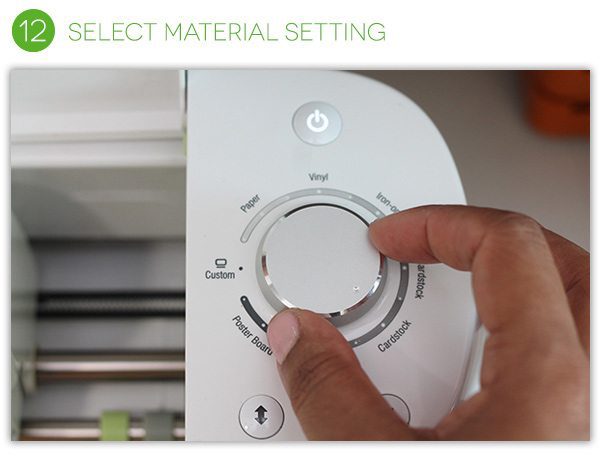 Next you’ll be prompted to adjust the material setting. This setting is controlled by a knob on the side of your machine. For this particular iron-on, I found that the “Cardstock” setting worked best since it is a bit thicker than normal.
- The Cut button will start flashing. Press it and your creation will come to life.
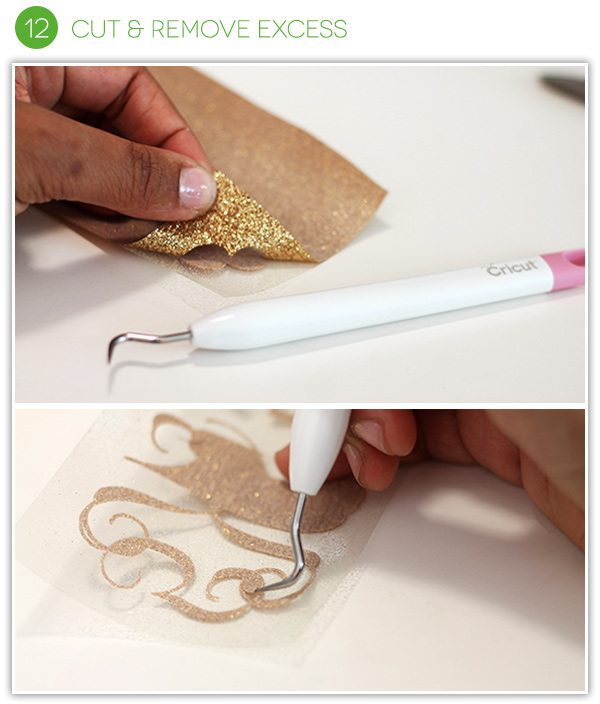
- Once the iron-on is cut, use the weeding tool to carefully peel back all the excess material. This particular design is very intricate, so this tool comes in very handy.
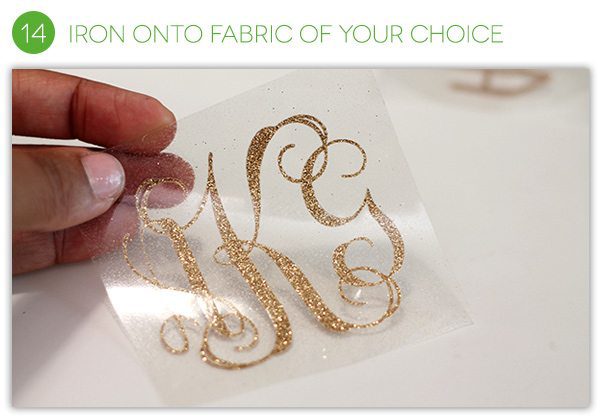
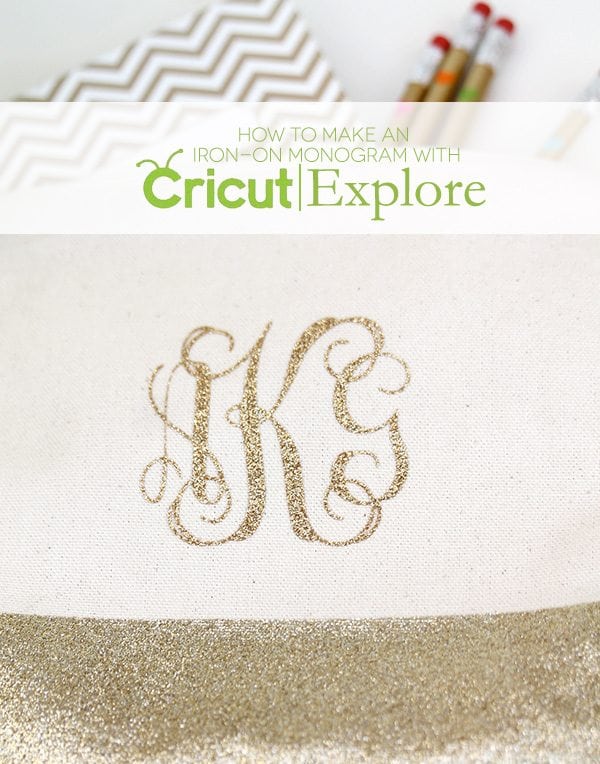
- And you’re done!! Your finished monogram will look like this and you are ready to iron it onto your project
- TIP: When ironing on the monogram, hold the iron in place rather than moving it back and forth as you would when ironing clothing. Hold the iron in place or 5-10 seconds at a time, with a piece of cloth in between the iron and the iron-on.
Click HERE to see what I made with my monogram!

