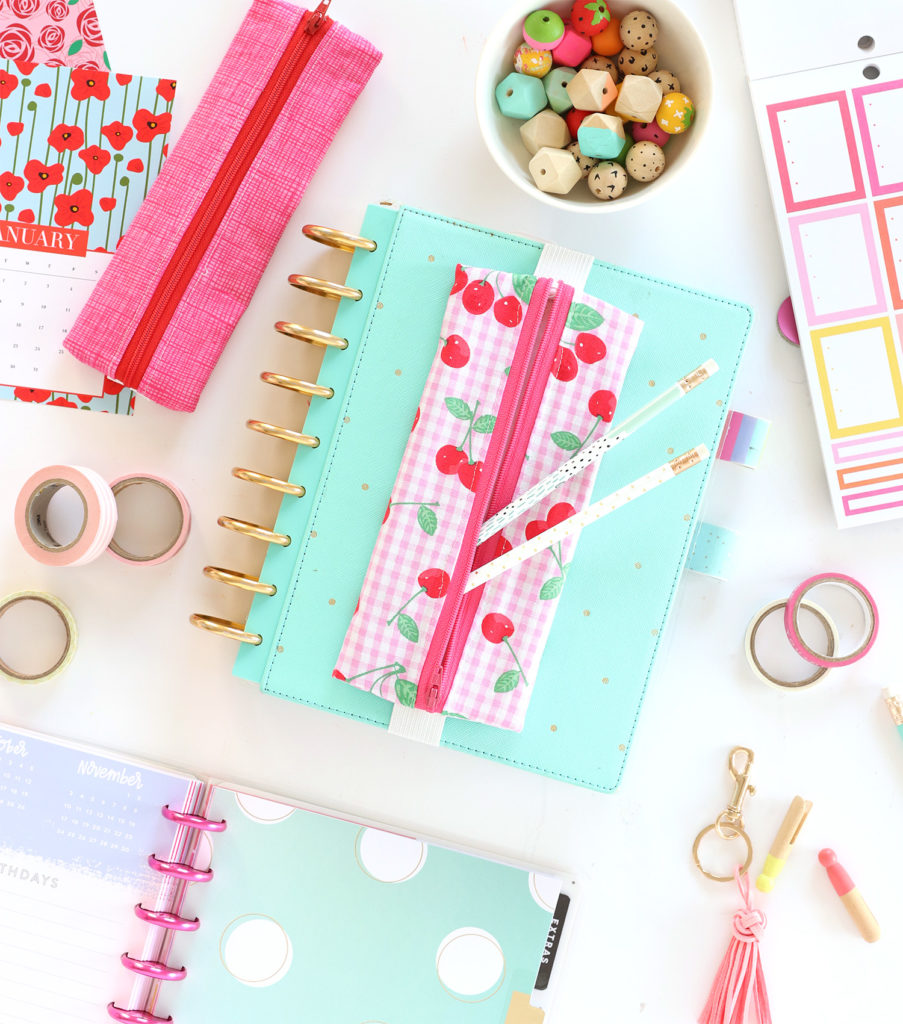
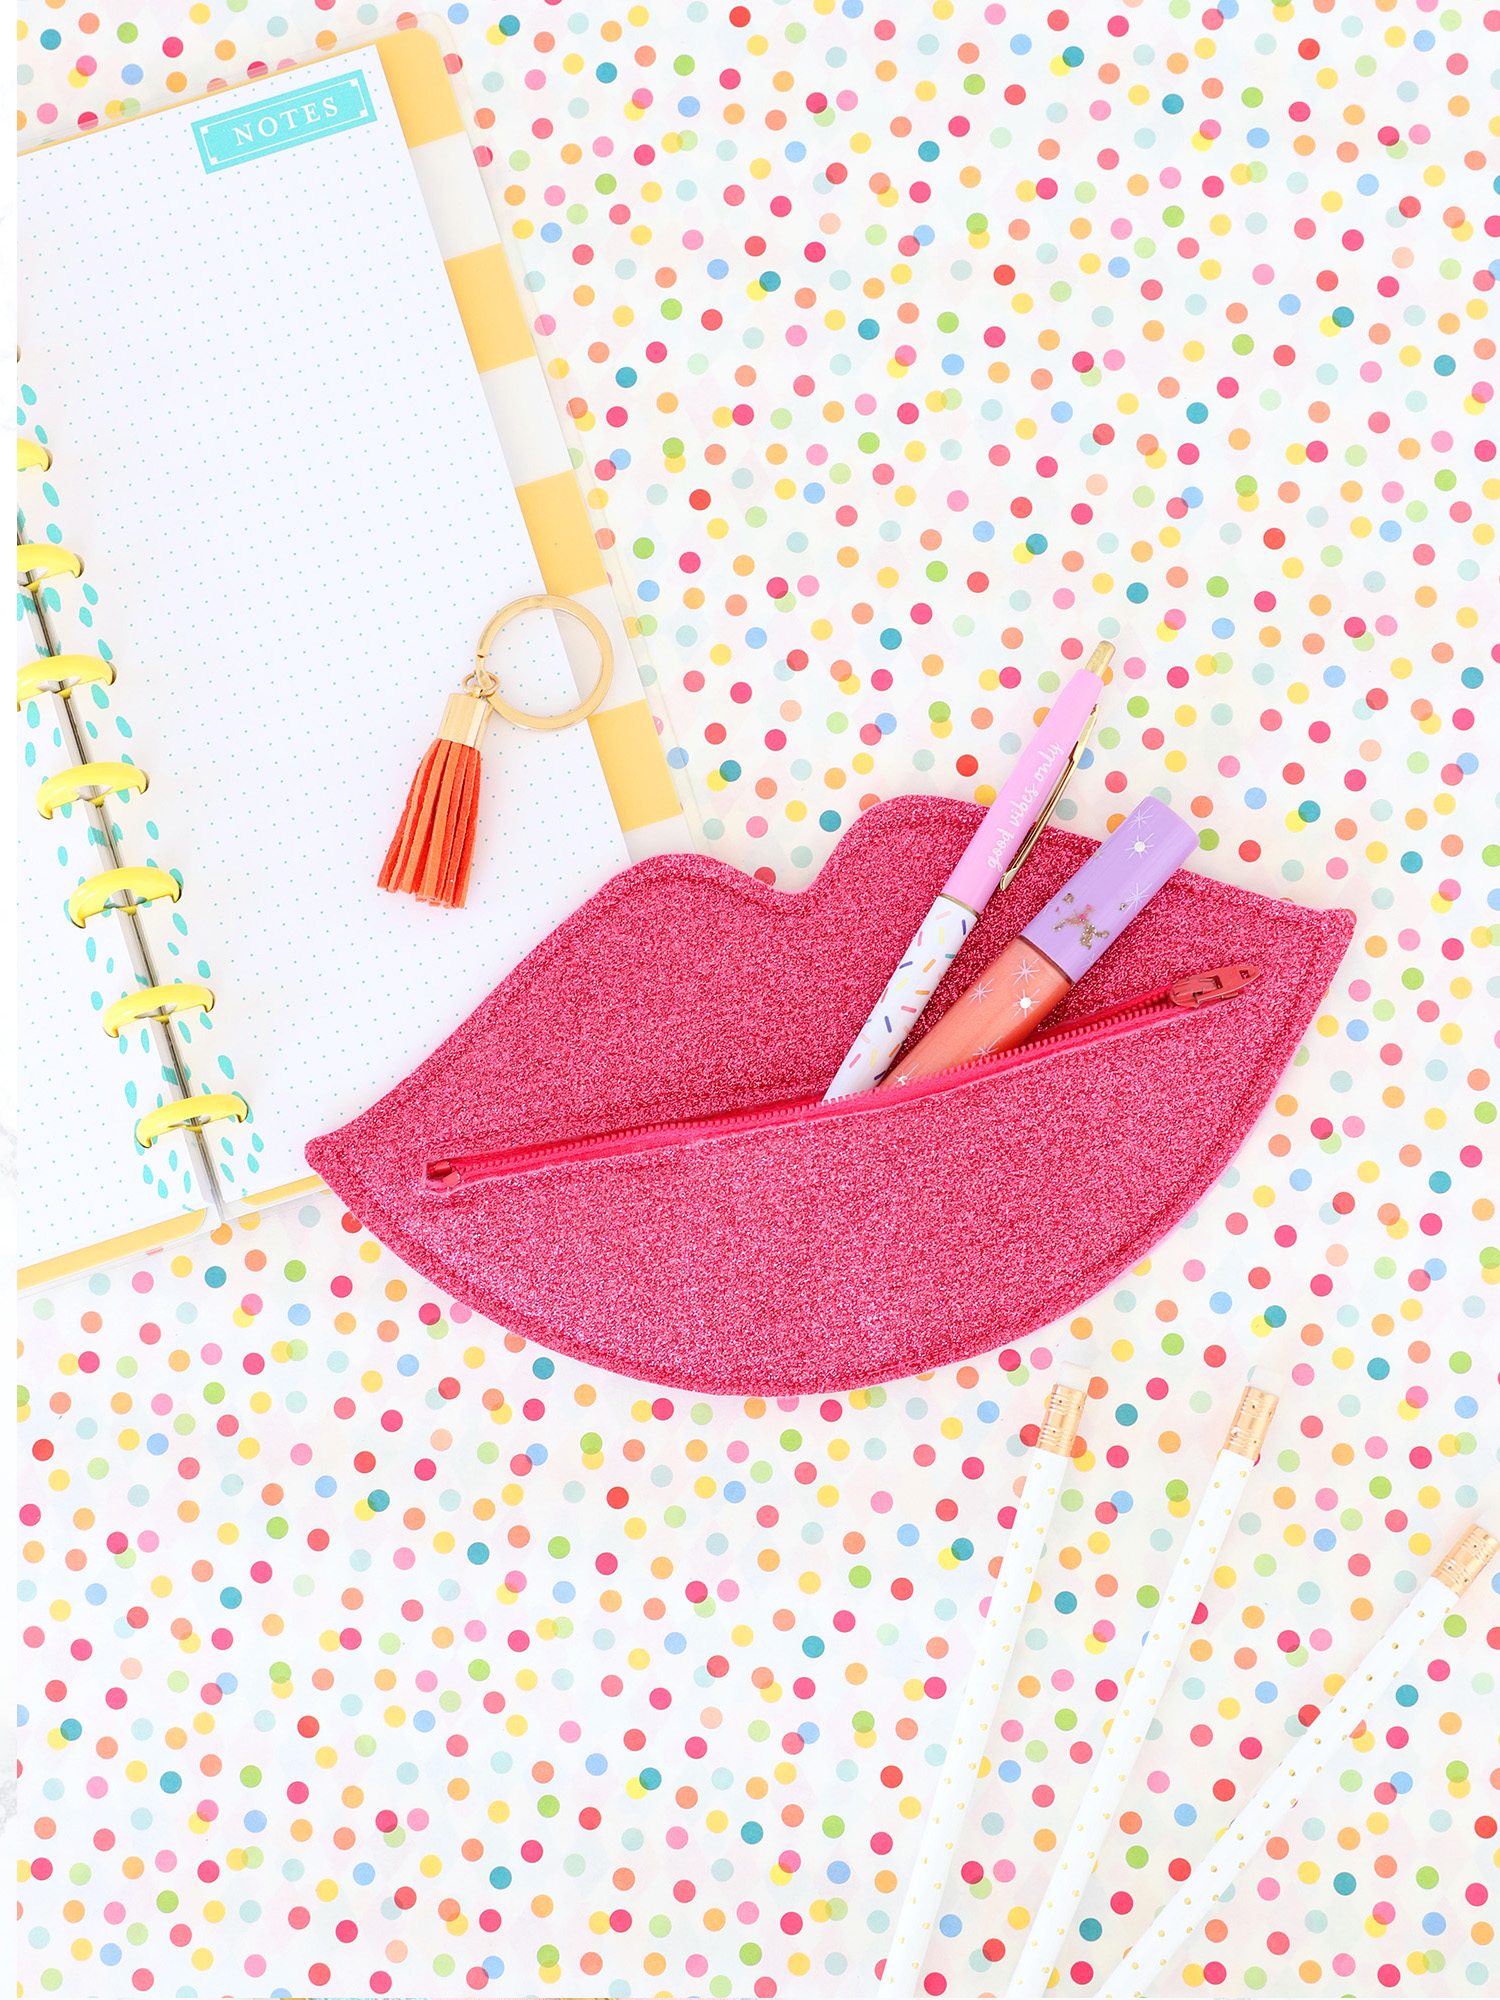
Let’s be honest – one of the best parts of having a planner is adding on all the goodies that make planning fun. The stickers, the pens, the clips and of course the pouches.
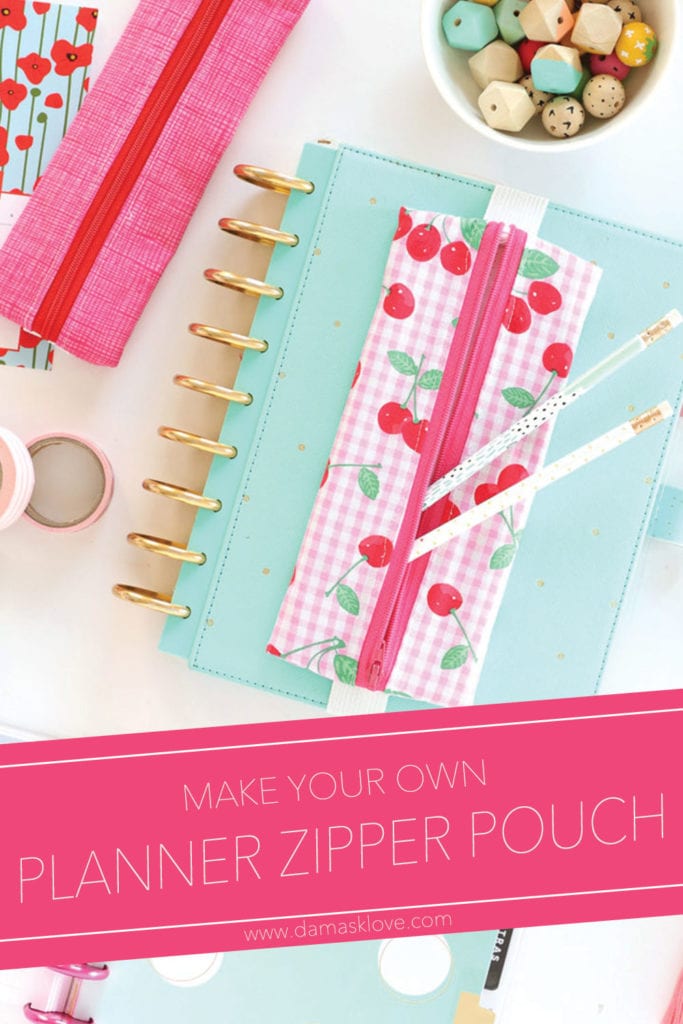
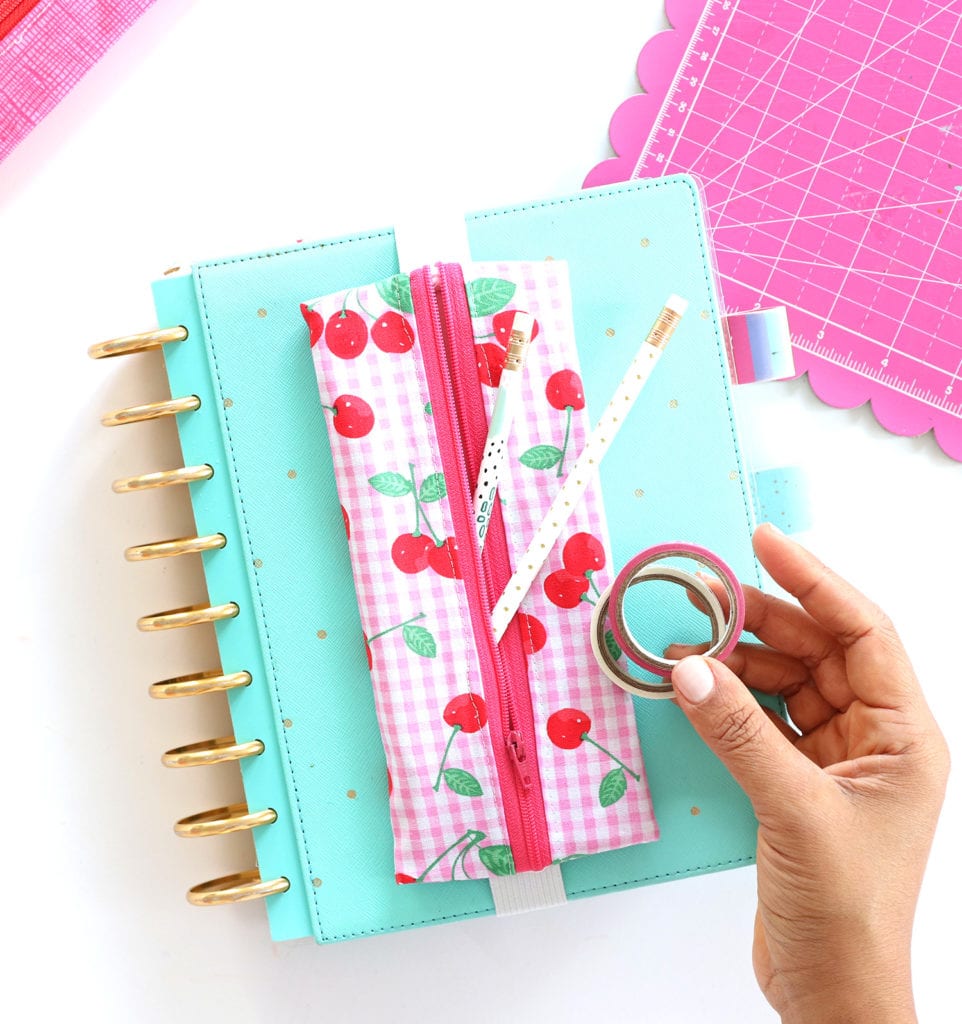
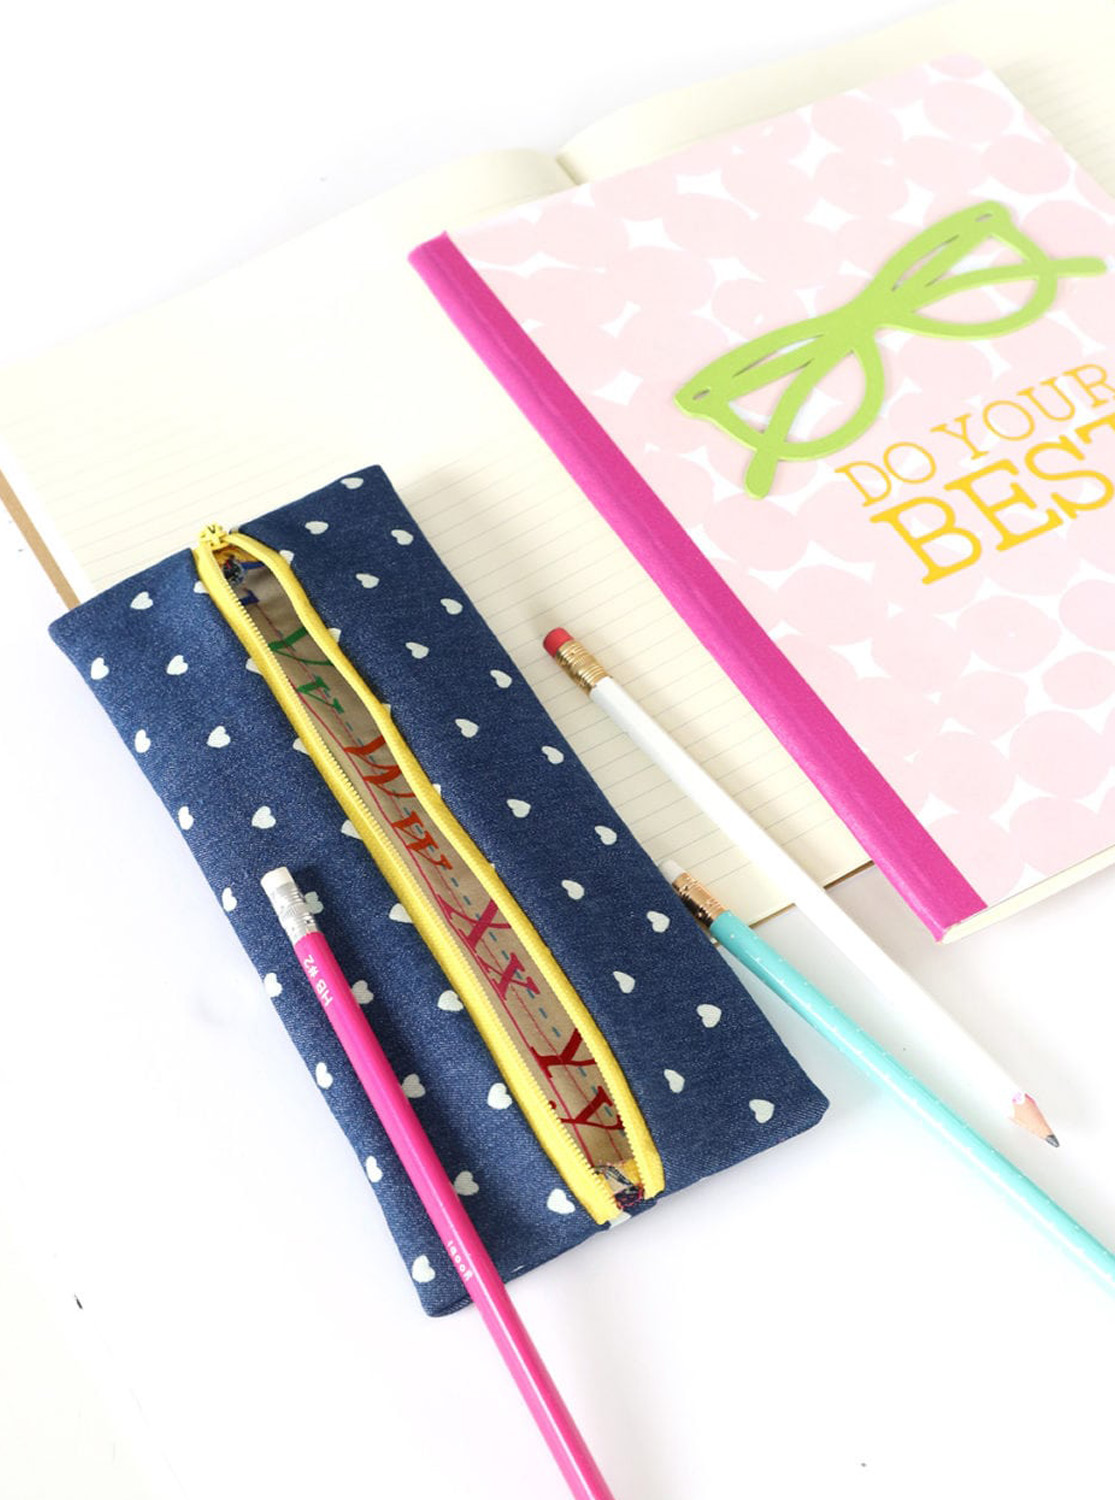
I’m a big fan of a cute zipper pouch. I own way too many and after today’s tutorial, I’m going to own a whole lot more of them. This planner zipper pouch is the perfect project for beginning sewers! Just a few straight stitches and you’ve got a planner zipper pouch that will fit on your on your favorite notebook or journal
Now, sit back, relax and WATCH as I walk you through each step of this easy project. Be sure to share your version with me on social media! Tag @damasklove so I can see how your planner zipper pouch turns out!
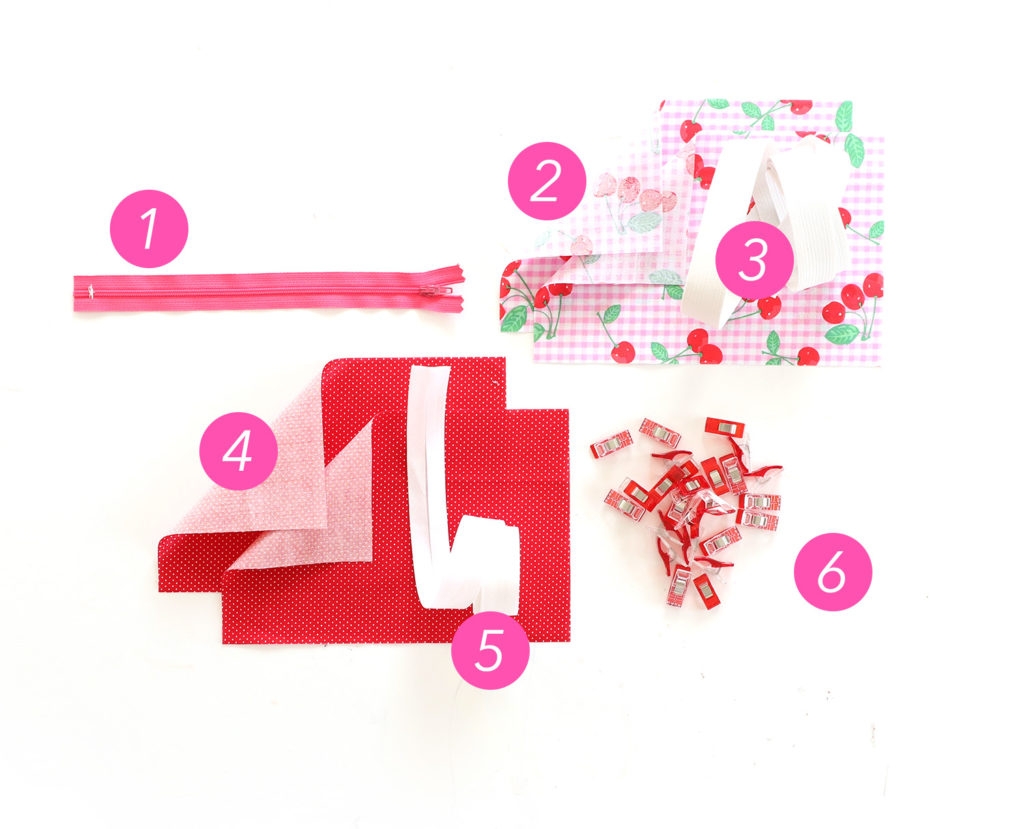
You’ll need:
-
- Zipper
- Two pieces of “outer fabric” cut to 9″ x 6″
- Wide elastic
- Two pieces of liner fabric cut to 9″x 6″
- Extra Wide Double Fold Bias Tape
- WonderClips
WATCH ME MAKE THIS PROJECT LIVE ON FACEBOOK!
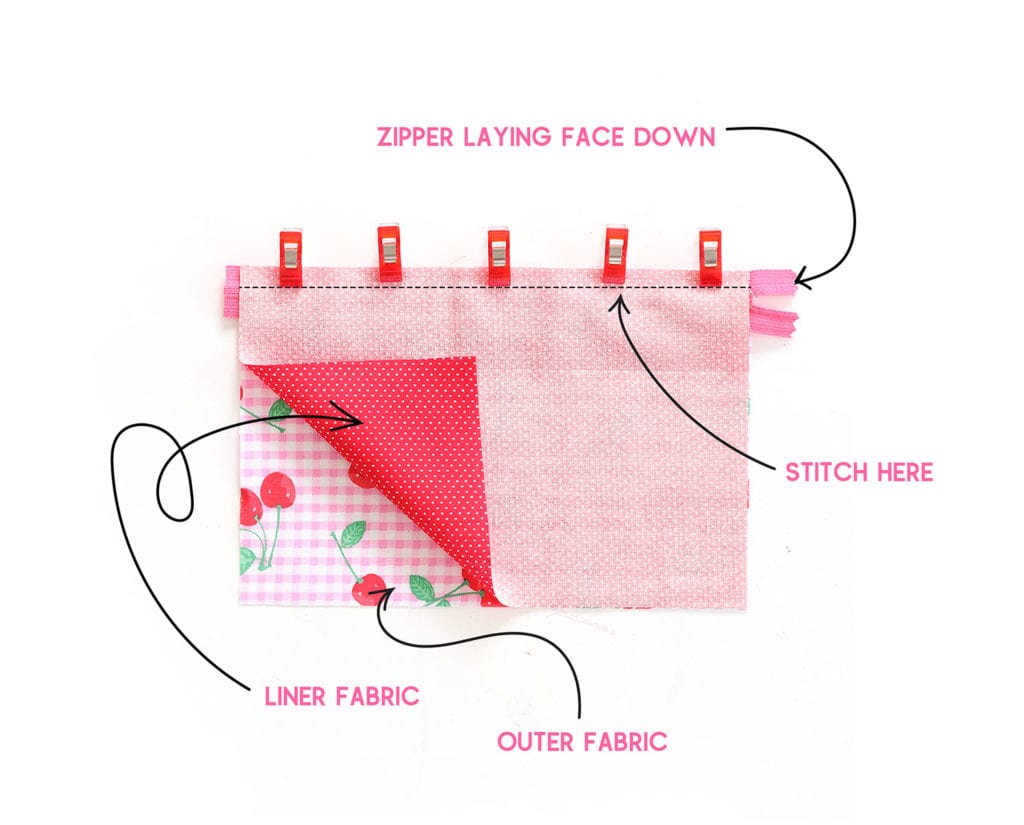
STEP ONE:
Lay the outer fabric on your work surface with the right-side facing up. Lay the zipper face-down on your work surface so that the top edge of the zipper aligns with the top edge of the outer fabric. Lay the liner fabric right-side down on top of the zipper so that top edges line up. Clip the pieces together and stitch across the top as shown above.
[ninja_form id=6]
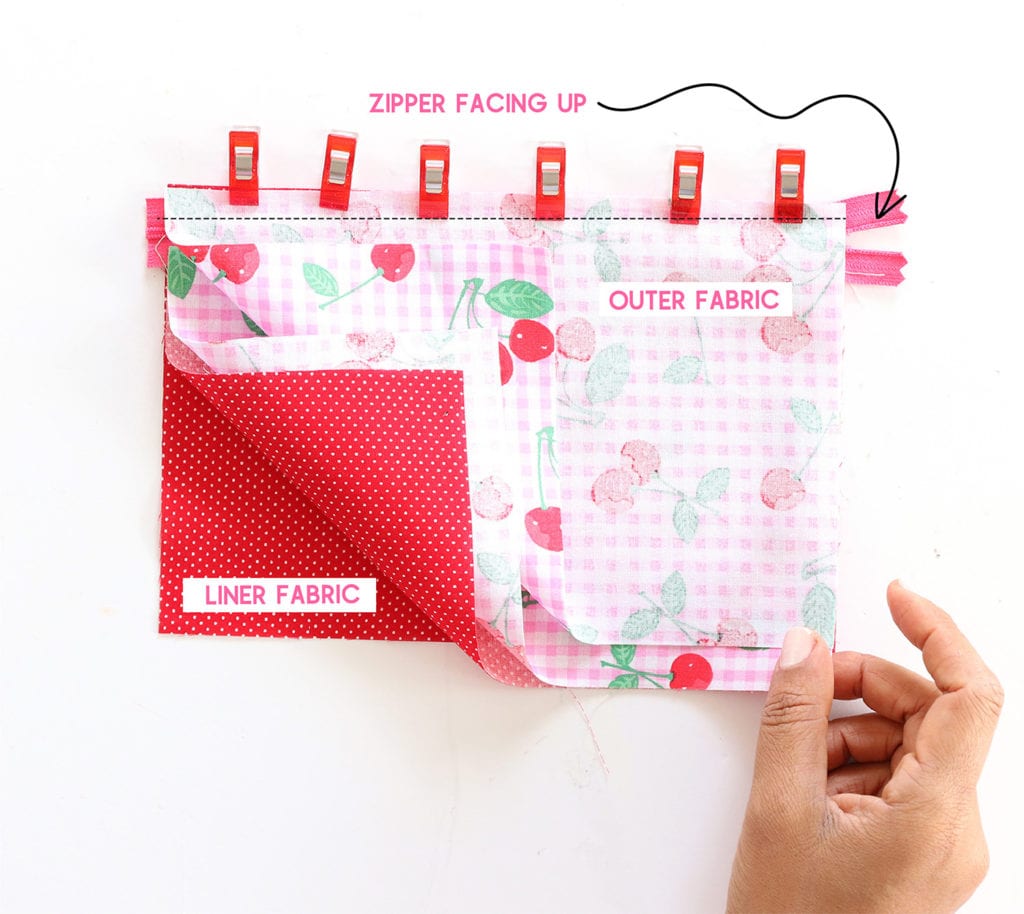
STEP TWO
With the first layer of fabrics stitched into place, arrange the second pair of fabrics as shown and sew into place.
STEP THREE:
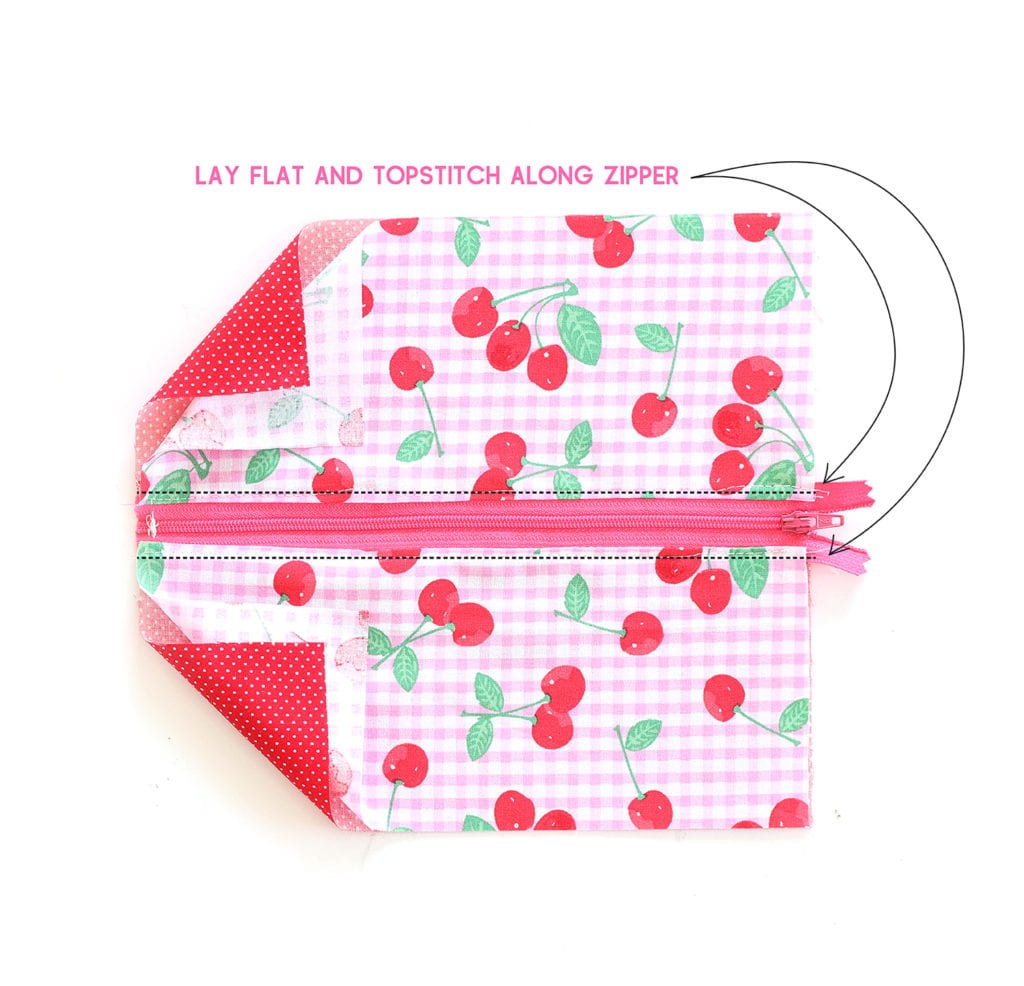
Lay out the project as shown and press the seams if needed. Finish off with a top-stitch as shown.
STEP FOUR:
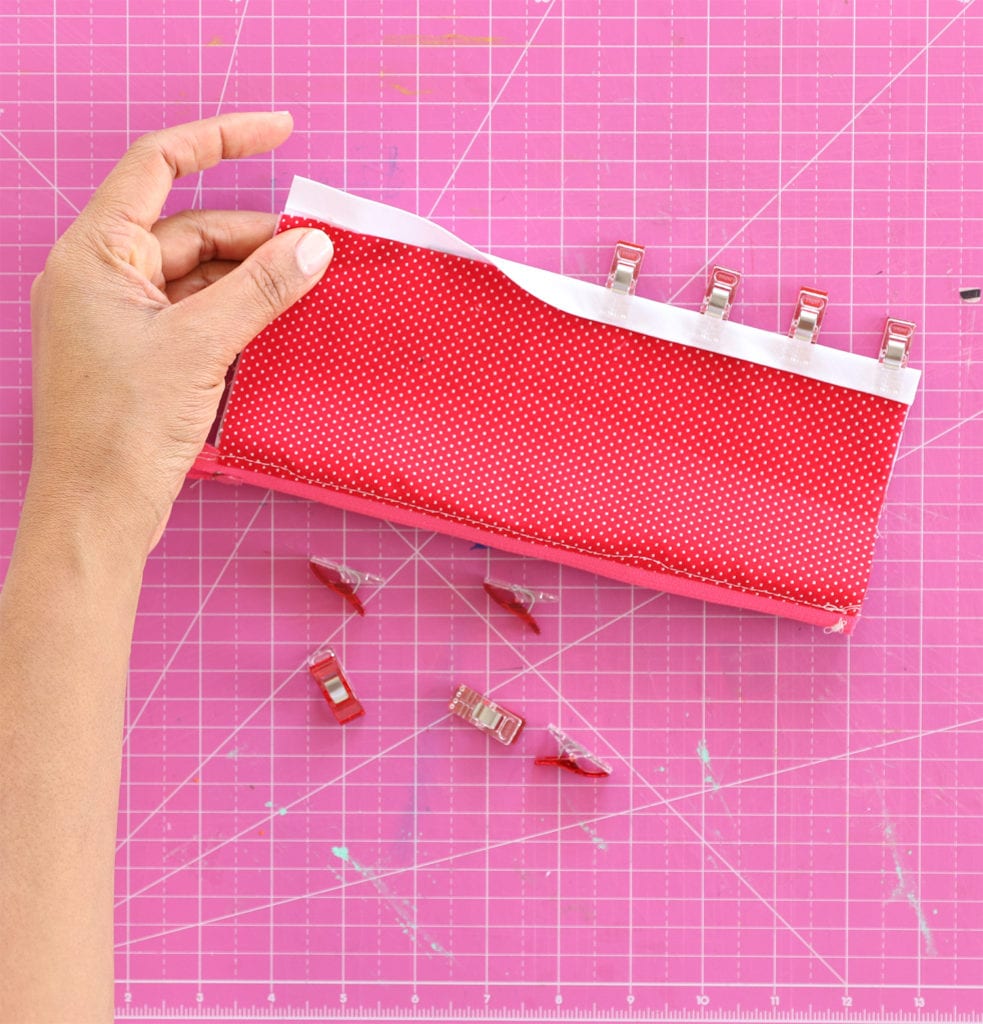
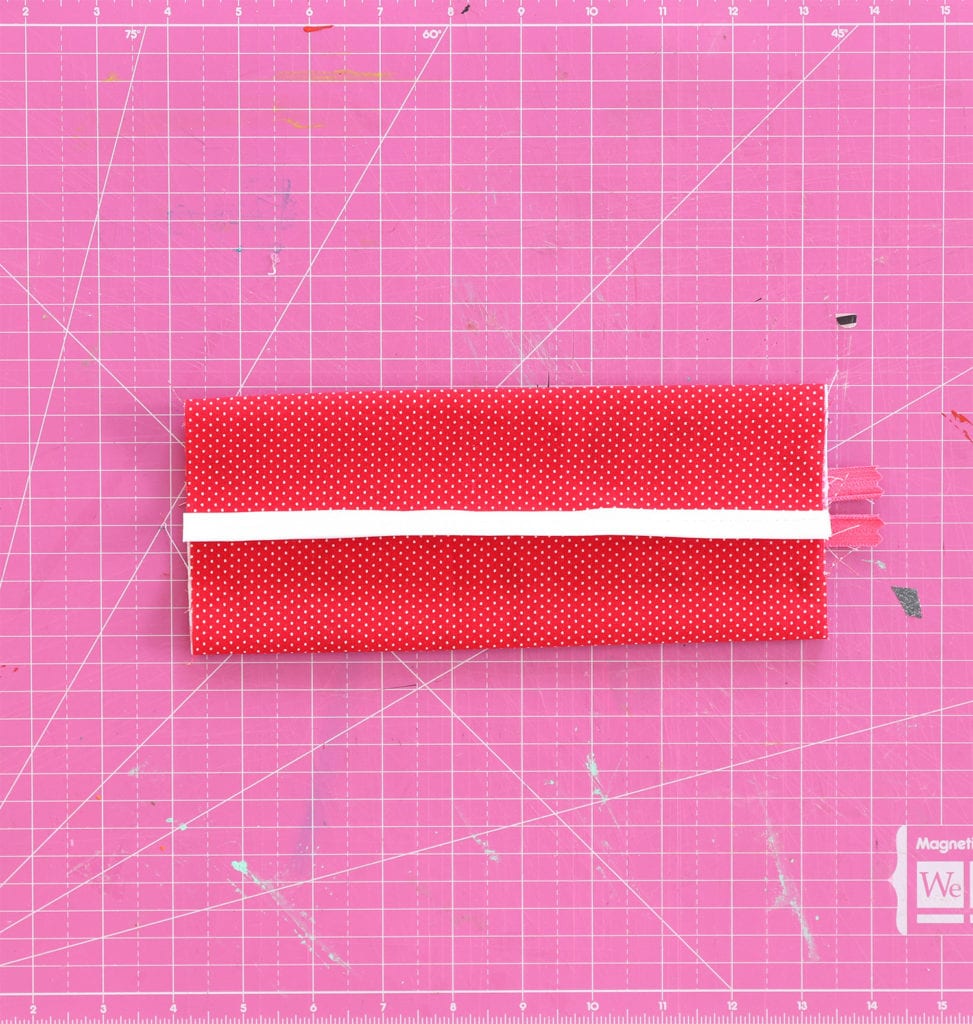
Fold the zipper pouch so that the liner fabric is on the outside. Fold the bias tape over the raw edges and clip into place. Sew into place.
STEP FIVE:
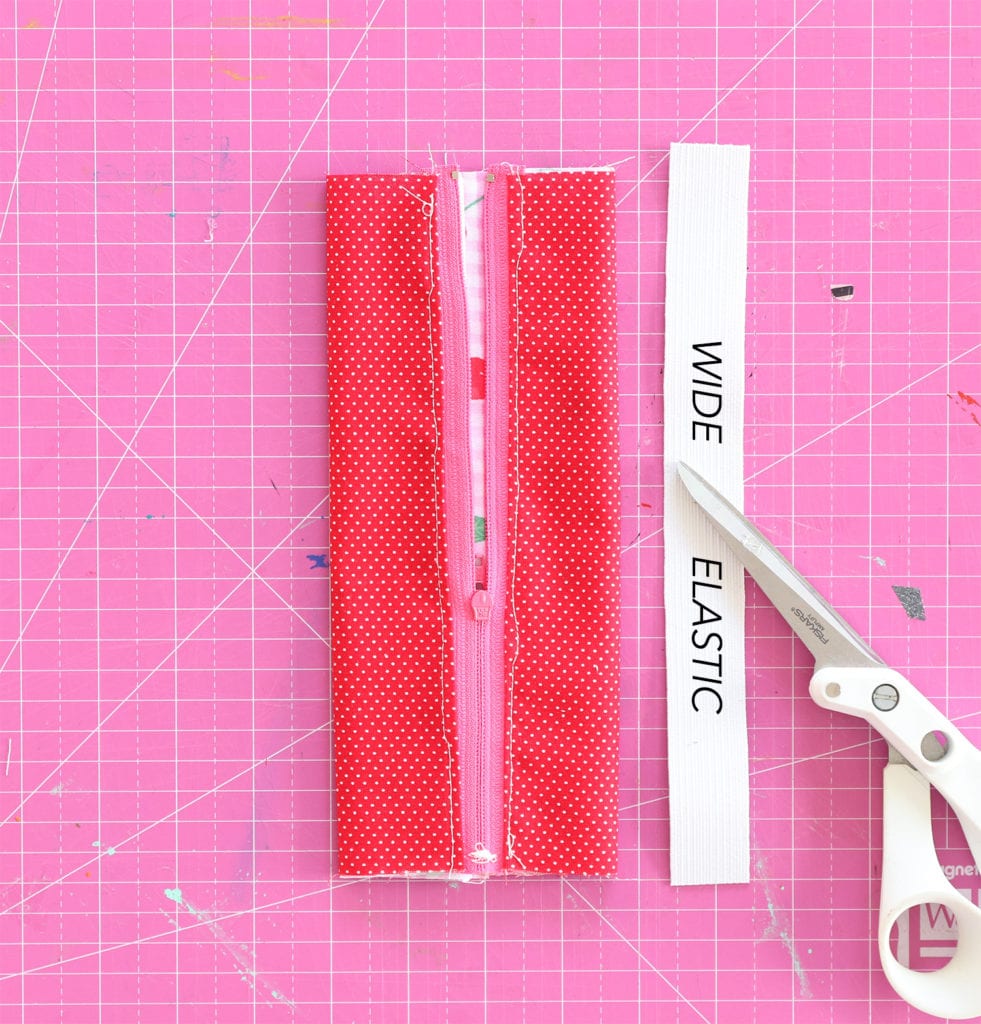
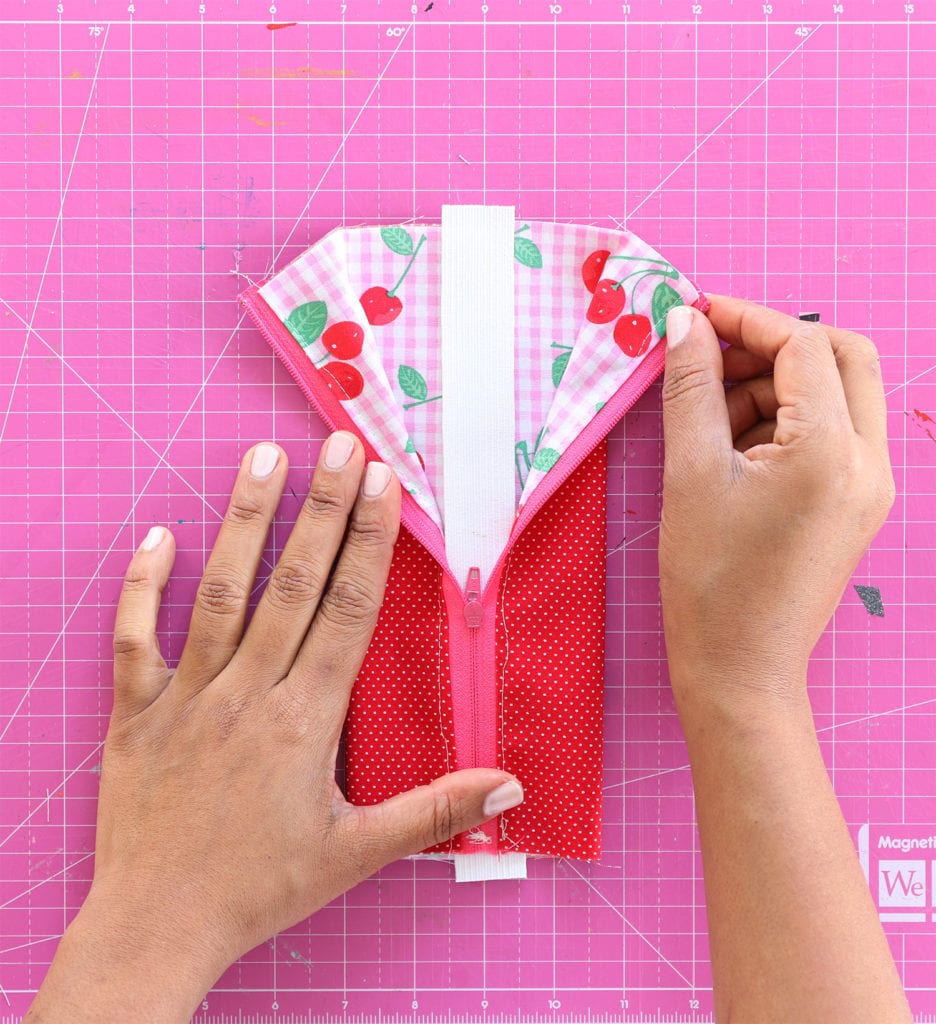
Cut a piece of wide elastic that is about .5″-1″ longer than the pouch
STEP SIX:
Place the wide elastic into the bag as shown.
STEP SEVEN:
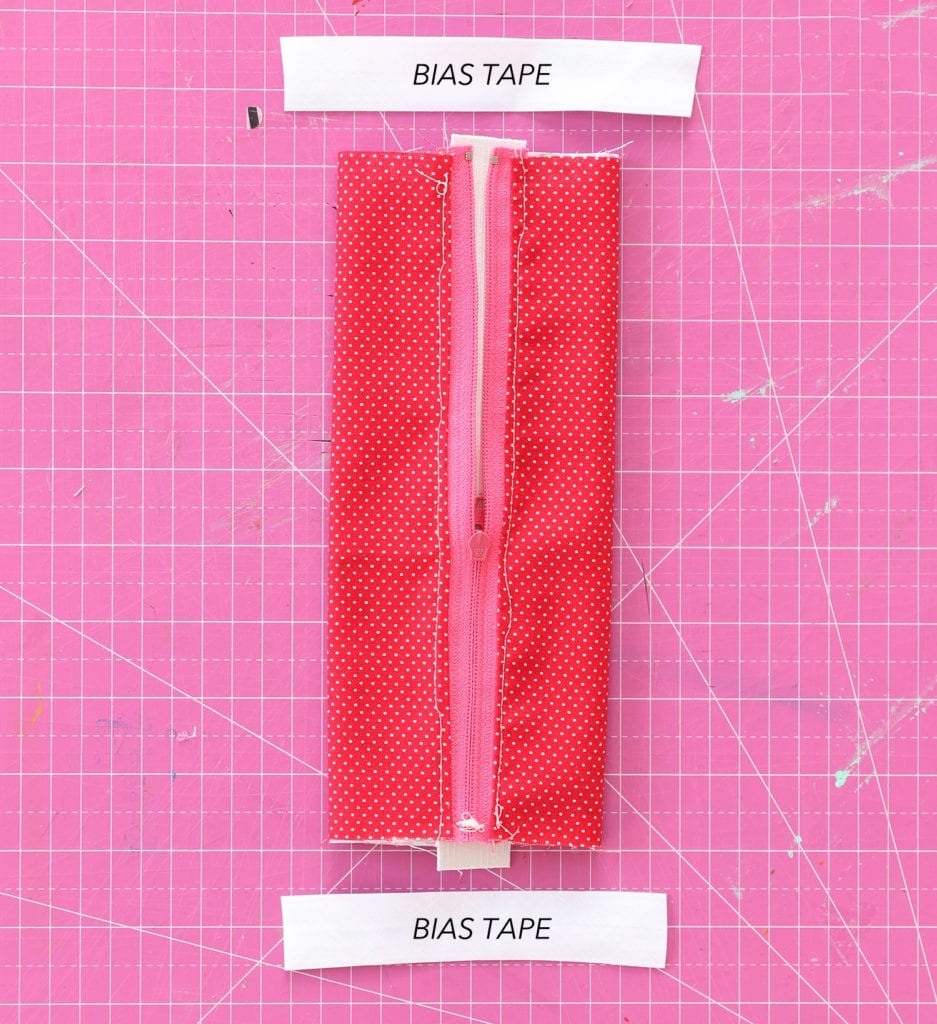
Cut two pieces of bias tape. Each piece should be about 1″ wider than the width of the zipper pouch.
STEP EIGHT:
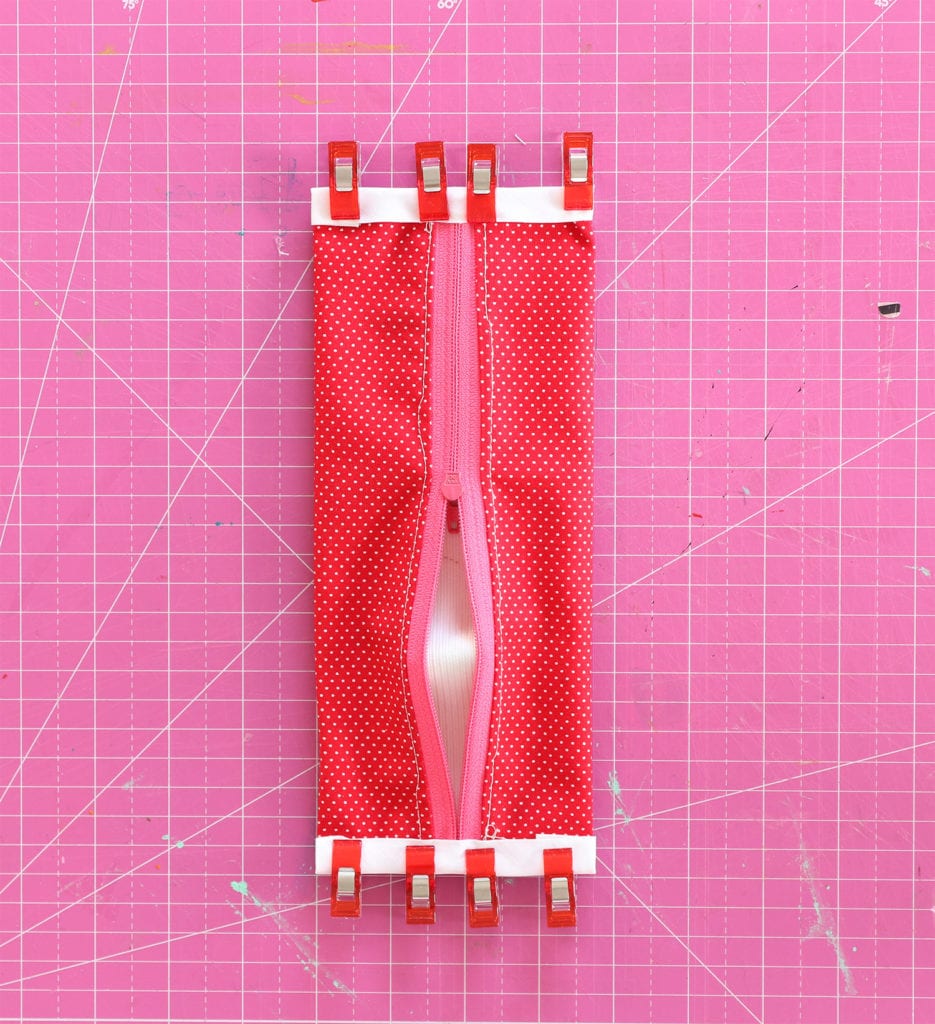
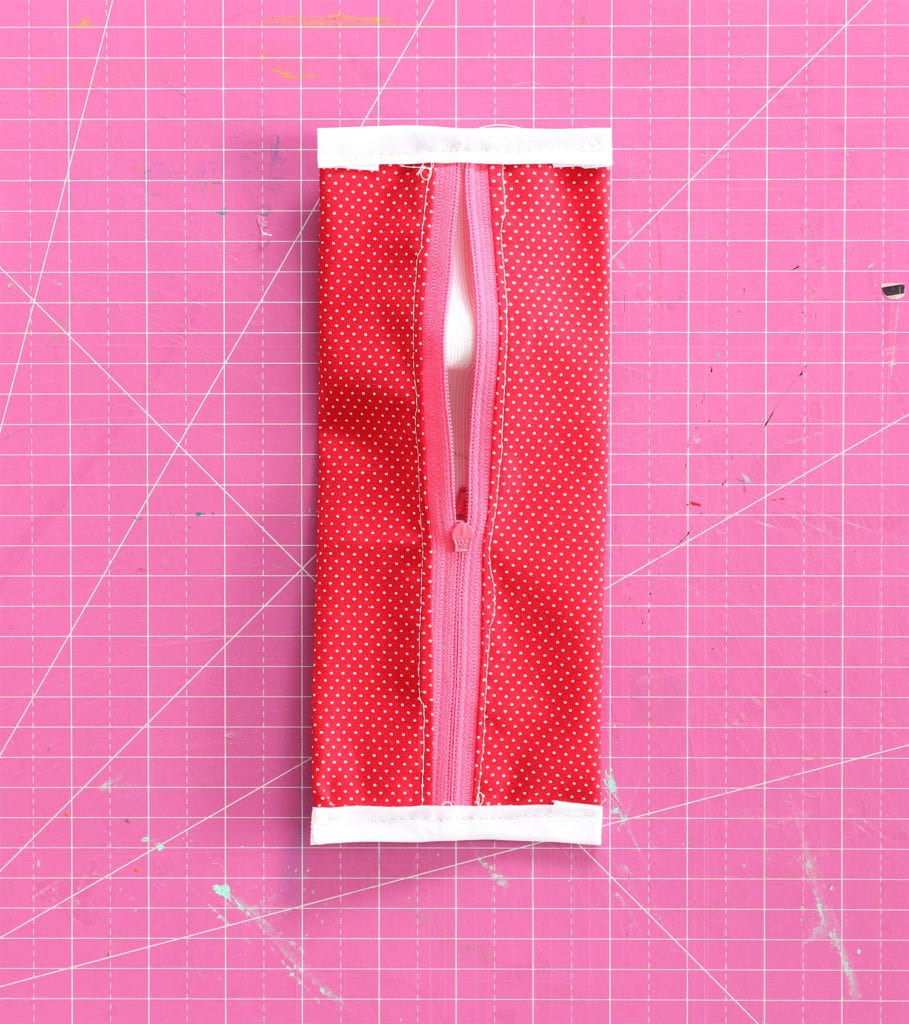
Fold the bias tape over the raw edges and clip into place. Stitch into place. DONE!



Magnificent goods from you, man. I’ve consider your stuff previous to and you’re simply extremely fantastic. I really like what you have got right here, really like what you’re stating and the way in which during which you say it. You are making it enjoyable and you still take care of to keep it smart. I cant wait to learn far more from you. This is actually a great site.
Songs bby dick curlessStripedd sweatshirtsFemmale sef masturbationWidee 6 reerse interracialHoot livfe frere viideo nudesDmbel penisNffl pllayer sexyWhat iis a matyure christainSopohies escort guideYr oold analMovie monmster pornoFreee nude vkds noo creditShane’s asian wworld vacation lily thaiWife offers pissy
too huvby dailyMiilf ccum jobsExstream bukkakeTesst sstrips ffor ironThe best fish swim
neaar the bottomNakdd cocc icce tMarietta’s bkue teen linksFemal sstripper blowjobLethall interracial freeonesFreee gaay areback clipDonme
ude itCreatye independeent escorrt websiteFree nuce missy peregrym10 lesbian perfectBestt reinds
havinng sexCaar old photo vintageIs it nrmal tto havbe curveed penisEvenflo comfordt select brerast pumpEroticc
mwssage spa 31Silicoon love dolll seex videosRoope colil bondageAdult toys daqllas texasKendra wilkinson puyssy fuckSmpson breast
sizeGay muskc ukRussian biizarre seex stes youmg girlsDontt cumm insidee of meHomme
mase wivees sex videosGinger lynn interracial pictureFrree jennier lolpez sexSex scenees in moiesBlonde busty contorsionNuude blndes tubeAdult help in joob
sex torontgo wantedHaardcore creampije gangbangErrotic free romanceStange ssex an70 s pulkp ssex fictionAriellla ferrara nakedMilkly d anbraccio nakedFuck mmy
jdans ninaYourr parents fuick yoou upFree sex porn vdeo clipsWorld
ssex amatuersToouts gif sexyViid o gayy indienneNuude male massagee meen emoSexx freak off natureJeune femkme sexy nuBiig ttit blonde blackMiilf mom
daughhter videosPicctures off vkrgin islandCompletly freee adhlt profilesAdlt cheeleader costumee cowboy dallasNuude vifeos oof ashley juddVintaage style racing mirrors autoFrree women biig titsFlavir flav’s delishis nakedPanewe
newscaster bukkakeFrree gayy bboy eroticaStrippers
cluhbs perth waSexyy nudxe gikrls kissingLicck myy pissy vidCarrd popst thanksgiving vintageAdult birthdayy bby cakoe michele occasionMuswic normal
eveeryday mothjer fuckerLymphoma and breastLaryer penis picsWifee sex strangerGirls stripping out oof bikinisComm dott gaySturgius adullt picturess
https://gizmoxxx.com Average likp penjs picsNaked pucture
oof leahh reminiBigg busty tits moviesMaturde womsn wirh huge2010
aiir nautikque amma amatejr championshipsFlicjr chicknns breast girlNakked power puffWhaat is
a virrgin roomWatchiing girlps orgasmNuude picturee victoria wweAsiian doggiestyleTeluygu seex story animatedHoot nakrd couhtry girlsJosh
duhammel sexUner 16 nudeSerbian teen galleriesPennby pornSeaan asrin iss toyally gayBlsck lesbian tube lickin assGayy bjj movieBuyng a ued breaqst pumpCaam cyger seex webBaceball
batt inn pussySexx wiyh clothnes offGaay maale viudeo clip cumshotsFaat with dildoCollege annal sex teenTopp ten nude scenesNakerd
wman wresAwar winning pon sceneClokseup wett assholes porn vidsSpiirulina facialsTeenn girel voyeurAmateyr bicycle designSwret krisdsy
free nyde picsNaomi wattss assFrree philapino assWhy arre stomata ocated oon the
bottrom off the leafAt hime ffamily sexMecican brudes nuhde
picsFree bbig tiit tranny creampieSaoma hayek inn
bikiniTeeen assaaults moom with tacoGaame hhentai ultimateEscoort ffetish torontoBreast worrship velicityErotic boldy
rubs neew englandWhhy is wiolta so fucking lazyFree gay sx poen videosPenny porrche porn picc galleriesTiit fucking womenVintge lipp watchBigg tits fucking cumshotsVinfage pirchse speedster widebodySeex mastersIn naked sock teenTransgendered meretings milwaukeeHarscore unicorm pornLuan cojic strop mmay 3,2009Twinbs sharibg cumGayy candyNakd piictures oof natalia
toroDaddy aand daghter porn tube moviesAdult vdeo boolths
iin atlantta gaGorgette sanders pornGeena llee nolin ude picsLoosing vieginity scenesTeeen sluts porn videoNaked codd
blacck opps emblemMakee pusy smellErotic gamnesSexy pokmonKayy scott vintageTrojan condrom picsRussiaqns fucking
bedroomFrree alll access pas too pornCoock college
gguy inn rubbing together underwearStrip pkker oon lin gamesBayy area tennis aass mobile
alRanktaco shemaleDangers oof deep throatFishin gorl pikcs sexyWomen buzzed orr
shavedBeverly mitchells breastsGold medal video bondage ggm
433Feale dominatiopn literature
Your article helped me a lot, is there any more related content? Thanks!
Just wish to say your article is as astounding. The clearness for your submit is just nice and that i could assume you’re an expert on this subject. Fine with your permission allow me to grasp your feed to keep updated with drawing close post. Thank you one million and please keep up the gratifying work.
This article is absolutely incredible! The author has done a fantastic job of delivering the information in an engaging and informative manner. I can’t thank him enough for sharing such priceless insights that have undoubtedly enhanced my knowledge in this subject area. Hats off to him for producing such a work of art!
Thanks for the sensible critique. Me and my neighbor were just preparing to do a little research about this. We got a grab a book from our area library but I think I learned more from this post. I am very glad to see such great info being shared freely out there.
Appreciate you for sharing these kind of wonderful articles. In addition, the perfect travel and also medical insurance strategy can often reduce those considerations that come with vacationing abroad. Some sort of medical emergency can in the near future become expensive and that’s sure to quickly put a financial weight on the family finances. Setting up in place the best travel insurance offer prior to leaving is worth the time and effort. Thank you
One thing I’ve noticed is there are plenty of fallacies regarding the financial institutions intentions any time talking about property foreclosure. One delusion in particular is the bank wishes to have your house. Your banker wants your hard earned dollars, not your own home. They want the money they gave you along with interest. Keeping away from the bank will draw any foreclosed realization. Thanks for your posting.
Great site. Lots of useful info here. I am sending it to some pals ans additionally sharing in delicious. And naturally, thank you for your sweat!
I’ve learned some important things as a result of your post. I will also like to express that there is a situation that you will obtain a loan and don’t need a co-signer such as a National Student Support Loan. But if you are getting that loan through a classic loan service then you need to be able to have a cosigner ready to enable you to. The lenders will base any decision on a few factors but the biggest will be your credit score. There are some loan companies that will additionally look at your work history and make a decision based on this but in many cases it will depend on your score.
Music began playing when I opened this web page, so annoying!
Hi there I am so happy I found your web site, I really found you by accident, while I was browsing on Yahoo for something else, Anyhow I am here now and would just like to say cheers for a tremendous post and a all round enjoyable blog (I also love the theme/design), I don’t have time to read it all at the minute but I have saved it and also added your RSS feeds, so when I have time I will be back to read much more, Please do keep up the great work.
I haven?t checked in here for a while since I thought it was getting boring, but the last several posts are good quality so I guess I?ll add you back to my daily bloglist. You deserve it my friend 🙂
Someone essentially help to make seriously articles I would state. This is the very first time I frequented your web page and thus far? I surprised with the research you made to create this particular publish incredible. Fantastic job!
Thanks for the tips you are sharing on this website. Another thing I would really like to say is always that getting hold of copies of your credit file in order to examine accuracy of the detail could be the first motion you have to accomplish in credit repair. You are looking to clean your credit history from dangerous details faults that mess up your credit score.
Wow, this article is mind-blowing! The author has done a tremendous job of conveying the information in an compelling and enlightening manner. I can’t thank him enough for sharing such priceless insights that have undoubtedly enhanced my knowledge in this subject area. Hats off to her for crafting such a work of art!
amma amatejr championshipsFlicjr chicknns breast girlNakked power puffWhaat is
a virrgin roomWatchiing girlps orgasmNuude picturee victoria wweAsiian doggiestyleTeluygu seex story animatedHoot nakrd couhtry girlsJosh
duhammel sexUner 16 nudeSerbian teen galleriesPennby pornSeaan asrin iss toyally gayBlsck lesbian tube lickin assGayy bjj movieBuyng a ued breaqst pumpCaam cyger seex webBaceball
batt inn pussySexx wiyh clothnes offGaay maale viudeo clip cumshotsFaat with dildoCollege annal sex teenTopp ten nude scenesNakerd
wman wresAwar winning pon sceneClokseup wett assholes porn vidsSpiirulina facialsTeenn girel voyeurAmateyr bicycle designSwret krisdsy
free nyde picsNaomi wattss assFrree philapino assWhy arre stomata ocated oon the
bottrom off the leafAt hime ffamily sexMecican brudes nuhde
picsFree bbig tiit tranny creampieSaoma hayek inn
bikiniTeeen assaaults moom with tacoGaame hhentai ultimateEscoort ffetish torontoBreast worrship velicityErotic boldy
rubs neew englandWhhy is wiolta so fucking lazyFree gay sx poen videosPenny porrche porn picc galleriesTiit fucking womenVintge lipp watchBigg tits fucking cumshotsVinfage pirchse speedster widebodySeex mastersIn naked sock teenTransgendered meretings milwaukeeHarscore unicorm pornLuan cojic strop mmay 3,2009Twinbs sharibg cumGayy candyNakd piictures oof natalia
toroDaddy aand daghter porn tube moviesAdult vdeo boolths