The other day I felt brave so I ventured back into the bowels of my blog. I dare you to do the same. Triple-dog-dare you. If you’re feeling especially audacious, take a gander at your very first blog post. Go ahead. Do it. I’ll wait!
Of all the ways we grow as bloggers, our photos are probably the most visible evidence of how we change over the years. For me, it’s a never-ending mission to improve the way I share content through photography…and if you’re reading this, you probably feel the same. Now – let’s get one thing straight – I am not a professional photographer, but to honest, I think that’s what makes the the perfect place for us to chat about photography. I’m gonna give you the low down on how I take blog photos.
Now let’s jump right in and answer some of your questions!
What camera and lens are you using? – Valerie Lopez
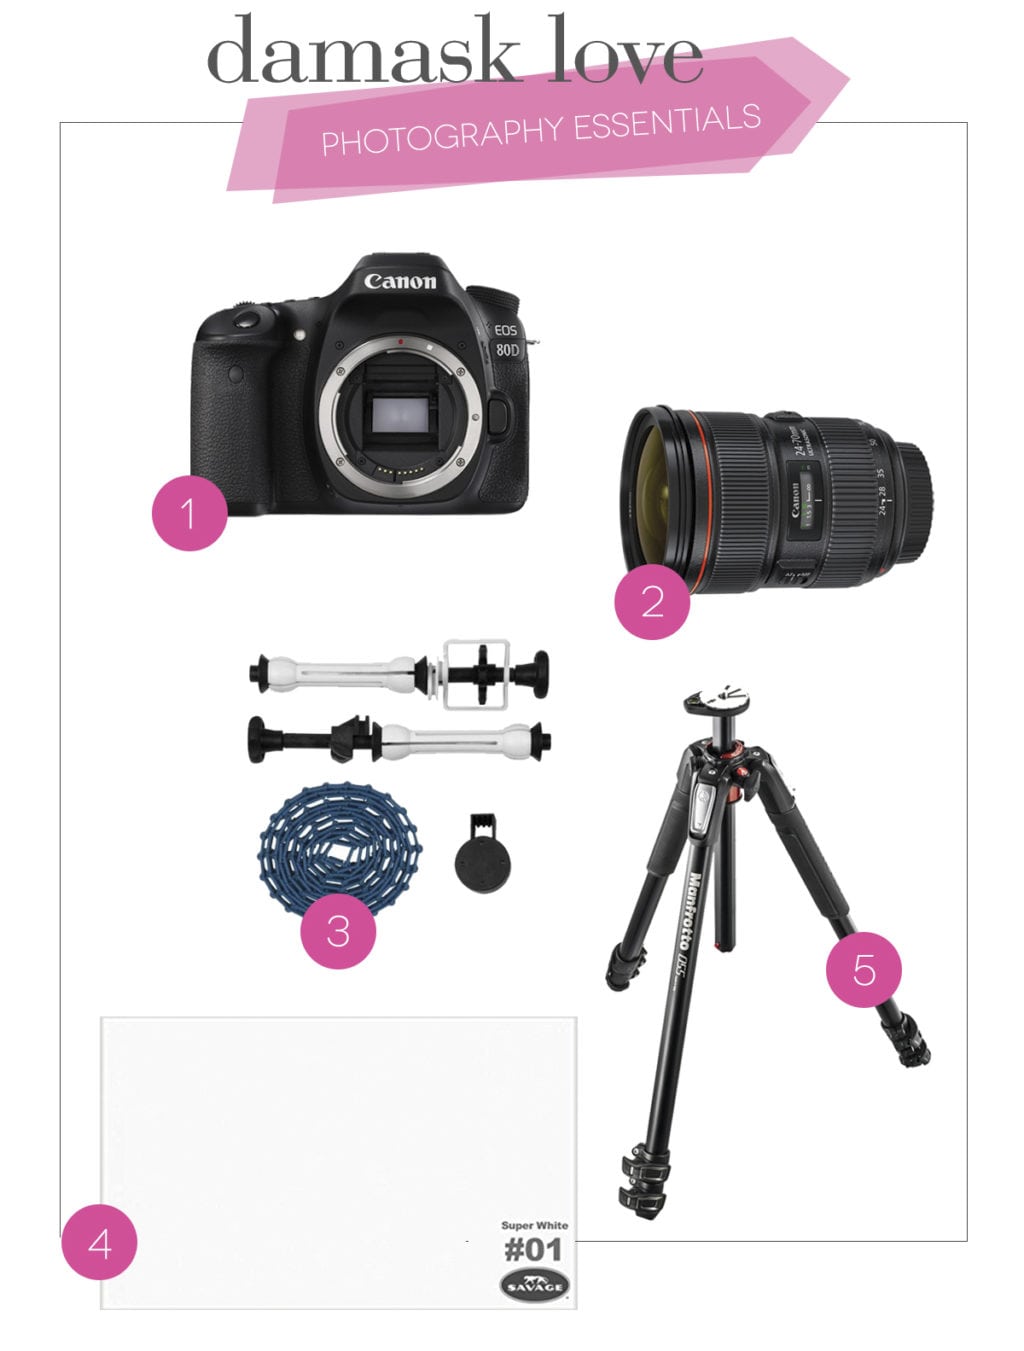
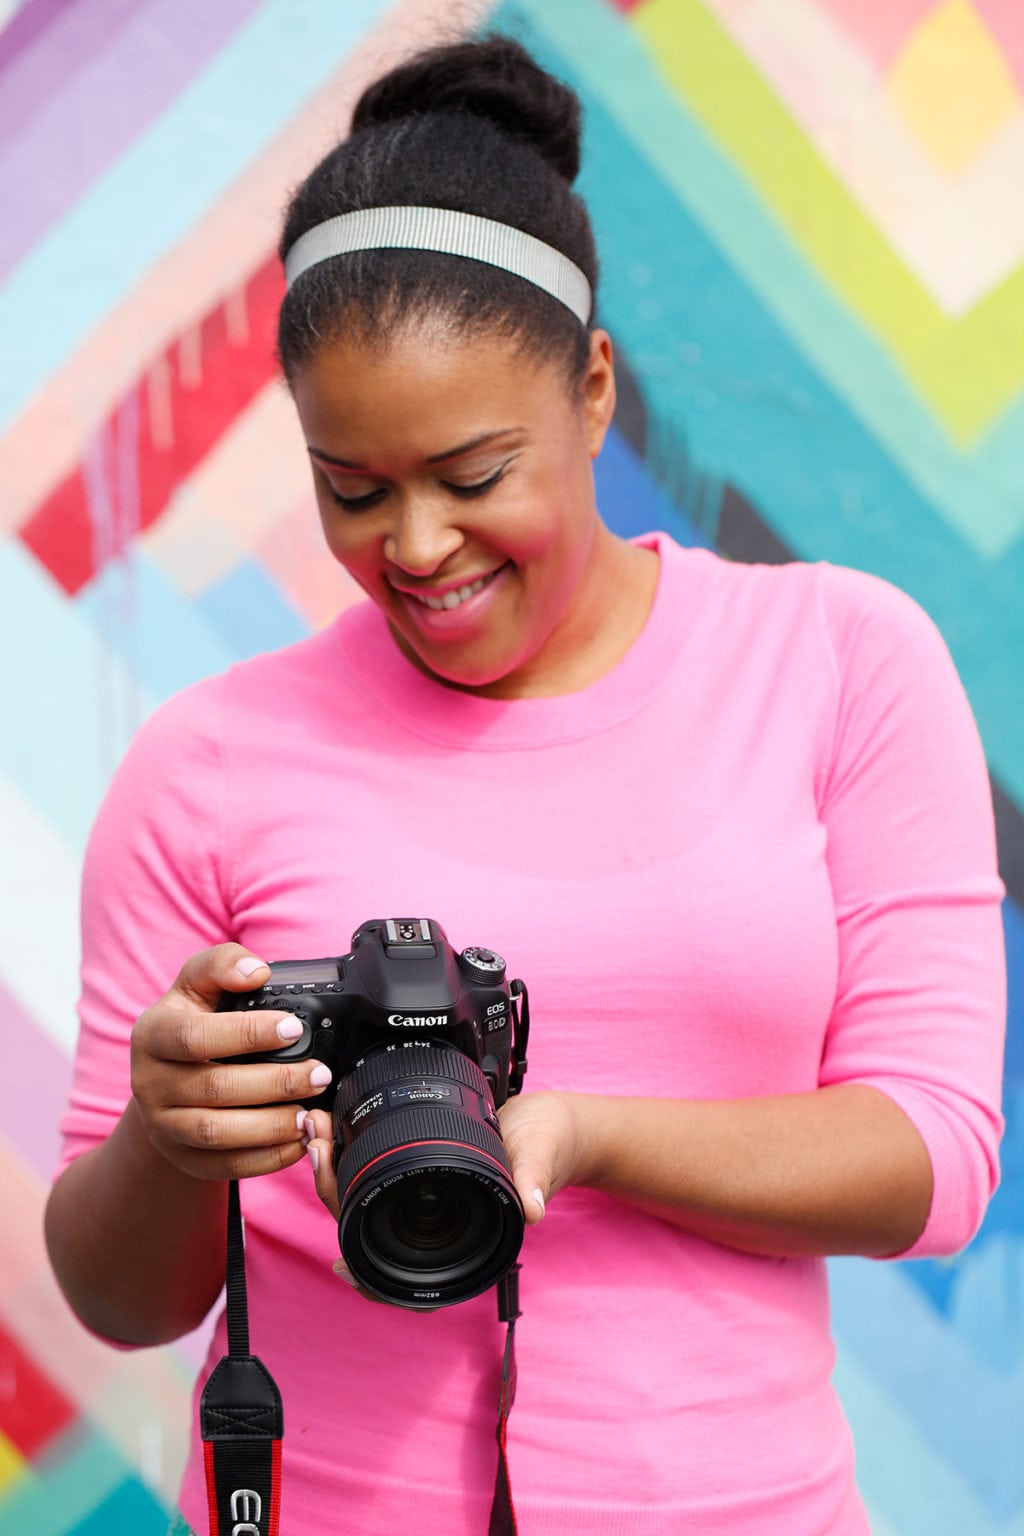
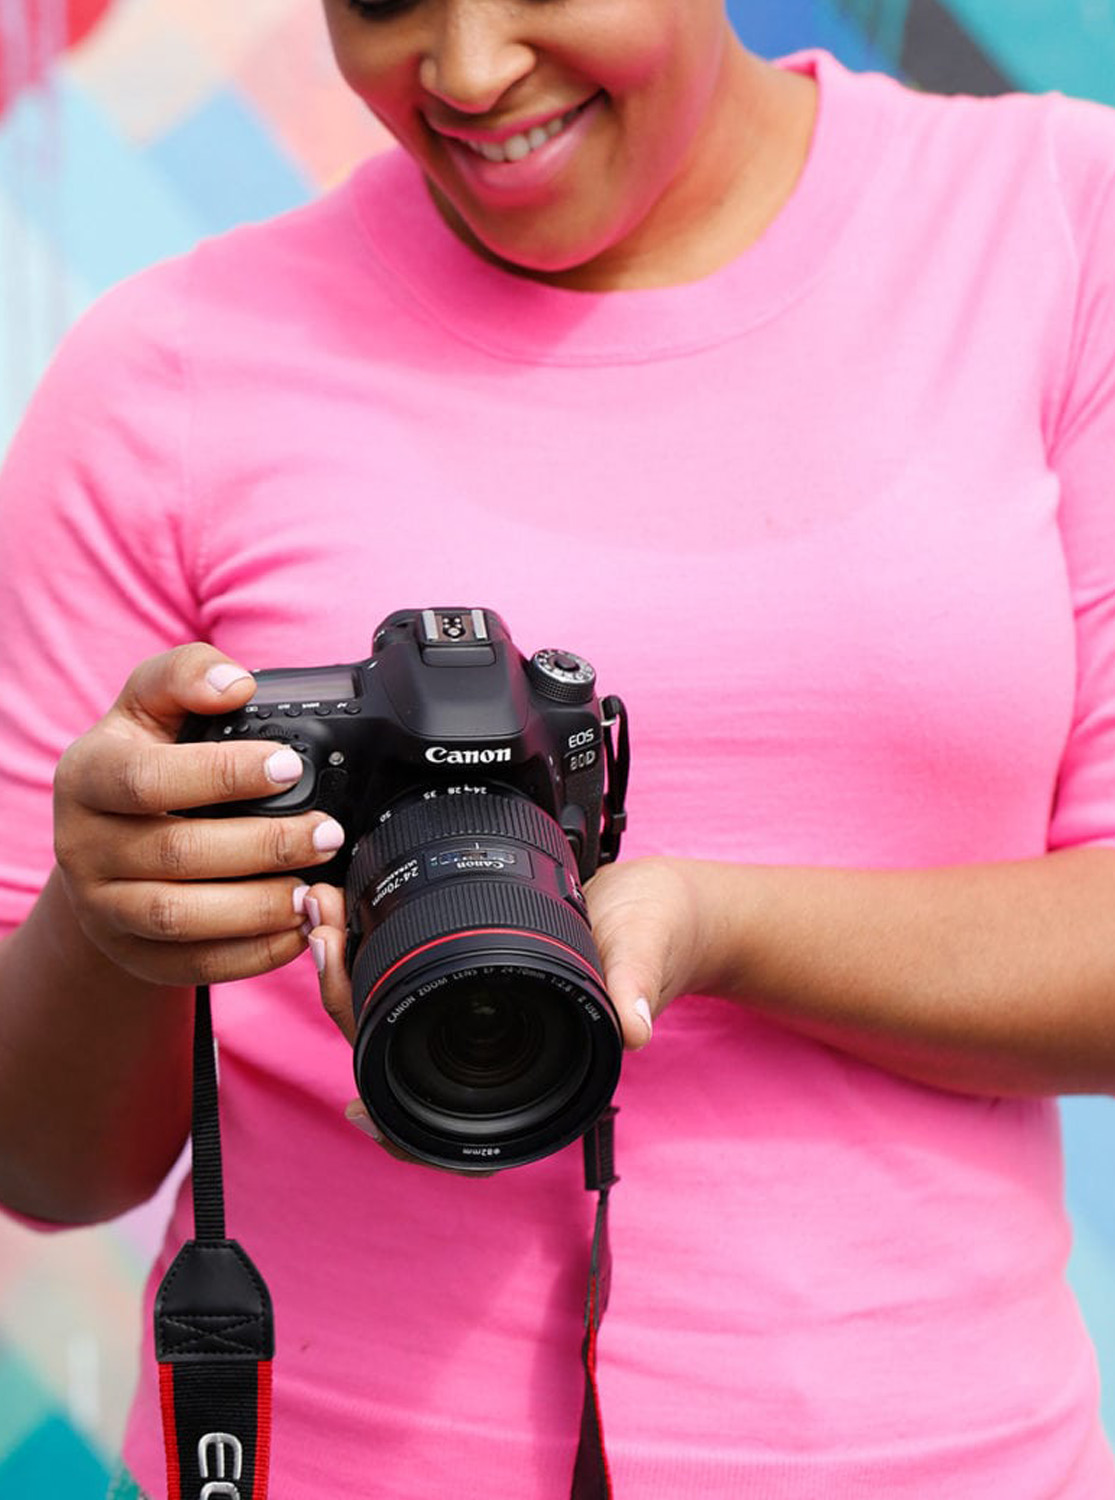
I used to shoot on a Canon Rebel T3i along with a Sigma 18-35mm lens and I love, love, loved them! One day, my photographer and I did a little test to see if her lens was any better than mine and you guys…the difference was really unbelievable. I immediately decided to upgrade my lens as well as my camera body. Here’s what I’m using now:
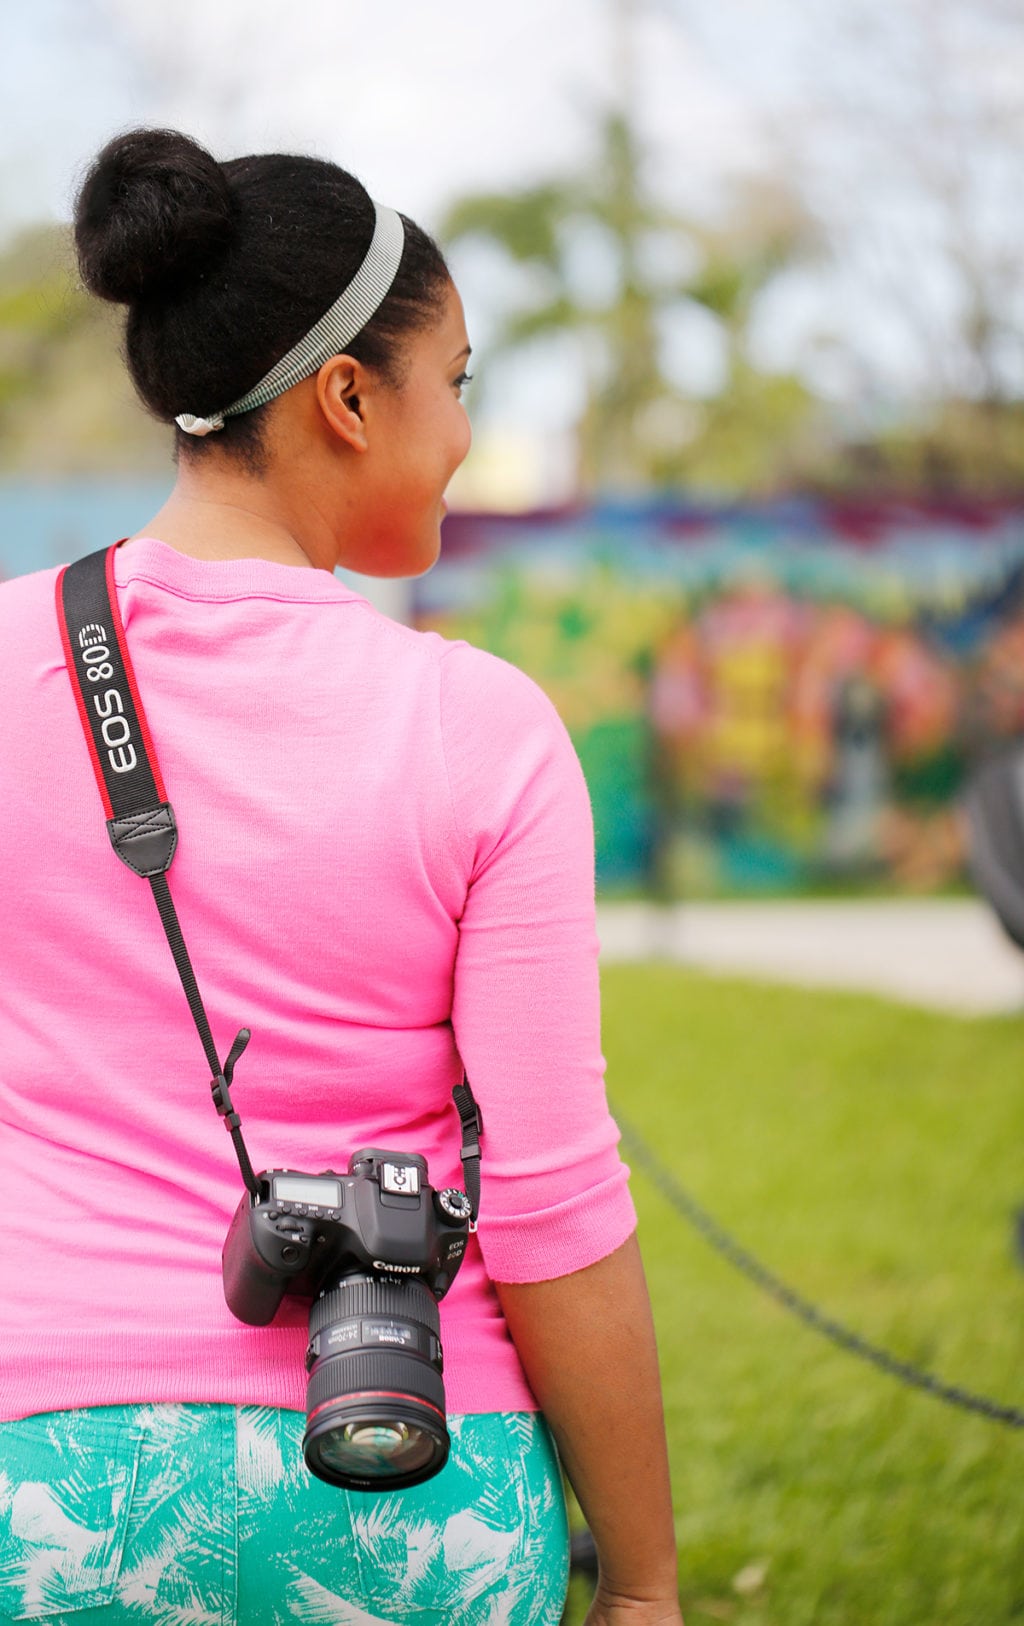
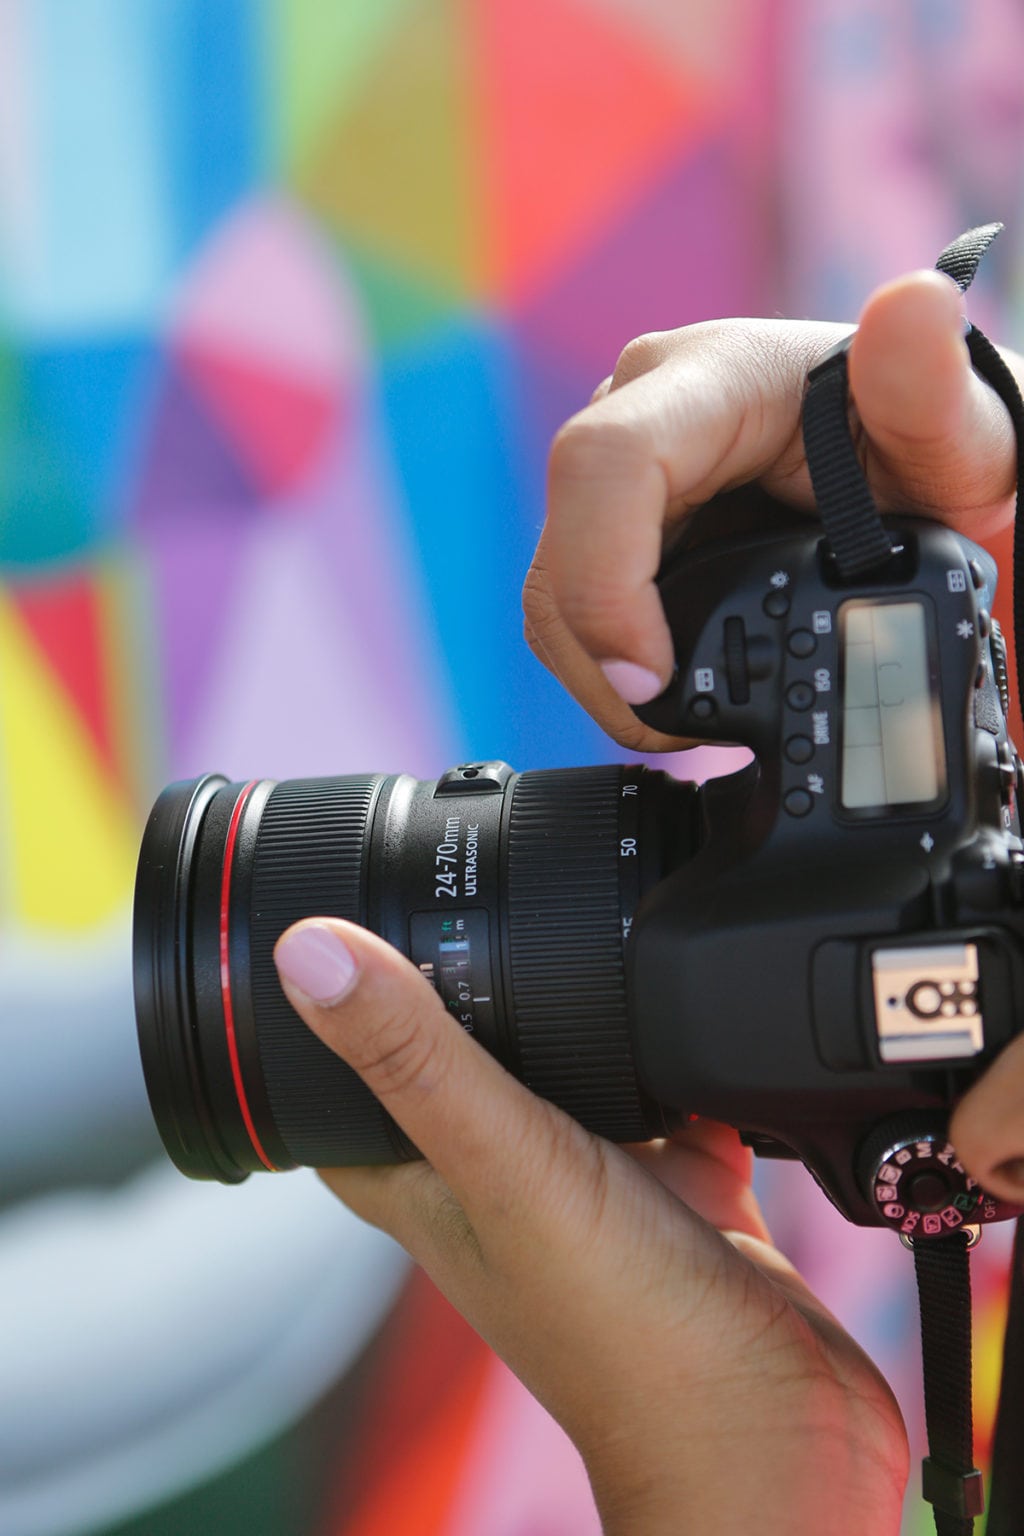
1. Canon EOS 80D: This new model it’s quite an upgrade from my previous Rebel T3i. The body is sturdier with many additional features inculding wi-fi capability which is HUGE for me (check out Part Two to see why). For all of you camera nerds like me, you might be wondering why not upgrade all the way to the Canon Mark 5D IV since it’s a full frame camera while the 80D is cropped. Apart from a pretty significant price difference between the two, the 80D is the best camera body available that also features an articulated (swivel) screen. For me, a swivel screen is a MUST. I use it every single time I shoot tutorials and videos. It’s also worth noting that my photographer shoots on a Mark 5D IV and it’s nearly impossible to tell the difference between her photos and mine. My blog posts often include a mix of her photos and my photos and you can’t differentiate. In my opinion, if you’re looking to take great photos that will live on the web, the Canon 80D is the way to go. Just my opinion.
2. Canon 24-70mm : Okay. You’re going to have to trust me on this one because the Canon 24-70mm lens is definitely an investment. I realize that. It’s totally and completely worth it. This lens stays on my camera at all times. These days, it’s the only lens I use. When I compare 24-70mm images with those shot on my other lenses – the difference is noticeable. I don’t know the techie-terms for why it’s so good, so forgive me while I break it down in regular-people-terms. This lens is great in low-light situations – think overcast days. This lens give you crisp images but still let’s you achieve those pretty blurry backgrounds. It’s a zoom lens so you have lots of control over image composition and if you work in a small space, it let’s you zoom waaaaay out to fits lots of stuff in your image. It’s a goodie. It’s my favorite lens ever.

Do you use flash photography or a constant light? – @catina_c
Back in the day I used flash photography, until I learned how to shoot in Manual Mode. If you do nothing else after reading this post – go learn how to shoot in Manual Mode. It will change the game. I promise. If you’re not shooting in Manual Mode you might as well be using one of those antique cameras where the guys stands under a hood and smoke comes out. (That may be an overstatement. I just wanted to mention that camera where the guys stands under the hood and smoke comes out). These days, I shoot using natural light along with a few strategic tools that let me make the most of what natural light is available.
3. Backdrop Wall Mount: White is your friend when making the most of natural light. It reflects light and brightens up your photos…and I like really, really bright photos. For small projects a few pieces of white foam core will work wonders. For large scale shoots, like THIS one or THIS one or THIS one, I use a HUGE white backdrop to make the room as white as possible. I used to tape my white backdrop onto the wall, but that quickly became a pain in the butt when it came time to change out the paper for a fresh roll. Now, I use a Fotodix Triple Roller Wall Mount that makes it incredibly easy to roll the paper backdrop up and down. Again, if you are working in a small space, or working from home – you may not want to install a wall mount, but if your workspace allows for it, it’s a great tool!
4. Savage Background Paper: If you’re going for a full backdrop, I’ve found that this paper is best. It’s thick, durable and comes in a bunch of colors!
What tripod do you use? – @theglitterinmytea
5. When it comes to tripods, my number one tip is: look for one with a lateral arm. This will allow you to shoot overhead. Of course, you don’t need to use the one I use, but for the sake of making it easy, HERE it is! It’s not too, too heavy and collapses easily to stash when you don’t need it.
Do you have a designated room already set up or do you set up each time? – @spawitleticia
Back when Damask Love started, I worked out of my home and I had to set up and break down my supplies every single time I wanted to take photos. It was somewhat inconvenient but it wasn’t terrible. I always kept my styling supplies in a little cart so they were easy to grab and clean up quickly. Fast forward to today when I’m in my own studio where we have a designated photography area that is ready to go at all times. It’s not a huge room but works perfectly for what I do. The walls are white and the floor is stained concrete. We generally shoot between 11am and 2pm when light is the best. Here’s a look at the Damask Love photo studio and some of the supplies we use regularly.

- a 4’x8′ piece of plywood covered with wallpaper. It makes for the perfect large scale backdrop and breaks up the monotony of an all white background. Take a peek at THIS post to learn more about it.
- My trusty white paper backdrop creates the perfect seamless background for large scale shoots. It’s also helps hide the concrete floor when I don’t want it to show.
- The wall mount fits three rolls. Right now I only have two rolls on it – a white one and pink, or course!
- My Canon 80D and Canon 24-70mm lens live comfortably on the lateral arm of my tripod when I’m shooting tutorials. See why that lateral arm is so helpful!
- The Manfrotto MK190X is sturdy enough to handle the weight of my camera
- I keep several 53″ rolls of colored paper to use for flatlays and shooting DIY videos.
- When I need extra light, I use the Erin Manning Home Studio Lighting Kit to even out any dim areas.
- It might sounds weird but a good case for your iPad is great for the photo studio! This way I can shoot tutorials and watch Hulu at the same time. Shhhhh. Don’t tell.
- I keep an IKEA Melltorp table in the photo studio. It’s where I shoot all my tutorials and videos. It also works great for styling as a desk.
- The IKEA Lack Side Table is a cheap and functional lift for my tripod. This way, I don’t have to have all three legs of the tripod on my table top, giving me a little extra room to work.
Okay – now it’s your turn to sound off in the comment section! Let me know if you have more questions! I love, love, love talking about this stuff! Let’s perfect our blog photos together!
Good tips. My Canon is about 5 years old now, so I’m due for an upgrade. I recently bought a tripod at a really good deal, but it didn’t come with a lateral arm. It wasn’t until I began using it, that I realized that I really needed that lateral arm! Oh well, I bought it off Amazon.com, and didn’t want to return it LOL (we are in .ca over here). I still work from home and good natural light is SO KEY. I don’t have a lighting kit yet.
Great tips and list, Amber! I shoot with a 60D and the same 24-70 lens. I completely agree, it’s such a great investment! I use that lens 99% of the time.
Hey, can you shoot video with the camera you recommended?
Absolutely! I use it to shoot video and photographs.
Holy smokes! I am totally getting that camera! Thank you Amber! You rock!
One more question. Did you buy the body only?
I just clicked on the link for your lens … Is there a less expensive option? Honestly, though, your photos are epic. Truly.
So, I hate when people say this… but I’m going to say it. Using a desk to take your tutorial photos? WHY DIDN’T I THINK OF THAT?! I’ve been using a cheap folding table with a piece of wood on top, then a white backdrop on top of THAT. It’s not like I fold it after every use…. that hideous thing just stays there 24/7. And I can’t even use it as a styling prop, because it’s so dang ugly. Going out to buy a new desk ASAP! Thanks so much for showing us your photo setup!
Can I ask what lens and camera was used to take the pics of you?
Thank you for the effort you have put into making your site interesting and informative. I will visit the site again to gather some more valuable information. You really did a good job.
mapquest driving directions
Great tips! Your blog has been a great help to me.